> ## Documentation Index
> Fetch the complete documentation index at: https://www.courier.com/docs/llms.txt
> Use this file to discover all available pages before exploring further.
# Mailgun
> Send emails with Mailgun via Courier. Covers profile setup, overrides, attachments, EU host config, delivery webhooks, and error handling.
## Setup
You will need a [Mailgun](https://www.mailgun.com/) account with a verified sending domain. In Mailgun, navigate to your domain settings to get your API key and domain name. In Courier, navigate to the [Mailgun Integration](https://app.courier.com/integrations/catalog/mailgun) page, enter your API key, domain, and From Address, then click "Save."
For EU-region Mailgun accounts, set the host to `api.eu.mailgun.net` in the integration settings or via a config override.
## Profile Requirements
Courier uses the `email` key in the recipient profile to send messages through Mailgun.
```json theme={null}
{
"message": {
"to": {
"email": "user@example.com"
},
// …other message properties
}
}
```
## Overrides
Use the `override` object to customize the payload sent to Mailgun’s Messages API. Example: add a Mailgun tag.
```json theme={null}
{
"message": {
"template": "NOTIFICATION_TEMPLATE_ID",
"to": {
"email": "user@example.com"
},
"providers": {
"mailgun": {
"override": {
"body": {
"o:tag": "notifications"
},
"config": {
"apiKey": "",
"domain": "",
"host": ""
}
}
}
}
}
}
```
Courier replaces the full request body with the contents of `override`.
To customize the `fromAddress` or other Mailgun config options, set them under `override.config`.
Refer to the [Mailgun API docs](https://documentation.mailgun.com/en/latest/api-sending.html) for supported parameters.
To send through Mailgun’s EU region, set the `host` value to `api.eu.mailgun.net`.
```json theme={null}
"config": {
"apiKey": "",
"domain": "",
"host": "api.eu.mailgun.net"
}
```
## Attachments
To include attachments, add an `attachments` array in the override. File content must be base64-encoded.
```json theme={null}
{
"message": {
"template": "NOTIFICATION_TEMPLATE_ID",
"to": {
"email": "user@example.com"
},
"data": {
"hello": "world"
},
"providers": {
"mailgun": {
"override": {
"attachments": [
{
"filename": "billing.pdf",
"contentType": "application/pdf",
"data": "Q29uZ3JhdHVsYXRpb25zLCB5b3UgY2FuIGJhc2U2NCBkZWNvZGUh"
}
]
}
}
}
}
}
```
## IP Allowlisting
Mailgun supports IP allowlists for API access. Courier runs on AWS and doesn’t use fixed outbound IPs.
To manage this, AWS provides a workaround:\
Subscribe to the [`AmazonIpSpaceChanged`](https://docs.aws.amazon.com/general/latest/gr/aws-ip-ranges.html#subscribe-notifications) SNS topic. You’ll get notified whenever AWS updates its IP ranges, so you can update your allowlist accordingly.
## Delivery Tracking
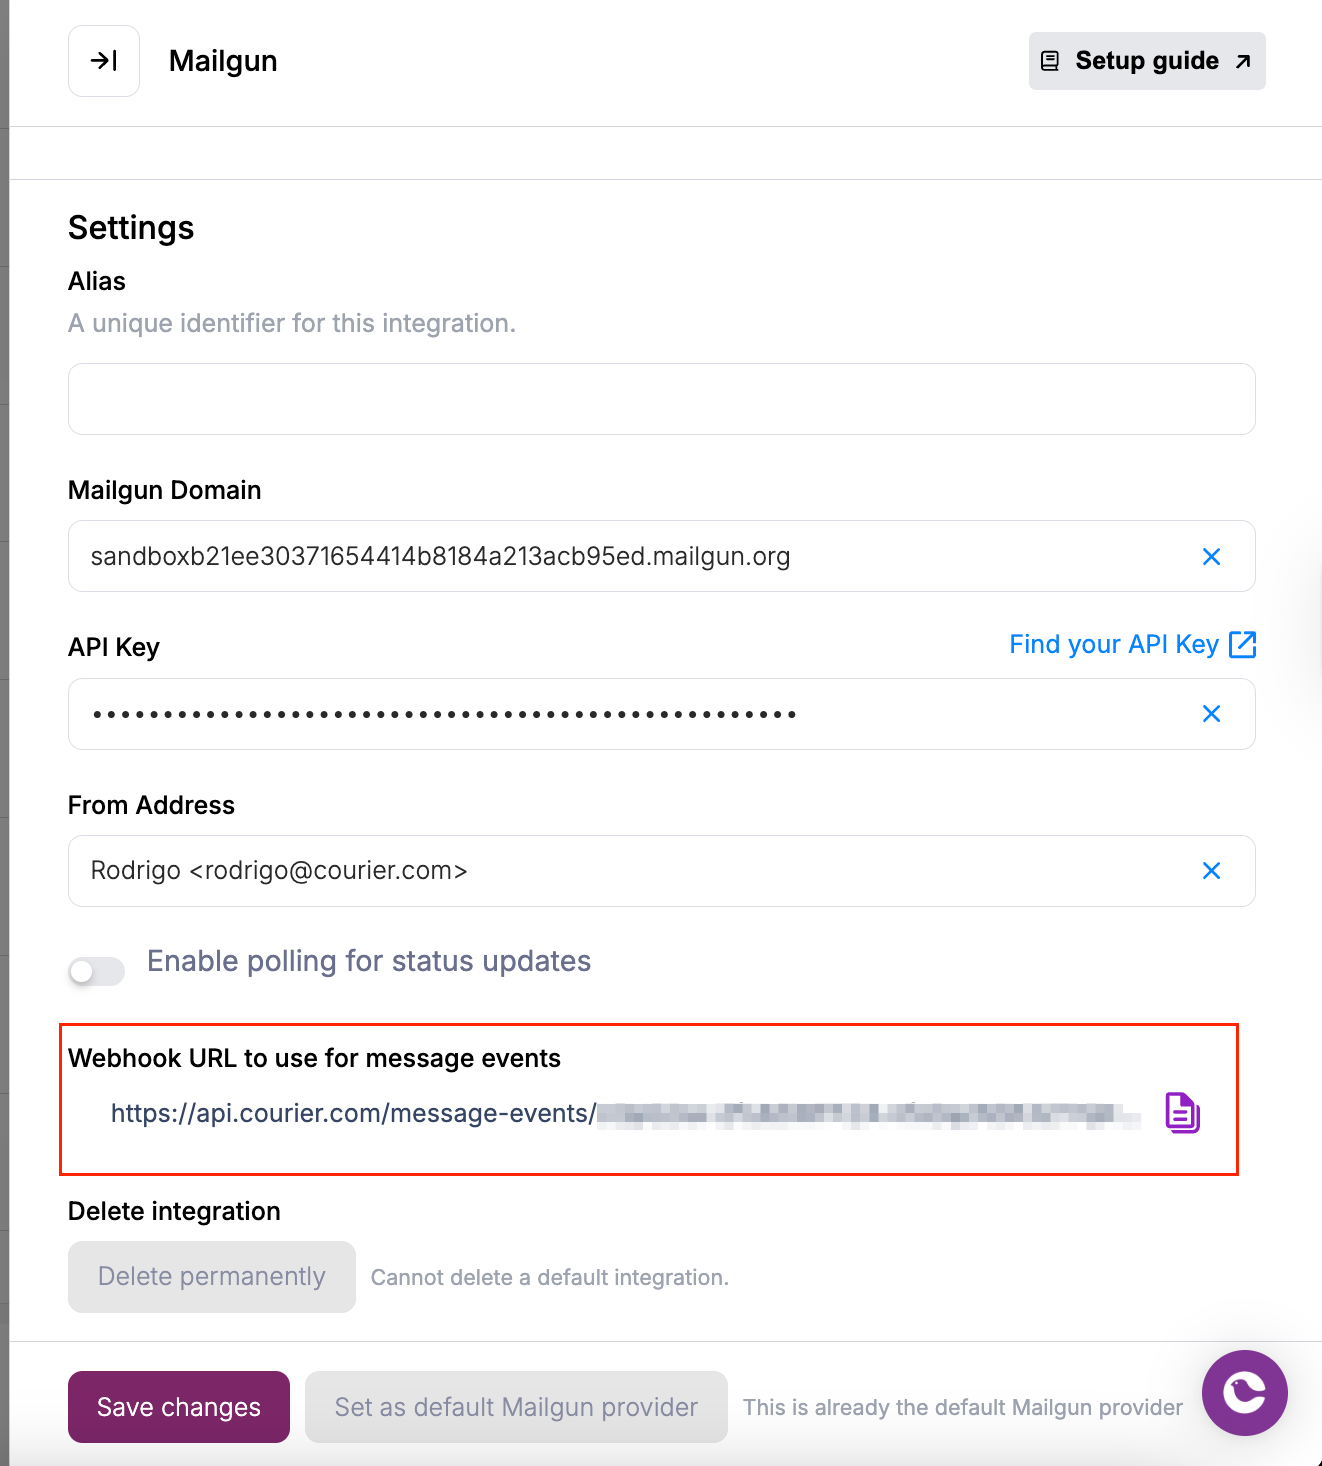
Courier polls Mailgun for status by default. To get real-time delivery updates, set up Mailgun webhooks.
In Courier, go to the [Mailgun configuration page](https://app.courier.com/integrations/catalog/mailgun). Copy the generated Webhook URL.
 In Mailgun, navigate to **Sending → Webhooks**.\
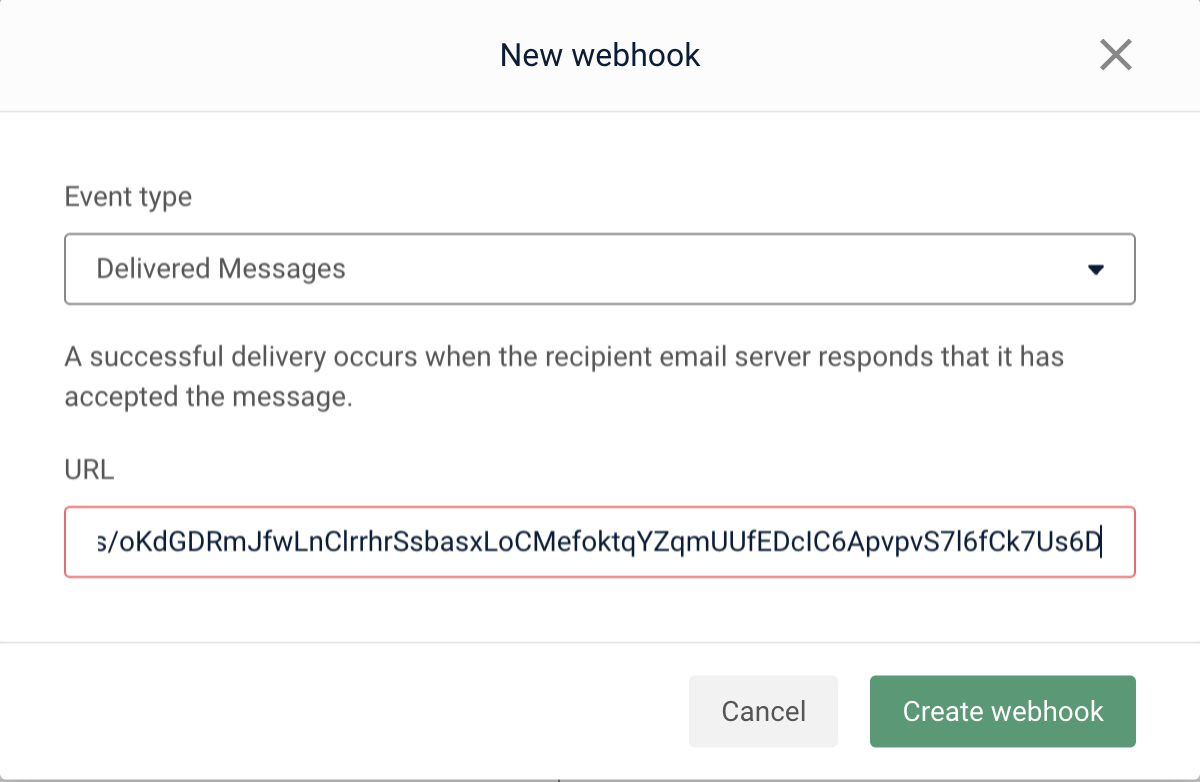
Add a webhook for **Delivered Messages**, and paste the URL.\
Repeat for **Permanent Failure**.
In Mailgun, navigate to **Sending → Webhooks**.\
Add a webhook for **Delivered Messages**, and paste the URL.\
Repeat for **Permanent Failure**.
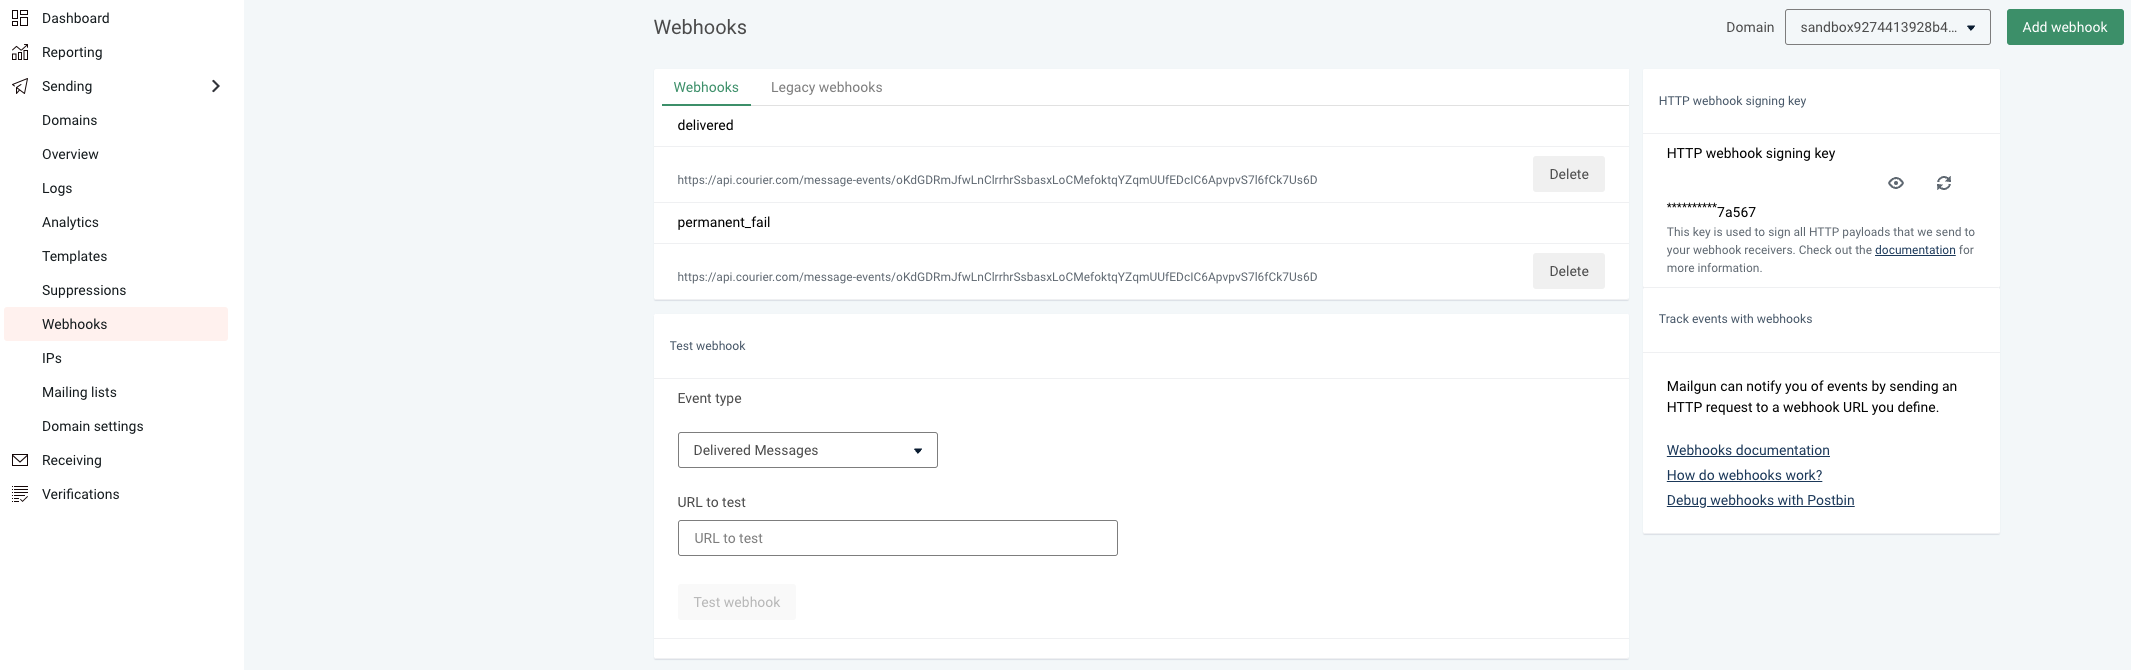
 In Mailgun, ensure the selected domain matches the one configured in Courier.
After \~1 hour (to allow in-flight updates), disable polling in Courier under **Enable polling for status updates**, then click **Save**.
## Troubleshooting
Mailgun returns a 550 error when the sending domain doesn’t have an MX record.
**Fix:**\
Add an MX record to your domain’s DNS. Wait \~2 hours for propagation.
Mailgun may throttle or suspend delivery for accounts with high bounce/spam rates or traffic spikes.
**Fix:**
1. Complete Mailgun’s Business Verification.
2. Remove addresses that bounce consistently. Avoid bulk sends to unverified users.
In Mailgun, ensure the selected domain matches the one configured in Courier.
After \~1 hour (to allow in-flight updates), disable polling in Courier under **Enable polling for status updates**, then click **Save**.
## Troubleshooting
Mailgun returns a 550 error when the sending domain doesn’t have an MX record.
**Fix:**\
Add an MX record to your domain’s DNS. Wait \~2 hours for propagation.
Mailgun may throttle or suspend delivery for accounts with high bounce/spam rates or traffic spikes.
**Fix:**
1. Complete Mailgun’s Business Verification.
2. Remove addresses that bounce consistently. Avoid bulk sends to unverified users.