> ## Documentation Index
> Fetch the complete documentation index at: https://www.courier.com/docs/llms.txt
> Use this file to discover all available pages before exploring further.
# Test with Sample Data
> Preview your notifications with test data and send test messages to validate content before publishing
This feature is only available in the V2 Courier Template Designer.
## Overview
The Preview & Test mode lets you see exactly how your notification will appear with real data before publishing. You can:
* Preview your template with test variable values
* Send test notifications to yourself or team members
* Manage reusable test events with different data scenarios
## Accessing Preview & Test
1. Open your template in the designer
2. Click the ▶️ **Preview & Test** button in the header toolbar
3. The preview sidebar appears on the left with input controls
***
## Input Sources
Preview & Test supports two ways to provide test data:
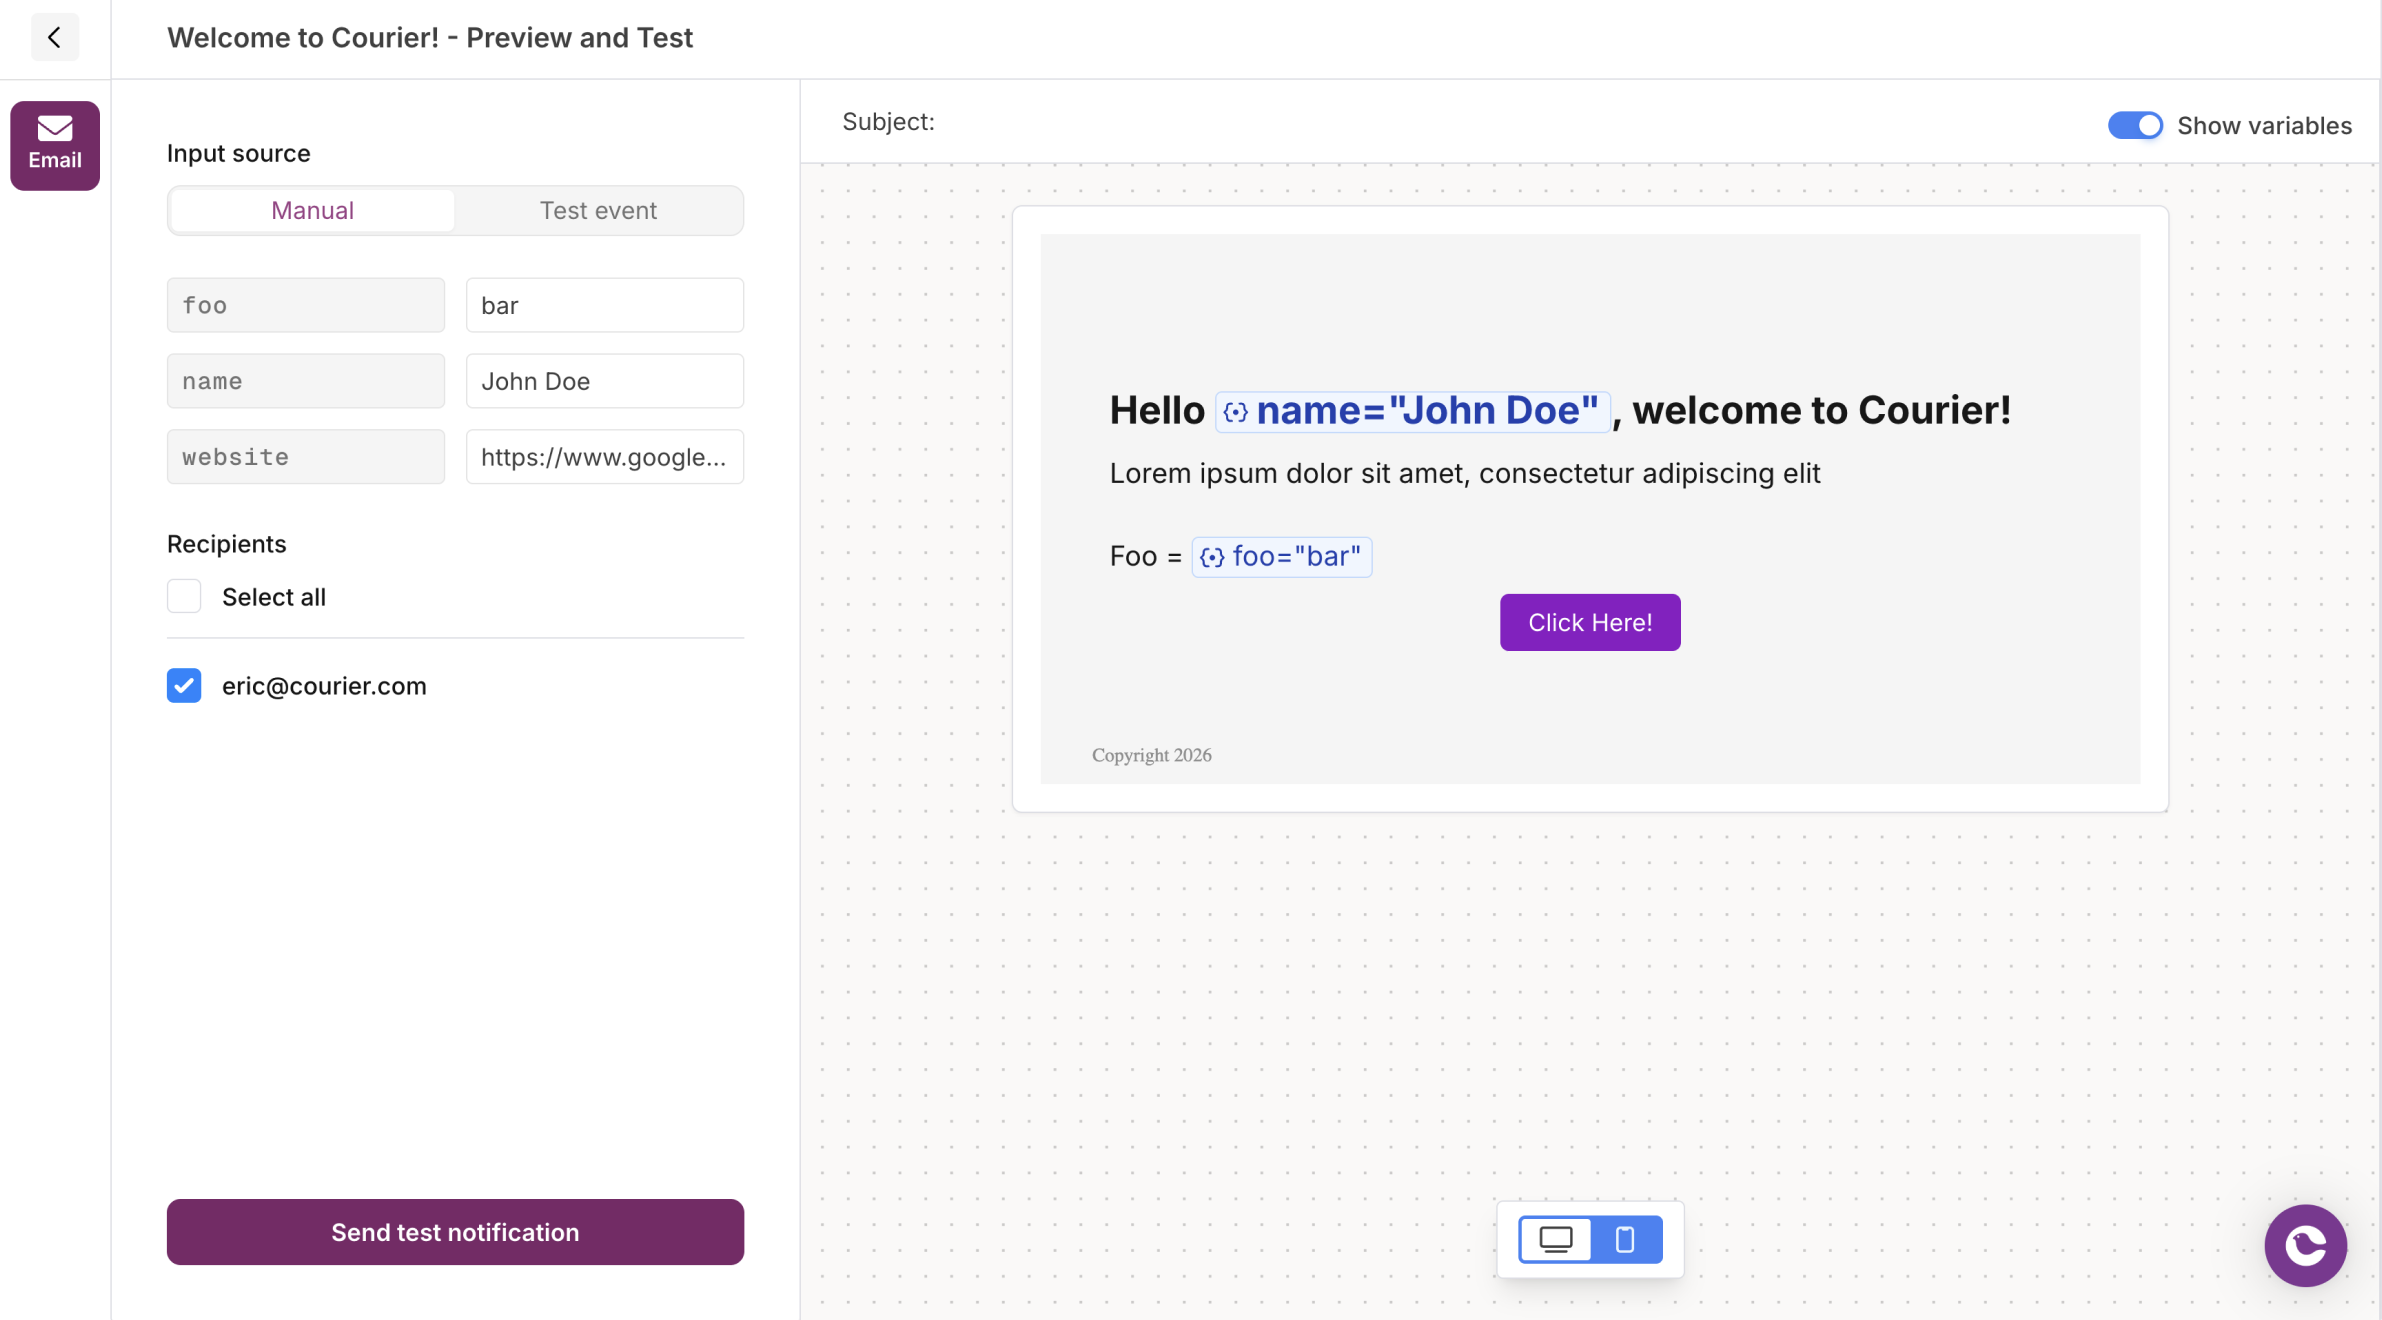 ### Manual Input
Enter variable values directly in the preview sidebar. This is useful for quick testing with simple data.
1. Select **Manual** from the input source toggle
2. Enter values for each detected variable
3. Select recipients from your workspace members (for email)
4. Click **Send test notification**
The Variables section displays all variables detected in your template. Enter test values to see them rendered in the preview.
If no variables appear, type `{{` in the editor to add a variable to your template.
### Manual Input
Enter variable values directly in the preview sidebar. This is useful for quick testing with simple data.
1. Select **Manual** from the input source toggle
2. Enter values for each detected variable
3. Select recipients from your workspace members (for email)
4. Click **Send test notification**
The Variables section displays all variables detected in your template. Enter test values to see them rendered in the preview.
If no variables appear, type `{{` in the editor to add a variable to your template.
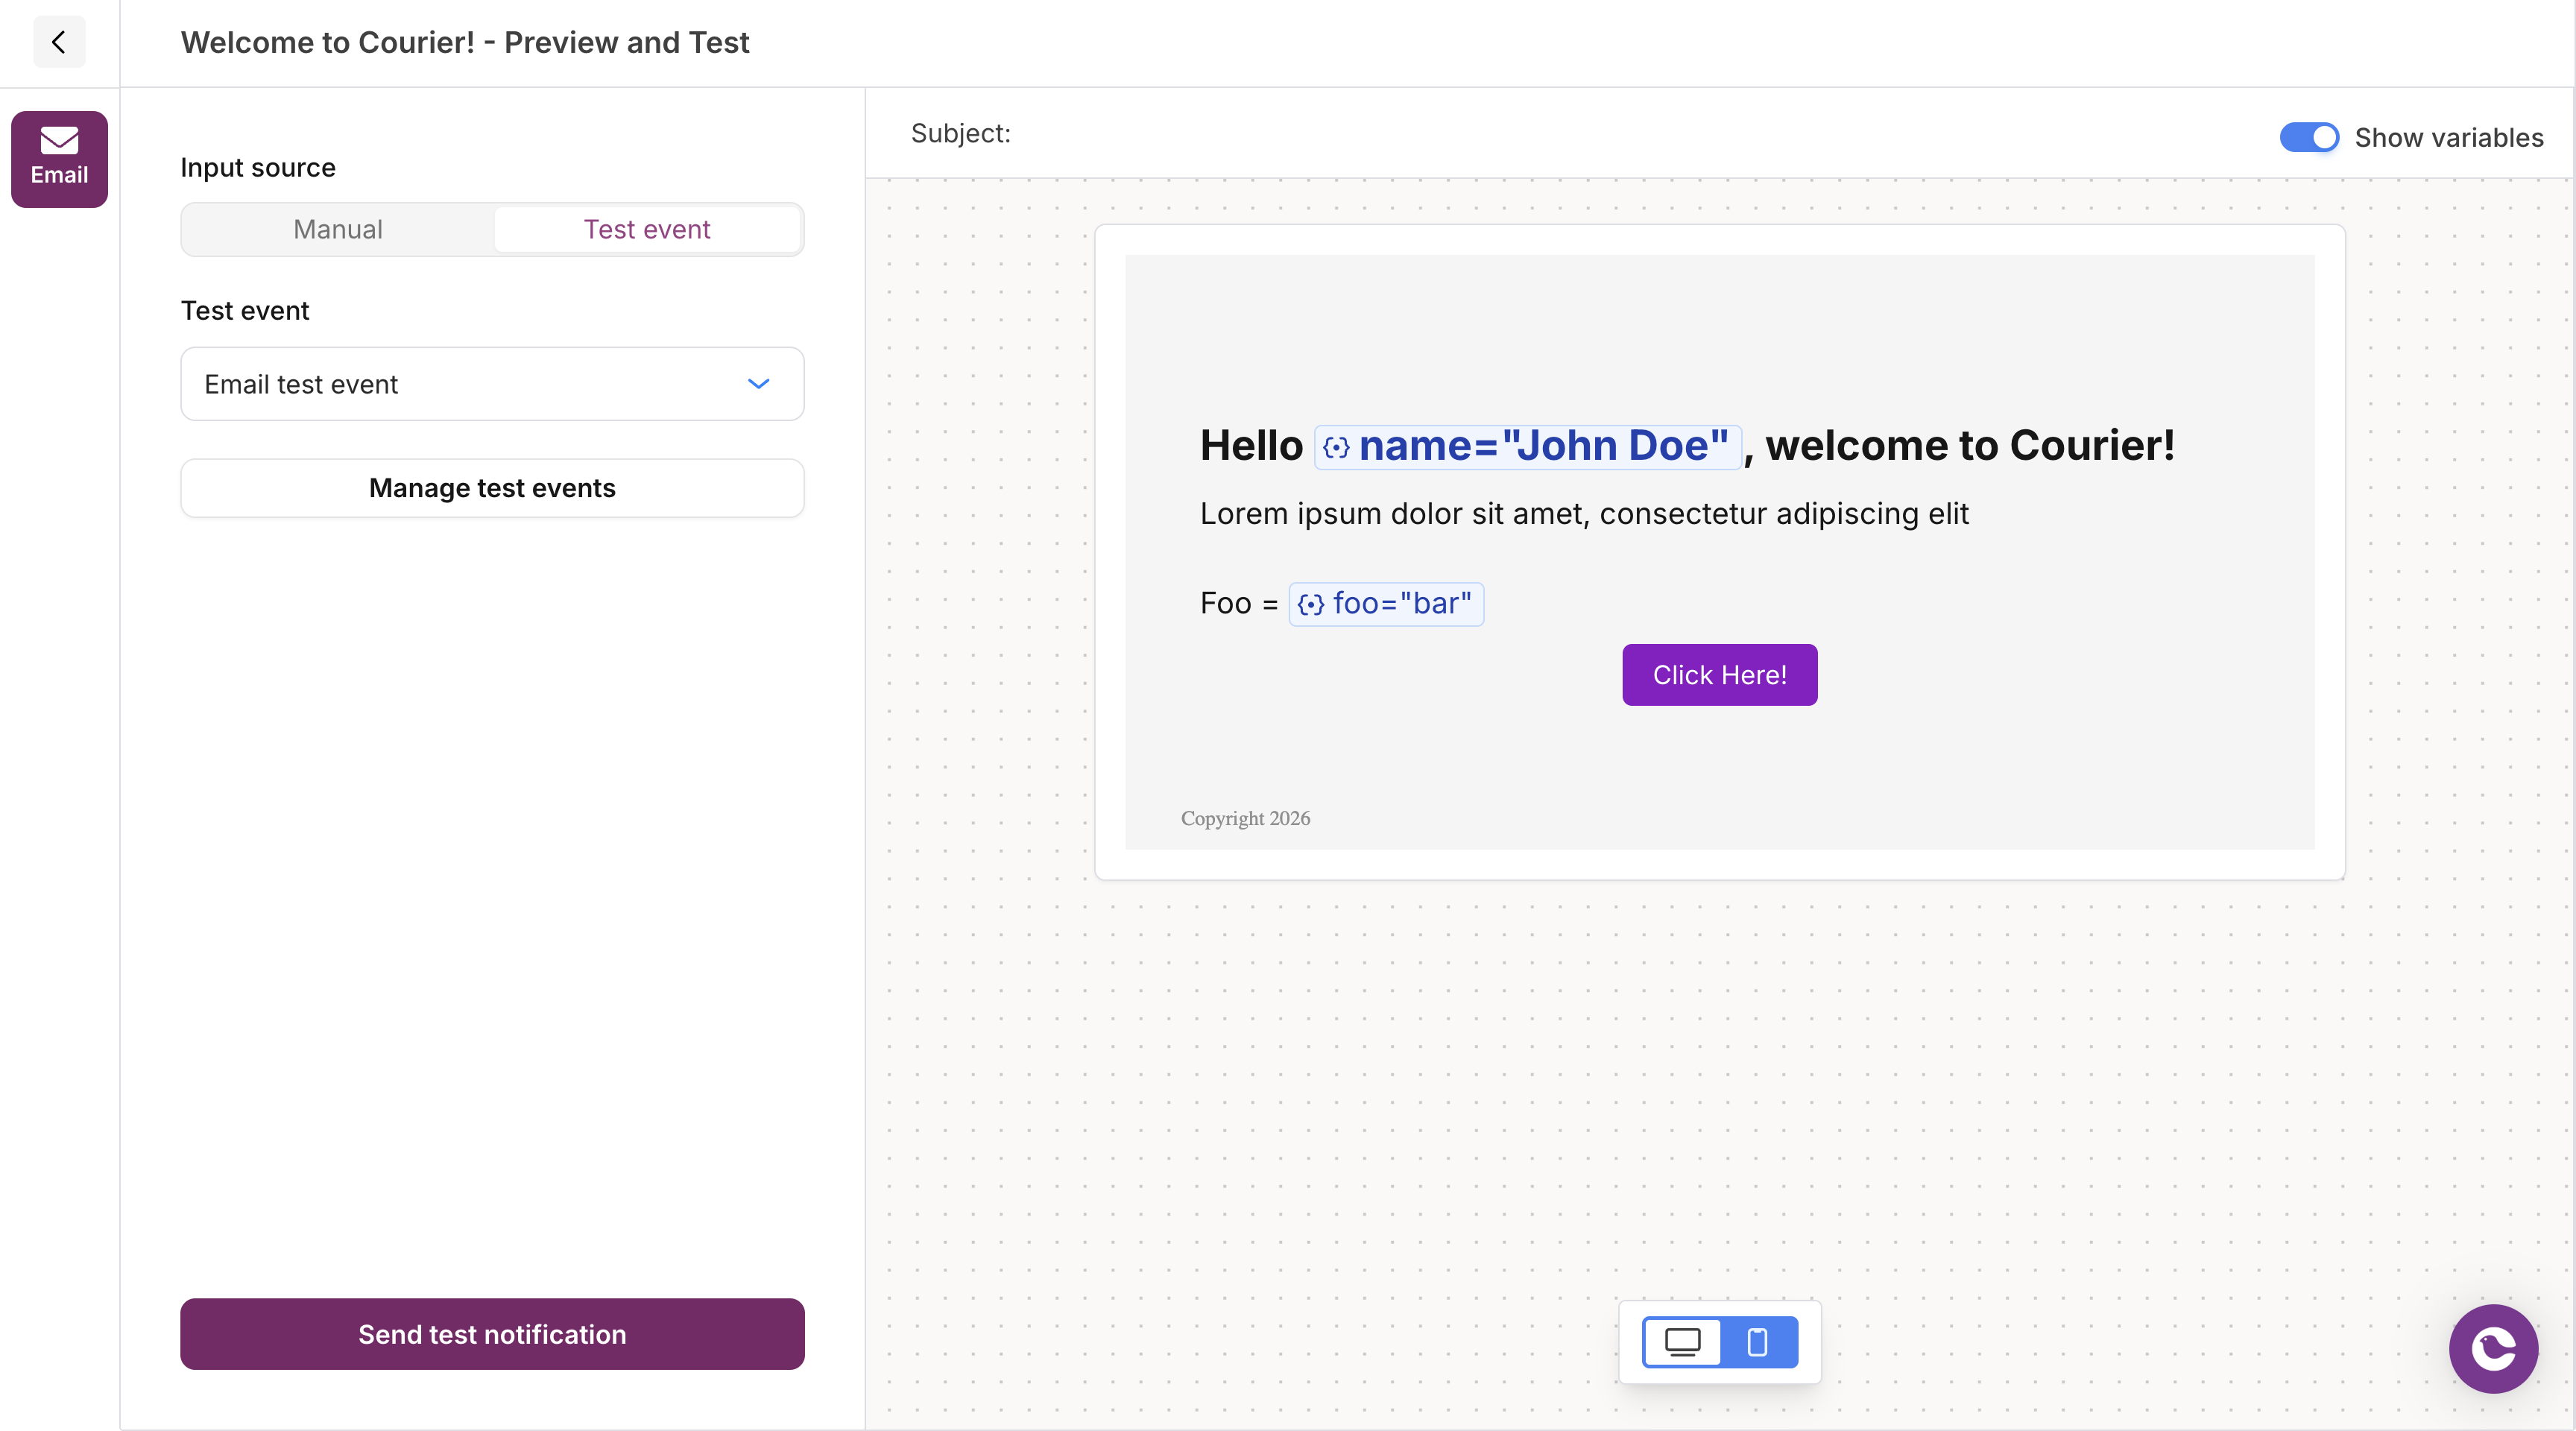 ### Test Events
Use saved test events for repeatable testing with complex data structures.
1. Select **Test Event** from the input source toggle
2. Choose an existing test event from the dropdown, or click **Create test event**
3. The preview updates with data from the selected event
4. Click **Send test notification**
## Managing Test Events
Test events are reusable JSON payloads that simulate the data your notifications will receive in production.
### Test Events
Use saved test events for repeatable testing with complex data structures.
1. Select **Test Event** from the input source toggle
2. Choose an existing test event from the dropdown, or click **Create test event**
3. The preview updates with data from the selected event
4. Click **Send test notification**
## Managing Test Events
Test events are reusable JSON payloads that simulate the data your notifications will receive in production.
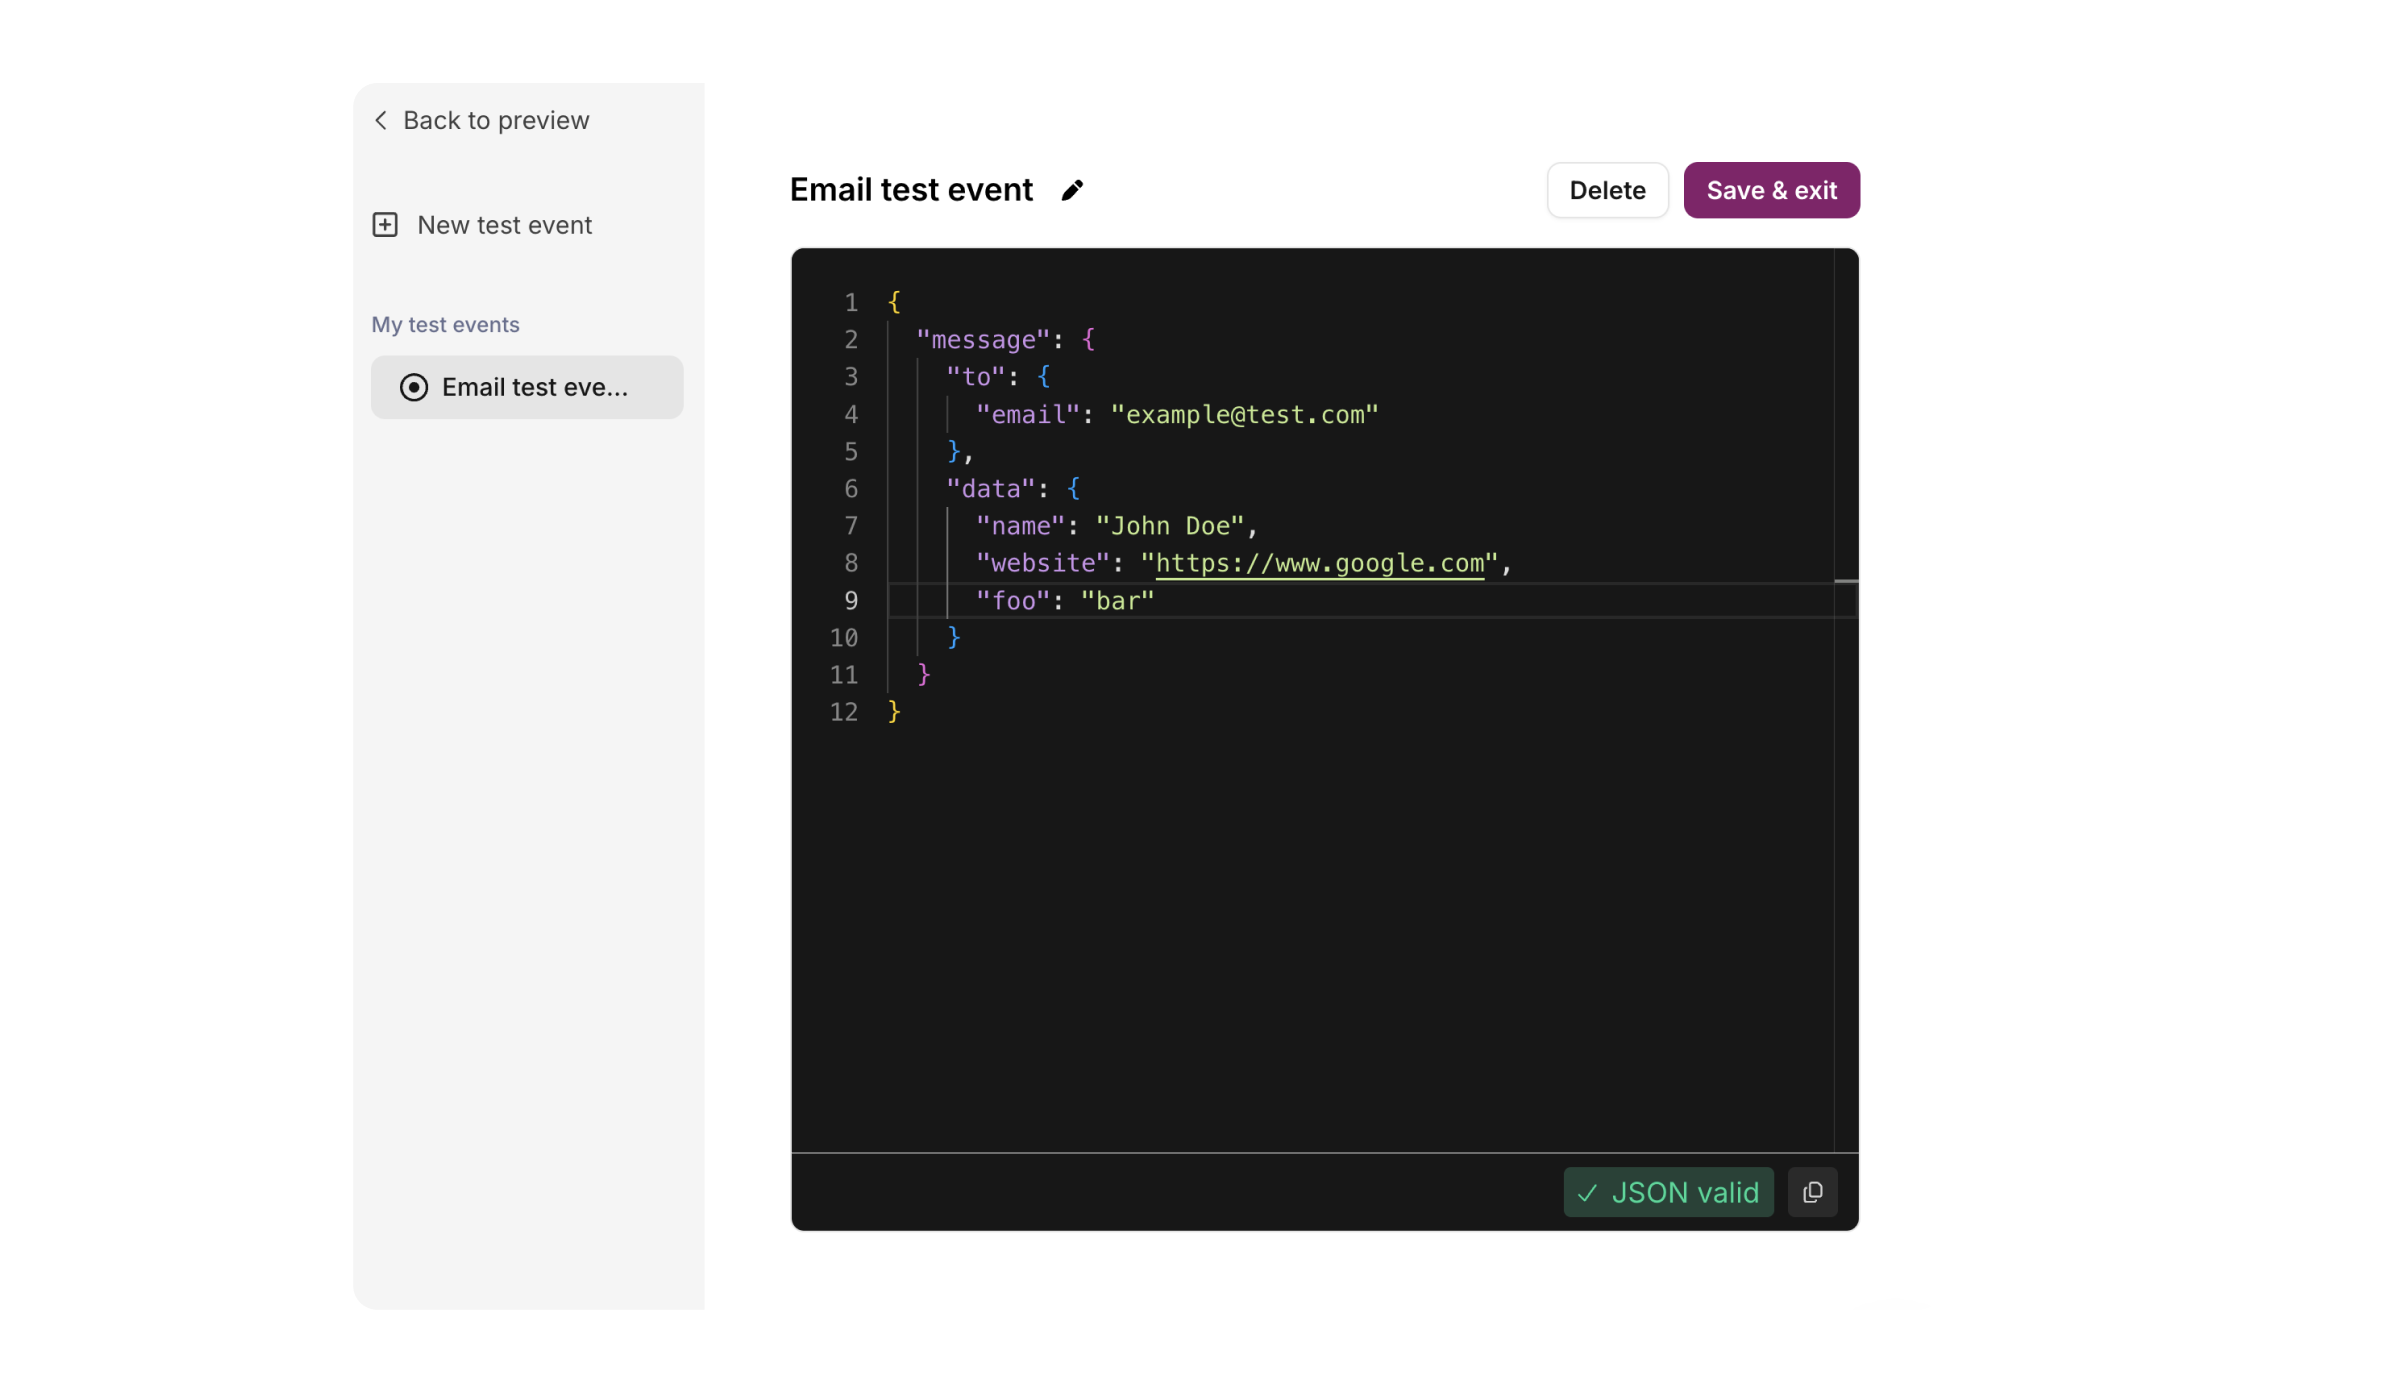 ### Creating a Test Event
1. Click **Manage test events** (or **Create test event** if none exist)
2. Click **New test event** in the sidebar
3. Enter a name for your test event
4. Edit the JSON in the editor to include your test data:
```json theme={null}
{
"message": {
"to": [],
"data": {
"name": "Jane Doe",
"order_id": "12345",
"items": [
{ "name": "Widget", "price": 29.99 }
]
}
}
}
```
5. The editor validates your JSON in real-time (green = valid, red = invalid)
6. Click **Save & exit**
From this same modal, you can edit existing test events by selecting them from the sidebar, or delete them using the **Delete** button.
## Recipients
When previewing email notifications in Manual mode, you can select recipients from your workspace members:
* Your email appears first in the list
* Check multiple recipients to send to several people
* Use **Select all** to send to everyone in your workspace
Recipients are workspace members only. To send to external addresses, use test events with the recipient specified in the `to` field.
## Sending Test Notifications
Before publishing changes, you can send a test notification using your test data. This step helps catch issues that don’t appear in the visual preview; for example, email client rendering problems, broken links, or differences in provider formatting.
Click **Send test notification** at the bottom left corner of the preview to send a real message and validate your changes. The test notification:
* Uses your current **draft** version (not the published version)
* Sends to the currently selected channel only
* Appears in your [Message Logs](/platform/analytics/message-logs) for debugging
Looking for the classic (v1) notification preview process? See our tutorial: [How to Use Test Events](/tutorials/content/how-to-preview-notification)
### Creating a Test Event
1. Click **Manage test events** (or **Create test event** if none exist)
2. Click **New test event** in the sidebar
3. Enter a name for your test event
4. Edit the JSON in the editor to include your test data:
```json theme={null}
{
"message": {
"to": [],
"data": {
"name": "Jane Doe",
"order_id": "12345",
"items": [
{ "name": "Widget", "price": 29.99 }
]
}
}
}
```
5. The editor validates your JSON in real-time (green = valid, red = invalid)
6. Click **Save & exit**
From this same modal, you can edit existing test events by selecting them from the sidebar, or delete them using the **Delete** button.
## Recipients
When previewing email notifications in Manual mode, you can select recipients from your workspace members:
* Your email appears first in the list
* Check multiple recipients to send to several people
* Use **Select all** to send to everyone in your workspace
Recipients are workspace members only. To send to external addresses, use test events with the recipient specified in the `to` field.
## Sending Test Notifications
Before publishing changes, you can send a test notification using your test data. This step helps catch issues that don’t appear in the visual preview; for example, email client rendering problems, broken links, or differences in provider formatting.
Click **Send test notification** at the bottom left corner of the preview to send a real message and validate your changes. The test notification:
* Uses your current **draft** version (not the published version)
* Sends to the currently selected channel only
* Appears in your [Message Logs](/platform/analytics/message-logs) for debugging
Looking for the classic (v1) notification preview process? See our tutorial: [How to Use Test Events](/tutorials/content/how-to-preview-notification)