> ## Documentation Index
> Fetch the complete documentation index at: https://www.courier.com/docs/llms.txt
> Use this file to discover all available pages before exploring further.
# Journeys Overview
> Build customer messaging experiences with a visual workflow editor, typed data contracts, and step-by-step run inspection.
 Journeys give you a visual, opinionated interface for building customer messaging experiences. Define your data contract, design your workflow, and let Courier handle the execution logic; timing, branching, enrichment, and delivery across every channel.
You define the shape of the data your journey expects. Courier uses that contract to power autofill and variable hints throughout the editor, and makes the data available to every node in the workflow. When something goes wrong, you can step through an individual run against real production data and see exactly what happened at every node.
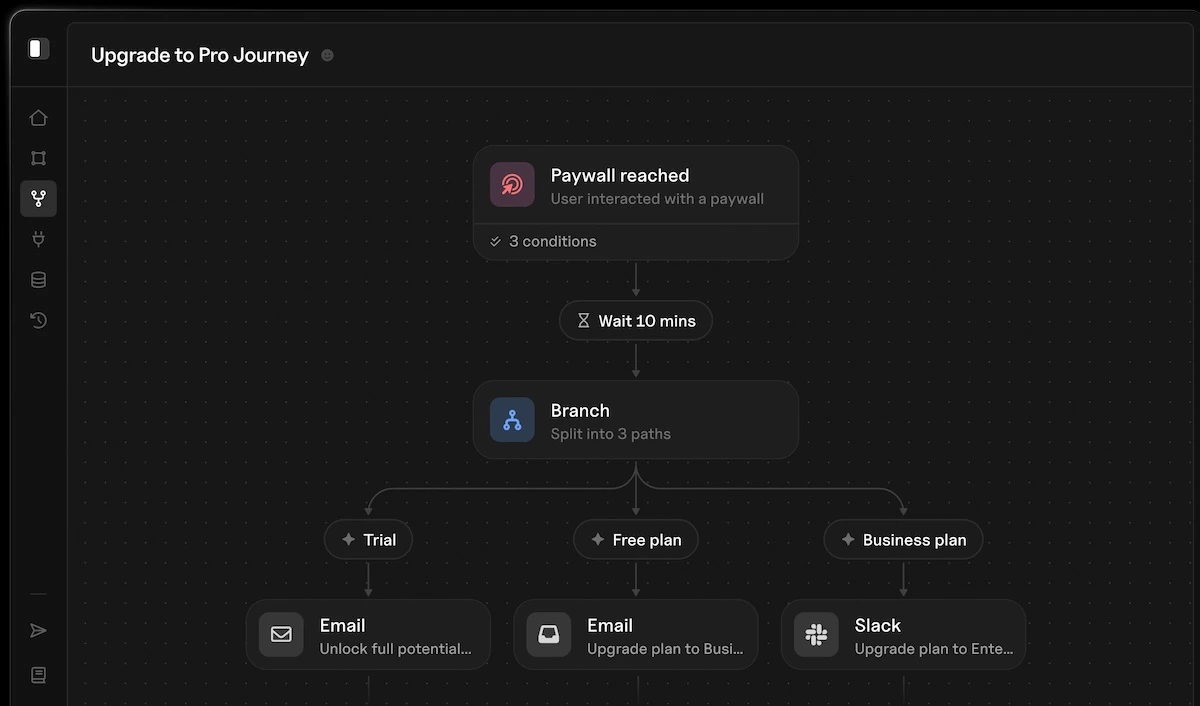
## How Journeys Work
A journey is a directed graph of nodes that executes when triggered. You build it visually in the journey editor, publish it, and invoke it from your application or an event stream.
Journeys give you a visual, opinionated interface for building customer messaging experiences. Define your data contract, design your workflow, and let Courier handle the execution logic; timing, branching, enrichment, and delivery across every channel.
You define the shape of the data your journey expects. Courier uses that contract to power autofill and variable hints throughout the editor, and makes the data available to every node in the workflow. When something goes wrong, you can step through an individual run against real production data and see exactly what happened at every node.
## How Journeys Work
A journey is a directed graph of nodes that executes when triggered. You build it visually in the journey editor, publish it, and invoke it from your application or an event stream.
Trigger → Node → Node → Node → ...
Every journey starts with a **trigger** that defines how users enter the workflow. From there, nodes execute in sequence. Branch nodes can split the flow into multiple paths. The journey continues until all paths reach their end.
## Core Concepts
Deliver messages through email, SMS, push, or inbox
Create notification content inline, scoped to the journey
Split execution into conditional paths at runtime
Pause execution for a duration or until a specific time
Pull data from external services during execution
Limit how often a user passes through a point in the journey
## Journeys vs Send API
The [Send API](/platform/sending/send-message) is the right choice for most notifications. It handles rendering, routing, preferences, and delivery in a single call. You don't need journeys for straightforward transactional messages.
Journeys are for when your messaging involves:
* **Multi-step sequences** with timing between steps (onboarding flows, reminder chains)
* **Conditional logic** that routes users down different paths based on their data or behavior
* **Data enrichment** from external services during execution
* **Rate limiting** to prevent notification fatigue
* **Auditability** where you need to step through exactly what happened for a specific user
| | Send API | Journeys |
| --------------------- | ----------------------------------- | --------------------------------- |
| **Complexity** | Single call | Multi-step workflows |
| **Data contract** | None (accepts any payload) | Typed schema with editor autofill |
| **Timing** | Immediate (or with delay parameter) | Built-in delays and scheduling |
| **Conditional logic** | In your code | Built-in branching |
| **Debugging** | Message logs | Step-by-step run inspection |
| **Best for** | Transactional messages | Complex messaging experiences |
## Getting Started
1. Navigate to [Journeys](https://app.courier.com/journeys) in the Courier app
2. Click **New Journey** and choose a trigger type
3. Add nodes to define your workflow
4. **Publish** the journey to activate it
5. Invoke via API or wait for a Segment event
For a hands-on walkthrough, see [Create Your First Journey](/tutorials/journeys/how-to-create-your-first-journey).
## What's Next
Configure API and Segment triggers
Add branching, delays, enrichment, and more
Step through individual runs to debug issues
Build a journey with branching, delays, and external data