> ## Documentation Index
> Fetch the complete documentation index at: https://www.courier.com/docs/llms.txt
> Use this file to discover all available pages before exploring further.
# Design and Send Your First Notification
> Create a notification template in Courier's Template Designer, configure a provider, add content and variables, preview with test data, publish, and send a test notification.
Walk through the full lifecycle of a Courier notification: configure a provider, design a template with content blocks and variables, preview it with test data, publish, and send a test message. By the end, you'll have a working notification ready to integrate into your codebase.
## Prerequisites
* A [Courier account](https://app.courier.com/)
* Credentials for at least one provider (e.g. SendGrid API key, Twilio SID). Courier also provides a built-in test email provider you can use to get started without external credentials.
## Step 1: Configure a Provider
Before you can send anything, your Courier workspace needs at least one integrated provider. If you've already configured a provider, skip to Step 2.
Navigate to the [Integrations tab](https://app.courier.com/integrations) in the left sidebar.
Search for your provider (e.g. SendGrid, Twilio, Firebase) and click it. Fill in the required credentials from your provider's dashboard and click **Install**.
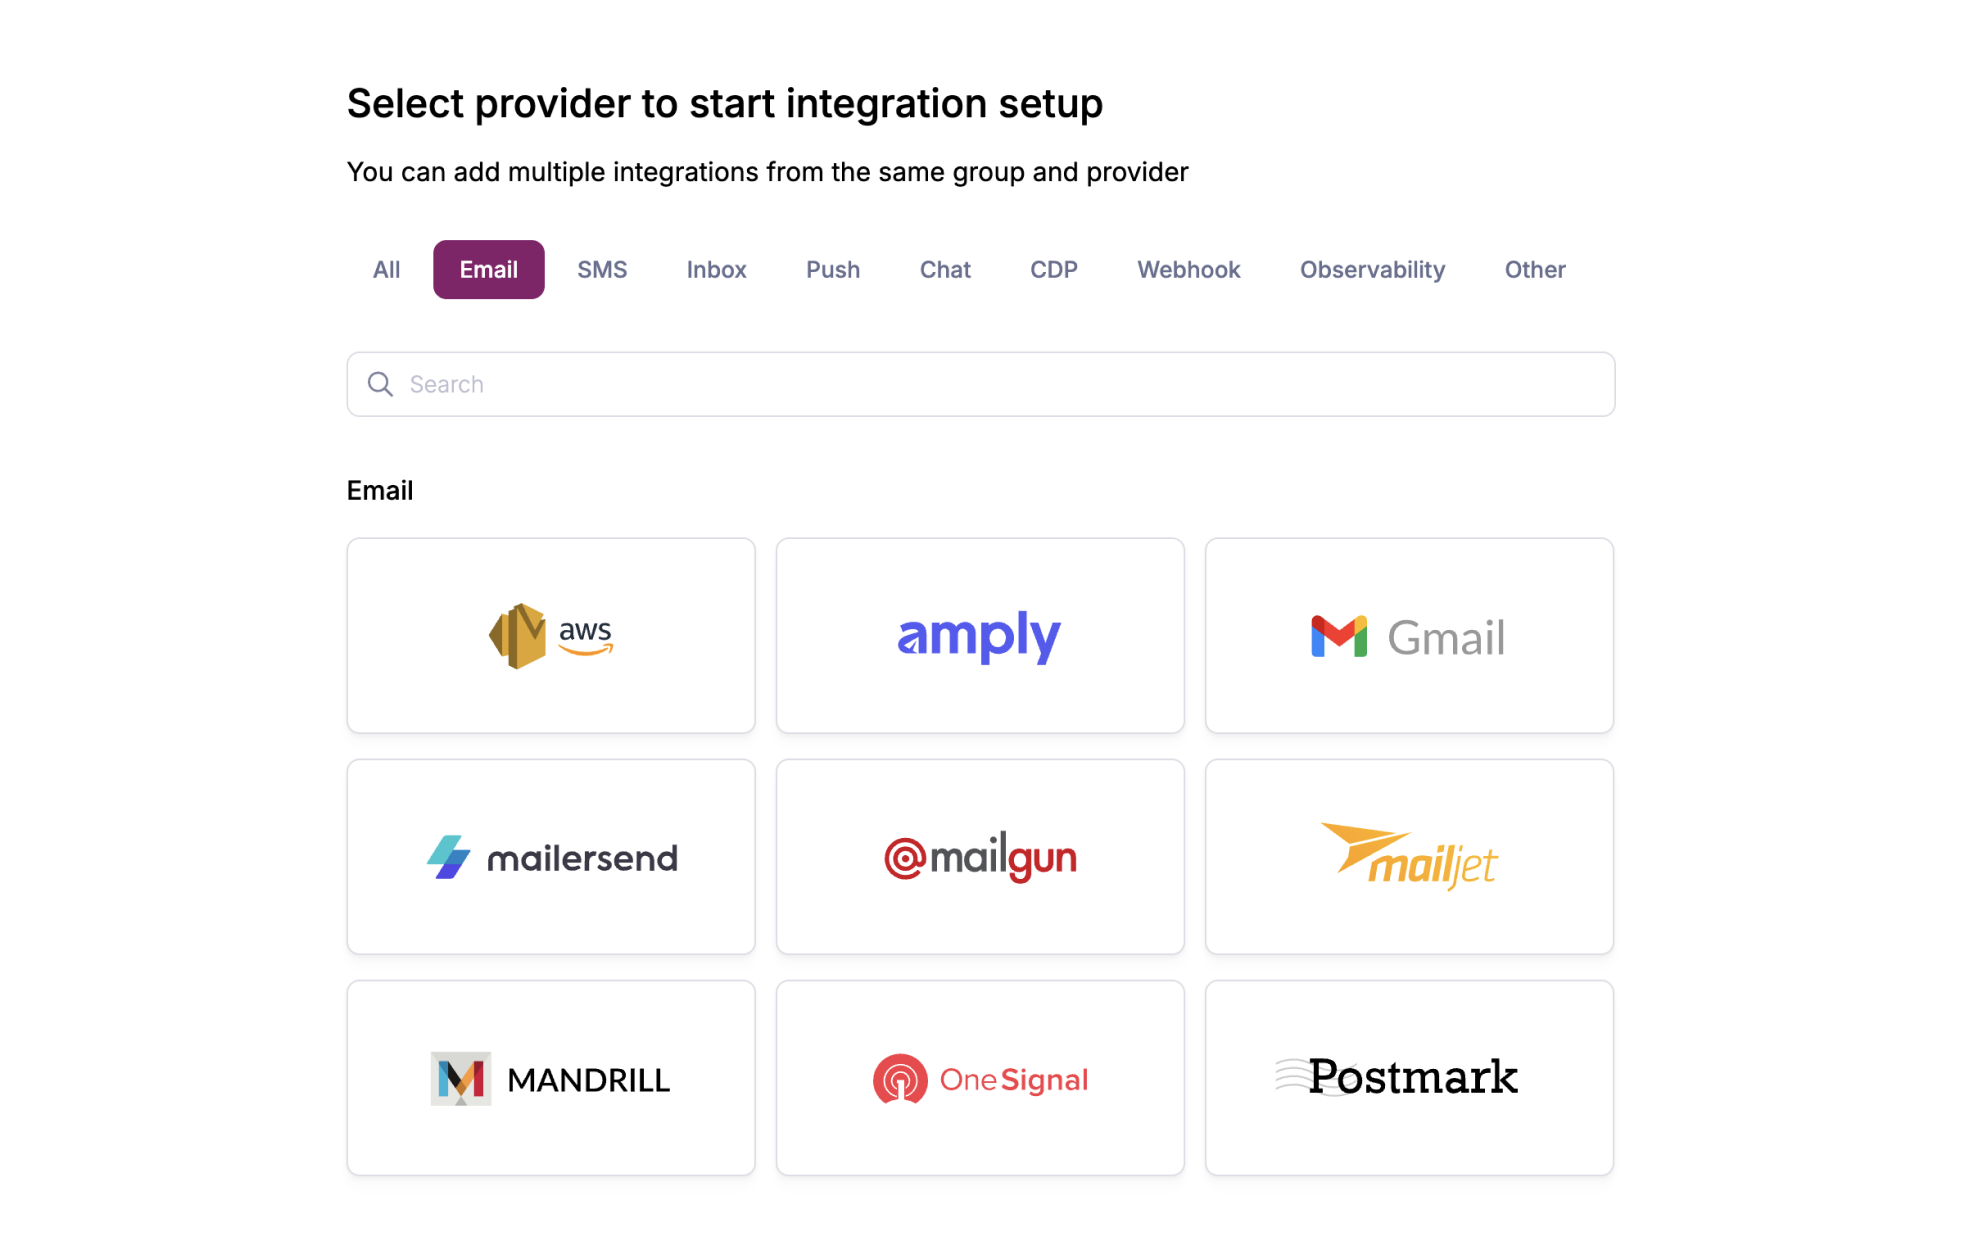 Your newly configured provider appears in the **Installed** section. You can now use it in any notification template.
You can also configure providers inline while designing a template. If you add a channel that has no provider, Courier will prompt you to configure one in the channel settings.
## Step 2: Create a Notification Template
Navigate to [Templates](https://app.courier.com/assets/templates) and click **+ New** > **Message Template**. Give it a name (e.g. "Welcome Email"), then click **Create Template**.
Under **Add Notification Channels**, select **Email**. In the left sidebar under **Channels**, hover over **Email** and click the cog icon to open channel settings. Choose the provider you configured in Step 1.
Your newly configured provider appears in the **Installed** section. You can now use it in any notification template.
You can also configure providers inline while designing a template. If you add a channel that has no provider, Courier will prompt you to configure one in the channel settings.
## Step 2: Create a Notification Template
Navigate to [Templates](https://app.courier.com/assets/templates) and click **+ New** > **Message Template**. Give it a name (e.g. "Welcome Email"), then click **Create Template**.
Under **Add Notification Channels**, select **Email**. In the left sidebar under **Channels**, hover over **Email** and click the cog icon to open channel settings. Choose the provider you configured in Step 1.
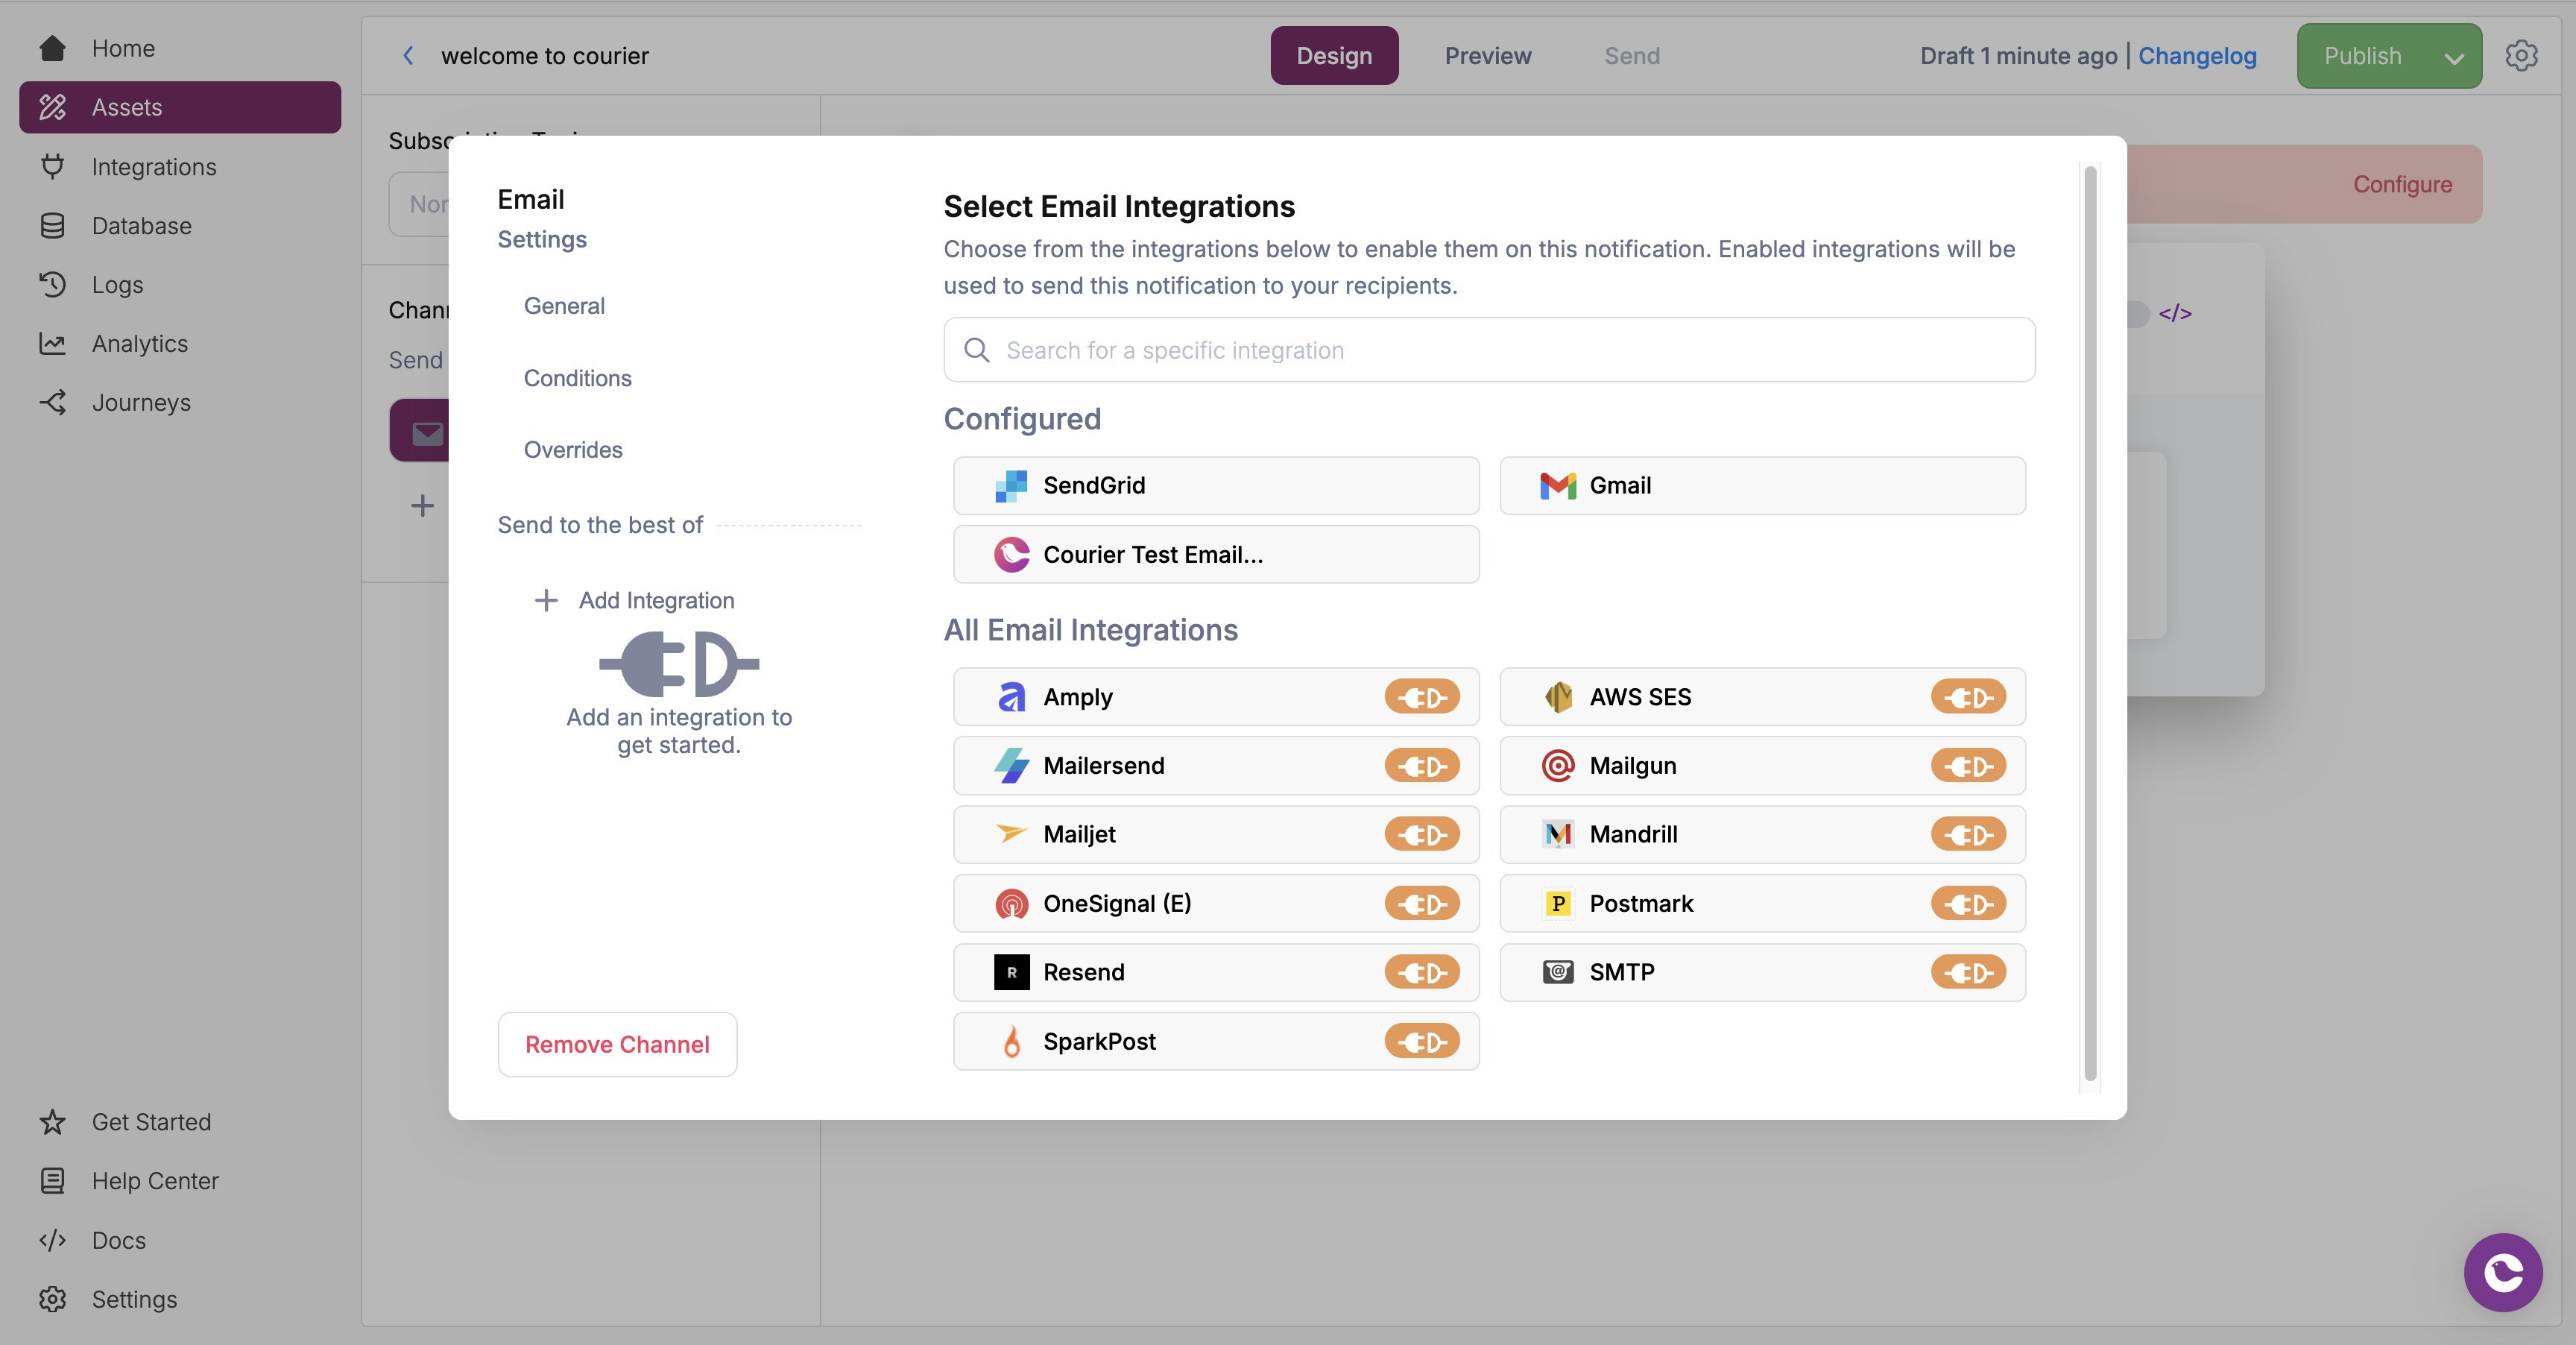 Providers you've already configured appear under "Configured" in the integrations list. You can add multiple providers per channel and set [priority rules](/platform/sending/channel-priority) to control failover.
## Step 3: Add Content
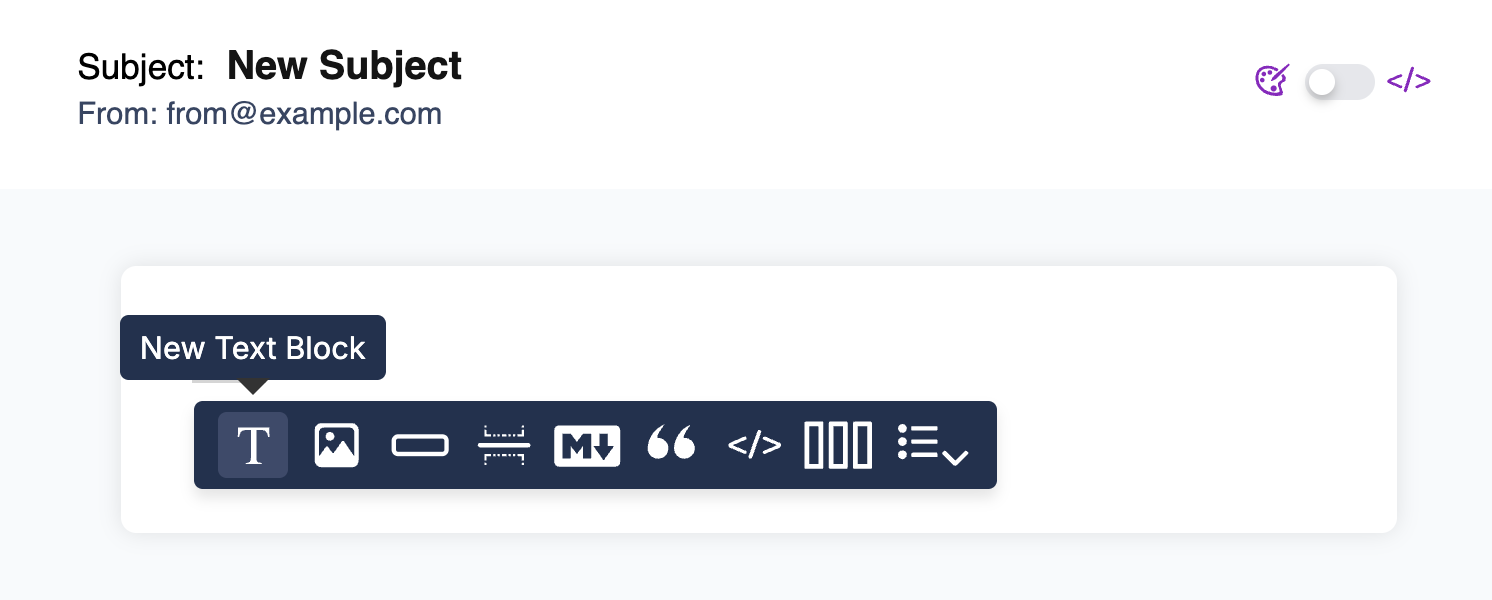
Click on the email channel to open the content editor. Use the content toolbar to build your notification with blocks.
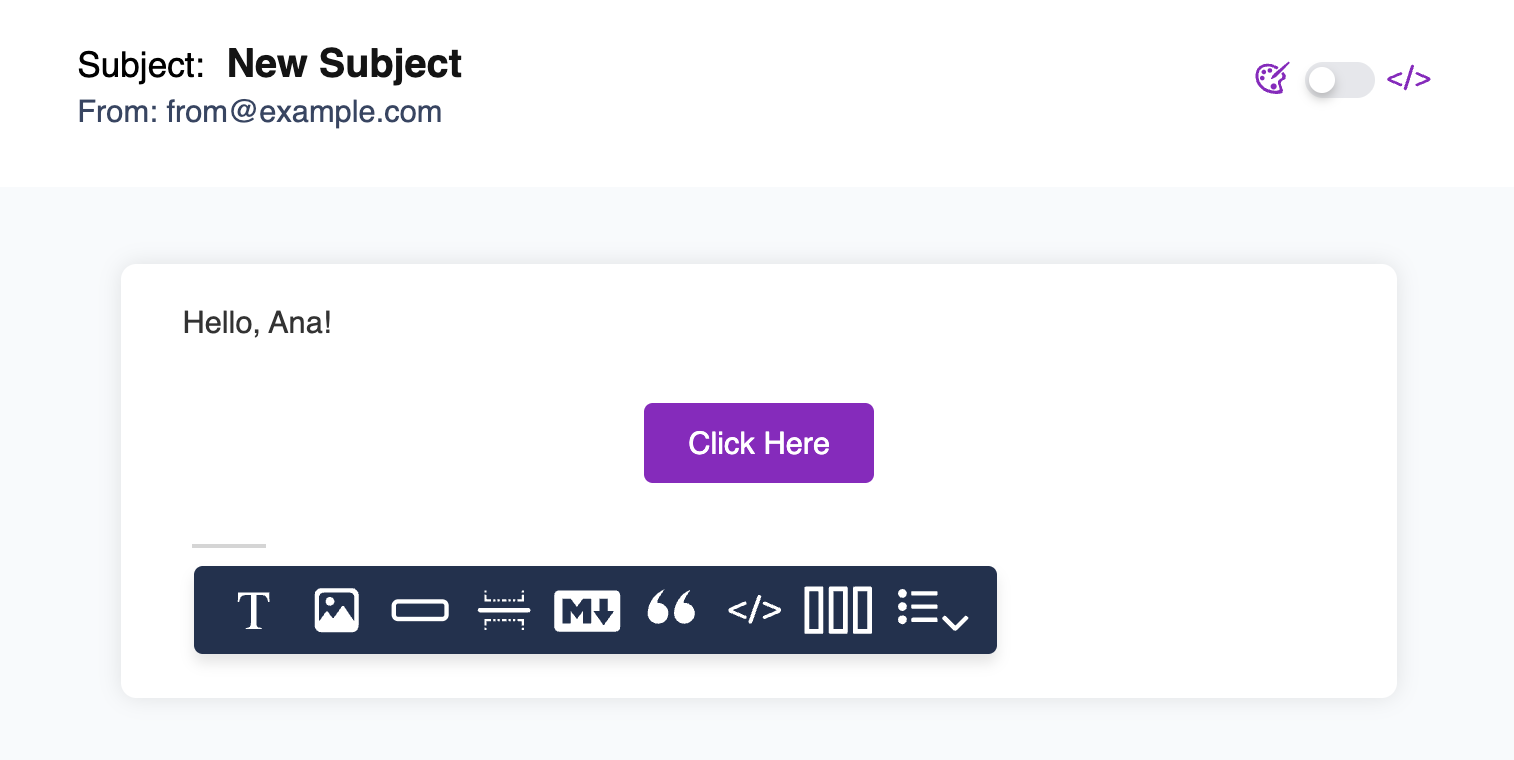
Click the **T** icon in the toolbar to add a text block. Replace the placeholder text with your message, e.g. `Hello, {profile.name}!`
Providers you've already configured appear under "Configured" in the integrations list. You can add multiple providers per channel and set [priority rules](/platform/sending/channel-priority) to control failover.
## Step 3: Add Content
Click on the email channel to open the content editor. Use the content toolbar to build your notification with blocks.
Click the **T** icon in the toolbar to add a text block. Replace the placeholder text with your message, e.g. `Hello, {profile.name}!`
 Click the button icon to add an action block. This renders as a clickable button (CTA) in email. You can set the button text and URL; use a variable like `{invite_url}` for dynamic links.
 Add images, dividers, markdown, or template blocks. Courier auto-saves and adapts your blocks for all channels. See [Content Blocks](/platform/content/content-blocks/content-block-basics) for the full list.
### Variables for Dynamic Data
Use curly-brace placeholders to insert dynamic data from the send request:
* **`{profile.name}`** - Recipient's name from their Courier profile
* **`{data.invite_url}`** or **`{invite_url}`** - Custom data passed in the send request
* **`{urls.preferences}`** - Link to the user's preference page
* **`{urls.unsubscribe}`** - One-click unsubscribe link
See [Variables](/platform/content/variables/inserting-variables) for the full syntax and available built-in variables.
### Multi-Channel Content
Once you've built content in one channel, open another channel and pull in the same blocks from the content library. Courier dynamically adjusts blocks to match each channel's format (e.g. stripping images for SMS).
## Step 4: Preview with Test Data
Click **Preview** at the top of the editor, then click **Create Test Event**.
Replace the `data` and `profile` objects with values that match your variables:
```json theme={null}
{
"data": {
"invite_url": "https://www.example.com"
},
"profile": {
"email": "you@example.com",
"name": "Test User"
}
}
```
Your variables should render with the test data. If any show as raw `{variable}` text, check that the key names match between your template and test event JSON.
Add images, dividers, markdown, or template blocks. Courier auto-saves and adapts your blocks for all channels. See [Content Blocks](/platform/content/content-blocks/content-block-basics) for the full list.
### Variables for Dynamic Data
Use curly-brace placeholders to insert dynamic data from the send request:
* **`{profile.name}`** - Recipient's name from their Courier profile
* **`{data.invite_url}`** or **`{invite_url}`** - Custom data passed in the send request
* **`{urls.preferences}`** - Link to the user's preference page
* **`{urls.unsubscribe}`** - One-click unsubscribe link
See [Variables](/platform/content/variables/inserting-variables) for the full syntax and available built-in variables.
### Multi-Channel Content
Once you've built content in one channel, open another channel and pull in the same blocks from the content library. Courier dynamically adjusts blocks to match each channel's format (e.g. stripping images for SMS).
## Step 4: Preview with Test Data
Click **Preview** at the top of the editor, then click **Create Test Event**.
Replace the `data` and `profile` objects with values that match your variables:
```json theme={null}
{
"data": {
"invite_url": "https://www.example.com"
},
"profile": {
"email": "you@example.com",
"name": "Test User"
}
}
```
Your variables should render with the test data. If any show as raw `{variable}` text, check that the key names match between your template and test event JSON.
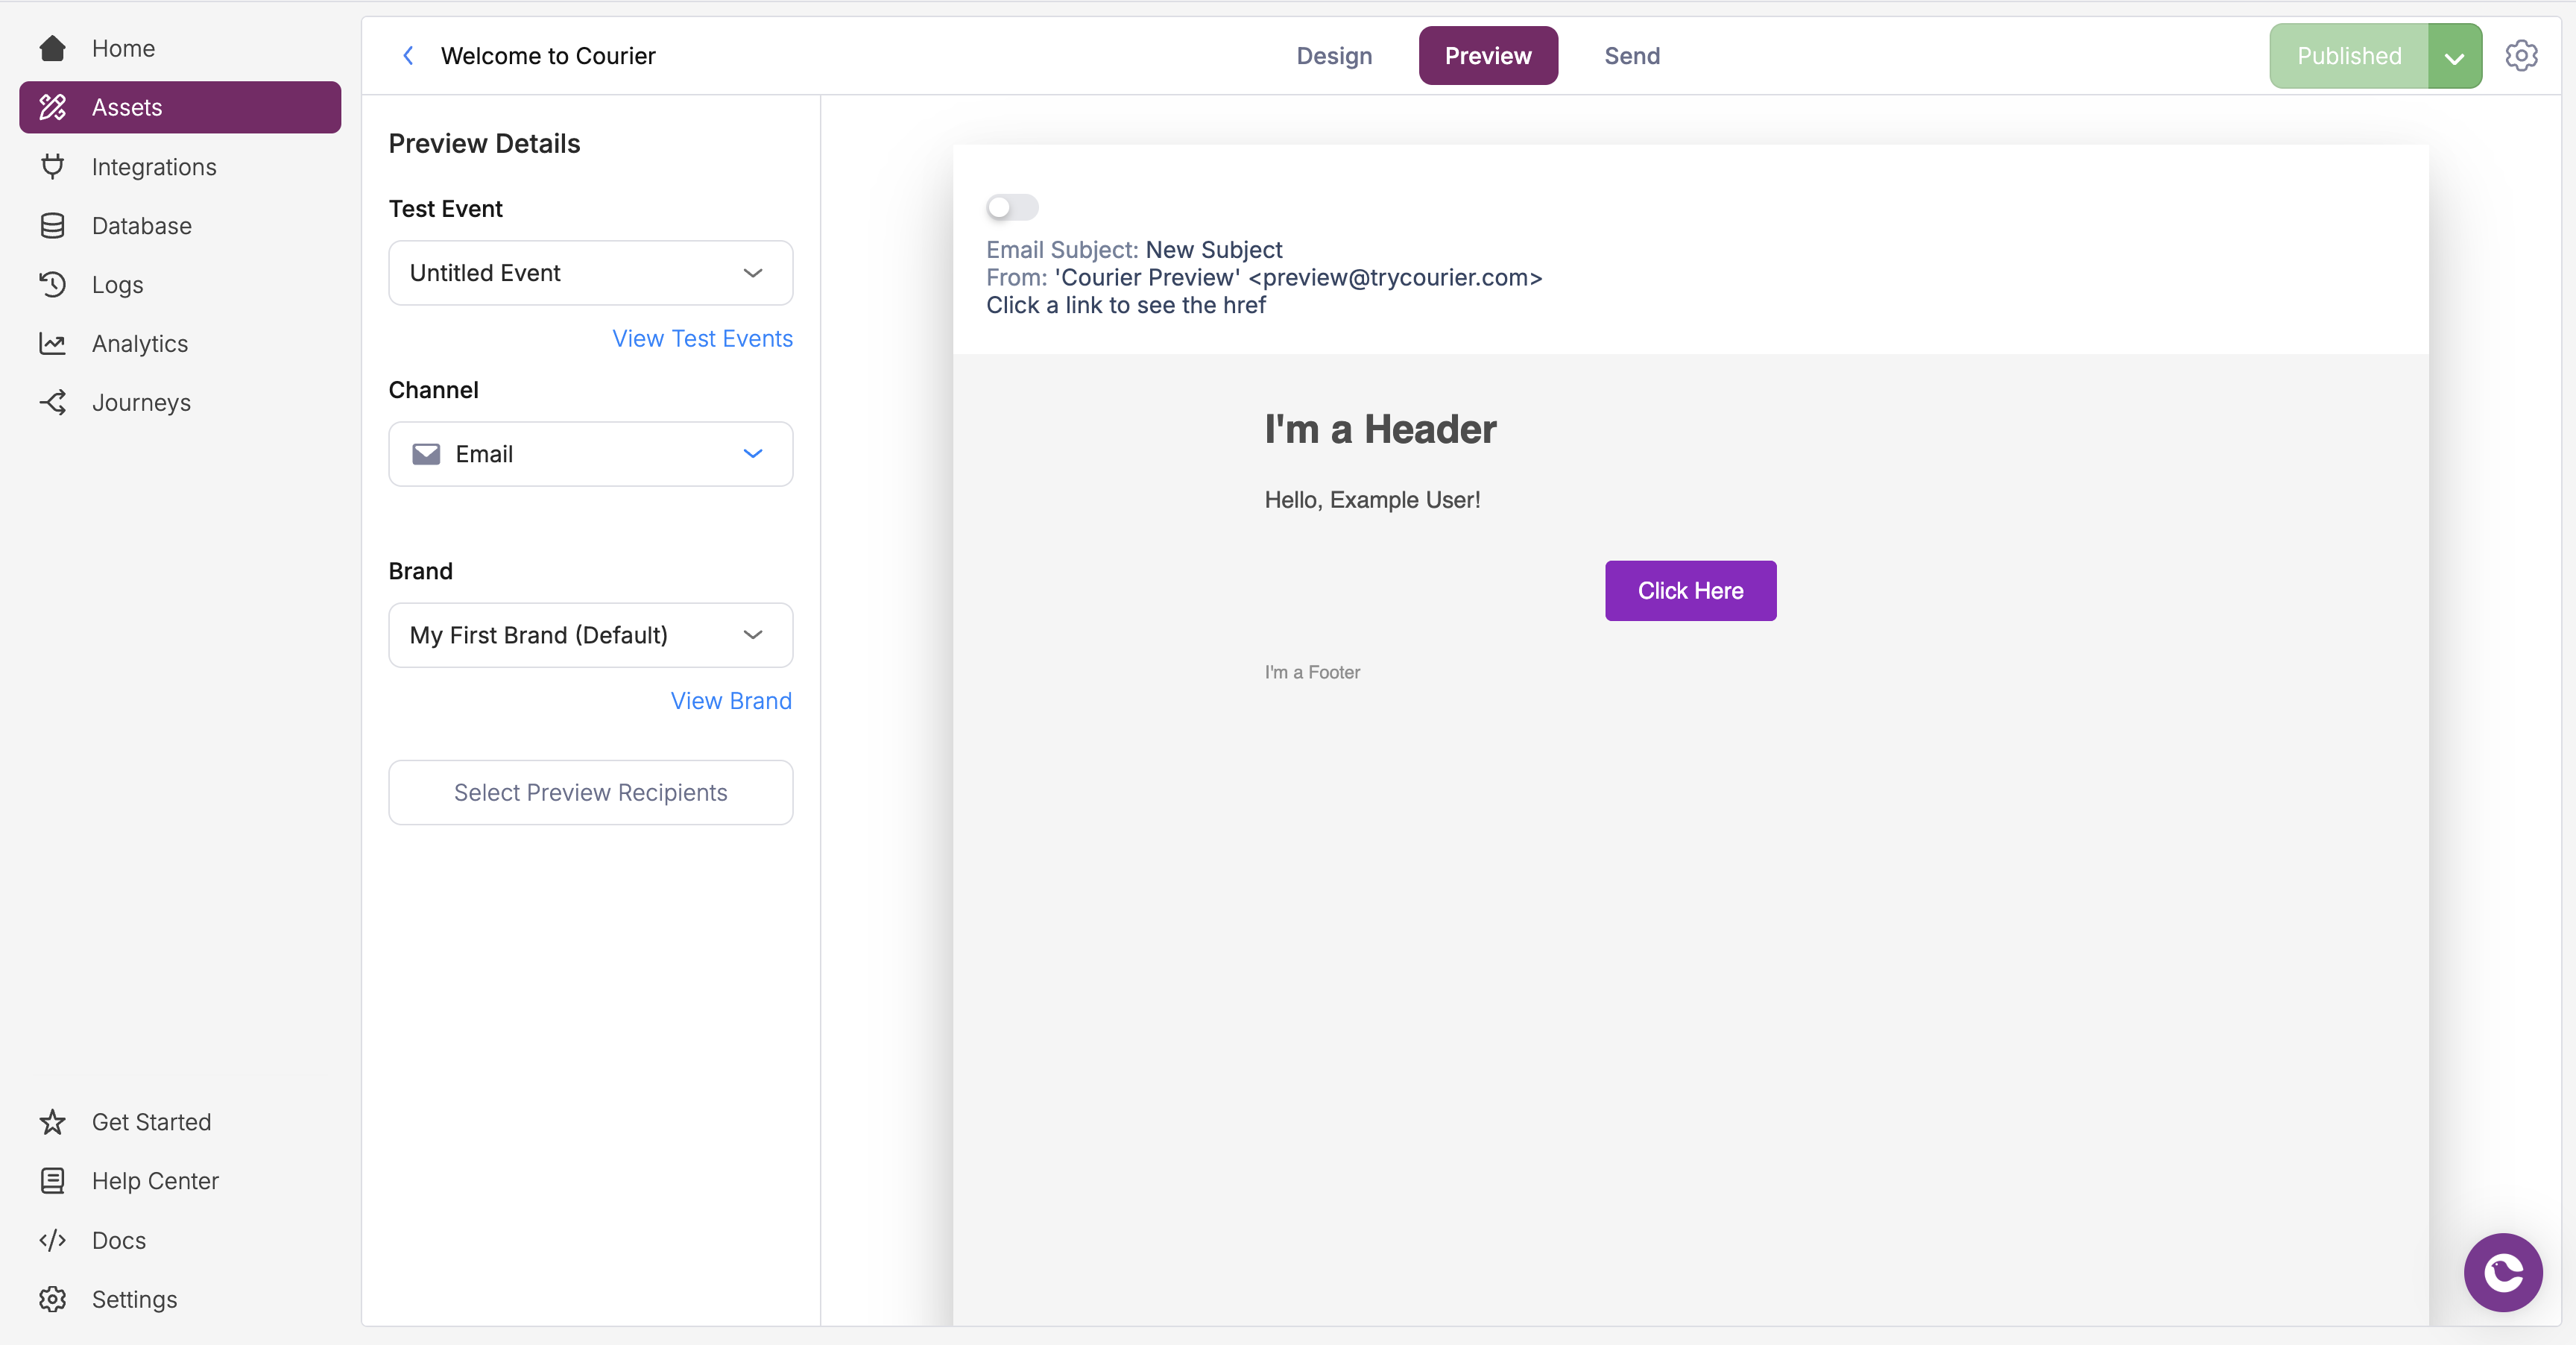 For more on test events (including creating them from message logs), see [How to Use Test Events](/tutorials/content/how-to-preview-notification).
## Step 5: Configure Branding (Optional)
[Brands](/platform/content/brands/brands-overview) let you apply consistent logos, colors, headers, and footers across notifications. If no brand is configured, Courier uses simple default styling.
To apply a brand, open **Template Settings** and select a brand from the dropdown. See [How to Create and Use Brands](/tutorials/content/how-to-create-and-use-brands) for a full walkthrough.
## Step 6: Publish
Click **Publish Changes** to save your notification template. Unpublished changes are only visible in draft mode; your live notifications won't update until you publish.
You can roll back to any previously published version in **Template Settings > Publish History**.
## Step 7: Send a Test Notification
Click the **Send** tab at the top of the editor.
For more on test events (including creating them from message logs), see [How to Use Test Events](/tutorials/content/how-to-preview-notification).
## Step 5: Configure Branding (Optional)
[Brands](/platform/content/brands/brands-overview) let you apply consistent logos, colors, headers, and footers across notifications. If no brand is configured, Courier uses simple default styling.
To apply a brand, open **Template Settings** and select a brand from the dropdown. See [How to Create and Use Brands](/tutorials/content/how-to-create-and-use-brands) for a full walkthrough.
## Step 6: Publish
Click **Publish Changes** to save your notification template. Unpublished changes are only visible in draft mode; your live notifications won't update until you publish.
You can roll back to any previously published version in **Template Settings > Publish History**.
## Step 7: Send a Test Notification
Click the **Send** tab at the top of the editor.
 Select your programming language, confirm the notification event, and set the recipient ID. Courier generates a ready-to-use code snippet.
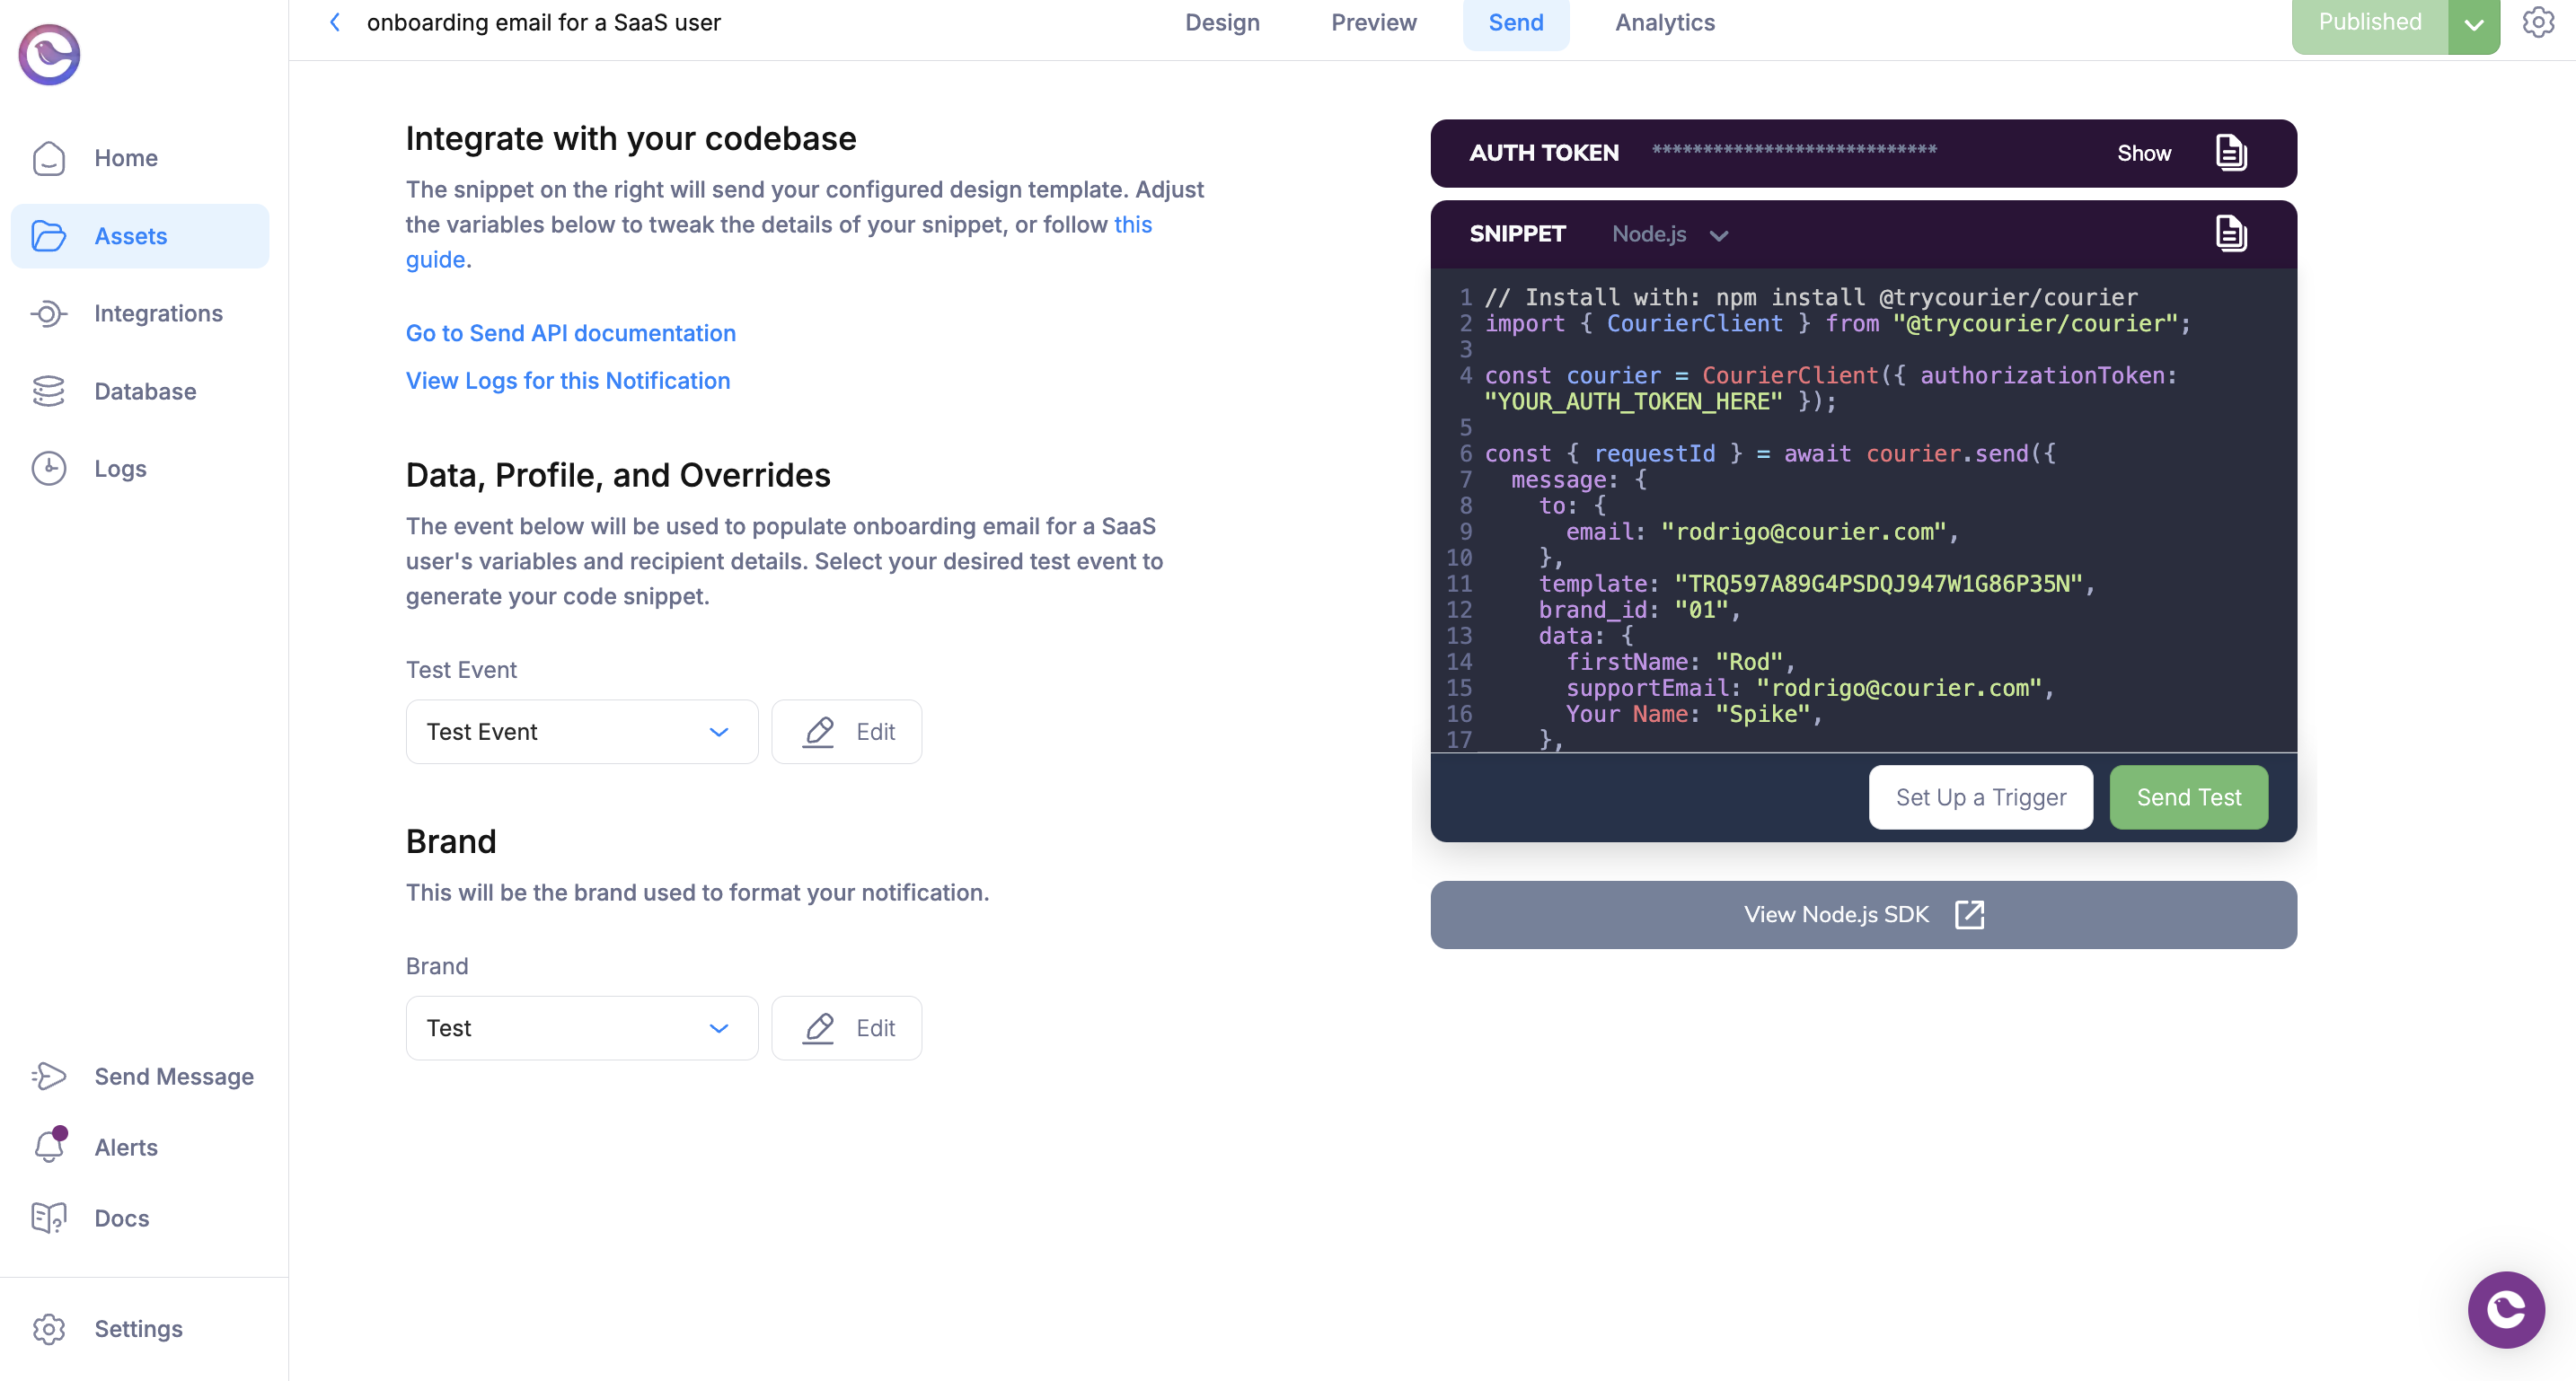 Select a test event (from Step 4), optionally choose a brand, and click **Send Notification**. Check the [Message Logs](/platform/analytics/message-logs) to verify delivery.
Copy the code snippet and integrate it into your application. You can also use the [Send API](/api-reference/send/send-a-message) directly or any of the [Courier SDKs](https://github.com/trycourier).
## What's Next
Explore all available block types for building notification content
Configure channel priority and failover rules
Apply consistent branding to your notifications
Full API reference for sending notifications
Select a test event (from Step 4), optionally choose a brand, and click **Send Notification**. Check the [Message Logs](/platform/analytics/message-logs) to verify delivery.
Copy the code snippet and integrate it into your application. You can also use the [Send API](/api-reference/send/send-a-message) directly or any of the [Courier SDKs](https://github.com/trycourier).
## What's Next
Explore all available block types for building notification content
Configure channel priority and failover rules
Apply consistent branding to your notifications
Full API reference for sending notifications