> ## Documentation Index
> Fetch the complete documentation index at: https://www.courier.com/docs/llms.txt
> Use this file to discover all available pages before exploring further.
# How To Embed Preferences in React
> Add an in-app notification preference center to your React application using Courier's pre-built components or custom hooks.
Build a preference center that lives inside your app instead of redirecting users to an external page. Courier provides two approaches: a pre-built `PreferencesV4` component for quick setup, or low-level `usePreferences` hooks for full custom UI control.
By the end of this tutorial, your users will be able to toggle notification topics on/off, choose delivery channels (Enterprise), and subscribe to digests directly in your app.
## Prerequisites
* A [Courier account](https://app.courier.com/) with at least one configured provider
* Subscription topics configured in the [Preferences Editor](https://app.courier.com/settings/preferences) (see [How To Set Up a Hosted Preference Center](/tutorials/preferences/how-to-set-up-hosted-preference-center) Steps 1-2)
* A React 17+ application
* A backend that generates [Courier JWTs](/platform/inbox/authentication) for user authentication
If you haven't created subscription topics and mapped templates yet, complete Steps 1-2 of the [hosted preference center tutorial](/tutorials/preferences/how-to-set-up-hosted-preference-center) first. The topics and template mappings are the same regardless of how you surface preferences.
## Step 1: Install Packages
Install the Courier React packages:
```bash React 18+ theme={null}
npm install @trycourier/react-provider @trycourier/react-preferences @trycourier/react-hooks
```
```bash React 17 theme={null}
npm install @trycourier/react-provider@17 @trycourier/react-preferences@17 @trycourier/react-hooks@17
```
## Step 2: Set Up the Courier Provider
Wrap your app (or the relevant section) with `CourierProvider`. This gives all child components access to Courier's preference APIs.
```tsx theme={null}
import { CourierProvider } from "@trycourier/react-provider";
function App() {
return (
{/* Your app content */}
);
}
```
Find your **Client Key** in the Courier dashboard under [Settings > API Keys](https://app.courier.com/settings/api-keys). The `userId` should match the user ID you use when sending notifications.
In production, you should also pass a `userSignature` (JWT) for authentication. See [How to Send a JWT from Your Backend](/tutorials/inbox/how-to-send-jwt) for details.
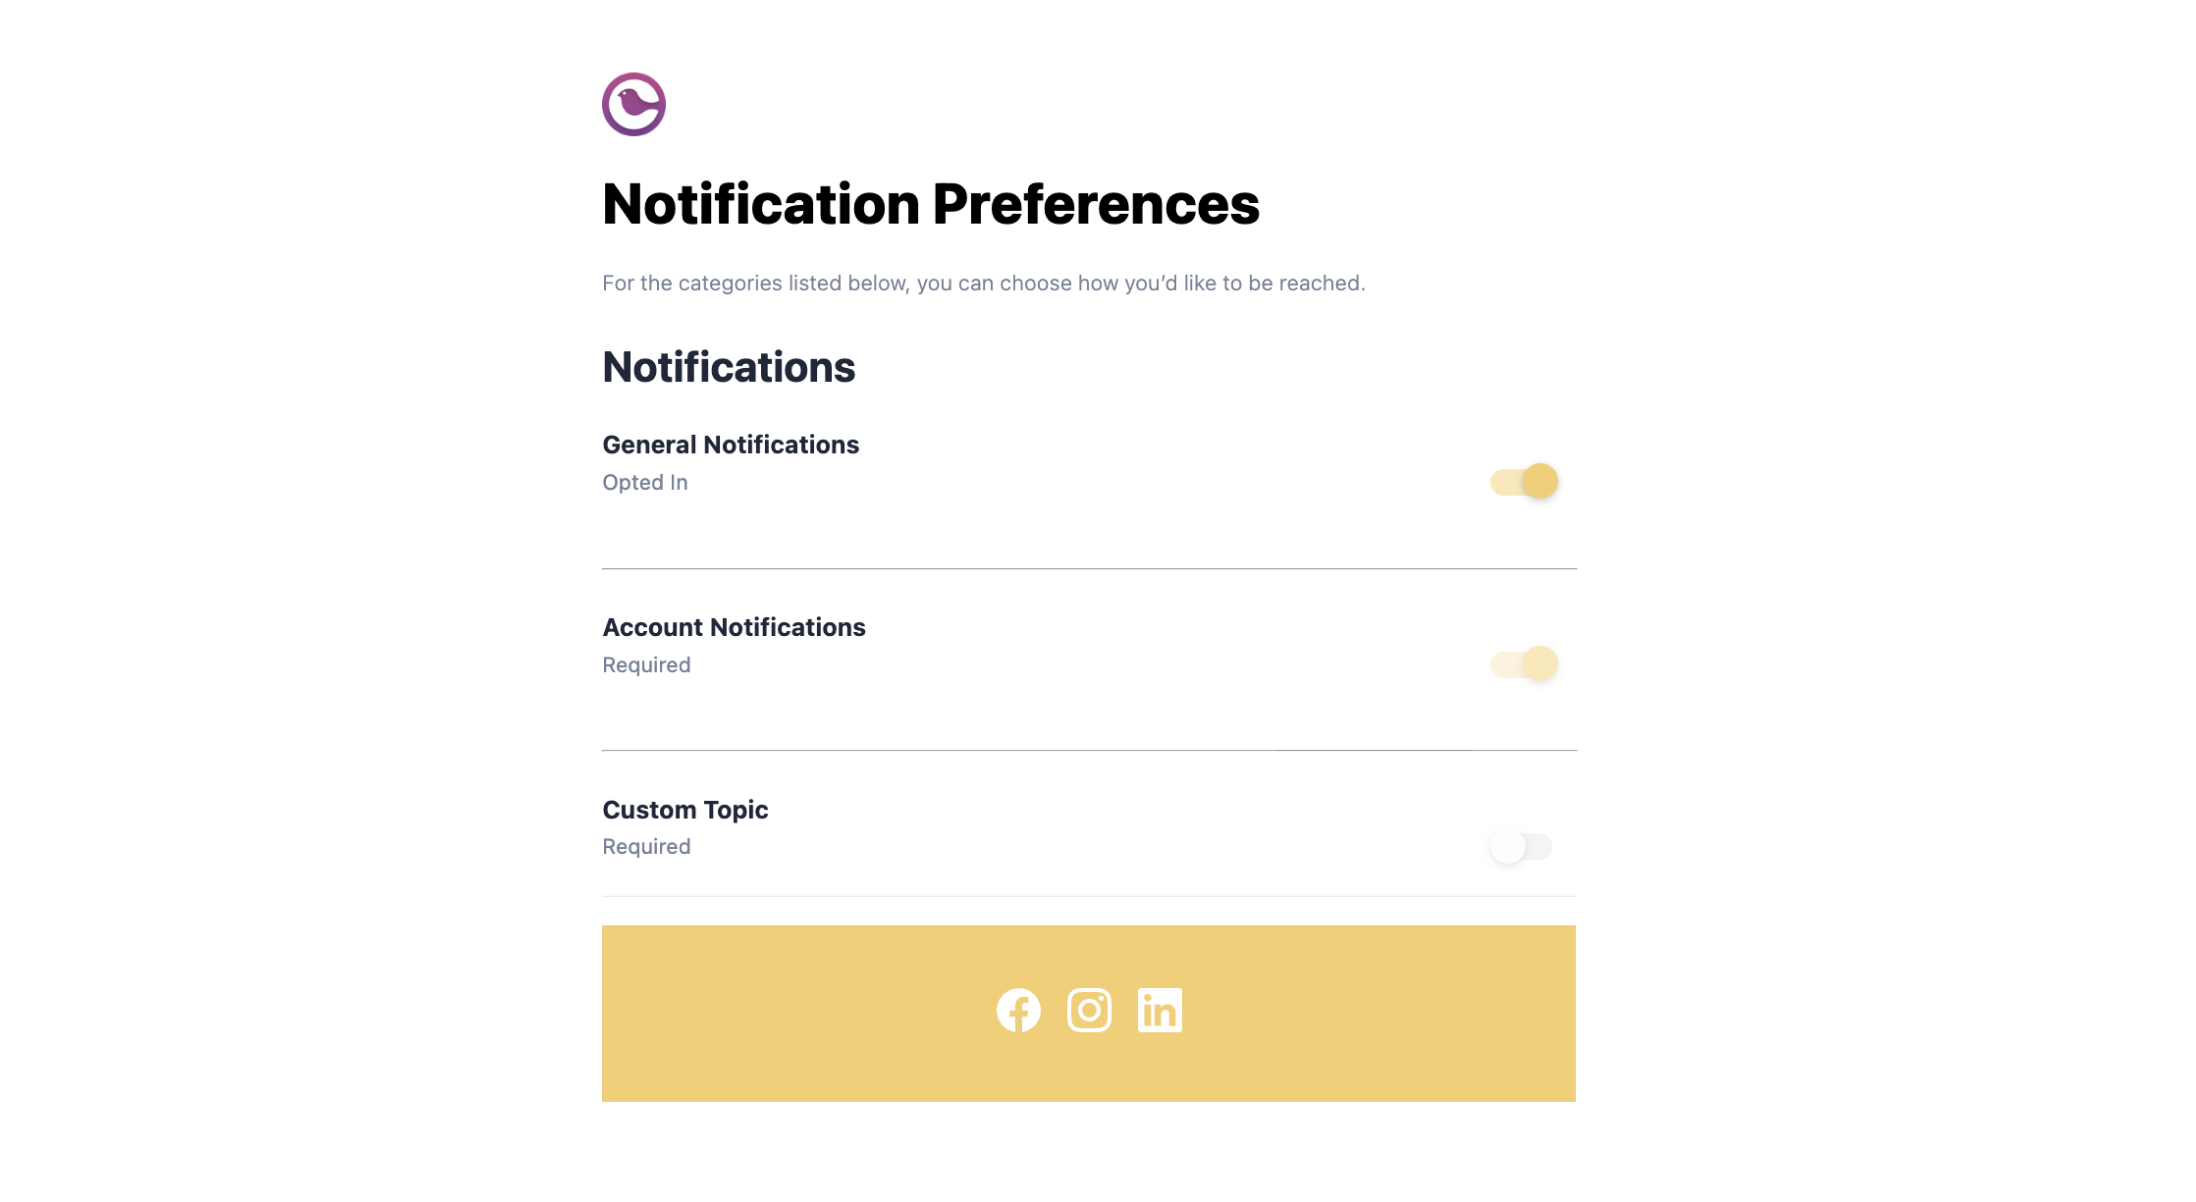
## Option A: Pre-Built Component (Quick Setup)
The `PreferencesV4` component renders a complete preference interface out of the box, including topic toggles, channel selection (Enterprise), and digest scheduling.
### Basic Implementation
```tsx theme={null}
import React from "react";
import { CourierProvider } from "@trycourier/react-provider";
import { Header, PreferencesV4, Footer } from "@trycourier/react-preferences";
function PreferencesPage() {
return (
);
}
```
The `Header` and `Footer` components are optional; they render brand-matched header/footer sections. You can omit them or replace them with your own.
### PreferencesV4 Props
| Prop | Type | Description |
| ---------- | -------------------- | ---------------------------------------------- |
| `tenantId` | `string` (optional) | Show preferences for a specific tenant context |
| `draft` | `boolean` (optional) | Show draft preferences before publishing |
### Multi-Tenant Preferences
If your app uses [tenants](/platform/tenants/tenants-overview), pass the `tenantId` to show tenant-specific preference configuration:
```tsx theme={null}
```
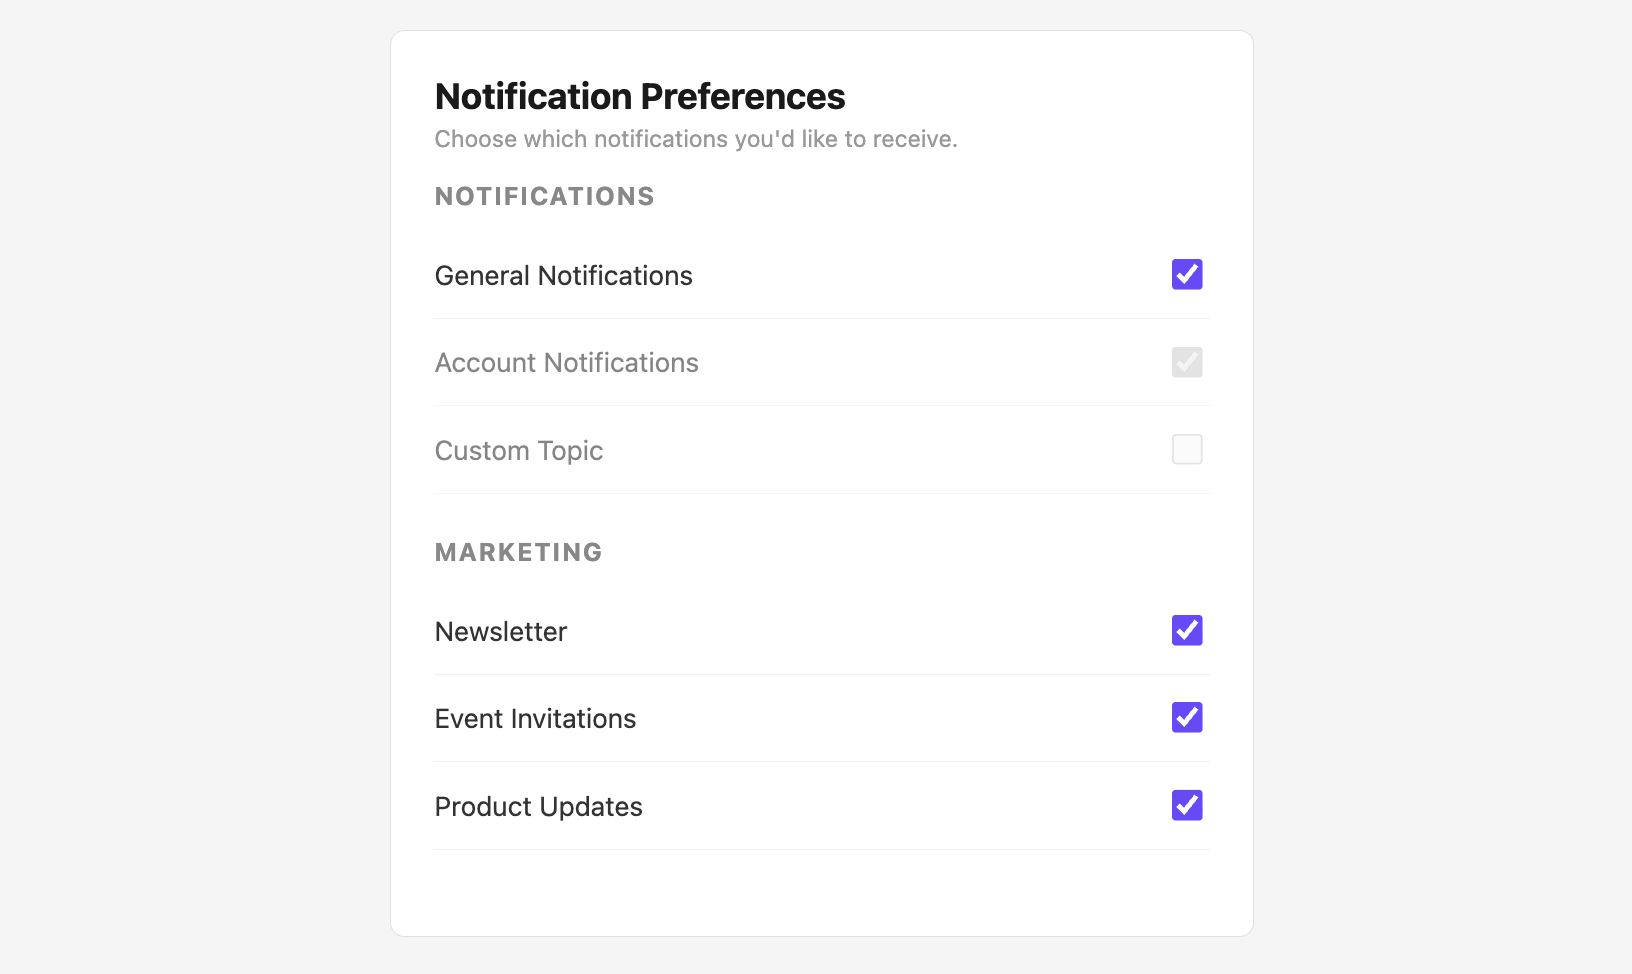
## Option B: Custom Hooks (Full Control)
For a fully custom UI, use the `usePreferences` hook from `@trycourier/react-hooks`. This gives you raw preference data and update functions to build your own interface.
### Fetching Preferences
```tsx theme={null}
import React, { useEffect } from "react";
import { usePreferences } from "@trycourier/react-hooks";
function CustomPreferences({ tenantId }) {
const {
recipientPreferences,
preferencePage,
fetchRecipientPreferences,
fetchPreferencePage,
isLoading,
} = usePreferences();
useEffect(() => {
fetchRecipientPreferences(tenantId);
fetchPreferencePage(tenantId);
}, [tenantId]);
if (isLoading || !preferencePage) {
return
);
}
```
### Hook Return Values
| Property | Type | Description |
| ---------------------------- | ----------------------------- | ------------------------------------------------------------------------------------------------------------------------------- |
| `recipientPreferences` | `Array` | User's current preference status per topic (each item has `templateId`, `status`, `templateName`) |
| `preferencePage` | `Object` | Preference page config; sections and topics are in GraphQL connection format (access via `.sections.nodes` and `.topics.nodes`) |
| `fetchRecipientPreferences` | `(tenantId?) => void` | Fetch user's preferences |
| `fetchPreferencePage` | `(tenantId?, draft?) => void` | Fetch page configuration |
| `updateRecipientPreferences` | `(payload) => void` | Update a topic preference |
| `isLoading` | `boolean` | Whether data is still loading |
### Updating Preferences
Use `updateRecipientPreferences` to toggle topics or set custom routing:
```tsx theme={null}
import React, { useEffect } from "react";
import { usePreferences } from "@trycourier/react-hooks";
function PreferenceToggle({ tenantId }) {
const {
recipientPreferences,
fetchRecipientPreferences,
updateRecipientPreferences,
} = usePreferences();
useEffect(() => {
fetchRecipientPreferences(tenantId);
}, [tenantId]);
const handleToggle = (templateId, currentStatus) => {
updateRecipientPreferences({
templateId,
status: currentStatus === "OPTED_IN" ? "OPTED_OUT" : "OPTED_IN",
hasCustomRouting: false,
routingPreferences: [],
digestSchedule: "",
tenantId,
});
};
return (
{recipientPreferences?.map((pref) => (
))}
);
}
```
### Update Payload
| Field | Type | Description |
| -------------------- | ------------------- | ------------------------------------------------- |
| `templateId` | `string` | The topic/template ID to update |
| `status` | `string` | `"OPTED_IN"` or `"OPTED_OUT"` |
| `hasCustomRouting` | `boolean` | Whether to use custom channel routing |
| `routingPreferences` | `string[]` | Array of channel types (e.g. `["email", "push"]`) |
| `digestSchedule` | `string` | Digest frequency if applicable |
| `tenantId` | `string` (optional) | Tenant context for multi-tenant apps |
## Step 3: Test Your Implementation
Confirm that all subscription topics from the Preferences Editor appear in your component.
If topics are missing or stale, make sure you've clicked **Publish** in the Preferences Editor. Changes are saved as a draft until you publish, so the component won't reflect updates until then.
Toggle a topic off, then send a test notification for a template linked to that topic. The notification should be suppressed for the opted-out user.
If channel selection is enabled, verify that users can choose delivery channels and that their choices appear in the API when you query preferences:
```bash curl theme={null}
curl -X GET https://api.courier.com/users/{user_id}/preferences/{topic_id} \
-H "Authorization: Bearer $COURIER_AUTH_TOKEN"
```
```typescript Node theme={null}
import Courier from "@trycourier/courier";
const client = new Courier({ apiKey: "your_api_key" });
const { topic } = await client.users.preferences.retrieveTopic("TOPIC_ID", {
user_id: "user_123",
});
console.log(topic.custom_routing); // e.g. ["email", "push"]
```
```python Python theme={null}
from courier import Courier
client = Courier(api_key="your_api_key")
response = client.users.preferences.retrieve_topic(
"TOPIC_ID",
user_id="user_123",
)
print(response.topic.custom_routing) # e.g. ["email", "push"]
```
## Local Development and CORS
The Courier React SDK sends requests to `https://api.courier.com/client/q` by default. During local development, browsers block these cross-origin requests. Use a dev server proxy to work around this.
### Vite Proxy Setup
Add a proxy to your `vite.config.js` that forwards requests to Courier's API:
```js theme={null}
// vite.config.js
import { defineConfig } from "vite";
import react from "@vitejs/plugin-react";
export default defineConfig({
plugins: [react()],
server: {
proxy: {
"/api": {
target: "https://api.courier.com",
changeOrigin: true,
secure: true,
rewrite: (path) => path.replace(/^\/api/, ""),
headers: {
origin: "https://app.courier.com",
},
},
},
},
});
```
Then set `apiUrl` on the provider to route through the proxy:
```tsx theme={null}
```
`apiUrl` replaces the **entire** GraphQL endpoint URL; the SDK does not append `/client/q` for you. Always include the full path (e.g. `/api/client/q`, not just `/api`).
Remove the `apiUrl` prop before deploying to production. In production, the SDK uses `https://api.courier.com/client/q` by default and CORS is handled by Courier's allowlisted domains.
## Styling
The `PreferencesV4` component uses CSS custom properties that you can override:
```css theme={null}
:root {
--ci-title-color: #1a1a1a;
--ci-text-color: #4a4a4a;
}
```
For deeper customization, use the hooks approach (Option B) and apply your own styles entirely.
## What's Next
Deploy a hosted preference page as an alternative or complement
Full reference for embedded preference components and hooks
Secure your embedded components with JWT tokens
API reference for server-side preference management
 The `Header` and `Footer` components are optional; they render brand-matched header/footer sections. You can omit them or replace them with your own.
### PreferencesV4 Props
| Prop | Type | Description |
| ---------- | -------------------- | ---------------------------------------------- |
| `tenantId` | `string` (optional) | Show preferences for a specific tenant context |
| `draft` | `boolean` (optional) | Show draft preferences before publishing |
### Multi-Tenant Preferences
If your app uses [tenants](/platform/tenants/tenants-overview), pass the `tenantId` to show tenant-specific preference configuration:
```tsx theme={null}
The `Header` and `Footer` components are optional; they render brand-matched header/footer sections. You can omit them or replace them with your own.
### PreferencesV4 Props
| Prop | Type | Description |
| ---------- | -------------------- | ---------------------------------------------- |
| `tenantId` | `string` (optional) | Show preferences for a specific tenant context |
| `draft` | `boolean` (optional) | Show draft preferences before publishing |
### Multi-Tenant Preferences
If your app uses [tenants](/platform/tenants/tenants-overview), pass the `tenantId` to show tenant-specific preference configuration:
```tsx theme={null}
 ### Update Payload
| Field | Type | Description |
| -------------------- | ------------------- | ------------------------------------------------- |
| `templateId` | `string` | The topic/template ID to update |
| `status` | `string` | `"OPTED_IN"` or `"OPTED_OUT"` |
| `hasCustomRouting` | `boolean` | Whether to use custom channel routing |
| `routingPreferences` | `string[]` | Array of channel types (e.g. `["email", "push"]`) |
| `digestSchedule` | `string` | Digest frequency if applicable |
| `tenantId` | `string` (optional) | Tenant context for multi-tenant apps |
## Step 3: Test Your Implementation
### Update Payload
| Field | Type | Description |
| -------------------- | ------------------- | ------------------------------------------------- |
| `templateId` | `string` | The topic/template ID to update |
| `status` | `string` | `"OPTED_IN"` or `"OPTED_OUT"` |
| `hasCustomRouting` | `boolean` | Whether to use custom channel routing |
| `routingPreferences` | `string[]` | Array of channel types (e.g. `["email", "push"]`) |
| `digestSchedule` | `string` | Digest frequency if applicable |
| `tenantId` | `string` (optional) | Tenant context for multi-tenant apps |
## Step 3: Test Your Implementation