

Prerequisites
- A Courier workspace
Configure the topics
Use the (Platform → Preferences). Topics, sections, and branding are all defined here. Every setting it exposes is in .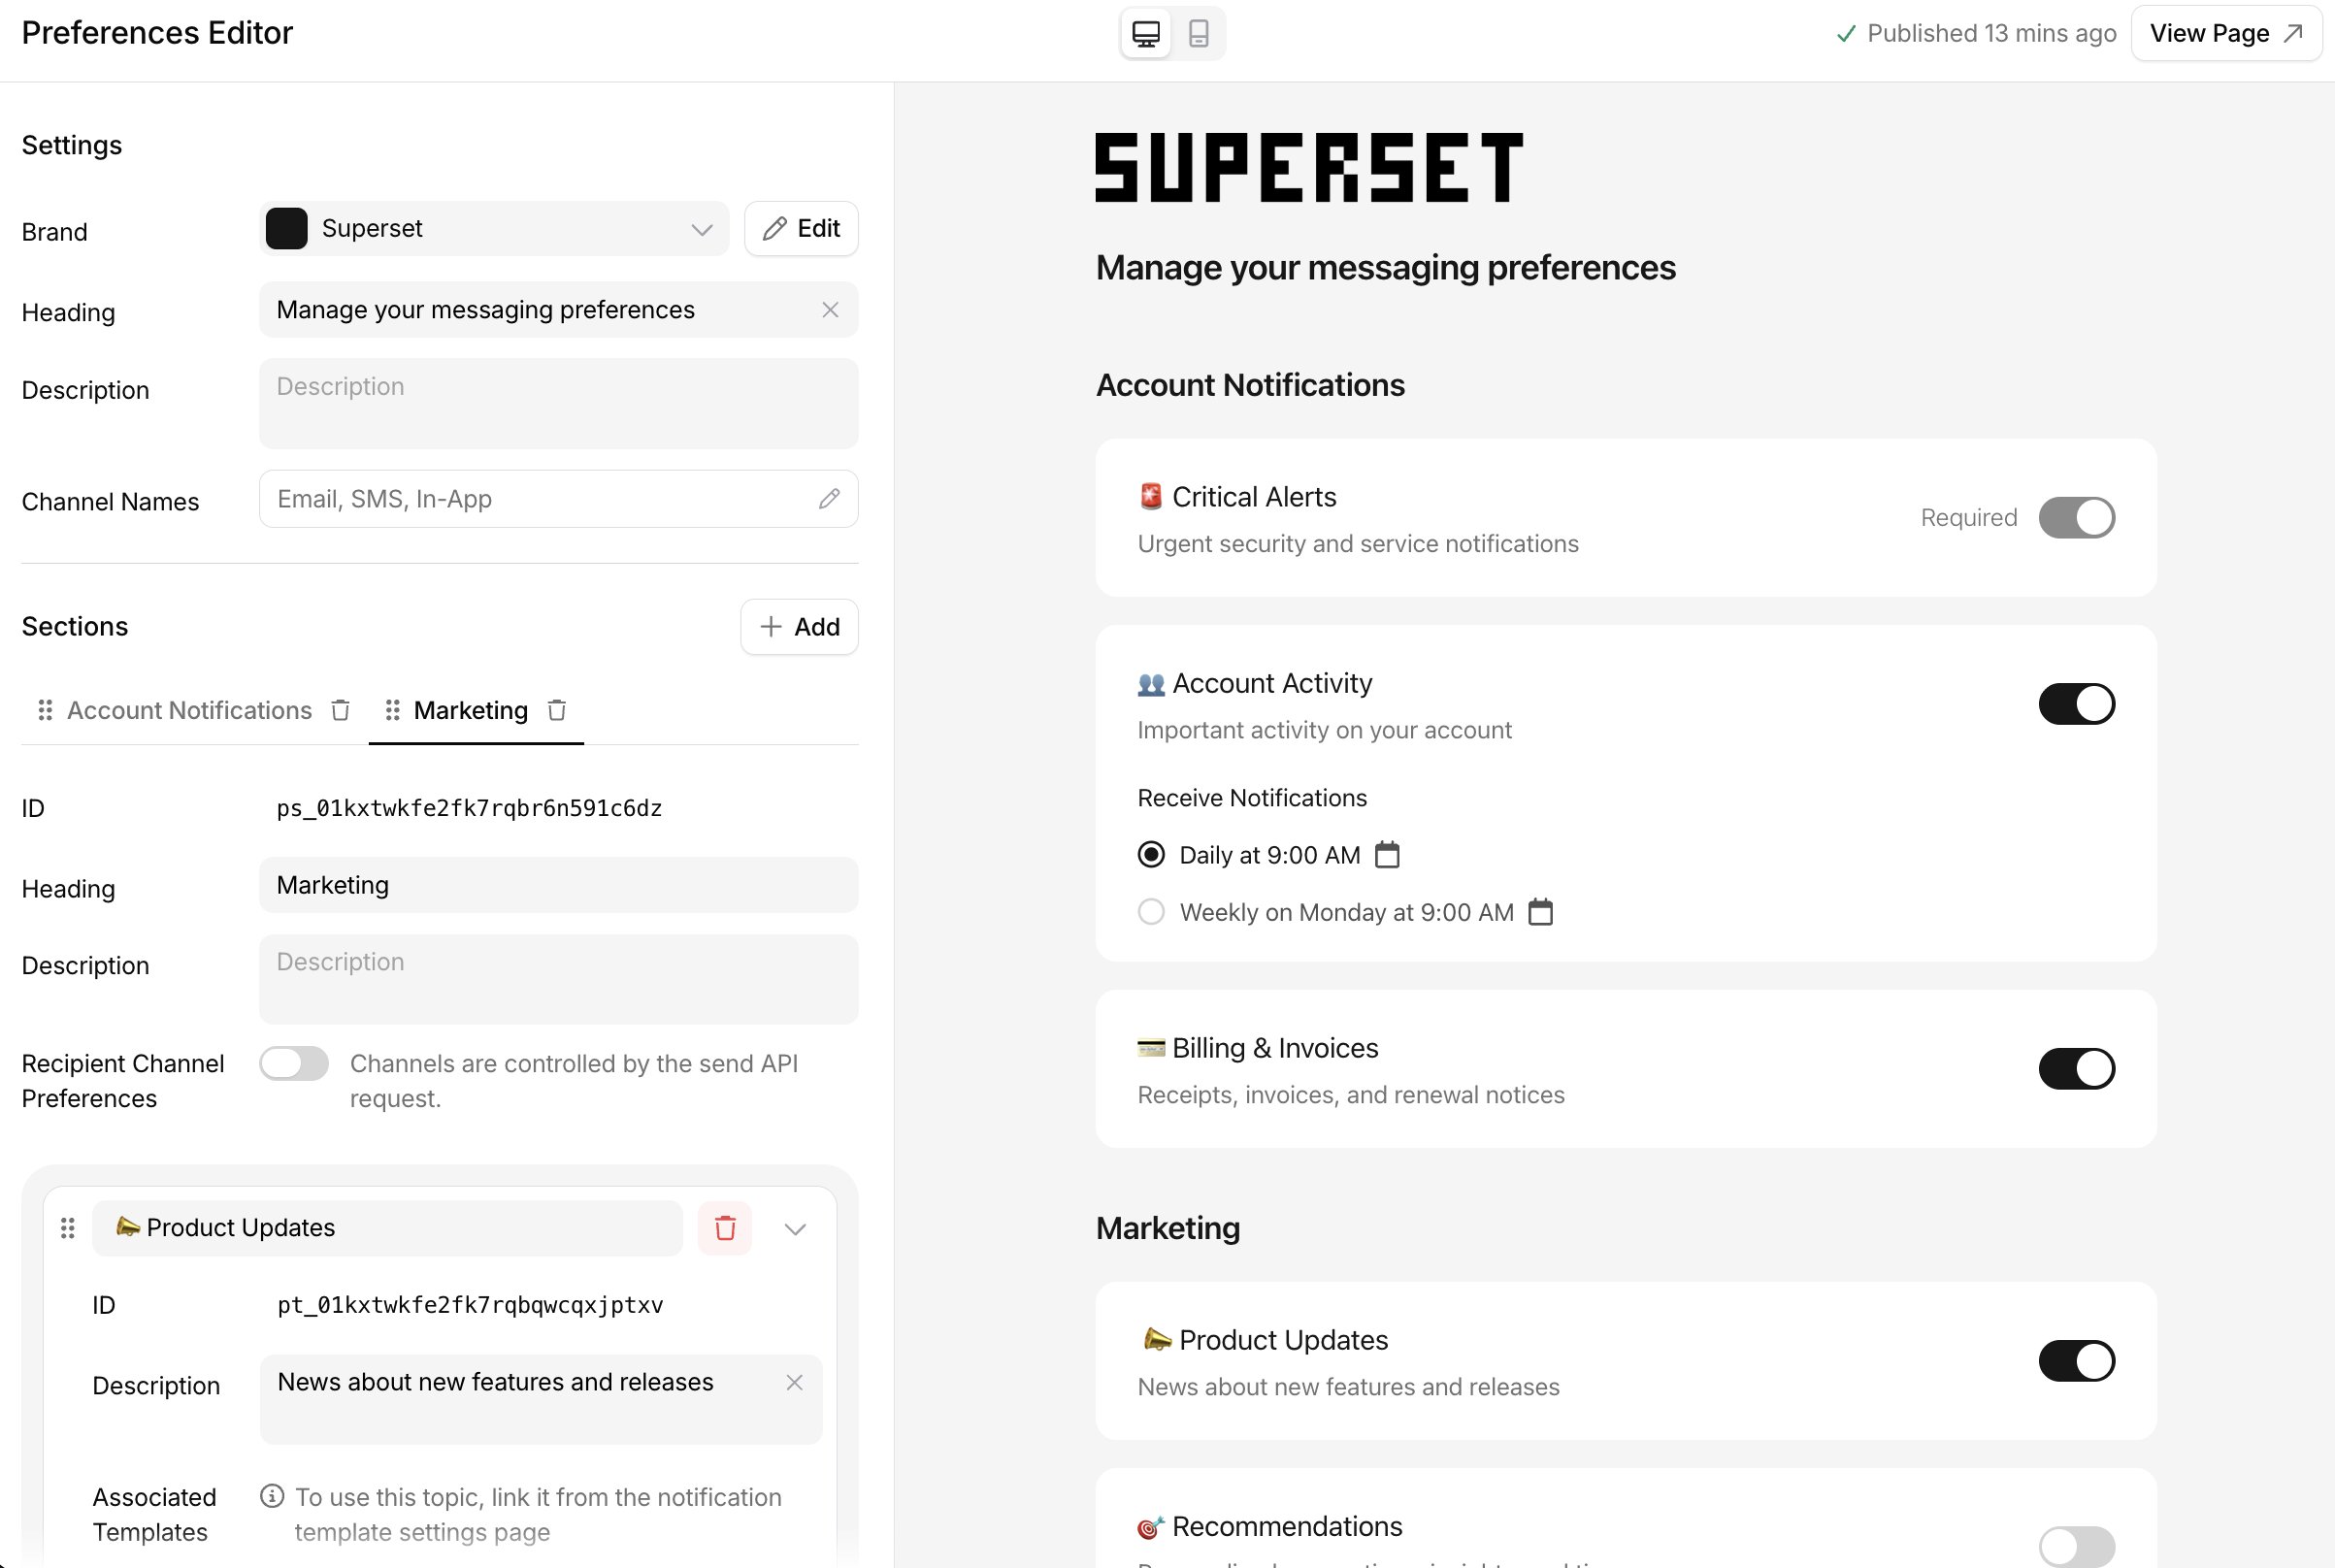
The preferences editor: page settings, sections, and topics, with a live preview of the hosted page.
1
Set page settings
Page settings apply to the whole page:
- An optional , for logo and colors.
- The heading and description.
- The channel names users see. Rename them to match your product, for example “In-App” to “Inbox”.
2
Add sections
Sections group related topics under a heading you name, such as “Account” or “Marketing”. Turn on channel selection for a section to let users pick which channels deliver its topics.
3
Add topics
Topics are the categories users opt in or out of. For each one, set a name, its section, and a default state:
- On (
OPTED_IN): users receive it unless they opt out. - Off (
OPTED_OUT): users receive nothing until they opt in. - Required (
REQUIRED): users cannot opt out. Use it for critical messages, and leave unsubscribe links off templates mapped to required topics.
4
Map templates to topics
Mapping a template to a topic makes Courier enforce the preference on every send. Set it in a template’s in Design Studio, or set the template’s
subscription field to { "topic_id": "<TOPIC_ID>" } through the API.5
Publish
Every change saves as a draft. Use Preview Page to open the page in draft mode, then Publish to make it live. Until you publish, users see the last published version.
Hosted page
The hosted preference center needs no frontend. It lists the user’s subscription topics with the heading, description, and optional brand you set in the editor. It works on desktop and mobile. Courier serves it athttps://view.notificationcenter.app/p/<id>. The id encodes the workspace, brand, and user, so each recipient sees their own preferences.
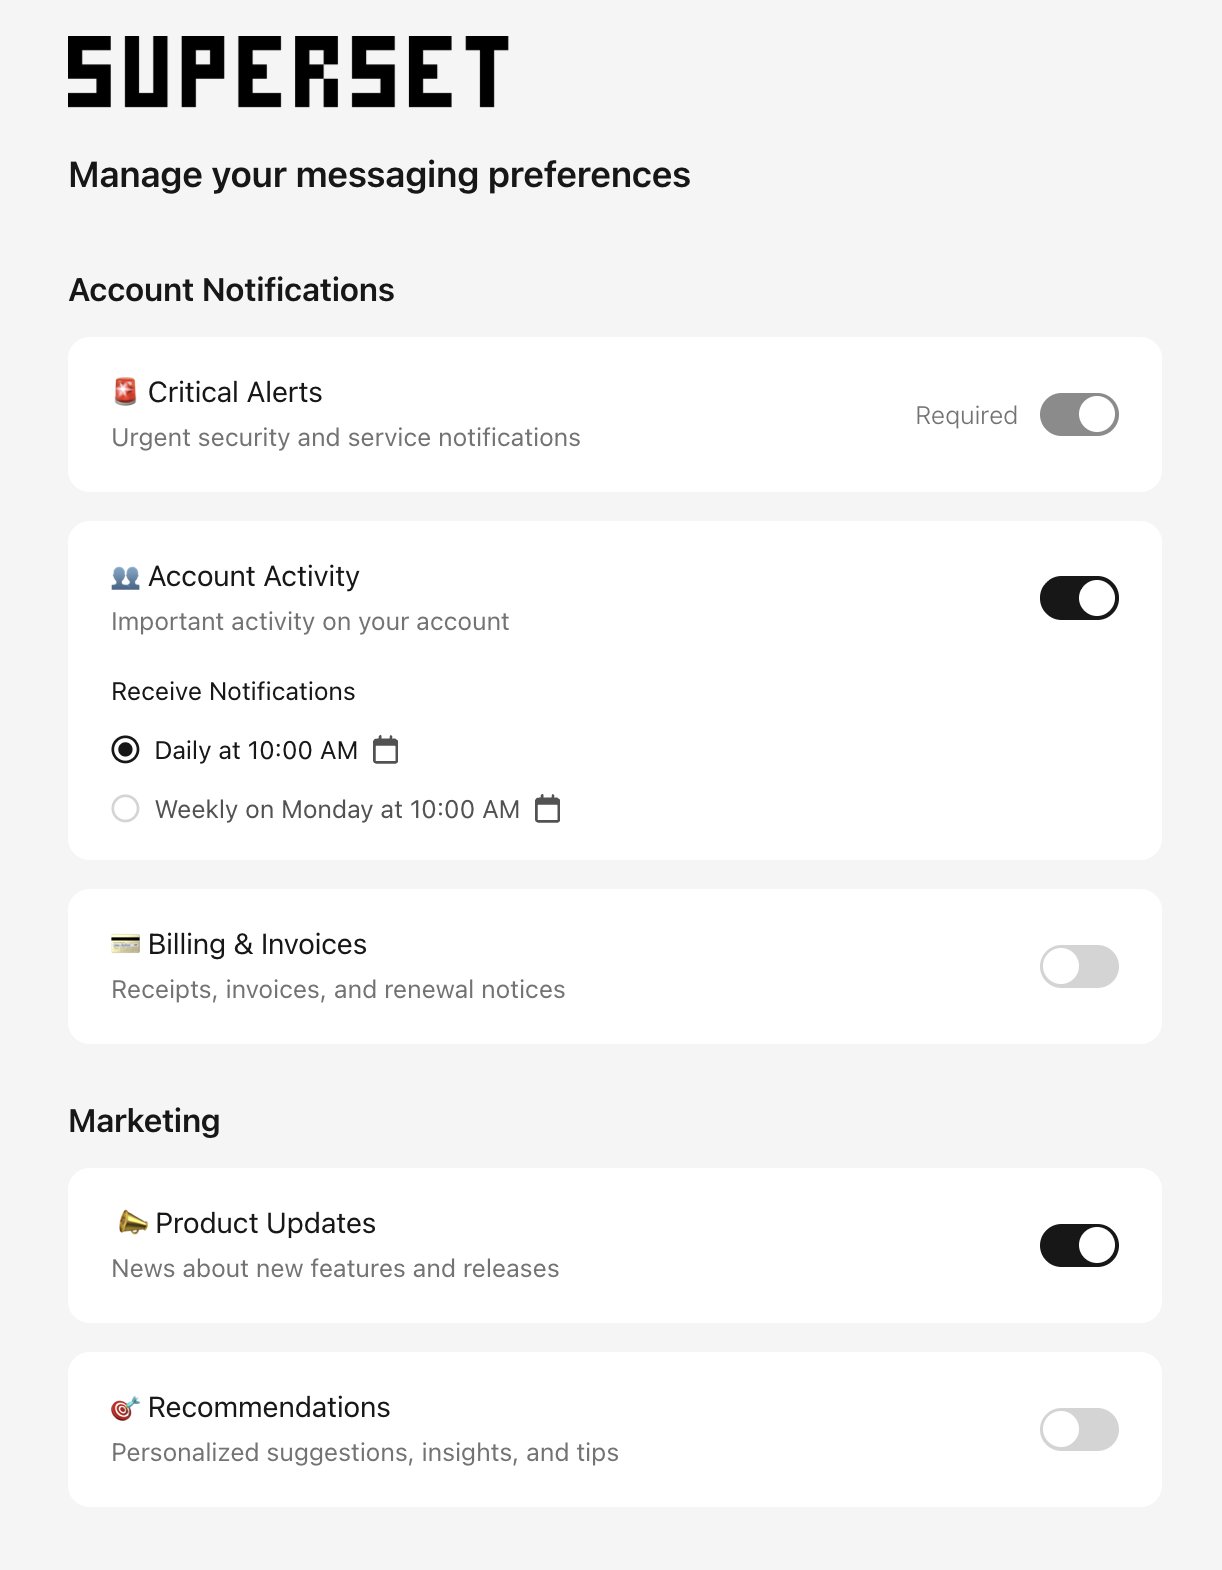
The Courier-hosted preference page a user opens from the preferences link: their subscription topics, grouped into sections and branded.
Link users to the preference center
Link users to their hosted page with thepreferences variable. Courier renders it as a secure, per-user URL. Include to.user_id in your send so each recipient gets their own link. Write the variable in the format for your editing context:
- Content blocks (Text, Markdown, Quote, List):
{{$.urls.preferences}} - Handlebars (Template blocks, email and brand templates):
{{var "urls.preferences"}} - Elemental JSON (action buttons and links):
{$.urls.preferences}
nt_01kx4h2jdafq8bk9aftxak4b40 is a template whose body includes {{$.urls.preferences}}:
unsubscribe variable the same way ({{$.urls.unsubscribe}}, {{var "urls.unsubscribe"}}, or {$.urls.unsubscribe}).
Place either link inside a message, or once in your footer so it appears on every message.
One-click unsubscribe headers
Gmail and Yahoo require bulk senders to support one-click unsubscribe. Turn on Unsubscribe Headers for a topic in the preferences editor, or setinclude_unsubscribe_header on the topic through the API. Courier then adds two headers to that topic’s email:
SendGrid is the only provider Courier emits these headers on today. On another email provider, set them yourself with a .
Embedded component
To keep users inside your product, embed the preference center instead of linking to the hosted page. It reads the same published topics and writes the same preference data, so a change in one place shows up in the other.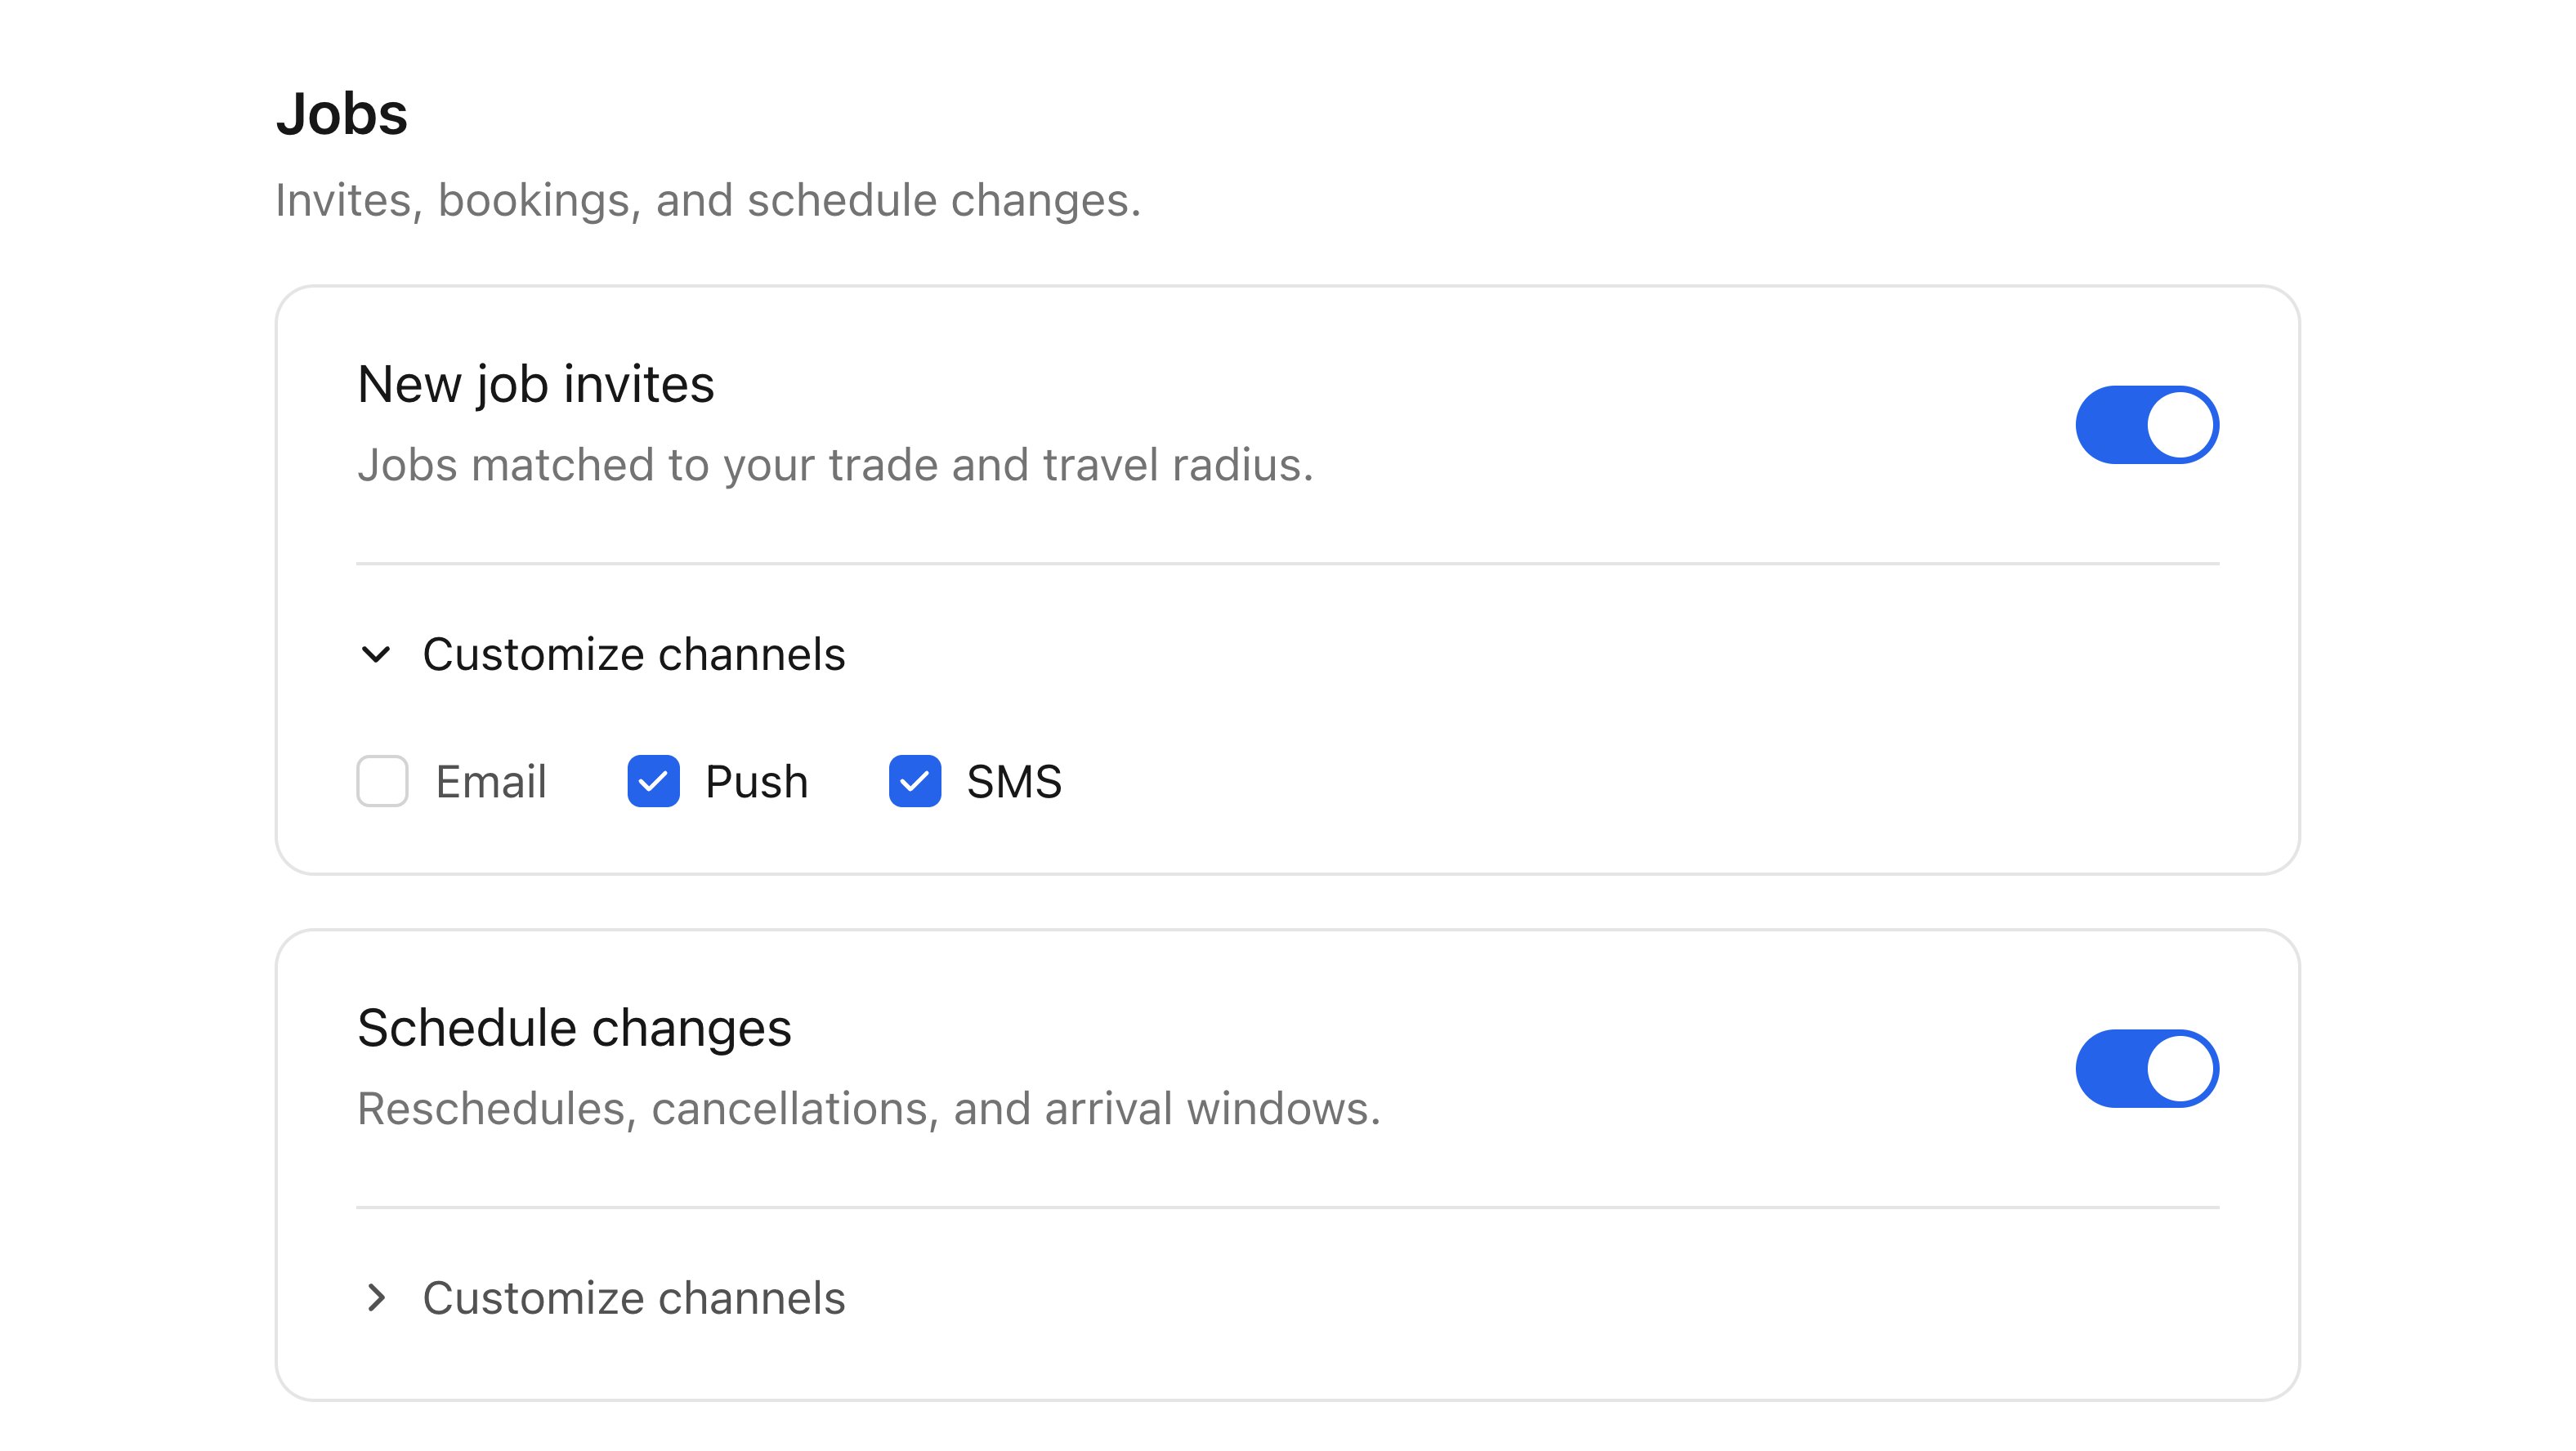
The embedded preference center component: subscription topics with per-topic channel choices.
Add a preference center
Install, authenticate, and render the component on every platform.
Customize Preferences
Theme the component or build your own preferences UI.
Verify
1
Open the preference center
Open the hosted page from a real send (a message containing
{{$.urls.preferences}} with to.user_id set), or load your embedded component as a test user.2
Toggle a topic off and send
Toggle a topic off. Send a message mapped to that topic and confirm the log shows the send blocked as
UNSUBSCRIBED.3
Read the change back
and confirm the
status matches what you toggled.