

Prerequisites
- An account on the Microsoft Teams Developer Portal
- An Azure portal account with App Registration permissions
- An administrator to grant API permissions, but only to address recipients by
emailorchannel_name
Setup
Steps 1 through 8 are the whole setup for addressing a recipient byconversation_id, channel_id, or user_id. Step 9 adds Graph API permissions, which need an administrator, and only email and channel_name need them.
Step 1: Create the Teams app
Step 1: Create the Teams app
- Navigate to the Microsoft Teams Developer Portal.
- Click Create a new app.
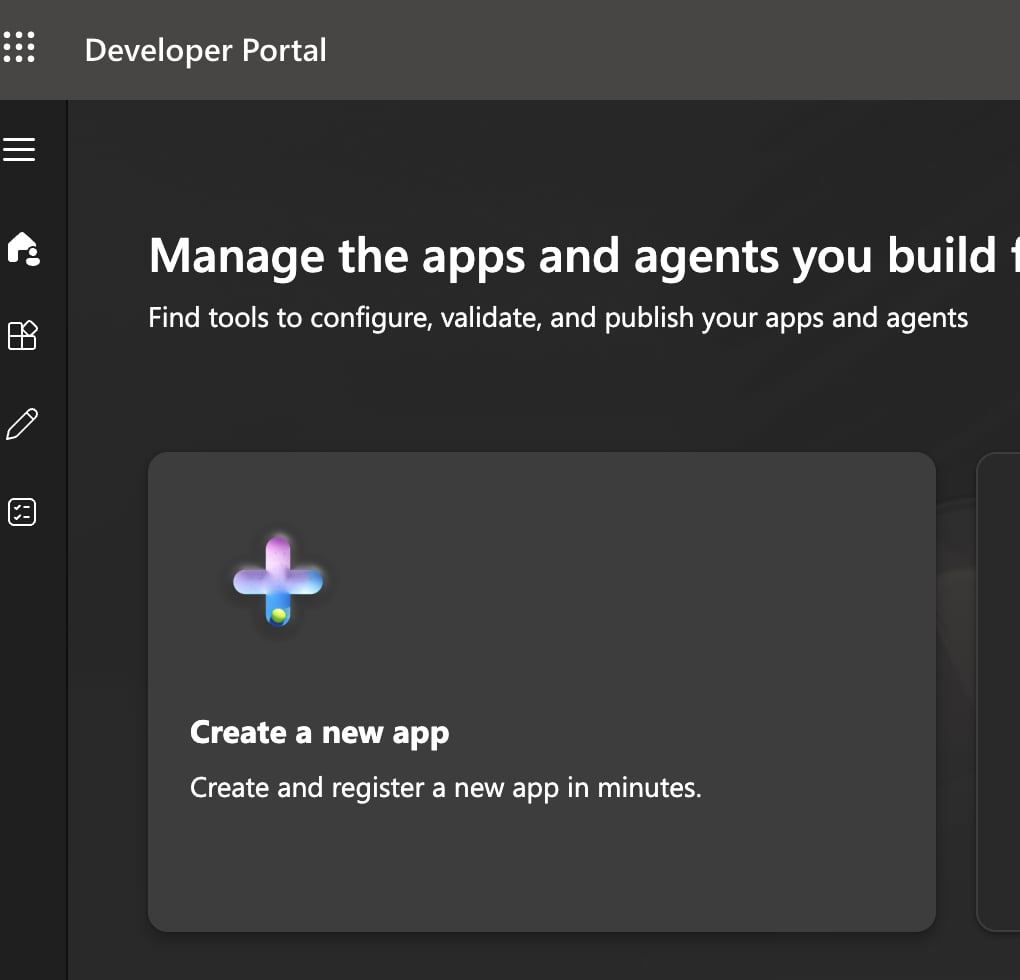
Teams App Creation
- Enter a name for your app and click Add.
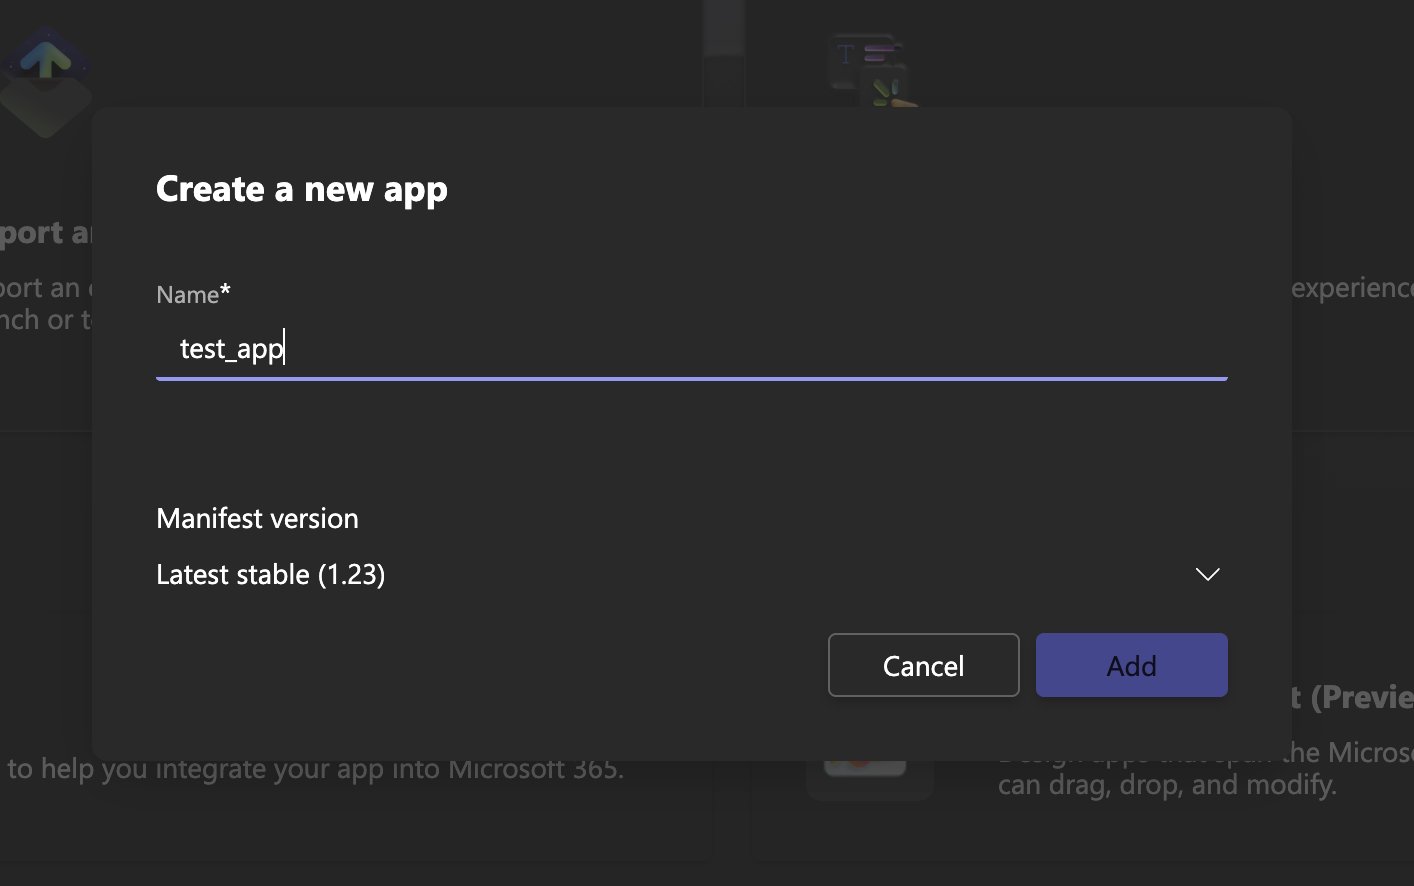
Naming the new app
- Save the generated App ID for later.
Step 2: Create the Azure app
Step 2: Create the Azure app
- Open the Azure Portal.
- Go to Azure Active Directory > App registrations.
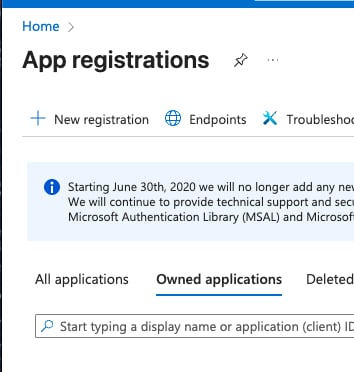
Azure App Registration
- Click New registration.
- Configure the registration:
- Name: Use the same name as your Teams Developer Portal app
- Supported account types: Select “Accounts in any organizational directory (Any Microsoft Entra ID tenant - Multitenant)”. The Azure default is single-tenant, which causes 401 authentication errors with Bot Framework.
- Redirect URI: Keep the default setting
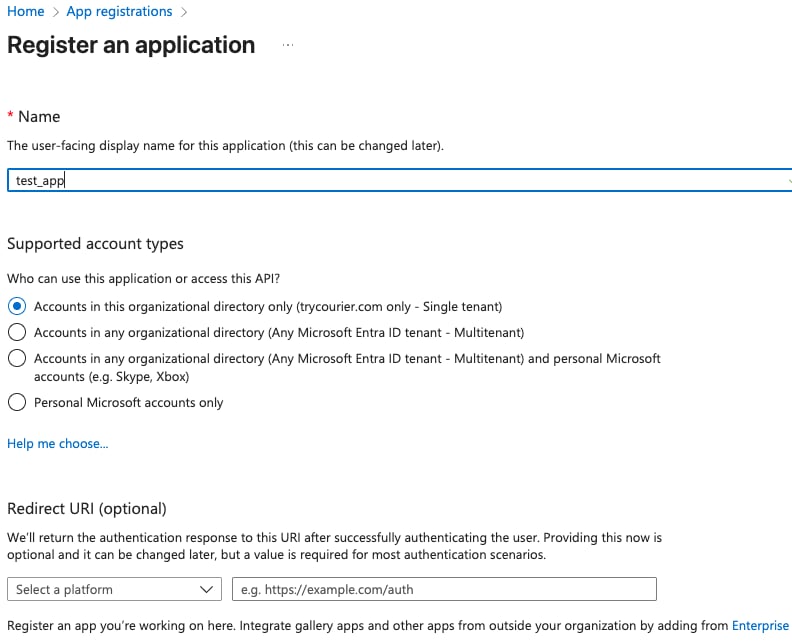
Azure App Configuration
- Click Register.
- Save your Application (client) ID for later.
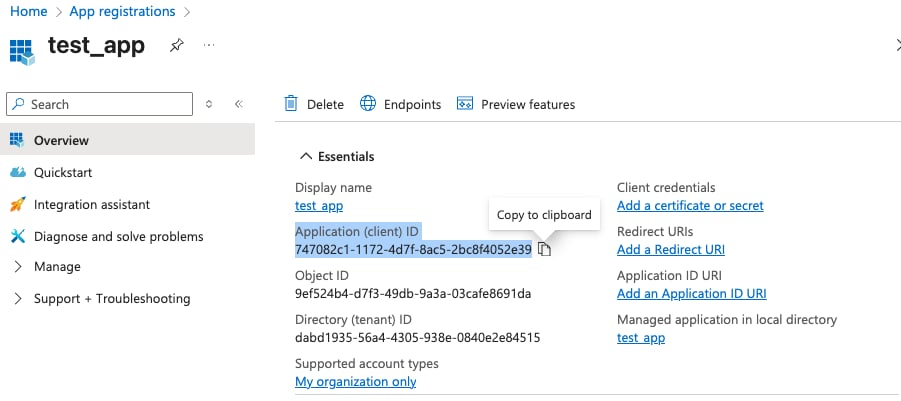
Grab your Azure AppID
Step 3: Link the Teams app to the Azure app
Step 3: Link the Teams app to the Azure app
- Return to the Microsoft Teams Developer Portal.
- Go to Configure > Basic Information.
- Scroll to the bottom of the page to the Application (client) ID field.
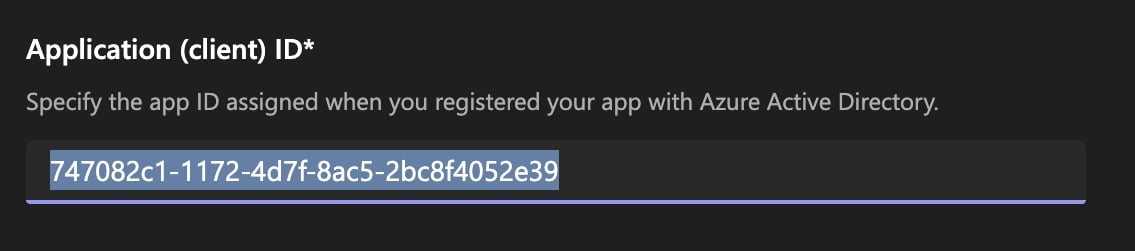
Teams and Azure app linking
- Paste the Application (client) ID you saved from Step 2.
- Click Save.
Step 4: Create the bot and set permissions
Step 4: Create the bot and set permissions
- In the Microsoft Teams Developer Portal, go to Tools > Bot Management.

Create new bot for Teams
- Click + New Bot and provide a unique name.
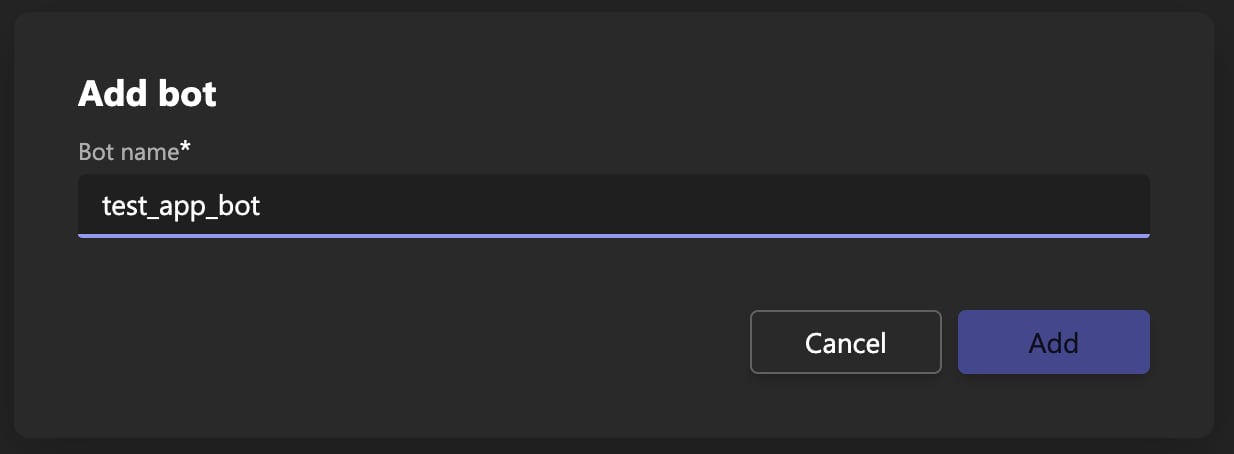
Naming your new bot
- Return to Apps > [Your App Name] > Configure > App Features
- Click the Bot item
- Select Select an existing bot
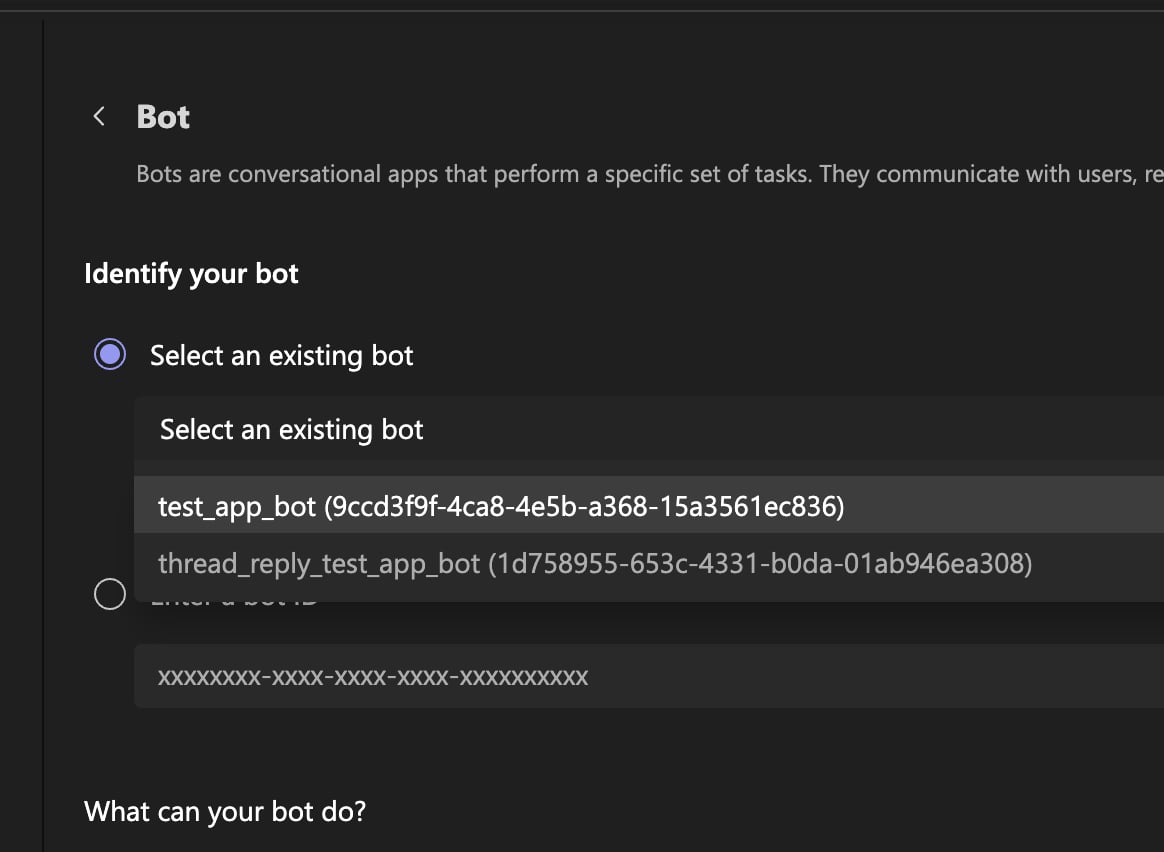
Select your newly created bot
- Choose the bot you created
- Configure the bot settings:
- Under What can your bot do?, select:
- ✓ Only send notifications (one-way conversations)
- Under Select the scopes where people can use your bot, select:
- ✓ Personal (for 1:1 notifications)
- ✓ Team (for channel notifications)
- ✓ Group Chat (for group chat notifications)
- Under What can your bot do?, select:
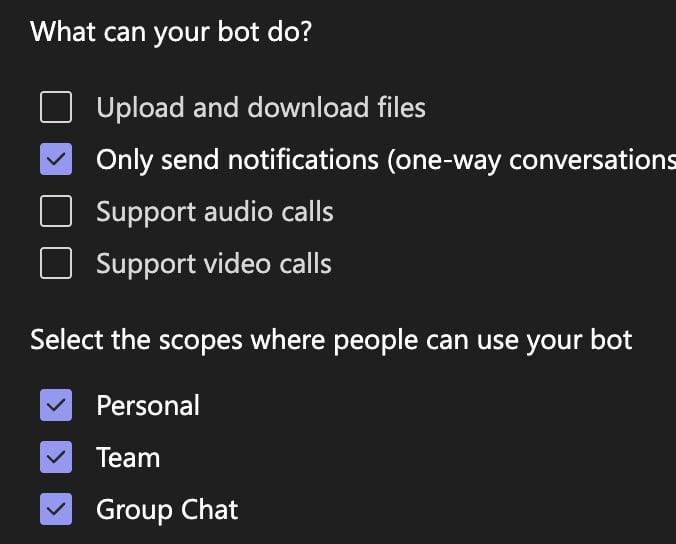
Select the scope for your bot
- Click Save
-
Configure API permissions, only to address recipients by
emailorchannel_name. Courier calls Microsoft Graph to turn those into an id, and that call needs an administrator’s consent. Skip this step if you send byconversation_id,channel_id, oruser_id.- Return to the Azure Portal.
- Go to App registrations > [Your Bot Name] > API permissions
- Add these Microsoft Graph permissions as Application permissions:
ChannelSettings.Read.AllTeamSettings.Read.AllUser.Read.All
- Ask an administrator to click Grant admin consent for [your_domain]
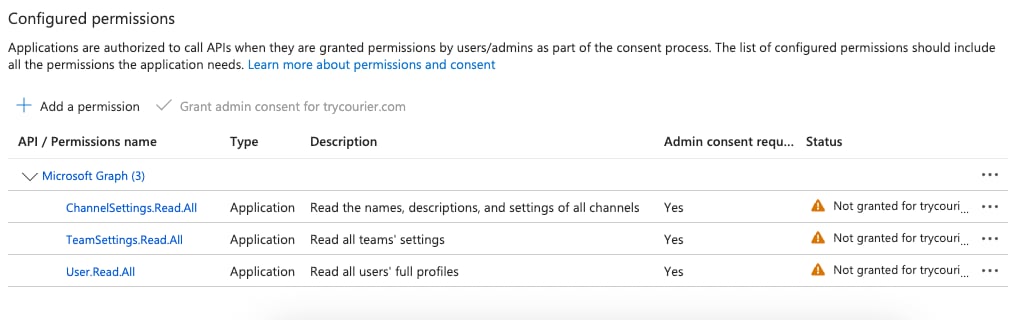
Add API permissions
- Generate bot credentials:
- In Azure, go to App registrations > [Your Bot Name] > Certificates & secrets
- Click + New client secret
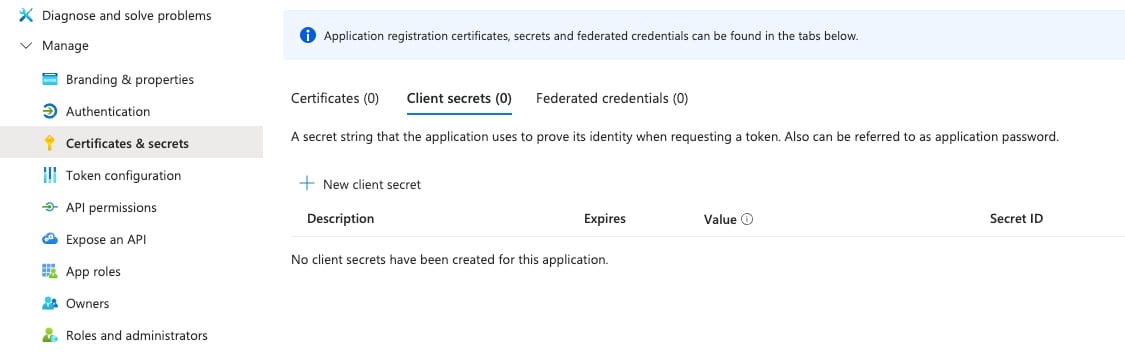
Create a new client secret
- Name it and select an expiration period
- Click Create
- Important: copy and store the generated secret value immediately
- Go to the Overview section
- Copy and store the Application (client) ID alongside your secret
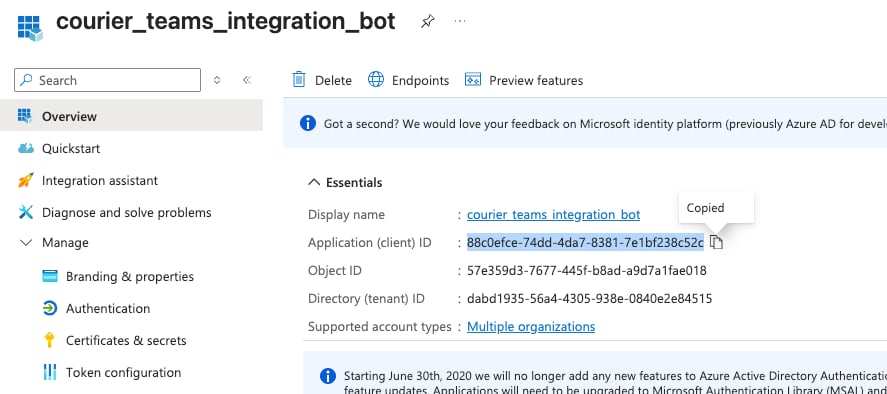
Get the ApplicationID from Azure (i.e. BotID)
Step 5: Configure in Courier
Step 5: Configure in Courier
- Head to the in Courier.
- Enter your Azure credentials from Step 4. Courier’s field labels do not match Azure’s names, so map them carefully:
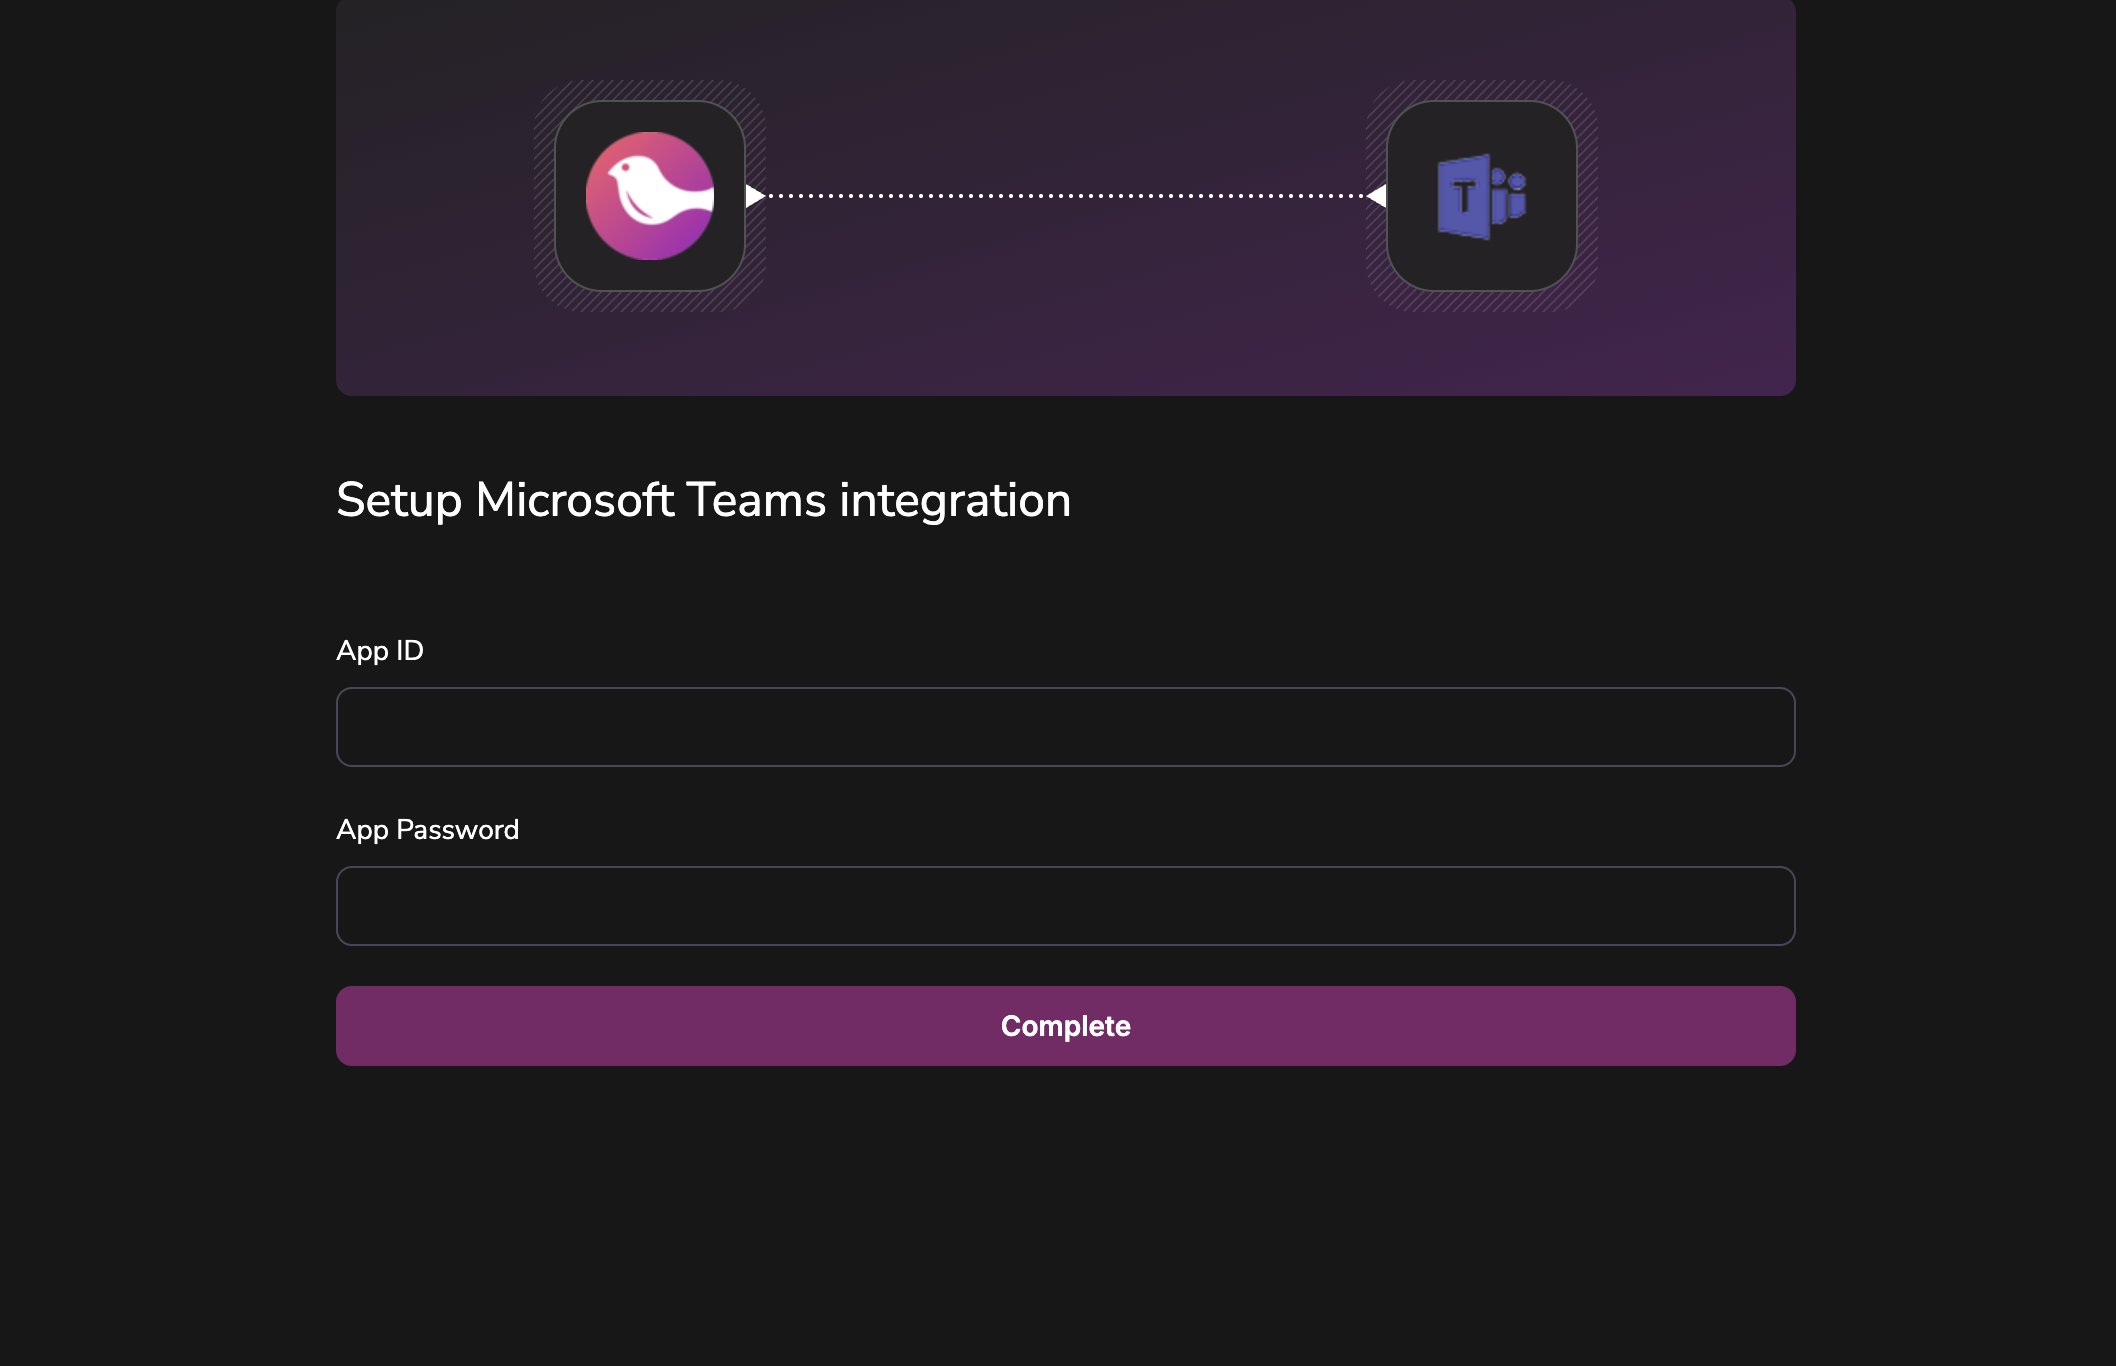
Add teams to your Courier Account
- Click Install Provider.
- Azure Portal > App registrations > [Your Bot Name]: “Application (client) ID”
- Azure Portal > App registrations > [Your Bot Name] > Certificates & secrets: “Client secrets”
Step 6: Install the app and test
Step 6: Install the app and test
- Return to Apps > your app
- Click Publish. When prompted, select “Download the app package”
- Note: fill in both the short and long app descriptions under Configure > Basic information. The app manifest requires them, and the app fails to install in Teams without them.
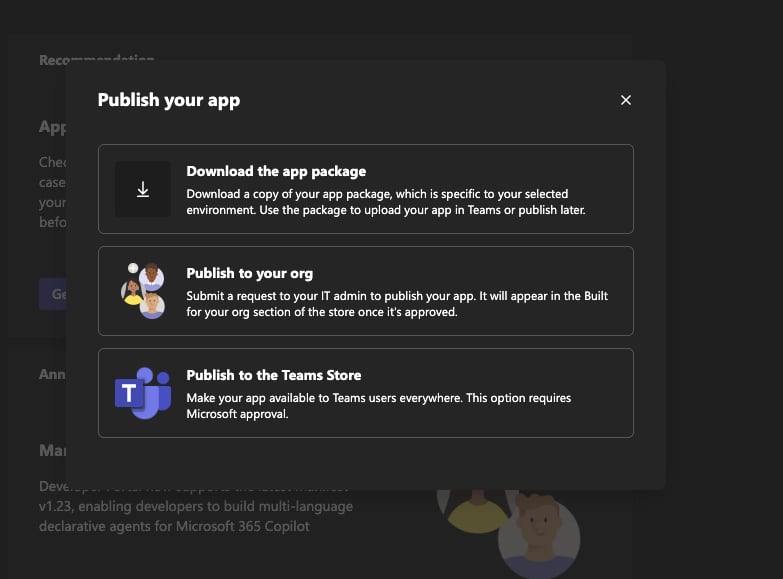
Publish your app
- Go to Microsoft Teams
- Go to Apps and select “Manage your apps” at the bottom
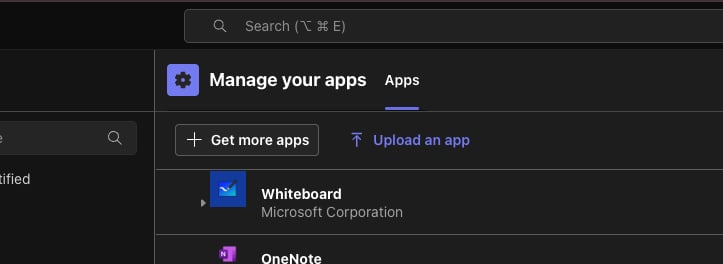
Manage your app
- Click “Upload an app” and select your downloaded app package
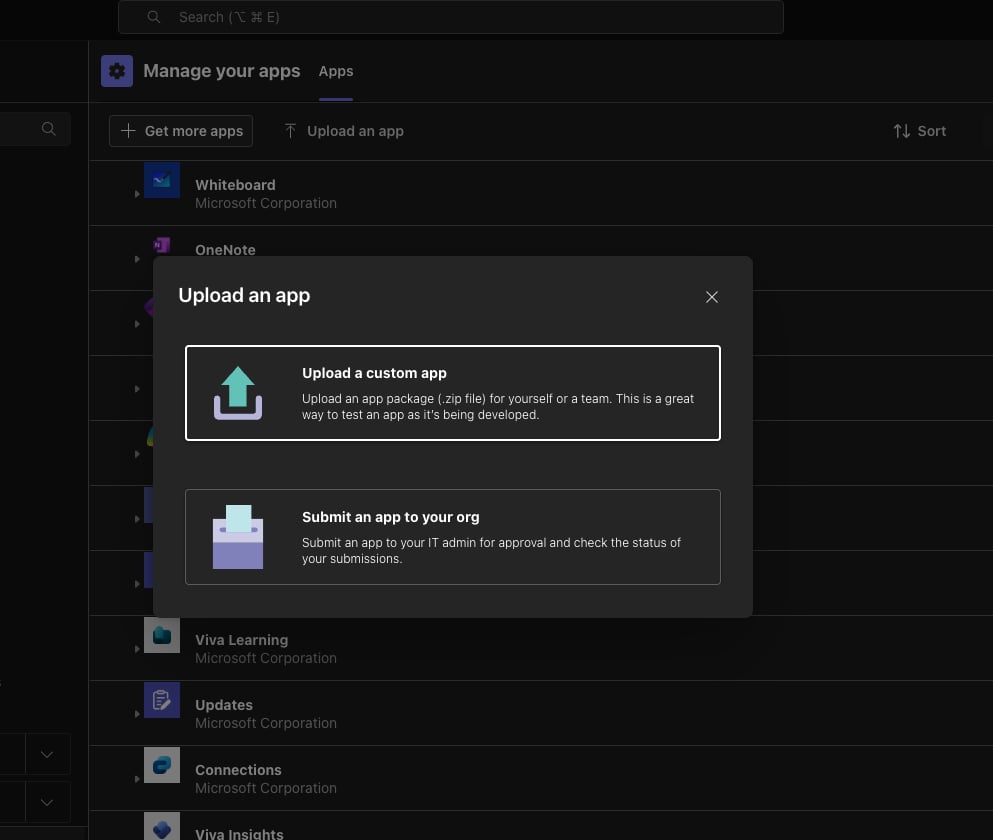
Upload your app
- When prompted, click “Add”
- Courier can now send messages to your channels and team members
- Open Microsoft Teams
- Hover over a channel, click the ellipsis icon, and select “Copy link”.
- You get a URL like:
https://teams.microsoft.com/l/channel/19%3A5140d7460868414cac958ac76a0a94d0%40thread.skype/slack-teams-test?groupId=feb55fc1-9e00-40f3-93b8-f7d14703f4dd&tenantId=dabd1935-56a4-4305-938e-0840e2e84515 - Paste it into a URL decoder such as Eric Meyer’s dencoder
- Copy the group ID, the team’s identifier. Here:
feb55fc1-9e00-40f3-93b8-f7d14703f4dd - Copy the channel name. Here:
slack-teams-test - Copy the tenant ID. Here:
dabd1935-56a4-4305-938e-0840e2e84515
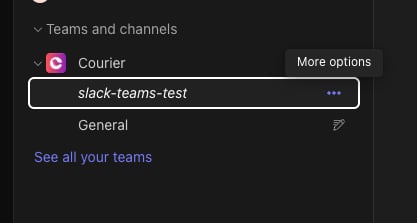
Get channel name
- Return to and create a new template.
- Select the Teams provider you configured in Step 5
- In the “Design” tab, write a basic text message. See for the designer.
- Click the Preview tab. Create a “Test event”, a request you can use to send a message.
- Click “Create test event” and enter this, using your own values:
- Click “Publish”
- Go to the Send tab. Click “Send Test”
Profile requirements
The recipient’s profile needs anms_teams object with:
service_url, optional. Defaults tohttps://smba.trafficmanager.net/amer, so set it only if your tenant is outside the Americas.tenant_id, required foremailandchannel_name(see Using a tenant_id). Courier also reads it from theservice_urlpath.- One of these identifiers:
user_idemailchannel_idconversation_id- Combination of
team_idandchannel_name - Thread reply fields:
reply_to_activity_idandconversation_id
tenantId from the redirected URL. If it is missing, use the three-dot menu beside your Team, choose Get link to team, and read it from that URL.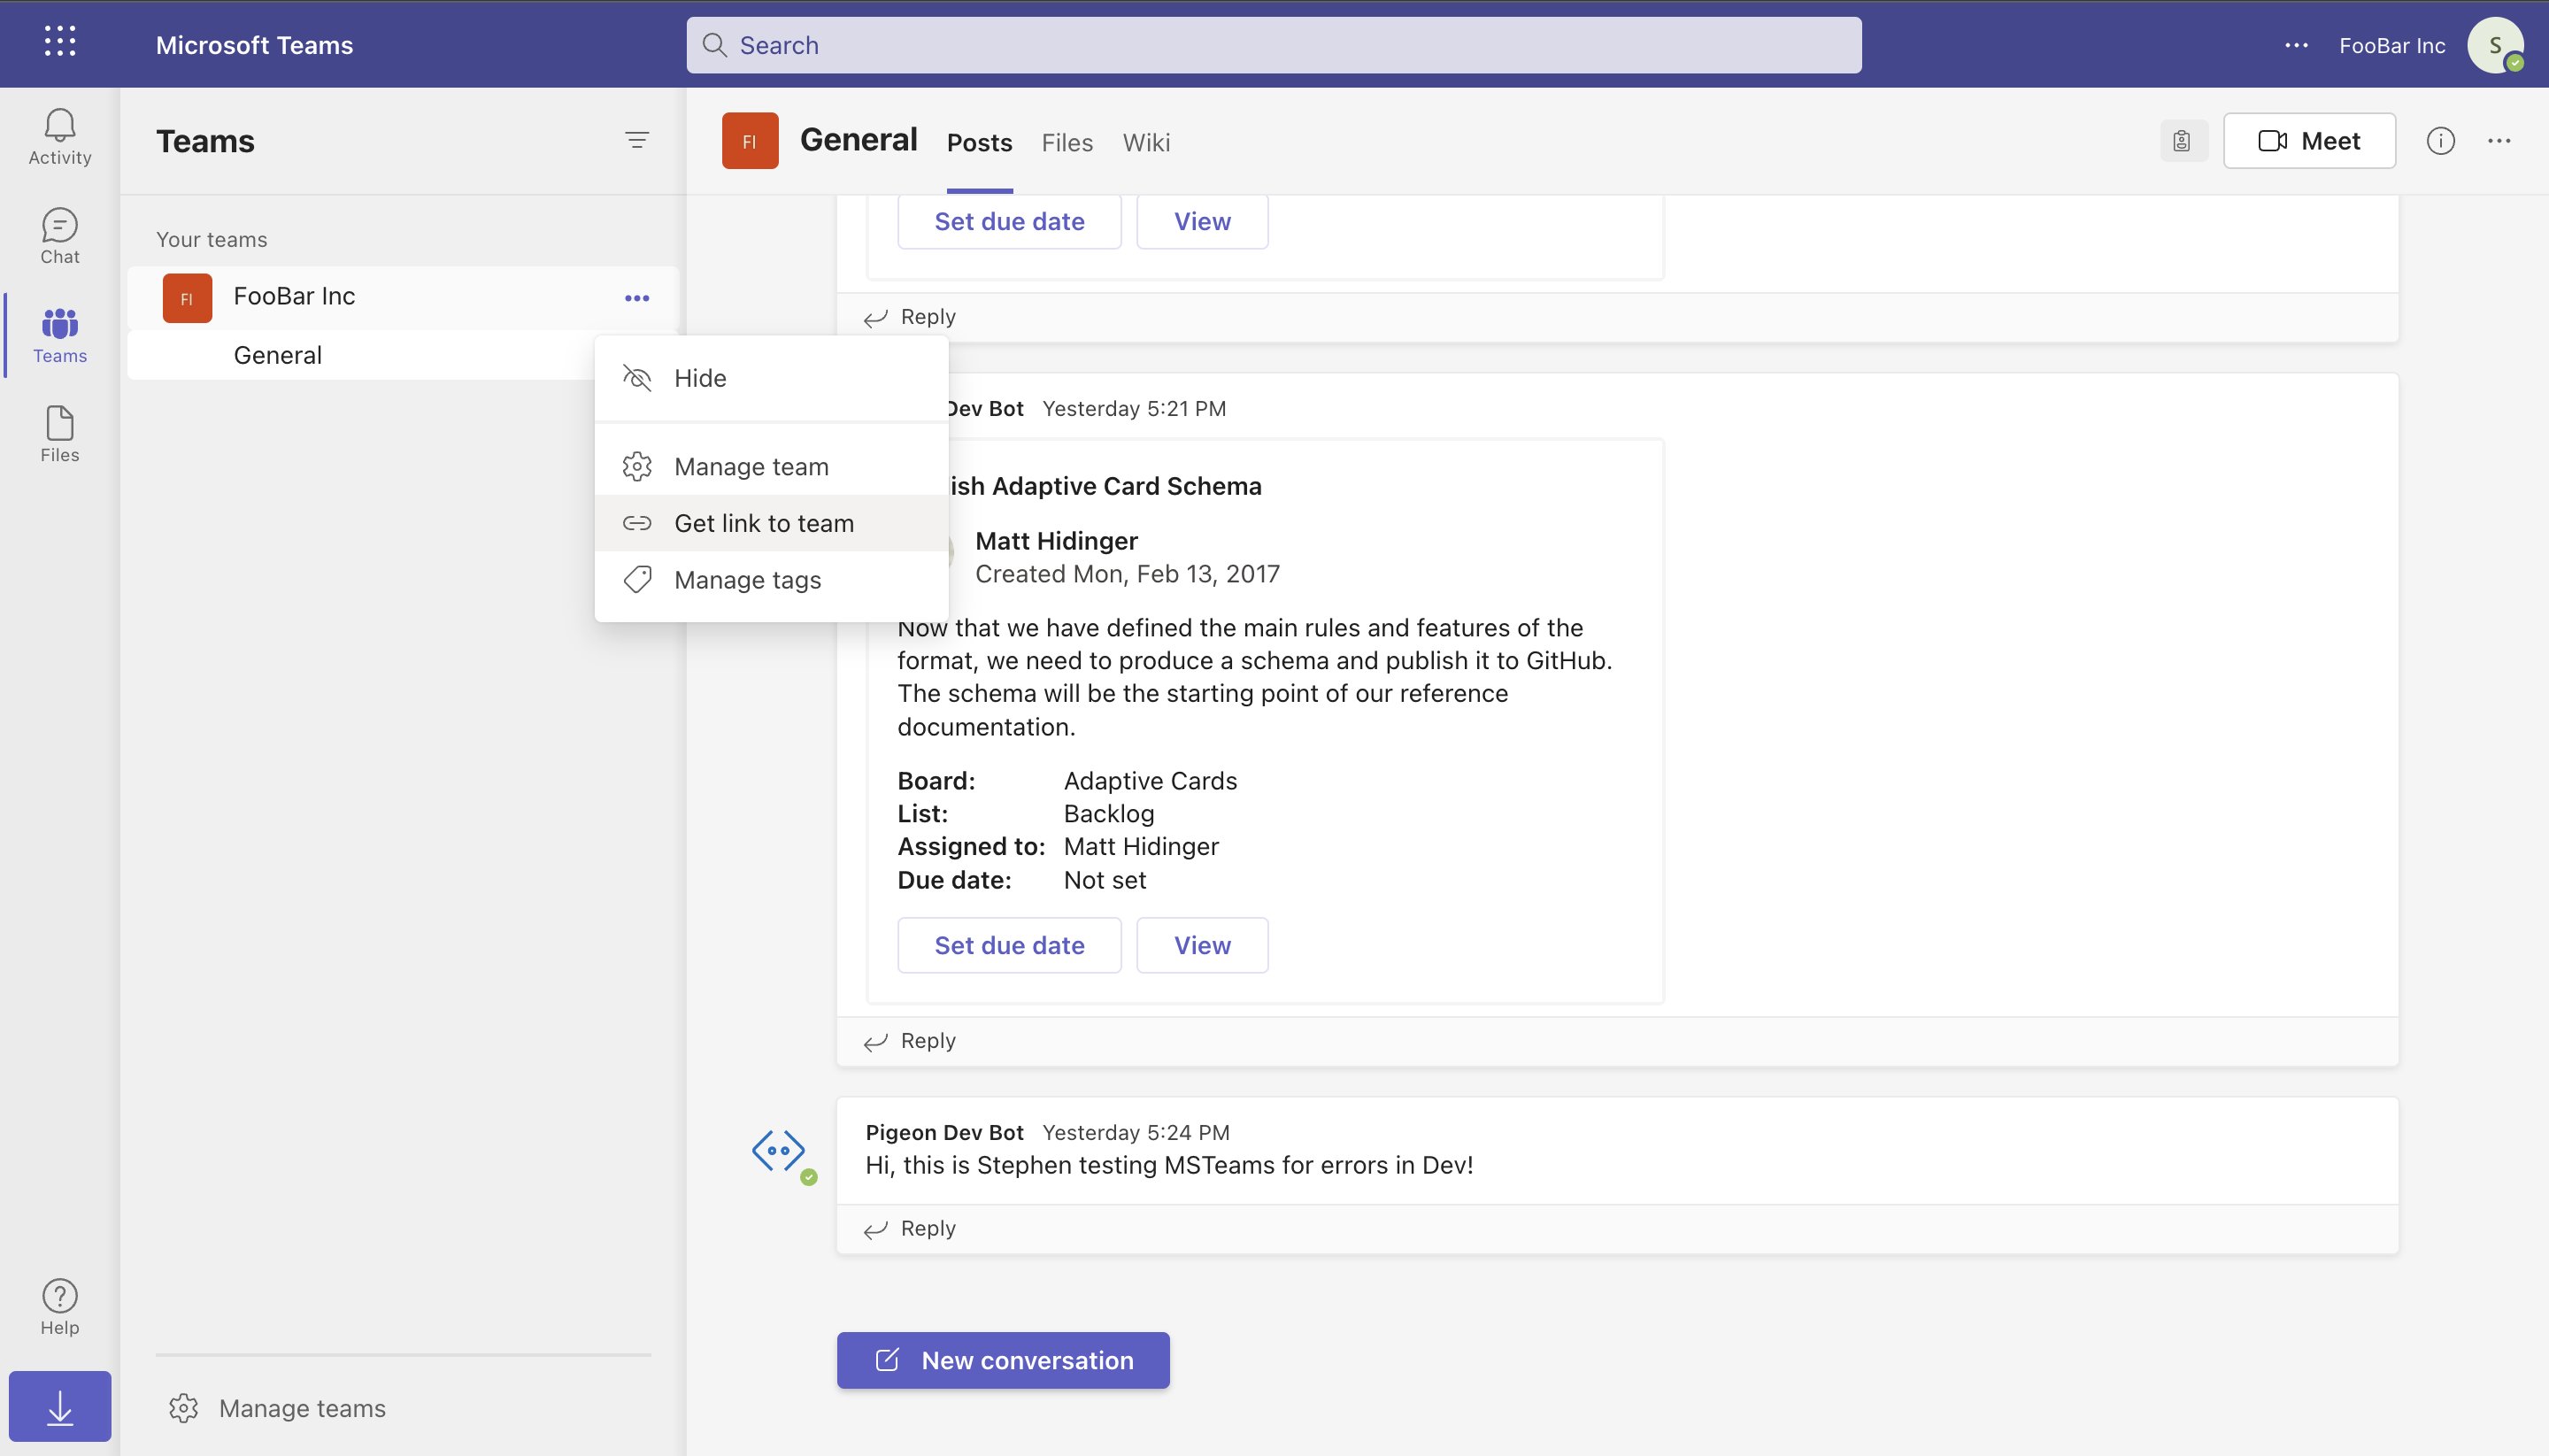
https://smba.trafficmanager.net/amer.email or channel_name, your bot needs these Microsoft Graph API permissions:ChannelSettings.Read.All(requires admin consent)TeamSettings.Read.All(requires admin consent)User.Read.All
user_id or channel_id through the Microsoft Graph API.Using a tenant_id
Courier requirestenant_id for the two shapes that need a Microsoft Graph lookup:
email, which Courier resolves to a user idchannel_name, which Courier resolves to a channel id
tenant_id is required when using 'email' or 'channel_name' for lookups. Send it on a user_id too, since Teams needs it to open a personal conversation.
Courier also reads tenant_id from the service_url path segments. Set it on service_url, as a body parameter, or both when the values match.
tenant_id appears on provider:sent and provider:delivered event payloads only when the request includes it, because that is the only time Courier knows it. Replies still work without it.source_tenant_id for the bot’s home tenant. tenant_id still routes the message, and source_tenant_id authenticates the bot. Setting it without tenant_id fails.
Store whichever shape you picked on the profile. Store the ms_teams object once with , which merges into the profile and creates it if it does not exist:
tenant_id and service_url.
Then send to user_id and Courier resolves the address.
Send by user id
Send to a recipient
- Send to user id
- Send to
ms_teams
ms_teams off the saved profile, so preferences apply and the value can change without touching this code.Thread replies
Courier can post a message as a reply to an existing channel message instead of a new root-level message. Every send returns reference data in theprovider:sent event, an activityId and a conversationId. Use those values to reply to that message in a thread.
Thread reply overview
Thread reply overview
- Send a root-level message to any Teams channel
- Look up the sent event (via API, webhook, or Courier UI) to get the
activityIdandconversationId - Use those identifiers to send channel thread replies
- Channels only. A Microsoft platform limit: thread replies work in channels, not in 1:1 or group chats. Standard, private, and shared channels all work.
- Reference data required. You need the
activityIdandconversationIdfrom a previous message’sprovider:sentevent. - Validation. Courier rejects invalid field combinations with a clear error.
Send the initial message
Get reference data from the provider:sent event
provider:sent event carries the reference data. Read it from:- Courier API: query message details for the
provider:sentevent data - Courier UI: view message details in the Messages section of your dashboard
- Webhooks (if configured): receive the reference data on every send
provider:sent event:Send the thread reply
Thread reply configuration
Thread reply configuration
-
Required fields:
reply_to_activity_id: the activity ID from the original message’s reference dataconversation_id: The conversation ID from the original message’s reference datatenant_id: your Microsoft Teams tenant IDservice_url: your Teams service URL (optional, uses the default if omitted)
-
Field restrictions:
With
reply_to_activity_id, you cannot include:channel_idorchannel_name+team_id(channel targeting fields)user_idoremail(user targeting fields)
conversation_iddetermines the thread location automatically.
- “Thread replies require ‘conversation_id’”: include the
conversation_idfrom the original message’s reference data. - “Thread replies cannot use channel targeting fields”: remove
channel_id,channel_name, andteam_id. - “Thread replies cannot use user targeting fields”: remove
user_idandemail.
Microsoft Teams channel ID reference
When sending messages to a Teams channel through Courier, theconversationId returned in delivered event webhooks is the channel ID. They are the same value.
Understanding the relationship
Understanding the relationship
conversation_context.conversationId in delivered event webhooks.Sending an initial message
Sending an initial message
conversationId value 19:a52e21710de34c65b9f2e09ededaad2a@thread.skype is the channel ID for the “General” channel.Replying in a thread
To reply to this message, use both theactivityId and conversationId from the webhook:
conversationId:
conversationId stays the same across a thread because it represents the channel. Only the activityId changes with each message.
Getting channel IDs directly from Teams
Getting channel IDs directly from Teams
/channel/ in URL-encoded format. Decode 19%3Aa52e21710de34c65b9f2e09ededaad2a%40thread.skype to get 19:a52e21710de34c65b9f2e09ededaad2a@thread.skype.Sending directly with conversation_id
Sending directly with conversation_id
conversation_id instead of looking up the channel by name:conversationId because it is already the channel ID.Technical details
Technical details
19:{guid}@thread.skype or 19:{guid}@thread.tacv2, depending on the Teams infrastructure version. They are stable and unique per channel within a tenant. Combined with tenantId, they identify a channel globally.The Bot Framework uses these channel IDs as conversation identifiers when posting to channels. Thread replies need both the conversationId (channel ID) and the reply_to_activity_id (the message being replied to). The reply URL uses the format {conversationId};messageid={activityId}, but the conversationId stored in the response is the channel ID with no suffix.Overrides
covers the two levels and which one wins. Aconfig override swaps the Azure Bot’s App ID and App Password for one send:
Adaptive Cards
Courier supports Microsoft Teams Adaptive Cards through Jsonnet blocks in Design Studio.Using Jsonnet blocks
Using Jsonnet blocks
Add a Microsoft Teams channel
Insert a Jsonnet block
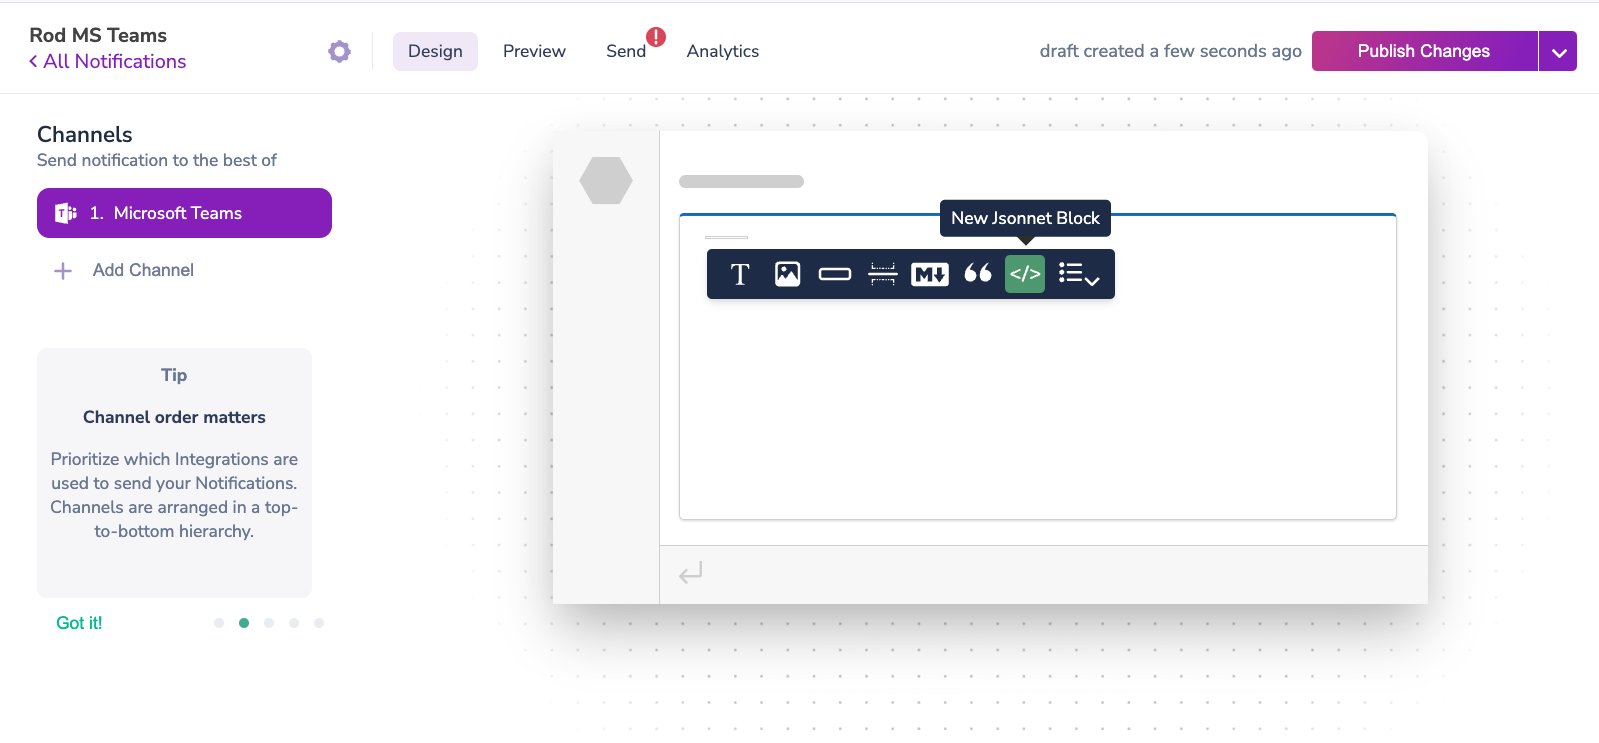
Jsonnet Block
Open the Adaptive Cards Designer
Copy the card JSON into your Jsonnet block
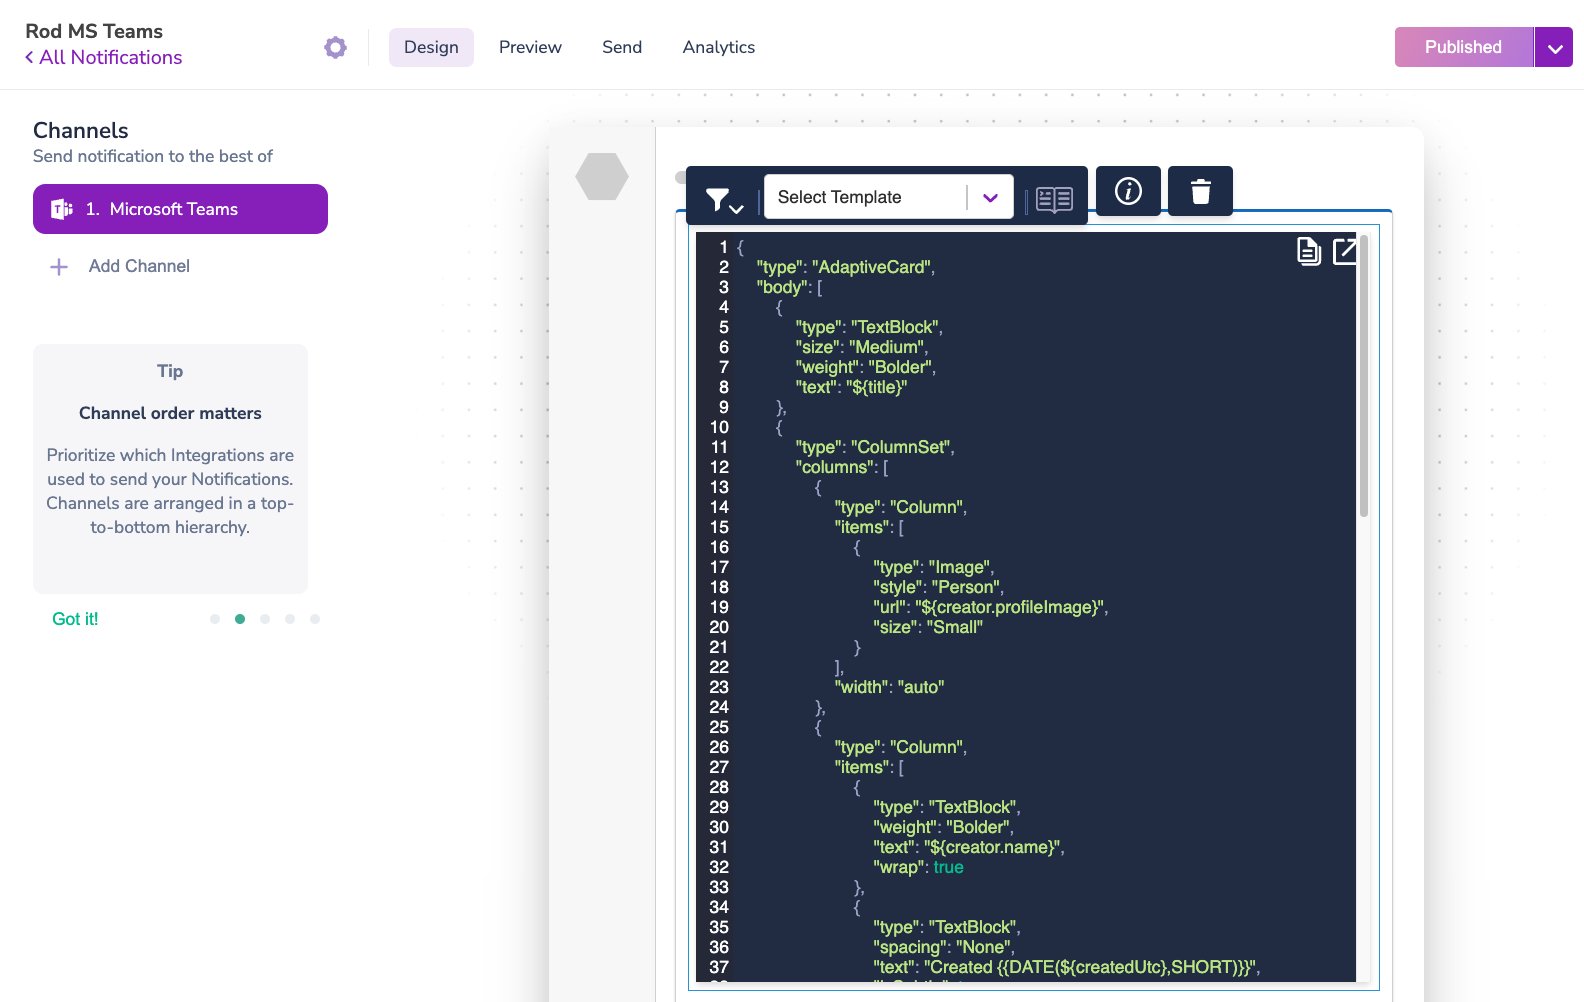
Sample Jsonnet
Sending an Adaptive Card
Sending an Adaptive Card
ms_teams object with the right fields, such as conversation_id. The card then appears in Microsoft Teams: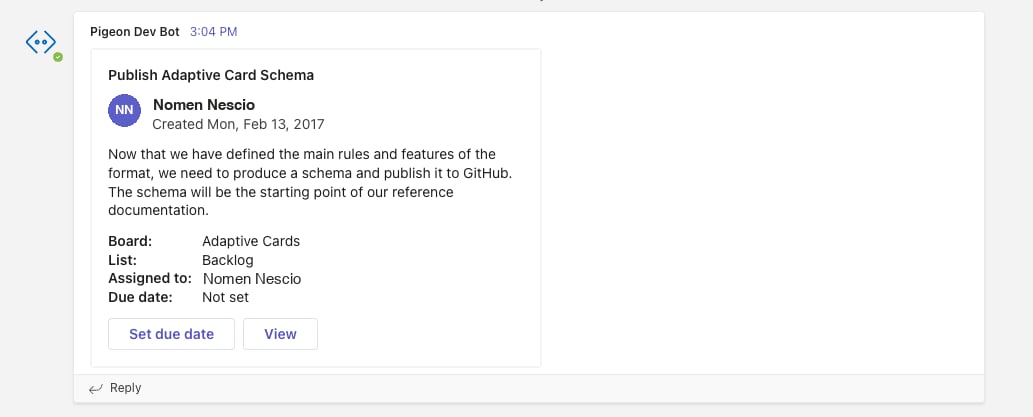
MS Teams Adaptive Card
Using @mentions in Adaptive Cards
Using @mentions in Adaptive Cards
<at>username</at>in the Jsonnet block.- A matching
entitiesobject in the Adaptive Card JSON payload, with the Teams user ID of the person mentioned.
Troubleshooting
401 Authentication error
If you seeAll Bot Framework authentication methods failed with status code 401:
- App not installed in the team (channel messages only): uploading the app to Teams covers personal messaging. For channel messaging, install the app in each team. See Step 6. This is the most common cause when user messages succeed and channel messages fail.
- Wrong credentials in Courier: Courier needs the Application (client) ID and Client Secret from the Azure Bot App Registration (Step 4), not the Teams App ID from the Developer Portal (Step 1). These are different values.
- Single-tenant App Registration: in Azure Portal > App registrations > [Your Bot] > Authentication, set “Supported account types” to “Accounts in any organizational directory” (Multitenant). The Azure default is single-tenant, which breaks Bot Framework authentication.
- Expired client secret: check the expiration date in Azure Portal > App registrations > [Your Bot] > Certificates & secrets. If it expired, create a new secret and update Courier’s Teams integration settings.
- Missing
tenant_id: includetenant_idin thems_teamsobject. Without it, Courier cannot attempt tenant-scoped authentication.
Messages to users work but channel messages fail
The app is almost certainly not installed in the team that owns the target channel. See item 1 above and Step 6.Credential confusion between Azure app registrations
Setup creates two Azure App Registrations:- Step 2 App Registration: used in the Teams Developer Portal configuration (Step 3). This is the parent application.
- Step 4 Bot App Registration: used in Courier’s integration settings (Step 5). This provides the bot credentials.
Reference: Courier → recipient flowchart
Provider details
routing.channels instead is supported, and sends through just this provider.