Set Up Chat Using Slack
Introduction
This step-by-step guide will walk you through sending a Slack Direct Message using Courier. You will:
Prerequisites
You will need both Courier and Slack accounts to complete this tutorial. If you don't have accounts already, sign up before proceeding. You will also need permission to create a Slack app, configure that app, and add it to a Slack workspace. If you do not have access already, you can create your own free Slack workspace.
Add the Slack Integration
Once logged in to Courier, navigate to the "Integrations" page. Click on the Slack Integration to configure it.
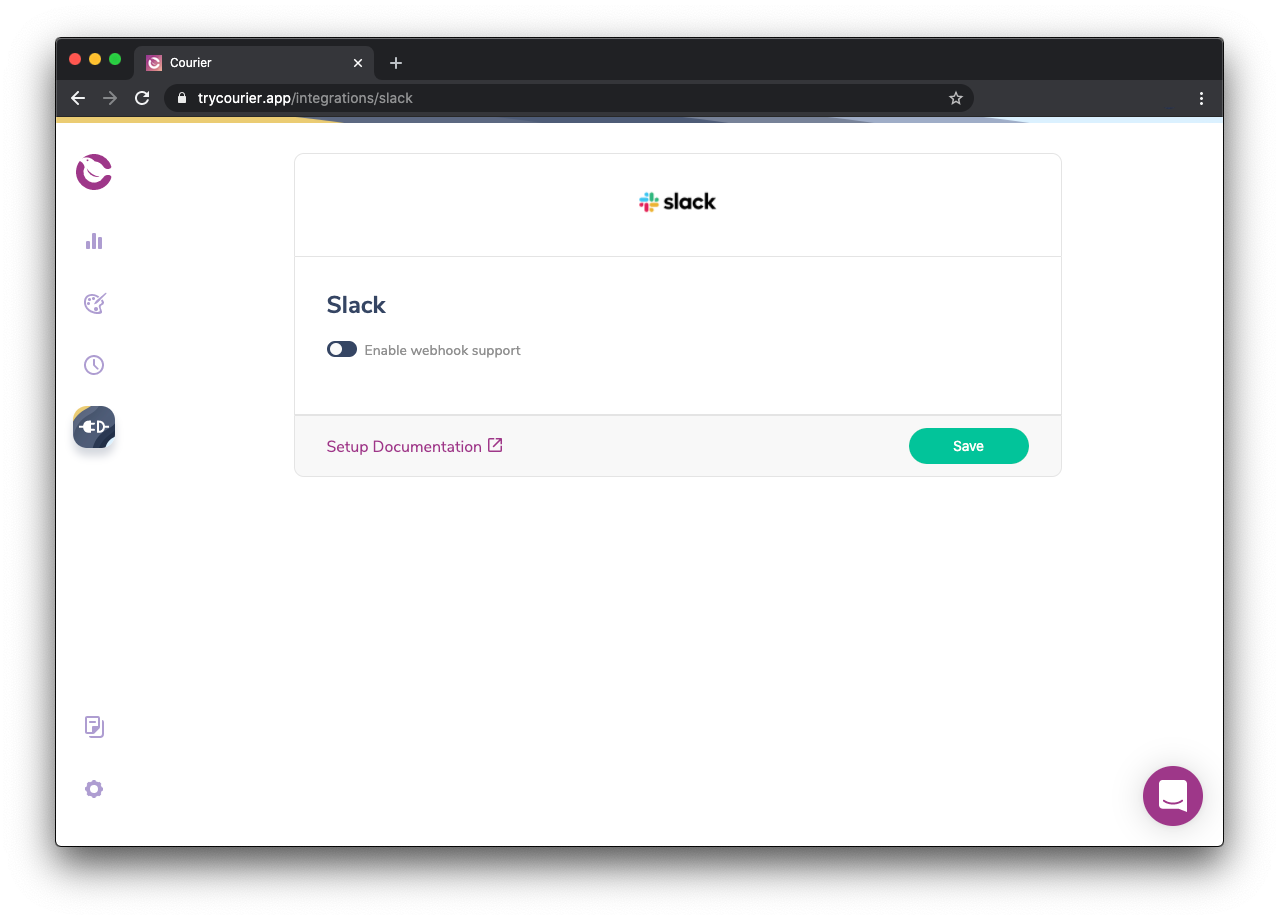
Courier Integrations each require different pieces of information based on the needs of the Integration provider. We will send our configuration details as part of our request body when sending a message. For now, click "Install."
Slack App
Our Slack app will be relatively simple. Slack allows for complex interactivity and menu interactions. For a full overview of what's possible, visit "An Introduction to Slack Apps". We will create an app that delivers direct messages only. If you would like to use an existing Slack App, you can skip to OAuth Permissions.
Create a Slack App
Once logged in to Slack, navigate to the "Apps" page, and click the "Create an App" button. This will open a modal with two form fields: "App Name," and "Slack Development Workspace."
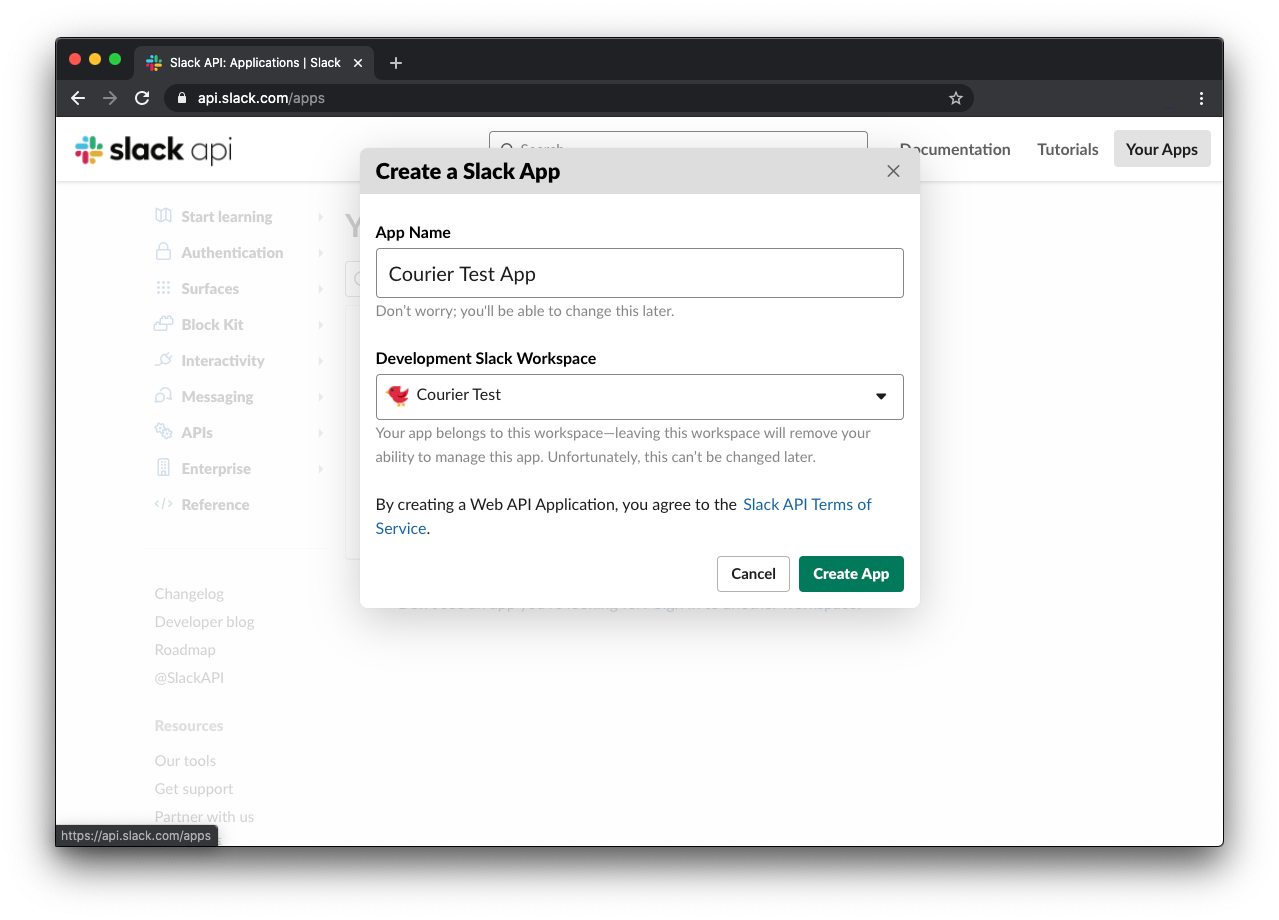
For the "App Name," use something like "Courier Test App." The "Development Slack Workspace" drop-down should display Slack workspaces where you are authenticated. Select the workspace you will be using to build this app. Then, click "Create App."
OAuth Permissions
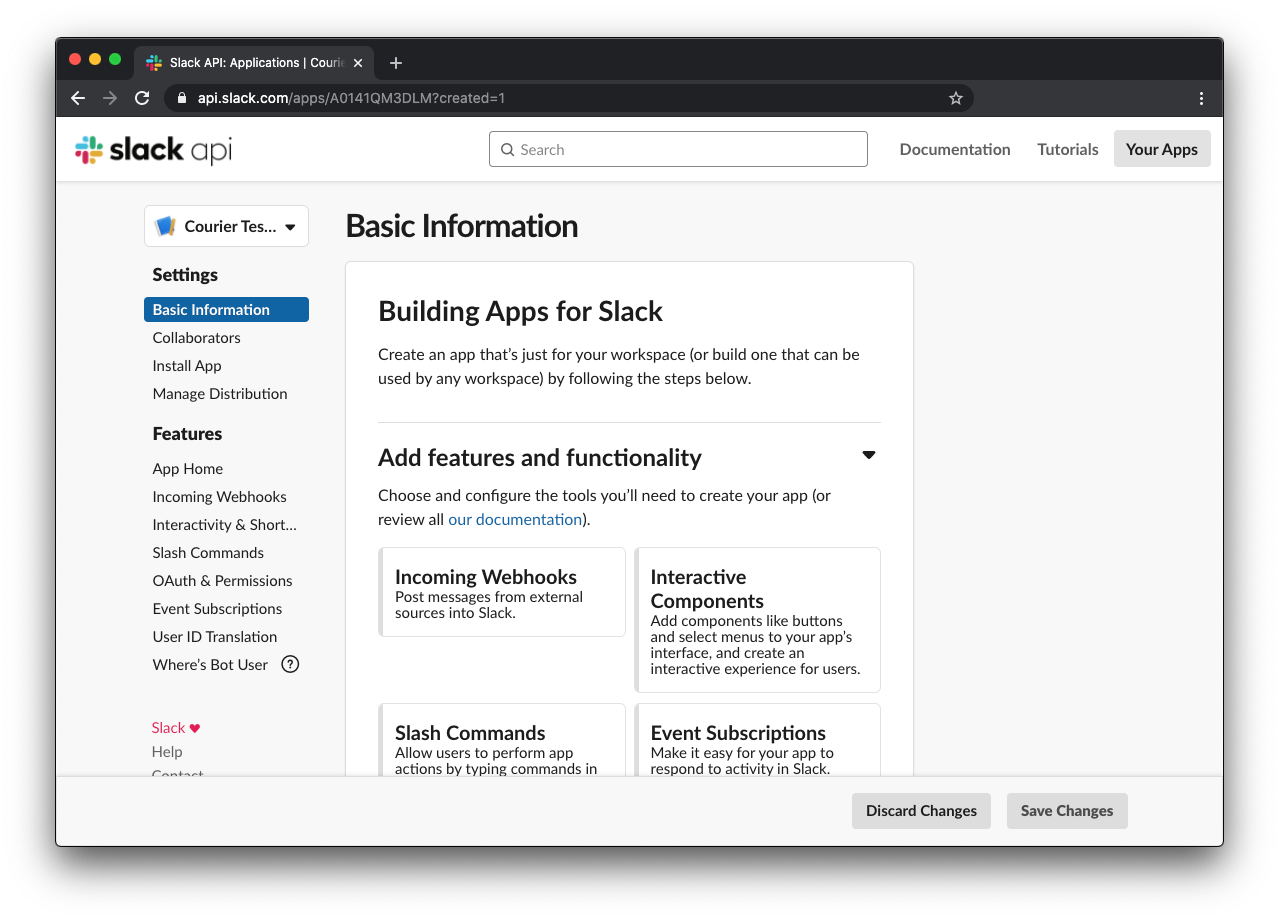
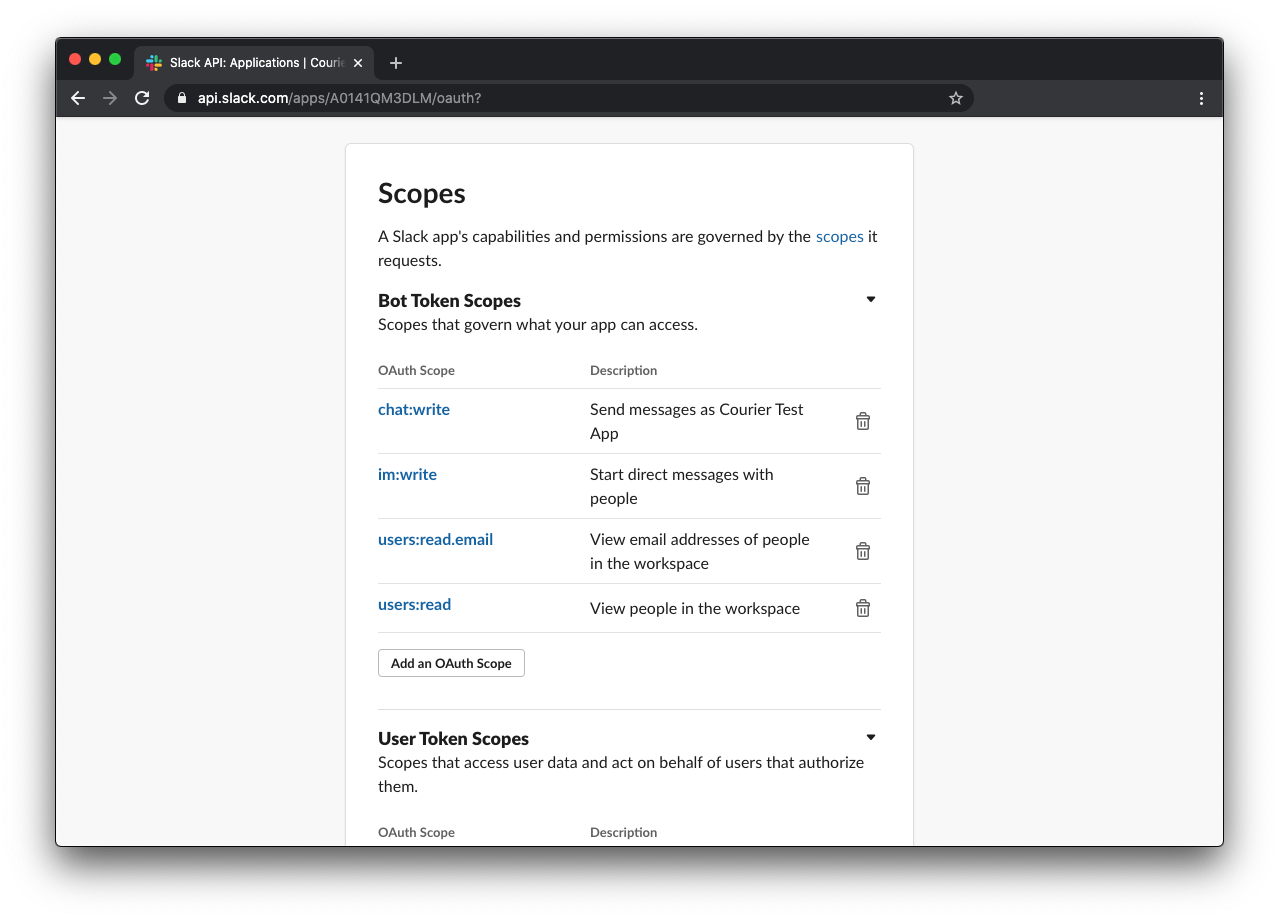
For this tutorial, we'll be sending a direct message using the email address associated with the recipient's Slack account. To do this, your app will need the following scopes: chat:write, im:write, users:read, and users:read.email. Navigate to the "OAuth & Permissions" page in the sidebar menu. In the Scopes section of the page, add these scopes as Bot Token Scopes.
At the top of this page is a button labeled "Install App to Workspace" or "Reinstall App" if you're using an existing Slack App. Click this button.
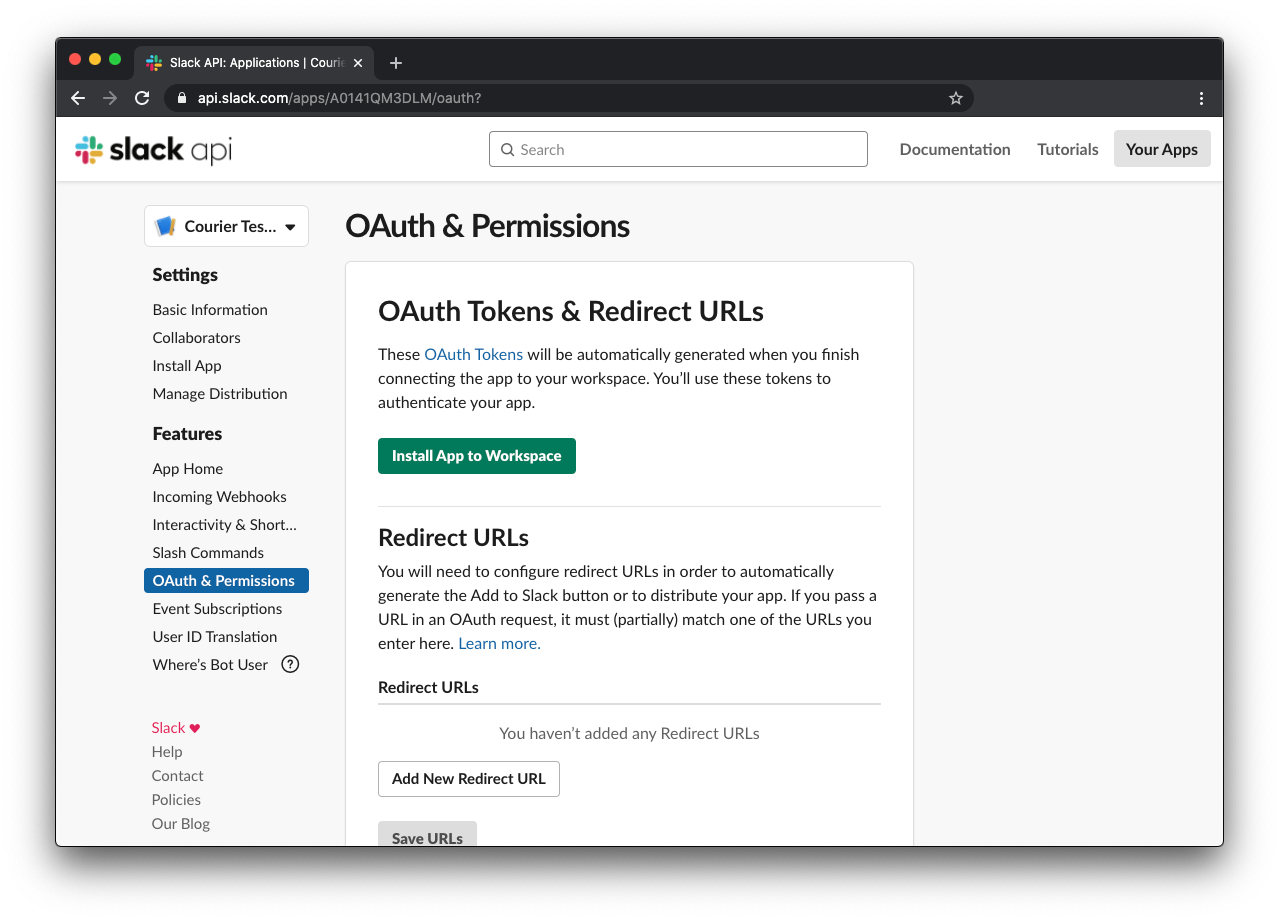
You should see a "Bot User OAuth Access Token." Make note of this value.

Congratulations, you've configured your Integration with Slack. Now, let's create a Notification.
Create a Courier Notification
Navigate to the Courier "Notifications" page and click "Create Notification." Click on “Untitled Notification” to rename your notification — for this tutorial, call it “Test Appointment Reminder.” From your list of configured Integrations, click on the Slack button. Then, click the “Slack” box that has been added to the sidebar in order to bring up a Slack template.
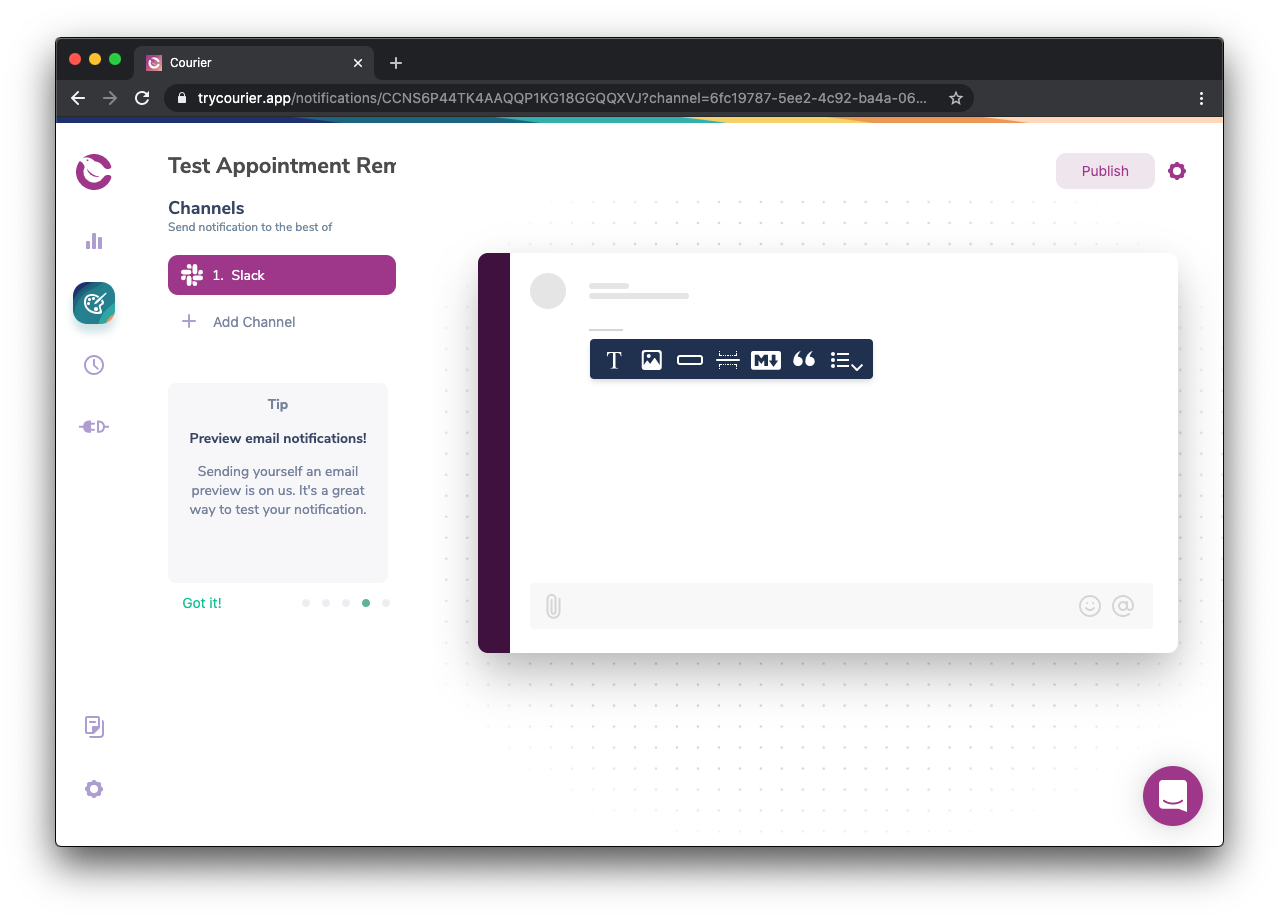
Courier provides a visual template editor, so you can send notifications that are formatted professionally. You can add content blocks to the template by clicking appropriate icons. If you remove a content block, it is moved to your Library in the sidebar and can be dragged back to the template if necessary.
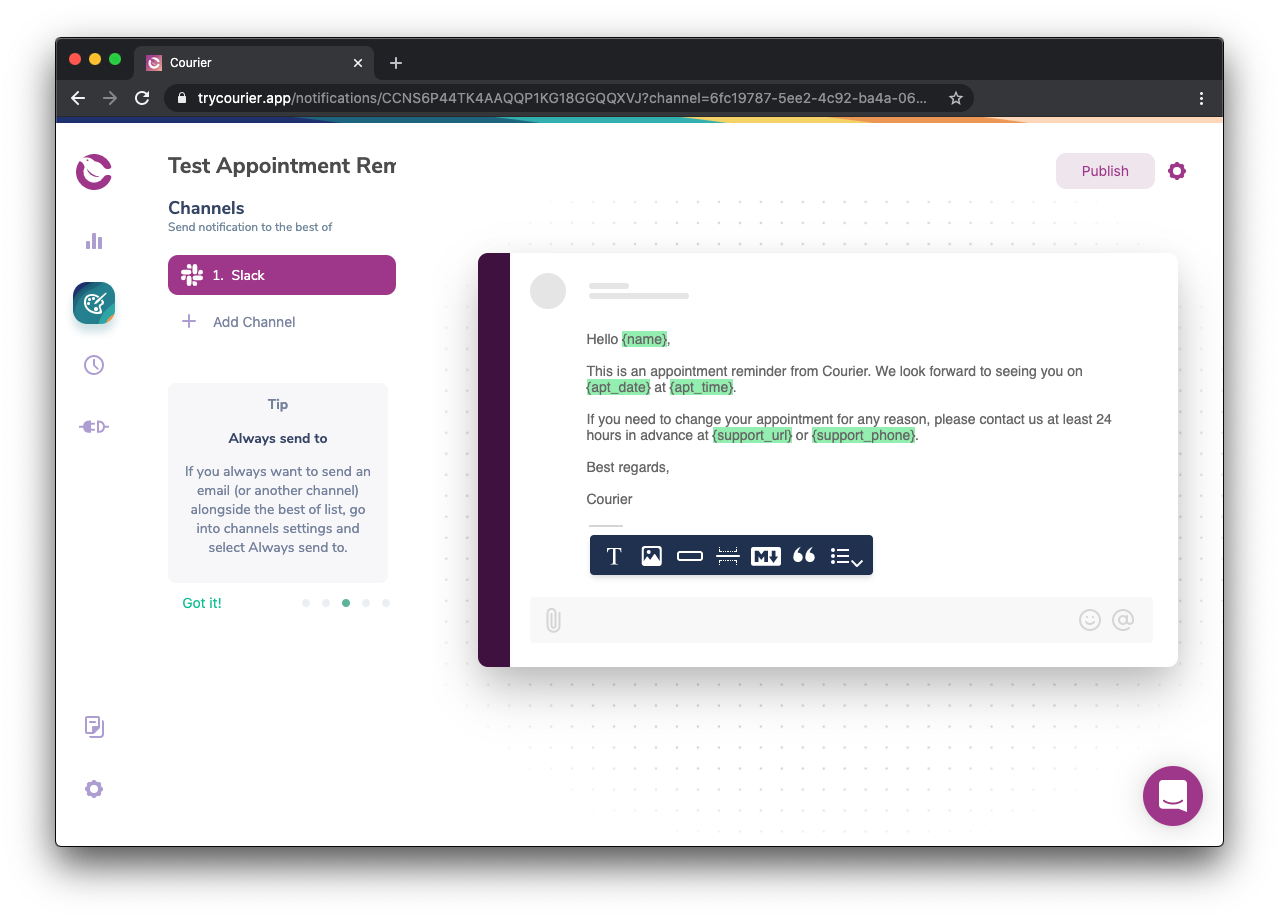
These content blocks can include variables using a mustache-like template syntax. Surround text with a single set of curly braces and that text will be interpreted as a variable (it will also be highlighted in green). For example, you may want to include a {name} variable (we'll cover the source of this variable data later in this tutorial).
For now, add a text block and fill it with whatever text you want to send. You can also copy the example below, which contains a few variables for demonstration.
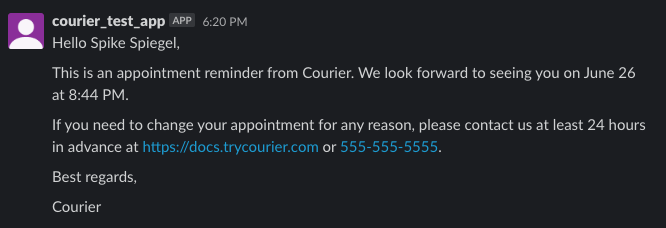
Hello {name},

This is an appointment reminder from Courier. We look forward to seeing you on {apt_date} at {apt_time}.

If you need to change your appointment for any reason, please contact us at least 24 hours in advance at {support_url} or {support_phone}.

Best regards,

Courier
When you are finished, click Publish in the upper right corner and give it a Publish Message of "Initial notification."
Send a Message
Courier passes messages to Integrations via the Send endpoint. For this tutorial, we will send our messages with cURL, but you can use your preferred language and HTTP library. You can also use an API testing tool such as Postman or Insomnia. For additional code samples, see the "Courier API Reference".
Authorization
Courier supports both basic and token authorization. For this tutorial, we will use token authorization. You can read more about authorization in Courier's "Authorization Overview".
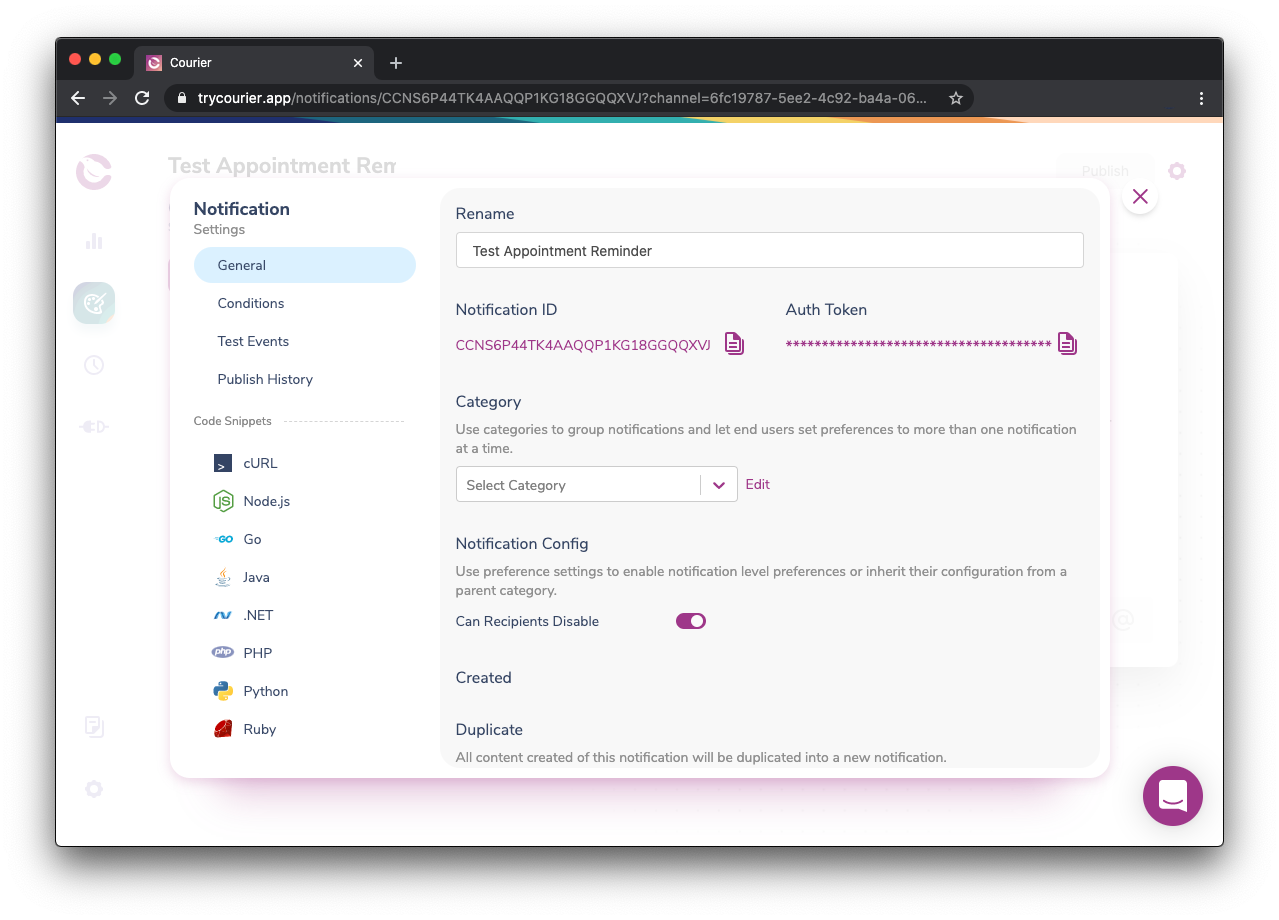
We must send an Authorization header with each request. The Courier Send API also requires an event. The authorization token and event values are the "Auth Token" and "Notification ID" we see in the detail view of our “Test Appointment Reminder” event. Click the gear icon next to the Notification's name to reveal them.
As a best practice, let's assign these values to environment variables. In a Bash terminal, you can add the variables by typing VARIABLE_NAME="<value>". Some examples are provided below. Note that the values are just examples. Do not copy them — be sure to use the tokens associated with your account instead.
Courier Auth Token Variable
COURIER_AUTH_TOKEN="YpW2yEaMDyNg6agN9yGkc9ycEg8MxiKVTiiu2WVc8"
Notification ID
COURIER_NOTIFICATION_ID="YpW2yEaMDyNg6agN9yGkc9ycEg8"
These variables will persist for as long as your Bash session remains alive. If you quit your terminal, you will need to recreate them. However you handle your authorization tokens, keep them secure, and never add them to source control.
To verify that you created the variables correctly, you can see them by typing echo $VARIABLE_NAME. For example, typing echo $COURIER_AUTH_TOKEN will print the Courier Auth Token value to the terminal.
Building the cURL Request
We want to send a POST request to https://api.courier.com/send. Let's build our cURL request line-by-line. First, we'll tell cURL this is a POST request.
curl --request POST
Next, add the Authorization header using the COURIER_AUTH_TOKEN variable we set earlier. We send this as a Bearer token.
curl --request POST \
--header "Authorization: Bearer $COURIER_AUTH_TOKEN" \
We also have a Content-Type header, which is application/json.
curl --request POST \
--header "Authorization: Bearer $COURIER_AUTH_TOKEN" \
--header "Content-Type: application/json" \
We will pass the body of our request using the cURL --data option. You will often send this data in JSON format. To improve working with cURL, Courier also supports a custom urlencoded format that can be used in the place of JSON. This format allows nested data values using square bracket syntax. This guide provides examples in both formats, so feel free to use the format that you like best.
Our --data option must also contain an event and recipient. Additionally, we will send profile and data objects.
The event value, for this example, is the "Notification ID" that we assigned to our COURIER_NOTIFICATION_ID environment variable earlier.
A recipient should be a unique identifier that does not change. This prevents duplicate entries in the event that a recipient changes their email or some other identifying value. We do not have any recipients in this tutorial, so we can enter any string value. Something like “spike_spiegel” will work.
The profile information is an object that includes any key-value pairs required by our Integrations. In the case of Slack, we need the "Bot User OAuth Access Token" and "Email associated with the recipient's Slack Account." These are sent as access_token and email respectively in a slack object. You can find the required keys for any Integration by selecting an Integration on the "Integrations" page.
Lastly, we define message variables inside the data object. Remember the variables we set in the visual template editor? This is where we provide the values. Our example message had name, apt_date, apt_time, support_phone, and support_url variables. For this tutorial, we can assign example strings to each.
Our --data object should look like this:
- JSON
- cURL urlencoded
{
  "event": "'"$COURIER_NOTIFICATION_ID"'",
  "recipient": "spike_spiegel",
  "profile": {
    "slack": {
      "access_token": "xoxb-487947363398-212718859602-bXYRRbrQHAijFnfnuKLM7JV1",
      "email": "spiegel@bebop.com"
    }
  },
  "data": {
    "name": "Spike Spiegel",
    "apt_date": "June 26",
    "apt_time": "8:44 PM",
    "support_phone": "555-555-5555",
    "support_url": "https://courier.com/docs"
  }
}
--data "event=$COURIER_NOTIFICATION_ID" \
--data "recipient=spike_spiegel" \
--data "profile[slack][access_token]=xoxb-487947363398-212718859602-bXYRRbrQHAijFnfnuKLM7JV1" \
--data "profile[slack][email]=spiegel@bebop.com" \
--data "data[name]=Spike Spiegel" \
--data "data[apt_date]=June 26" \
--data "data[apt_time]=8:44 PM" \
--data "data[support_phone]=555-555-5555" \
--data "data[support_url]=https://www.courier.com/docs/" \
Now add the Send URL, https://api.courier.com/send, to complete the cURL request.
Complete cURL Request in both Formats
- cURL in JSON
- cURL urlencoded
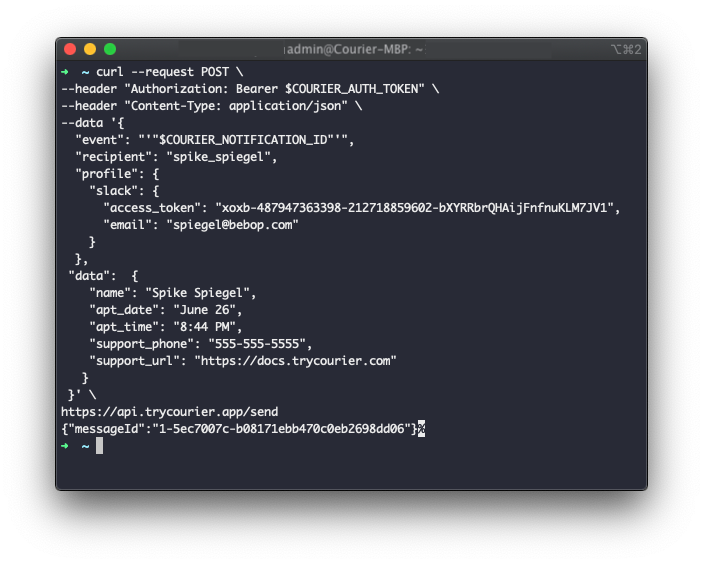
curl --request POST \
--header "Authorization: Bearer $COURIER_AUTH_TOKEN" \
--header "Content-Type: application/json" \
--data '{
  "event": "'"$COURIER_NOTIFICATION_ID"'",
  "recipient": "spike_spiegel",
  "profile": {
    "slack": {
      "access_token": "xoxb-487947363398-212718859602-bXYRRbrQHAijFnfnuKLM7JV1",
      "email": "spiegel@bebop.com"
    }
  },
 "data":  {
    "name": "Spike Spiegel",
    "apt_date": "June 26",
    "apt_time": "8:44 PM",
    "support_phone": "555-555-5555",
    "support_url": "https://courier.com/docs"
   }
 }' \
https://api.courier.com/send
curl --request POST \
--header "Authorization: Bearer $COURIER_AUTH_TOKEN" \
--header "Content-Type: application/json" \
--data "event=$COURIER_NOTIFICATION_ID" \
--data "recipient=spike_spiegel" \
--data "profile[slack][access_token]=xoxb-487947363398-212718859602-bXYRRbrQHAijFnfnuKLM7JV1" \
--data "profile[slack][email]=spiegel@bebop.com" \
--data "data[name]=Spike Spiegel" \
--data "data[apt_date]=June 26" \
--data "data[apt_time]=8:44 PM" \
--data "data[support_phone]=555-555-5555" \
--data "data[support_url]=https://www.courier.com/docs/" \
https://api.courier.com/send
Before sending this request, be sure to replace the access_token and email values with the Bot User OAuth Access Token and recipient's Slack Email. Also, note the "'"$COURIER_NOTIFICATION_ID"'" formatting in the JSON formatted --data option. The quotes are necessary to escape the JSON quotes and access the COURIER_NOTIFICATION_ID variable.
Paste your complete cURL request in either format in your terminal and hit "Return." You should receive a response like {"messageId":"<message id string>"}. You will also receive a Slack message from your Slack app.
Congratulations, you’re on your way to crafting a better notification strategy that your audience is sure to appreciate.