Most Popular
Start Routing Notifications Today!
Courier is a notification service that centralizes all of your templates and messaging channels in one place which increases visibility and reduces engineering time.
Sign-up
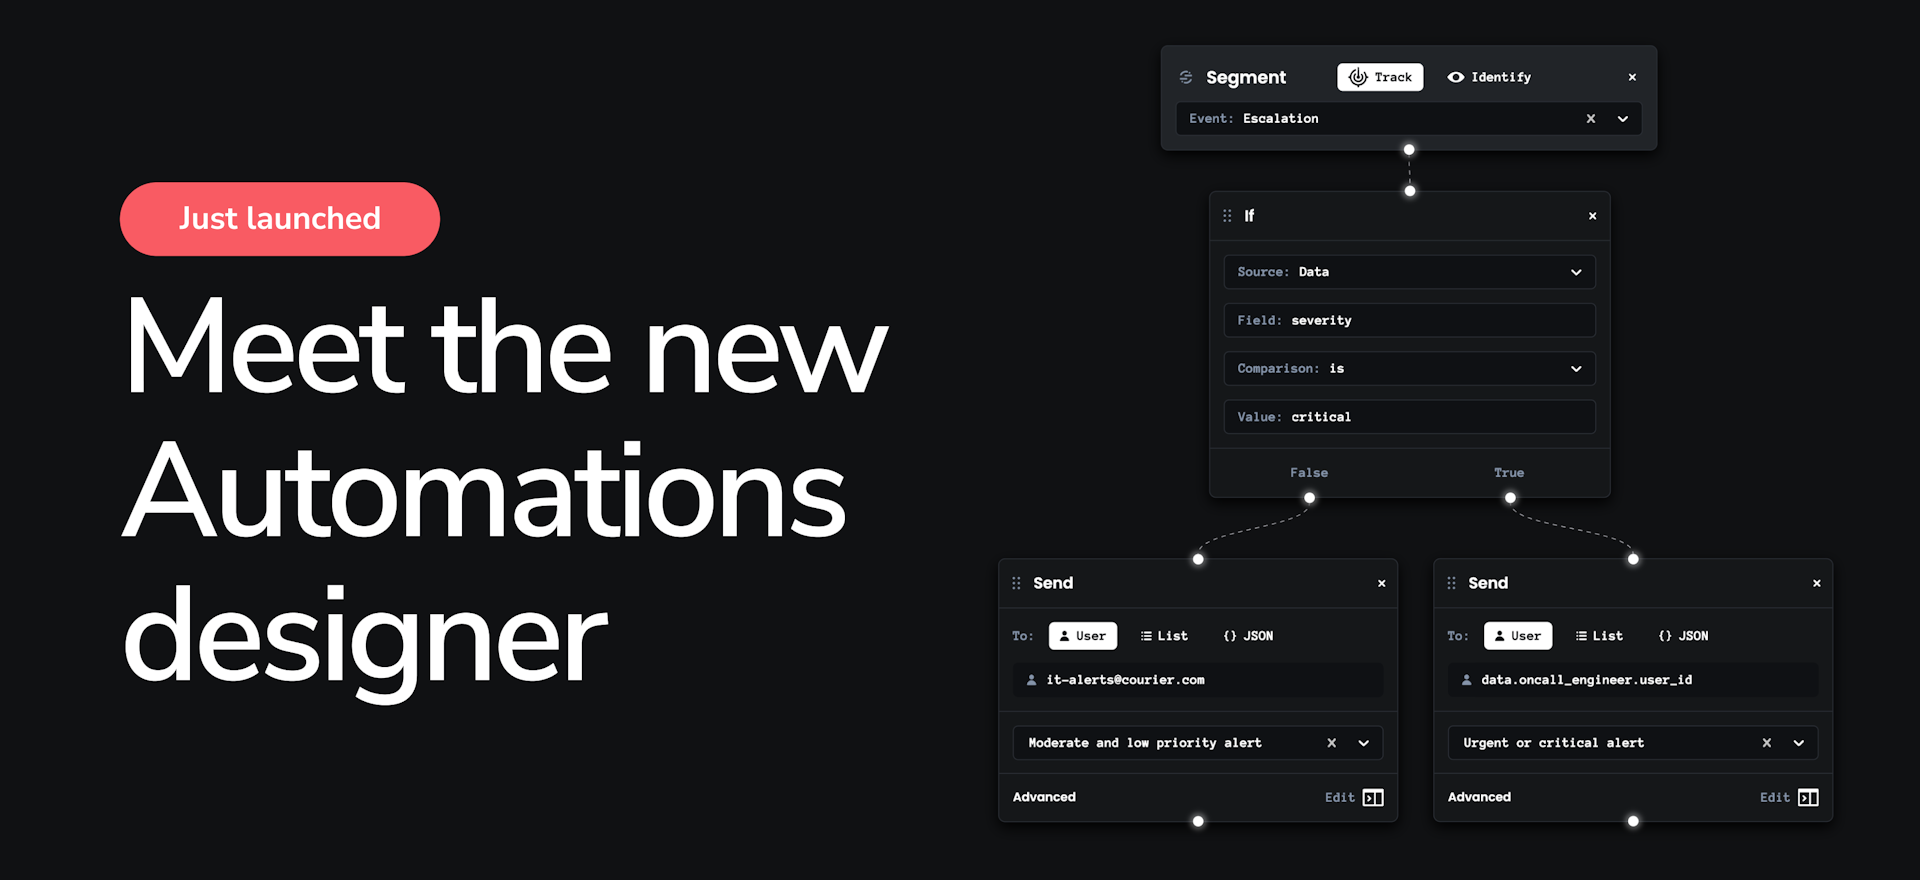
Introducing the new and improved Automations designer
Courier Automations lets you build smart notification workflows. With Automations, notifications can be scheduled, driven by events, canceled, and more.
We’ve just completed a big redesign of the automations UI — before this overhaul, notifications were restricted to linear workflows. This made it difficult to build more advanced automations, however the new automations UI, based on React Flow, allows you to build more sophisticated workflows, including those requiring branching logic.
In this article, we explain the differences in functionality between the old and new UI, how the new UI helps developers as well as product managers, and how the migration will affect you if you’re already using the automations designer. For those who are new to Courier automations, we explain the background of what automations are for and how to use them. We also cover how to use the new UI, while providing some useful real-world examples to help you get started.
What is Courier?
Courier serves as a product-oriented notification platform, and is well-suited for the post-marketing phase of a business; allowing you to streamline communication with users across your websites and/or applications. Its unified API accommodates multi-channel delivery — including email, SMS, browser notifications, push notifications, and direct messages through platforms such as Slack or Microsoft Teams. The power of the Courier app is that it allows you to design versatile message templates that can be easily repurposed across each messaging channel.
You can pull data from other systems into Courier, to populate variables within your message templates or when building your application logic in your automations. This data can come from a variety of sources — for example, from customer data platforms (CDPs) like Segment or RudderStack, or from your own site.
What are Courier automations?
Courier automations enable you to craft intricate notification delivery workflows while seamlessly integrating your custom application logic into the Courier notification ecosystem. Automations can be controlled either through an API or through the automations designer inside the Courier app. The automations designer allows you to design automations either by using a visual builder or by directly editing JSON. It’s the fastest way to build workflows.
The latest update to the automations designer includes a big update to the visual builder. Where previously your workflows were limited, or were made unnecessarily complex by the linear nature of the visual builder, you can now use the designer to design complex workflows in a simple and intuitive way.
For example, if you want to send different welcome emails to different groups of people based on user attributes, it was difficult to handle this level of complexity in the old UI.
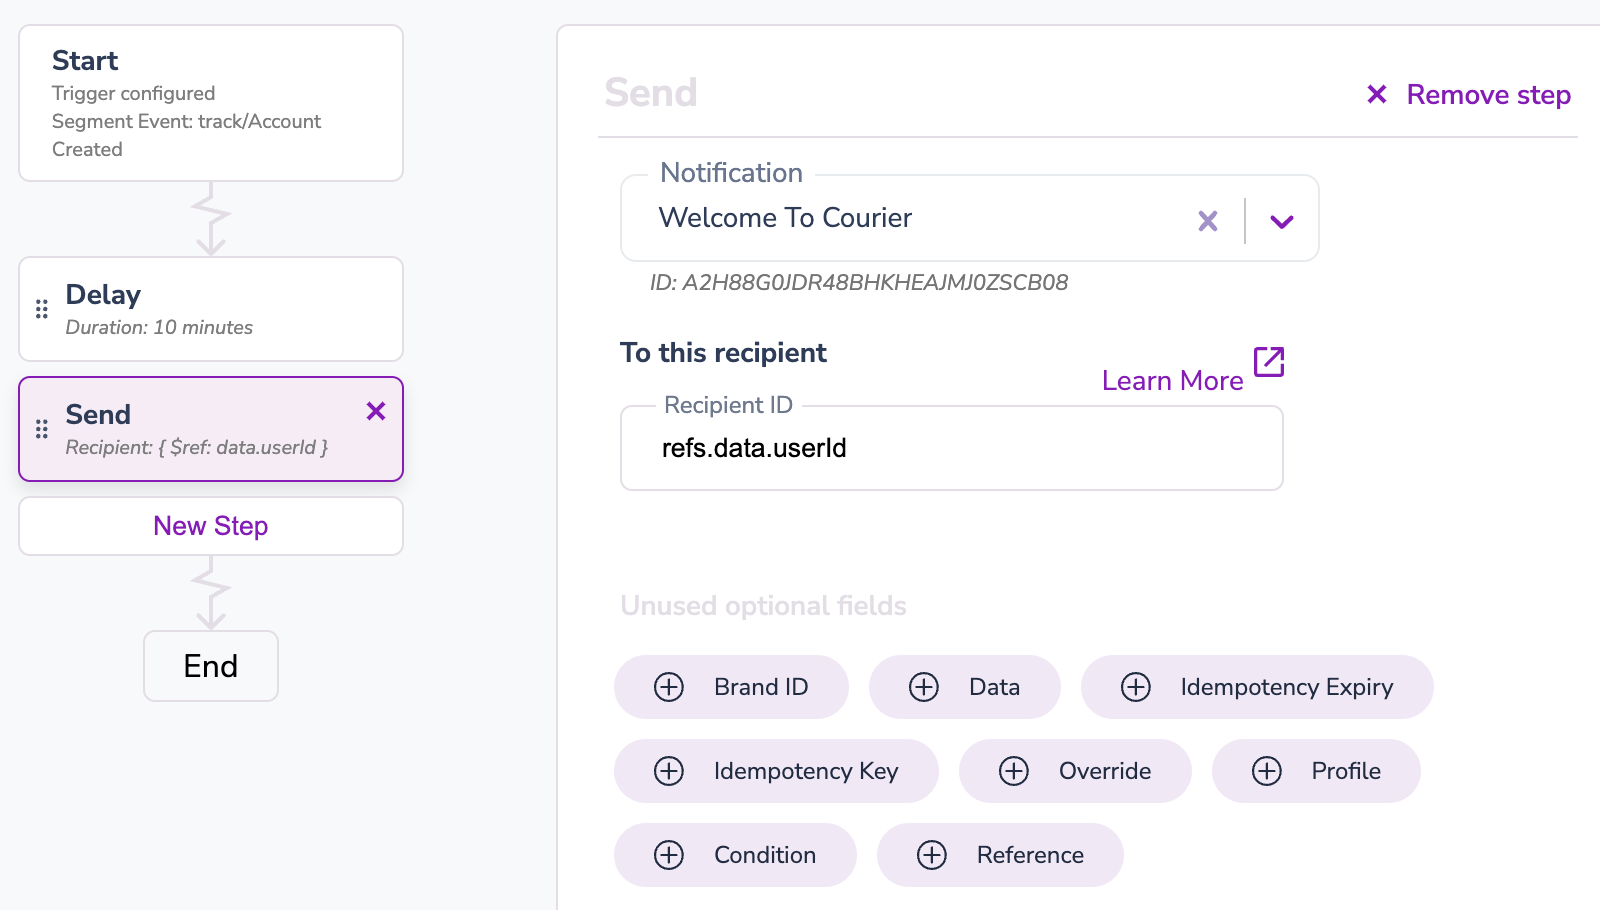 (The old UI consists of a linear series of steps. In this example, a Segment event, “Account Created” triggers a 10-minute delay before sending a welcome email.)
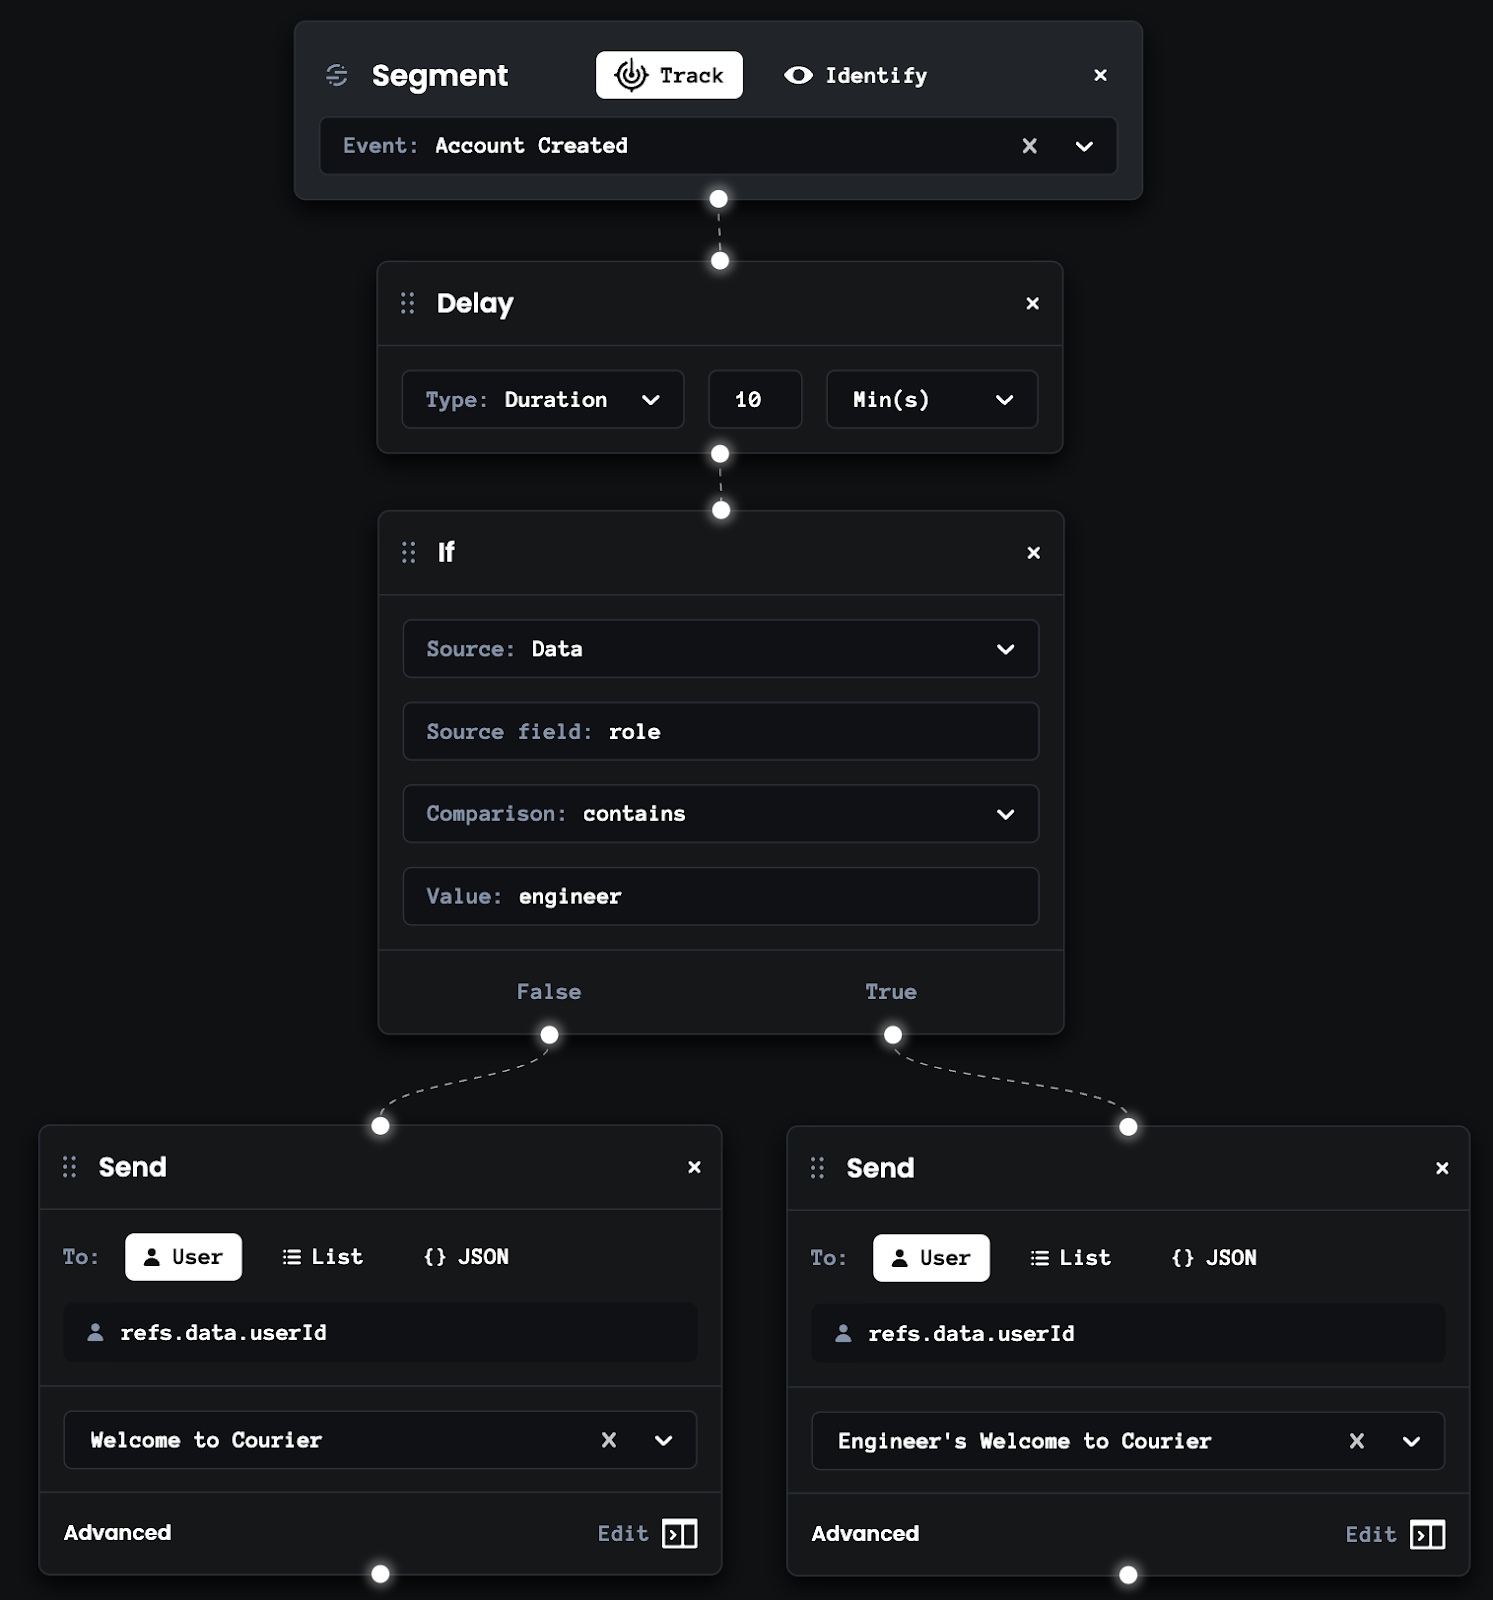 (The new automations designer has drag-and-drop elements that can help you create non-linear workflows. In this example, the Segment event, “Account Created” triggers a 10-minute delay and then checks whether the user’s job role contains “engineer.” If they are an engineer, they will be sent the engineer-specific welcome email, and if not, they will receive a generic welcome email.)
The new automations designer was built using React Flow, a library for building node-based interactive UIs. You can build your messaging workflows by dragging and dropping different elements such as triggers and actions onto a canvas. You can then connect them together in a sequential order, or use branching logic if required to build a more complex workflow.
The example above shows a workflow for waiting until a user has signed up to send them a message. If they’re online, you can just send a browser notification; otherwise you might want to send an email.
The elements of a Courier automation
Triggers
Triggers are events that cause a new automation run to be started. They define the conditions that must occur before an action can happen. A simple example of a trigger is a scheduler that waits until a particular timestamp is reached before an action can happen (such as sending a notification). Data pulled from your CDP can act as a trigger, too — for example, a new user signing up to your system.
You can also make use of data from Courier Audiences to design your triggers. An Audience is a dynamic list of your users. When someone joins or leaves an Audience, this event could be used as a trigger to send a notification. An example of this could involve an Audience of all users who are software engineers. If a user who previously worked in tech support becomes a software engineer, as soon as they update their profile they become part of the “software engineer” audience — which will cause your trigger to invoke an action such as sending a message.
Actions
An action is an activity that happens following a trigger. The most common action in Courier is the sending of a message, either to an individual or group. However, actions can also include fetching data from another API, updating a user profile, or adding a delay to your workflow – for example, waiting for 24 hours after a user signed up to remind them to fill in their profile.
Branching logic
Branching logic is a new feature in the latest automations designer that allows you to design more complex workflows by dragging and dropping if statement blocks into your workflow. These are accessed in the menu on the left, under “Control Flow.” An if statement block has nodes next to its true and false conditions, so you can draw lines that link these different conditions to the next steps in your workflow. As this doesn’t involve writing code, non-developers with a decent understanding of the data involved are often able to design their own notification workflows.
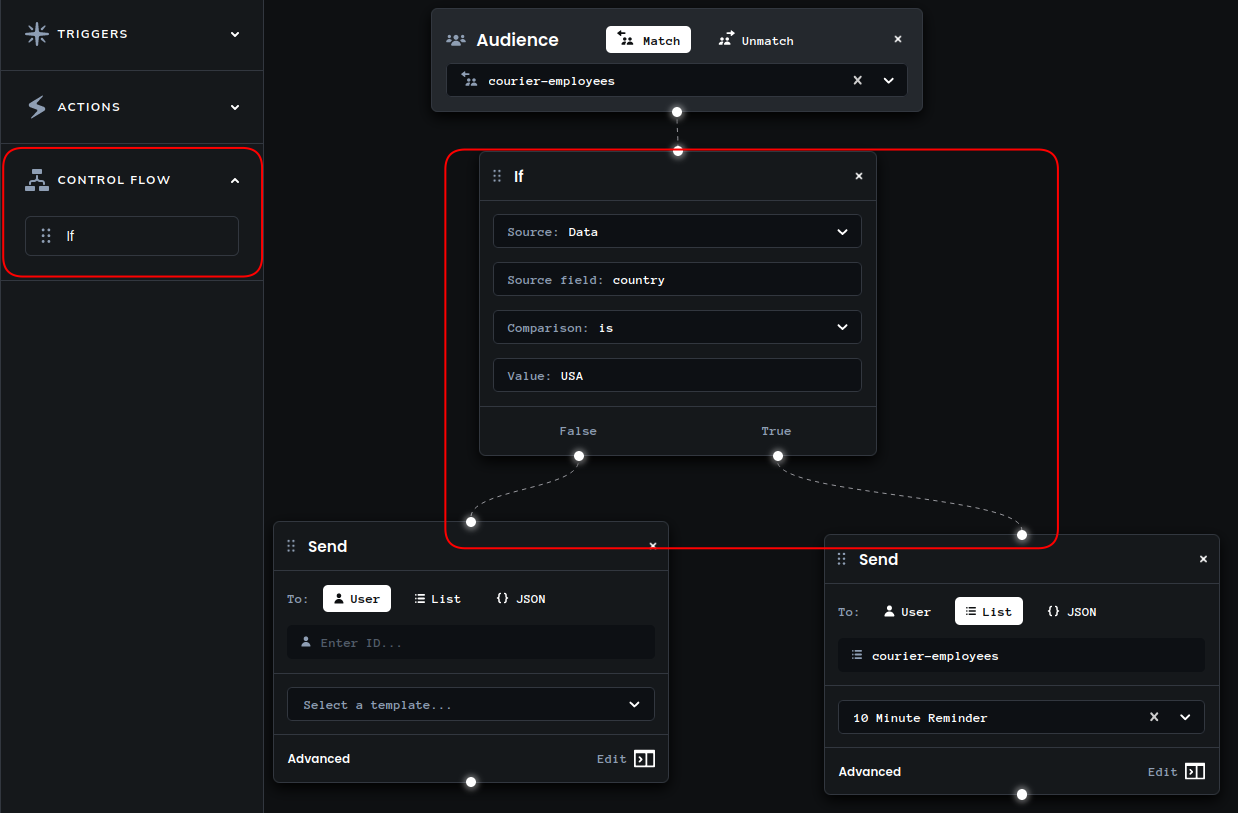 (Once you’ve dragged an
 if statement box onto the canvas, you can connect it to different parts of your workflow by drawing lines from the true or false nodes to other elements within your automations template.)
Why the new version of the Courier automations designer helps you
Until now, if you were using automations for complex, non-linear workflows, there was a good chance you had to manage this logic yourself using our API, which may even have required a separate back-end service just for dealing with this. And, due to ever-changing requirements, you may have needed to regularly update your code in small but necessary ways.
This can now be done in the UI, leading to much faster turnaround for small workflow changes. To achieve the fastest turnaround, it’s worth empowering product managers or designers to make their own changes to the logic when needed, so they don’t have to wait for a developer to fit small changes around feature work. As long as they have some knowledge of the underlying data, this can be accomplished with minimal training, as the interface is very intuitive. Allowing your colleagues to create or edit automations has the added benefit of freeing up your time to do more feature work instead of having to focus on small updates to application logic.
How to use the automations designer
You can follow our documentation on how to create a basic automation using the new automations designer UI. After creating your automation template, you’ll need to publish it before it can be invoked. The standard way for an automation to be invoked is automatically — when its trigger condition is met. However, it is still possible to invoke an automation by using our automations API.
If you need to use variables within your automations — for example, if you want to send your message to varying recipients, or if you want your message template to vary according to certain conditions — you can use our refs variable, which stores dynamic data within Courier.
The automations API
If you prefer to use the API directly, or use an SDK, that’s still an option. You can use these to either invoke automations or get the status of automations. For existing users of the API, you can be reassured that we’ve made no changes to the API — our latest automations release applies to the UI only.
Details for existing users of the automations designer
For existing users of the automations designer, we’ll now cover the main points that are likely to be of interest: the main differences between the old and new UIs, and what you need to do to migrate to the new version of automations.
Differences between the old and new automations designer UIs
The main difference is that the new automations designer UI is more expansive: you are no longer forced to follow a linear workflow, and can take advantage of branching logic. In addition to this, we have added some improvements to make the UI easier to use. For example, running an automation on a repeat schedule used to require users to learn Cron expressions — something that even most engineers have a tough time remembering. Now, with the new “Schedule” trigger, scheduling an automation is as easy as scheduling an appointment in your favorite Calendar app. Changes like these have made the UI more user-friendly, meaning that letting non-developers set up their own workflows is finally an option.
What you need to do to migrate to the new version of automations
You don’t need to do anything! We have already rolled out the new changes, so no work is required from your end.
If you have any existing automations templates that you’ve designed in the past, these will not change. They will appear in exactly the same way using the old UI. However, any new automations templates that you create will now appear using the new UI.
Get started
You can get started creating automations with the new Designer directly in the Courier UI. Setting up smart notifications in the new UI is fast and intuitive — just follow our documentation.
Start Routing Notifications Today!
Courier is a notification service that centralizes all of your templates and messaging channels in one place which increases visibility and reduces engineering time.
Sign-up
More from Product News

Courier Inbox for web and mobile, a complete notification center
A notification center inside of web and mobile apps is now an expectation. It’s a way to reach specific audiences or users with tailored messages and a way to boost engagement by bringing people back into the app. While Courier has been adding Inbox capabilities over the last couple years, we’re excited to announce a complete set of SDKs that span web and mobile. You can drop in a full-featured inbox to give your users a best-in-class notification center inside your app that works seamlessly with your existing notification flows.
Donnie Wang
June 14, 2023
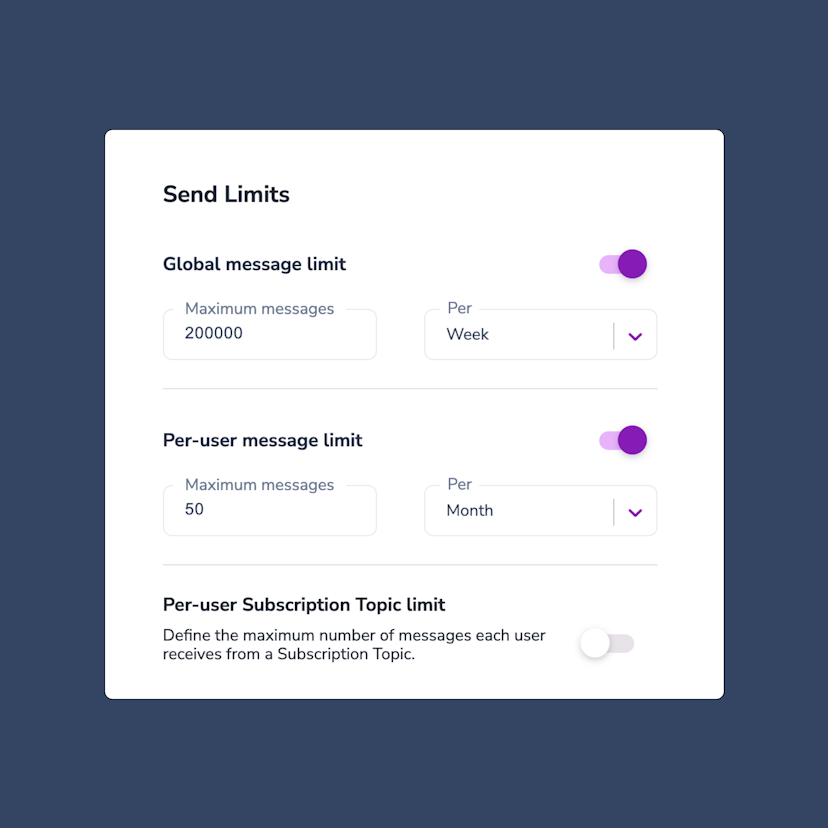
Controlling notification send limits in Courier
Send limits are a new addition to the Courier app that allow you to manage notification rate limits. This means you can set a maximum limit on the number of notifications you can send over a certain time period. The advantages of using send limits are twofold: you can save money by imposing spending caps on notifications, and you can improve the customer experience of your app by avoiding bombarding users with too many notifications at once. Send limits can be applied in a variety of ways, including system-wide notification limits, as well as specific limits for individual users or notification topics. For instance, you can set an overall limit of 200,000 notifications per week. This article will explore the various types of notification rate limits available, explain when send limits are useful, and provide guidance on how to set them up.
Jason Axtell
May 16, 2023
Free Tools
Comparison Guides
Build your first notification in minutes
Send up to 10,000 notifications every month, for free.
Get started for free

Build your first notification in minutes
Send up to 10,000 notifications every month, for free.
Get started for free
© 2024 Courier. All rights reserved.