Overview
This guide provides step-by-step instructions for creating and configuring a Microsoft Teams Application with an associated Bot. The Bot enables Courier to send notifications to Microsoft Teams channels and users.Prerequisites
- Access to Microsoft Teams Developer Portal
- Azure portal access with App Registration permissions
- Administrator privileges for granting API permissions
- Courier workspace access
Understanding the Microsoft Teams Integration Architecture
Microsoft Teams integration requires three separate but connected components:- Azure App Registration - The parent application that manages authentication
- Teams App - The application that gets installed in Teams
- Teams Bot - The bot component that actually sends messages
- You’ll create two apps (one in Azure, one in Teams)
- You’ll use one set of credentials in Courier (the bot’s Azure credentials)
- The Teams app links to the first Azure app, and the bot links to the Teams app
Step-by-Step Setup
Step 1: Create Teams App
Step 1: Create Teams App
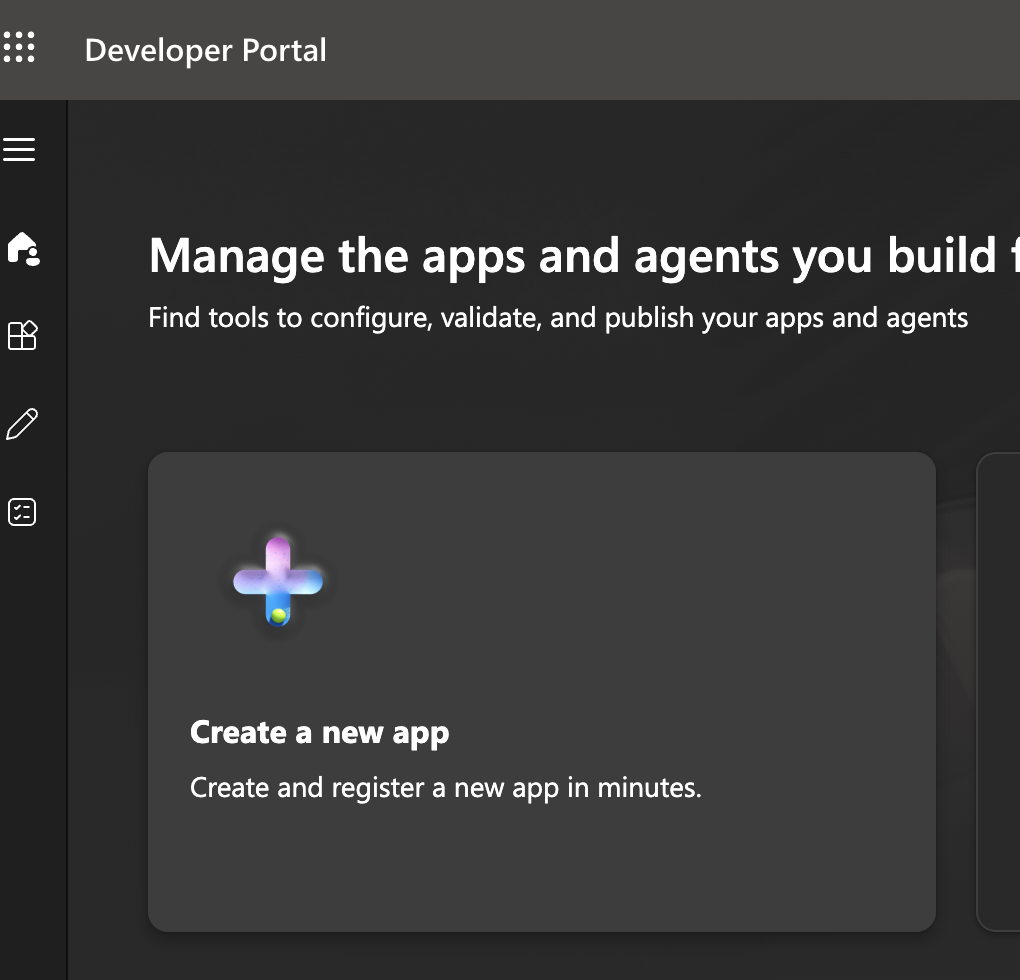
- Navigate to the Microsoft Teams Developer Portal.
- Click Create a new app.
- Enter a name for your app and click Add.
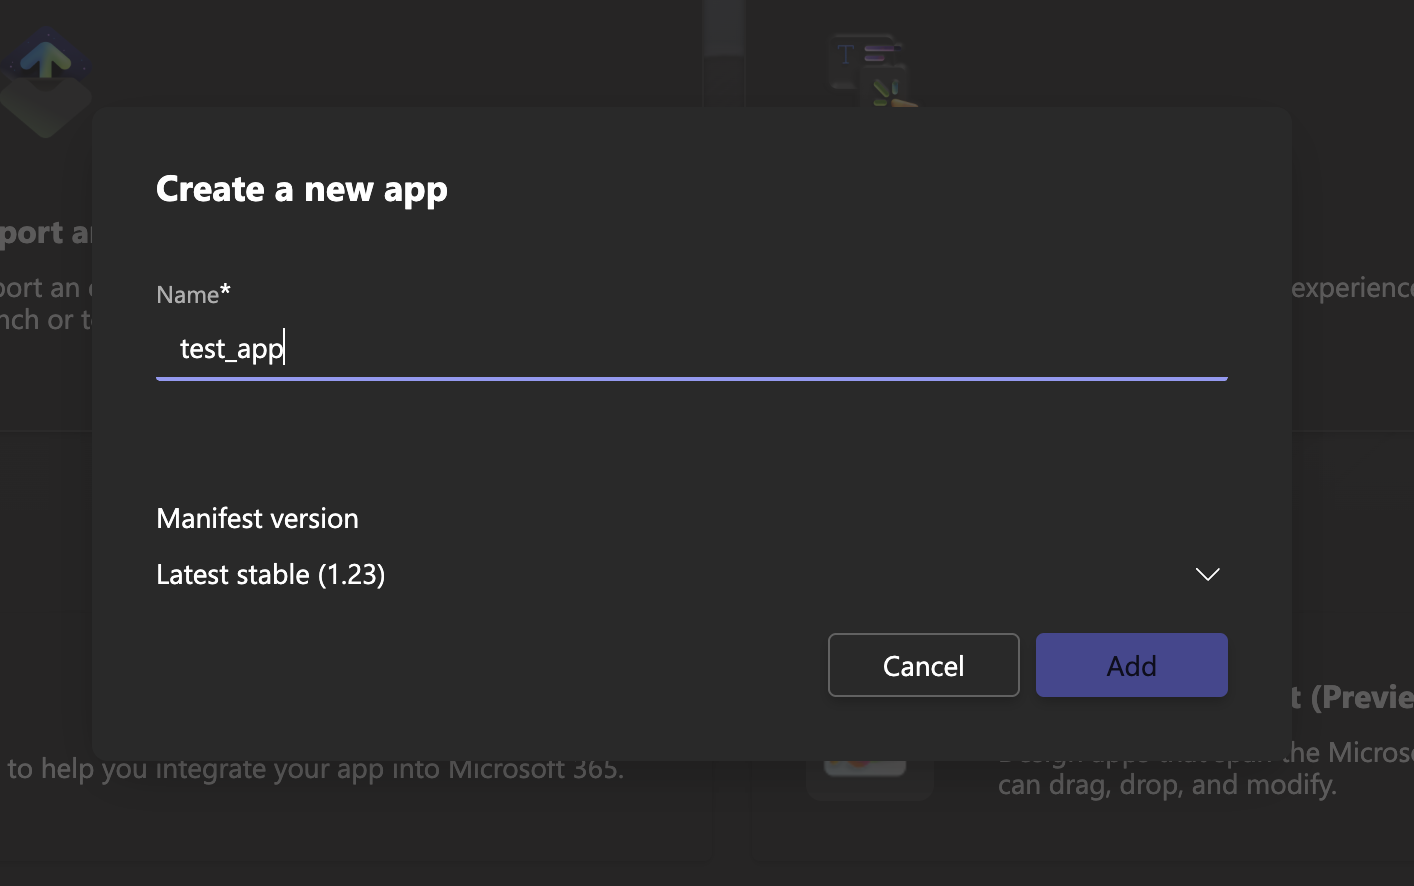
- Save the generated App ID—you’ll need this later.
Step 2: Create Azure App
Step 2: Create Azure App
- Open the Azure Portal.
- Navigate to Azure Active Directory > App registrations.

- Click New registration.
- Configure the registration:
- Name: Use the same name as your Teams Developer Portal app
- Supported account types: Select “Accounts in any organizational directory (Any Microsoft Entra ID tenant - Multitenant)”. The Azure default is single-tenant, which will cause 401 authentication errors with Bot Framework.
- Redirect URI: Keep the default setting
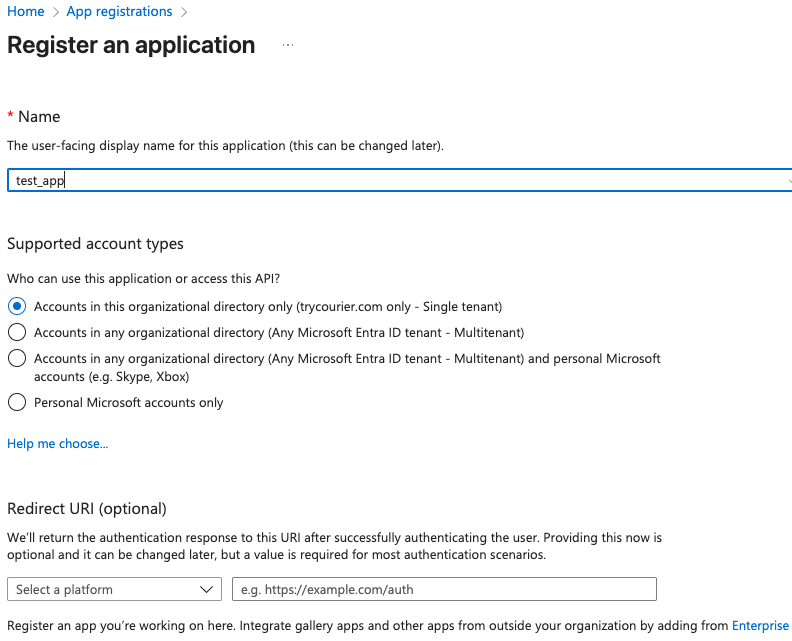
- Click Register.
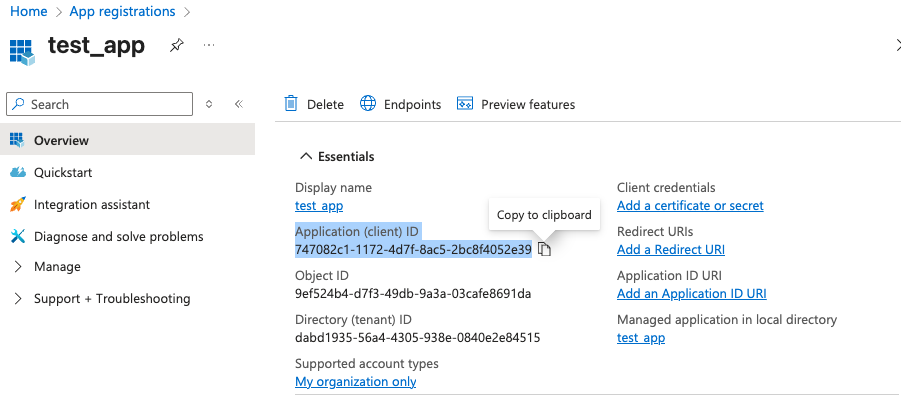
- Save your Application (client) ID—you’ll need this later.
Step 3: Link Teams App to Azure App
Step 3: Link Teams App to Azure App
- Return to the Microsoft Teams Developer Portal.
- Navigate to Configure > Basic Information.
- Scroll to the bottom of the page to the Application (client) ID field.
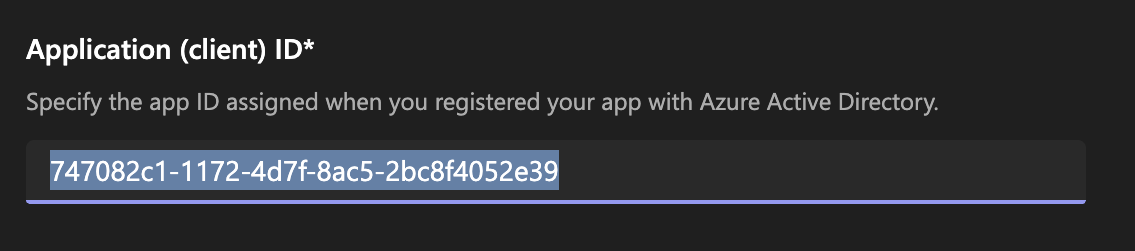
- Paste the Application (client) ID you saved from Step 2.
- Click Save.
The Application (client) ID you enter here is from your Azure App Registration (Step 2). This is different from the credentials you’ll use in Courier (Step 5), which come from the Bot’s Azure App Registration (Step 4).
Step 4: Create Bot and Configure Permissions
Step 4: Create Bot and Configure Permissions
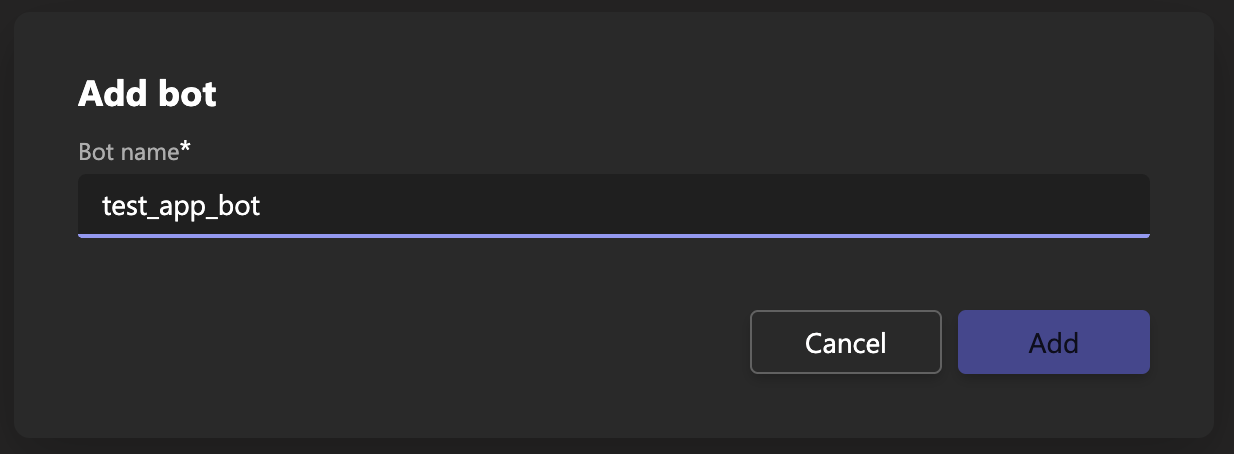
- In the Microsoft Teams Developer Portal, navigate to Tools > Bot Management.

- Click + New Bot and provide a unique name.
- Return to Apps > [Your App Name] > Configure > App Features
- Click the Bot item
- Select Select an existing bot
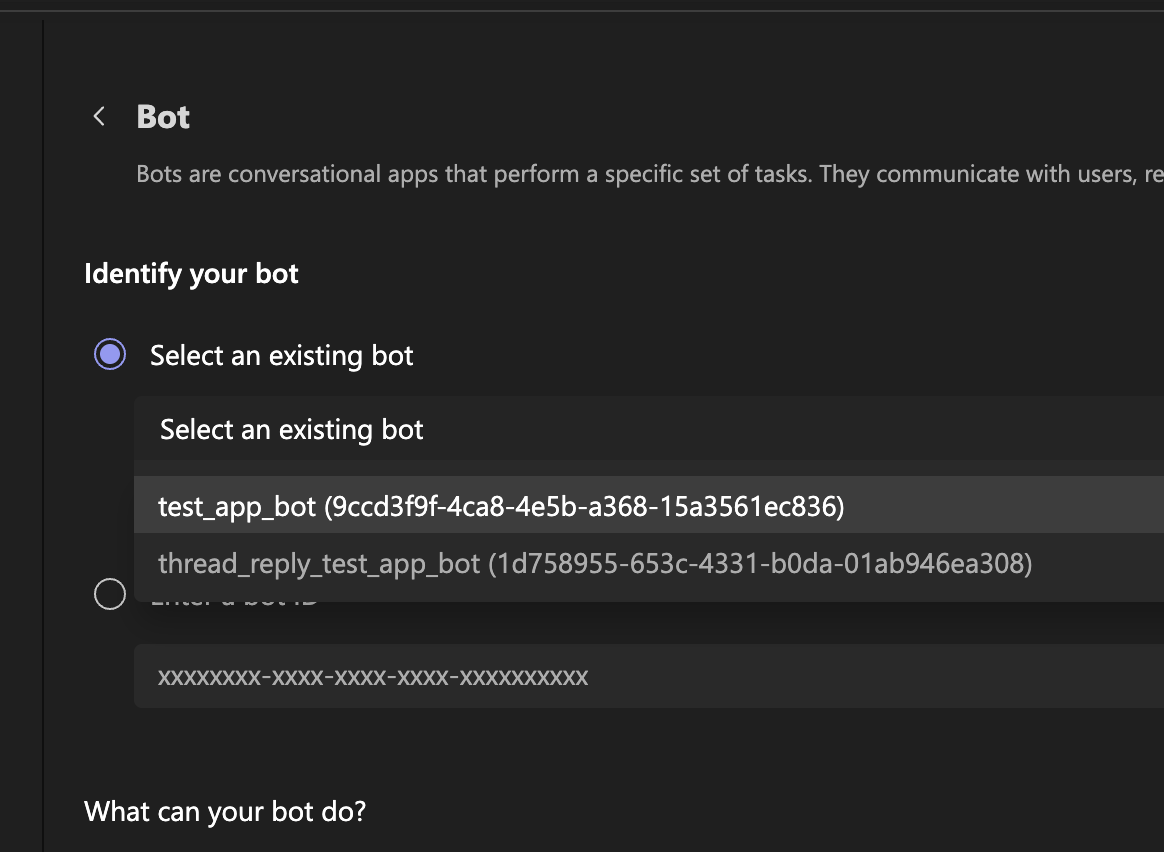
- Choose the bot you just created
- Configure the bot settings:
- Under What can your bot do?, select:
- ✓ Only send notifications (one-way conversations)
- Under Select the scopes where people can use your bot, select:
- ✓ Personal (for 1:1 notifications)
- ✓ Team (for channel notifications)
- ✓ Group Chat (for group chat notifications)
- Under What can your bot do?, select:
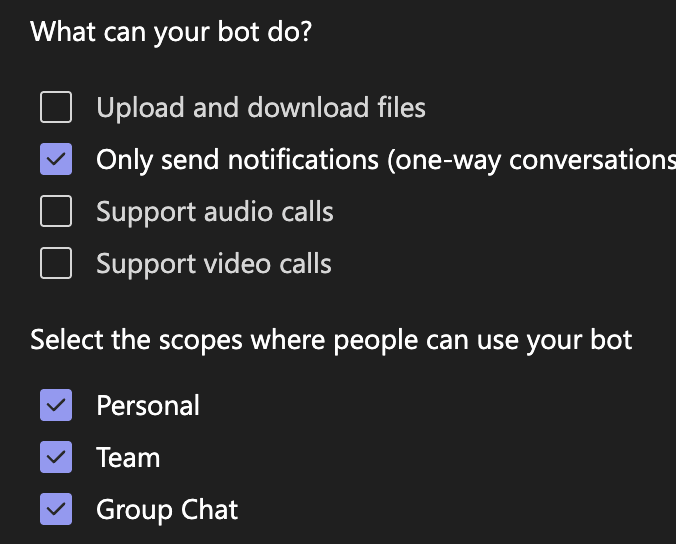
- Click Save
-
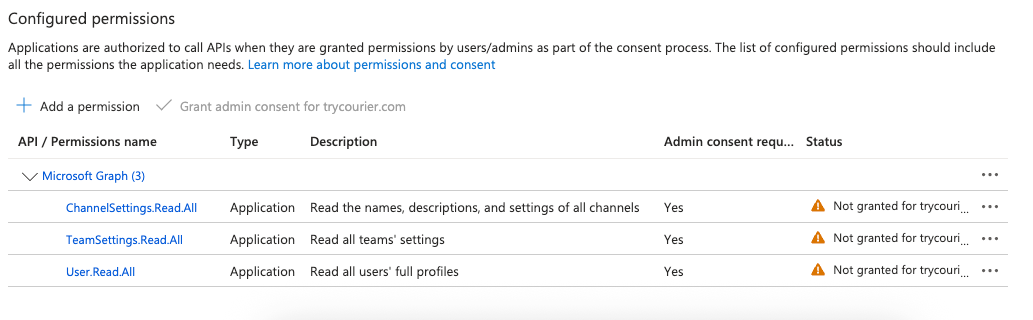
Configure API Permissions (requires admin):
- Return to the Azure Portal.
- Navigate to App registrations > [Your Bot Name] > API permissions
- Add the following Microsoft Graph permissions as Application permissions:
ChannelSettings.Read.AllTeamSettings.Read.AllUser.Read.All
- Request administrator approval by having them click Grant admin consent for [your_domain]
- Generate Bot Credentials:
- In Azure, navigate to App registrations > [Your Bot Name] > Certificates & secrets
- Click + New client secret
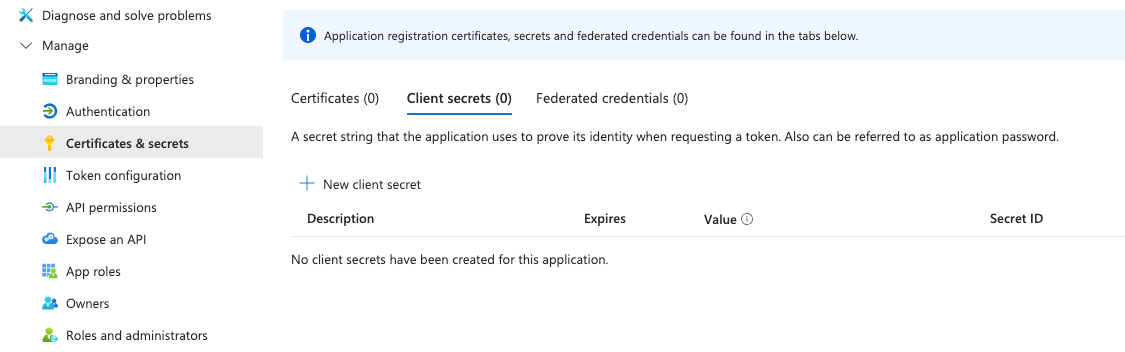
- Provide a descriptive name and select an expiration period
- Click Create
- Important: Copy and securely store the generated secret value immediately
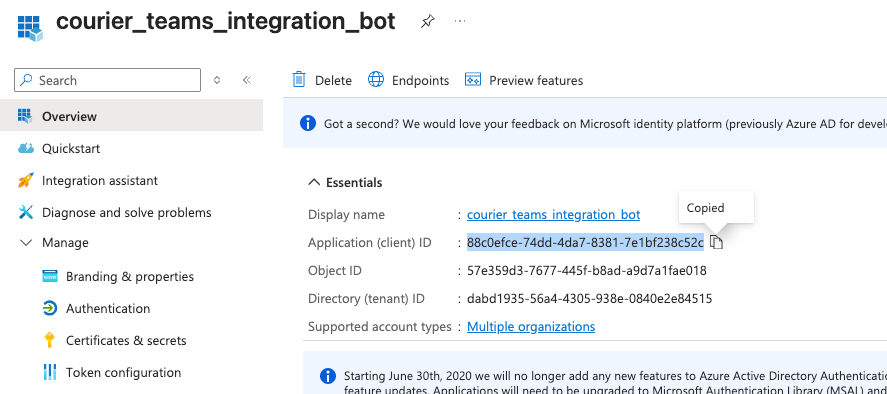
- Navigate to the Overview section
- Copy and store the Application (client) ID alongside your secret
Step 5: Configure in Courier
Step 5: Configure in Courier
Now that your Microsoft Teams app is ready, configure it in Courier: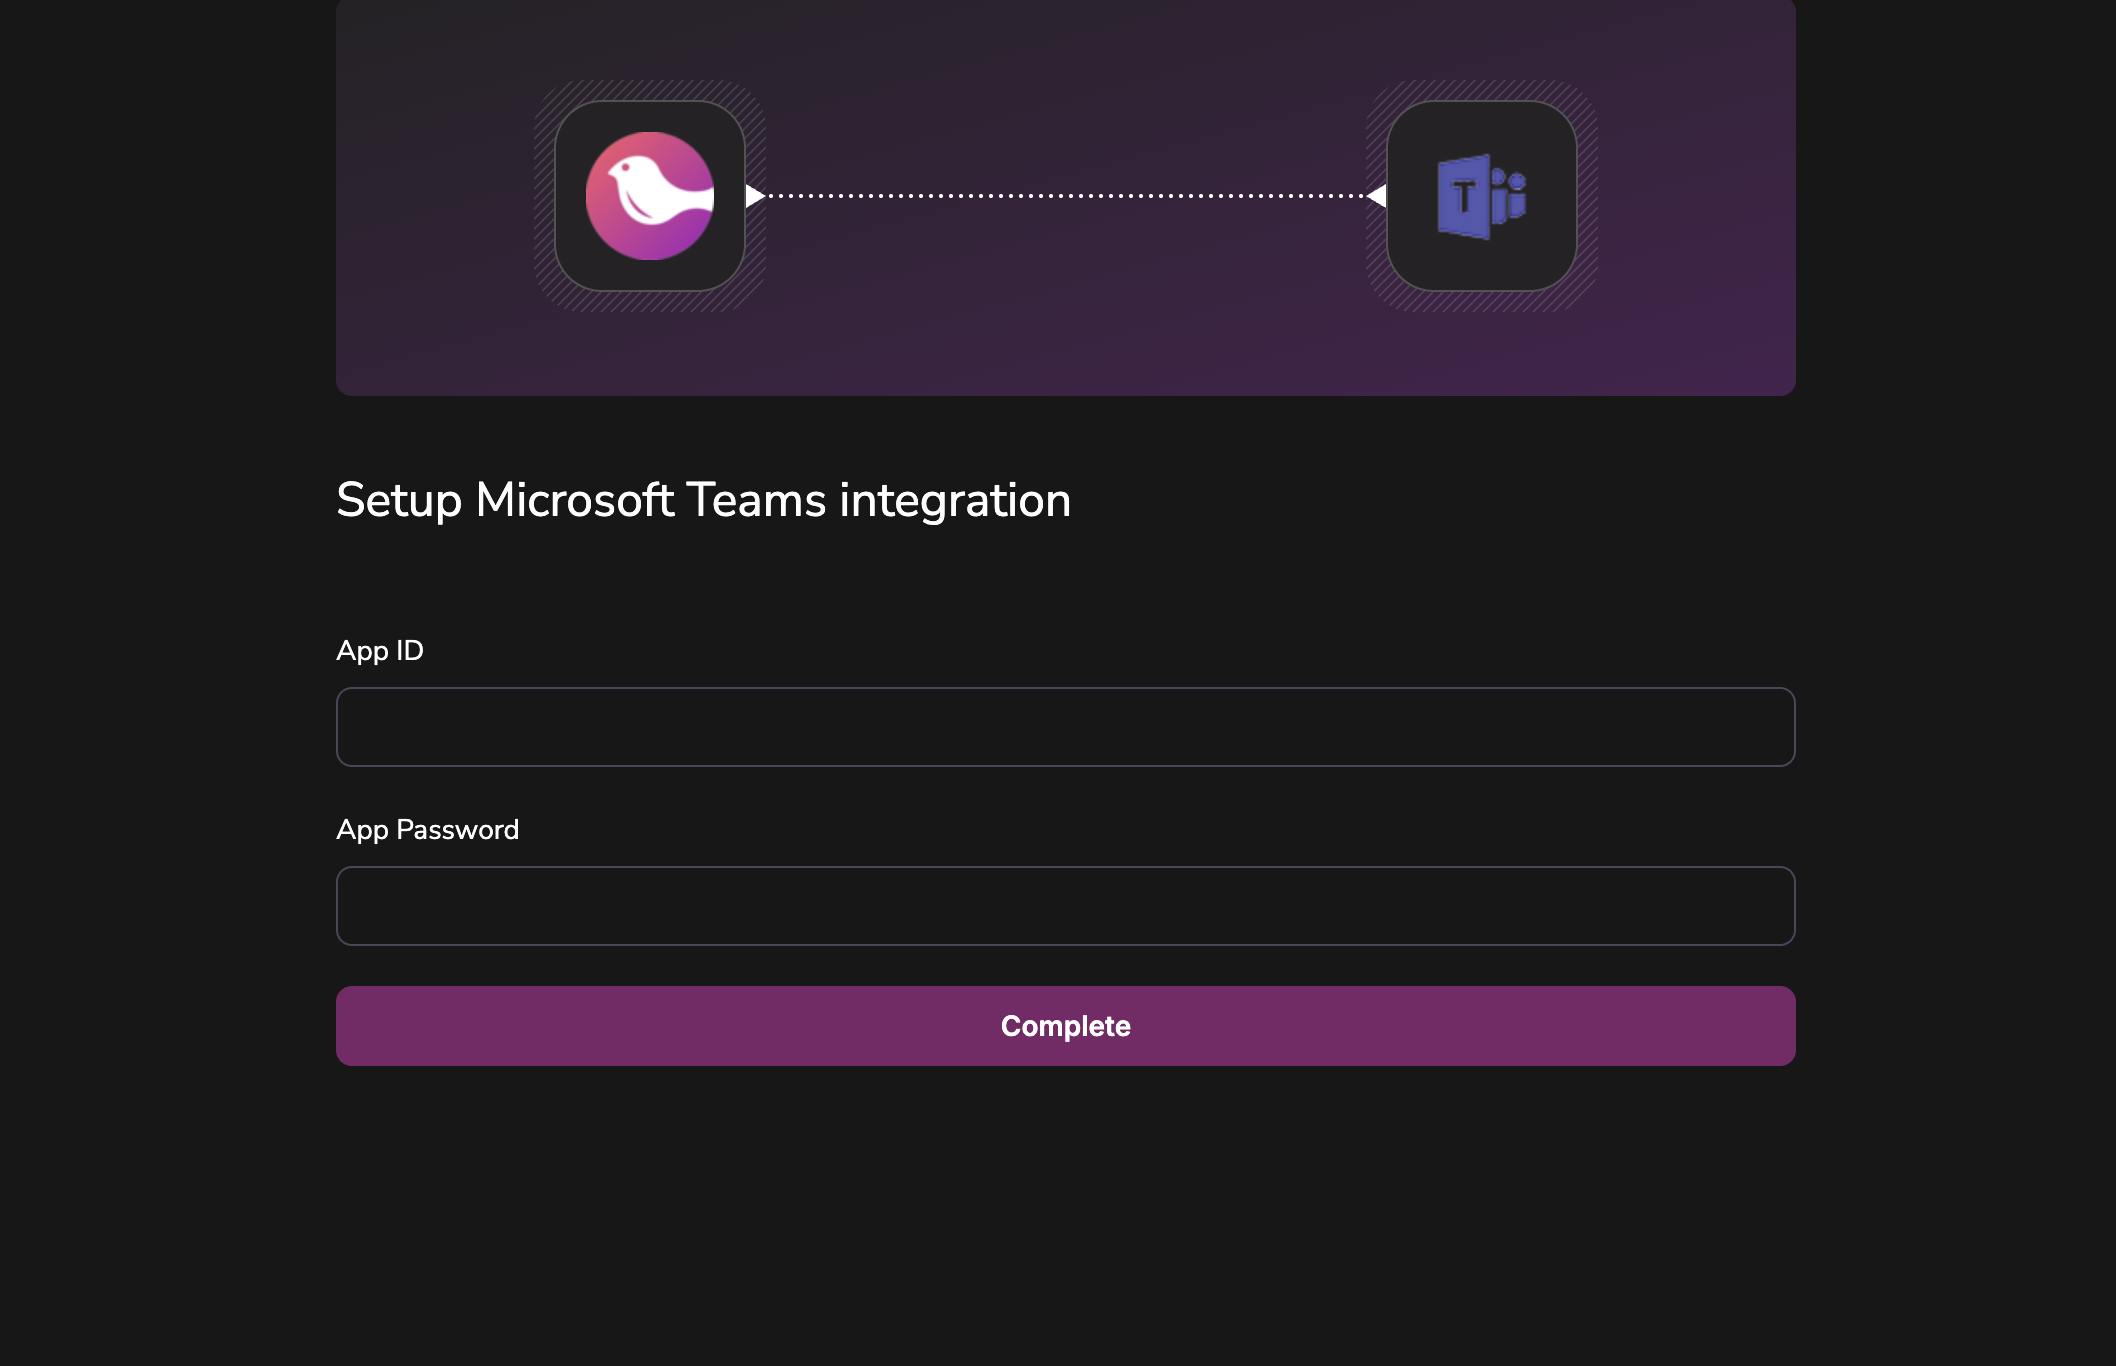
- Head to the Teams Integration in Courier.
- Enter your Application (client) ID from Azure and Client Secret from Azure, both from Step 4.
- Click Install Provider.
Courier’s integration requires the Application (client) ID and Client Secret from your Azure Bot App Registration (Step 4), not from the Teams Developer Portal. You can find these at:
- Azure Portal > App registrations > [Your Bot Name]: “Application (client) ID”
- Azure Portal > App registrations > [Your Bot Name] > Certificates & secrets: “Client secrets”
Step 6: Install App and Test
Step 6: Install App and Test
Install the App in Teams: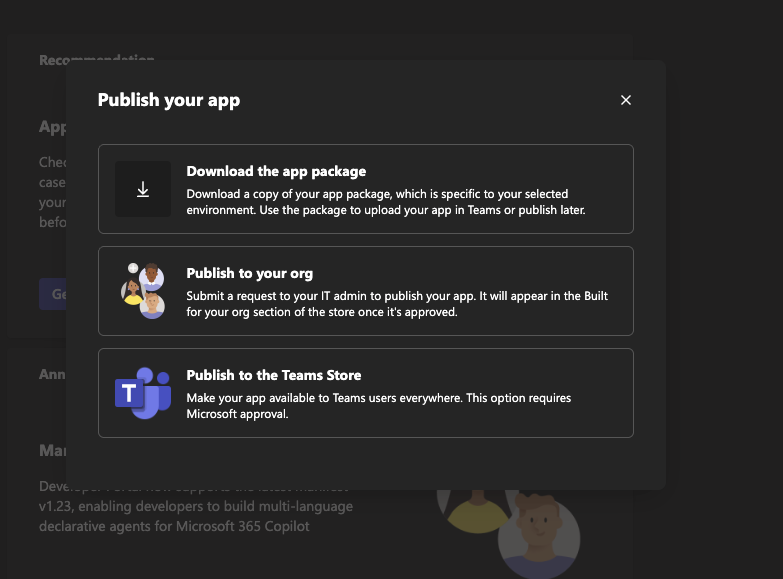
- Return to Apps > your app
- Click Publish. When prompted, select “Download the app package”
- Note: Ensure that you have filled in both short and long app descriptions within the Configure > Basic information section, as they are required fields in the app manifest. Your app will fail to install in Teams if these fields are left empty.
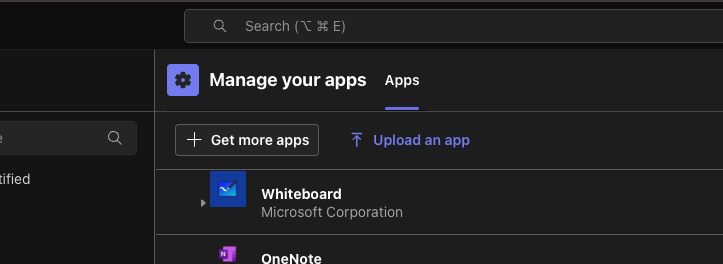
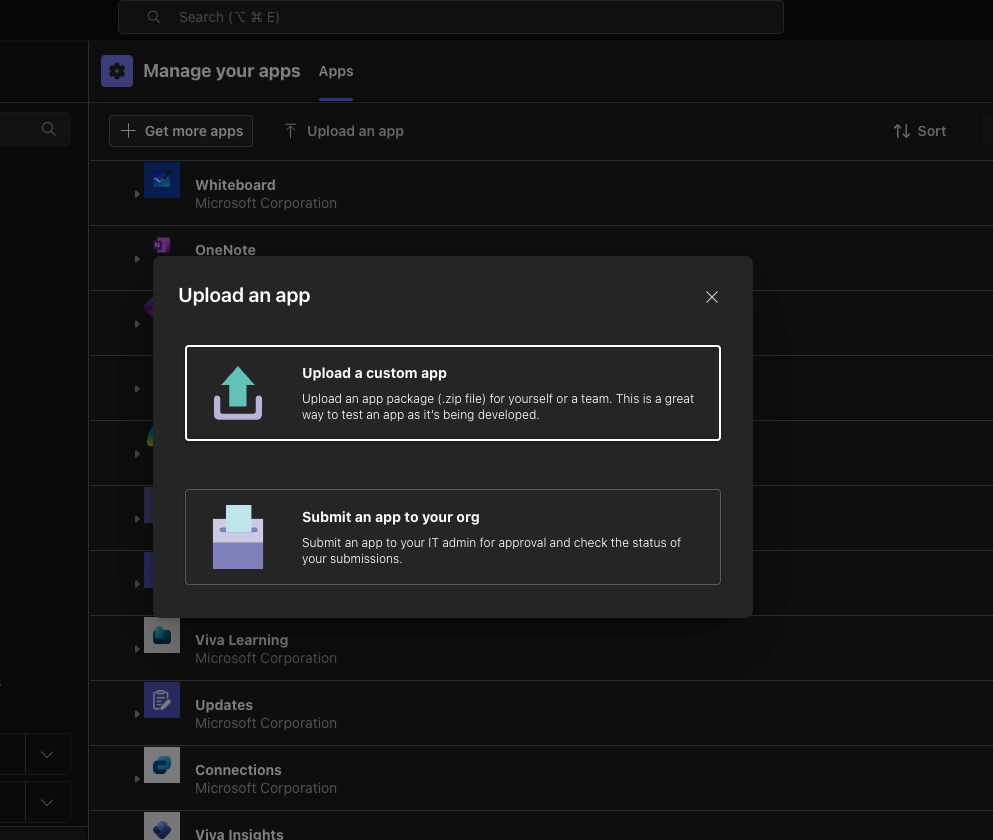
- Go to Microsoft Teams
- Navigate to Apps and select “Manage your apps” at the bottom
- Click “Upload an app” and select your downloaded app package
- When prompted, click “Add”
- Courier is now capable of sending messages to channels or members of your Teams
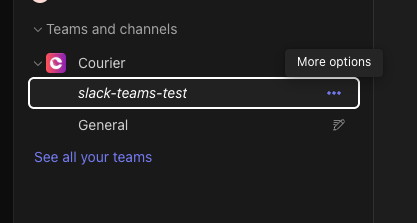
- Enter Microsoft Teams
- Hover over one of your channels. You should see an ellipsis icon you can click on. This will expose a menu item called “Copy link”. Click this option.
- You will see a URL similar to:
https://teams.microsoft.com/l/channel/19%3A5140d7460868414cac958ac76a0a94d0%40thread.skype/slack-teams-test?groupId=feb55fc1-9e00-40f3-93b8-f7d14703f4dd&tenantId=dabd1935-56a4-4305-938e-0840e2e84515 - Paste this string into a URL decoder, such as this one: https://meyerweb.com/eric/tools/dencoder/
- Copy the group ID. This is the identifier of the team. For example:
feb55fc1-9e00-40f3-93b8-f7d14703f4dd - Copy the channel name. In this example, it will be
slack-teams-test - Copy the tenant ID. In this example, it will be
dabd1935-56a4-4305-938e-0840e2e84515
- Return to Courier and create a new template.
- Select the Teams integration provider we created earlier in Step 5
- In the “Design” tab, create a basic text message. Refer to our Content Documentation if you need to learn how to use the designer.
- Click on the Preview tab. Create a “Test event”, which is a request you can use to send a message.
- Click “Create test event” and enter the following (make sure to use your own field values):
TestEvent
- Click “Publish”
- Navigate to the Send tab. Click “Send Test”
- Success!
Profile Requirements
To send notifications to Microsoft Teams, Courier requires the recipient’s user profile to include anms_teams object. This object must contain the following fields:
tenant_id: Your Microsoft Teams tenant ID.service_url: The service URL for your region (e.g.,https://smba.trafficmanager.net/amer).- One of the following identifiers:
user_idemailconversation_id- Combination of
team_idandchannel_name - Thread reply fields:
reply_to_activity_idandconversation_id
To find your 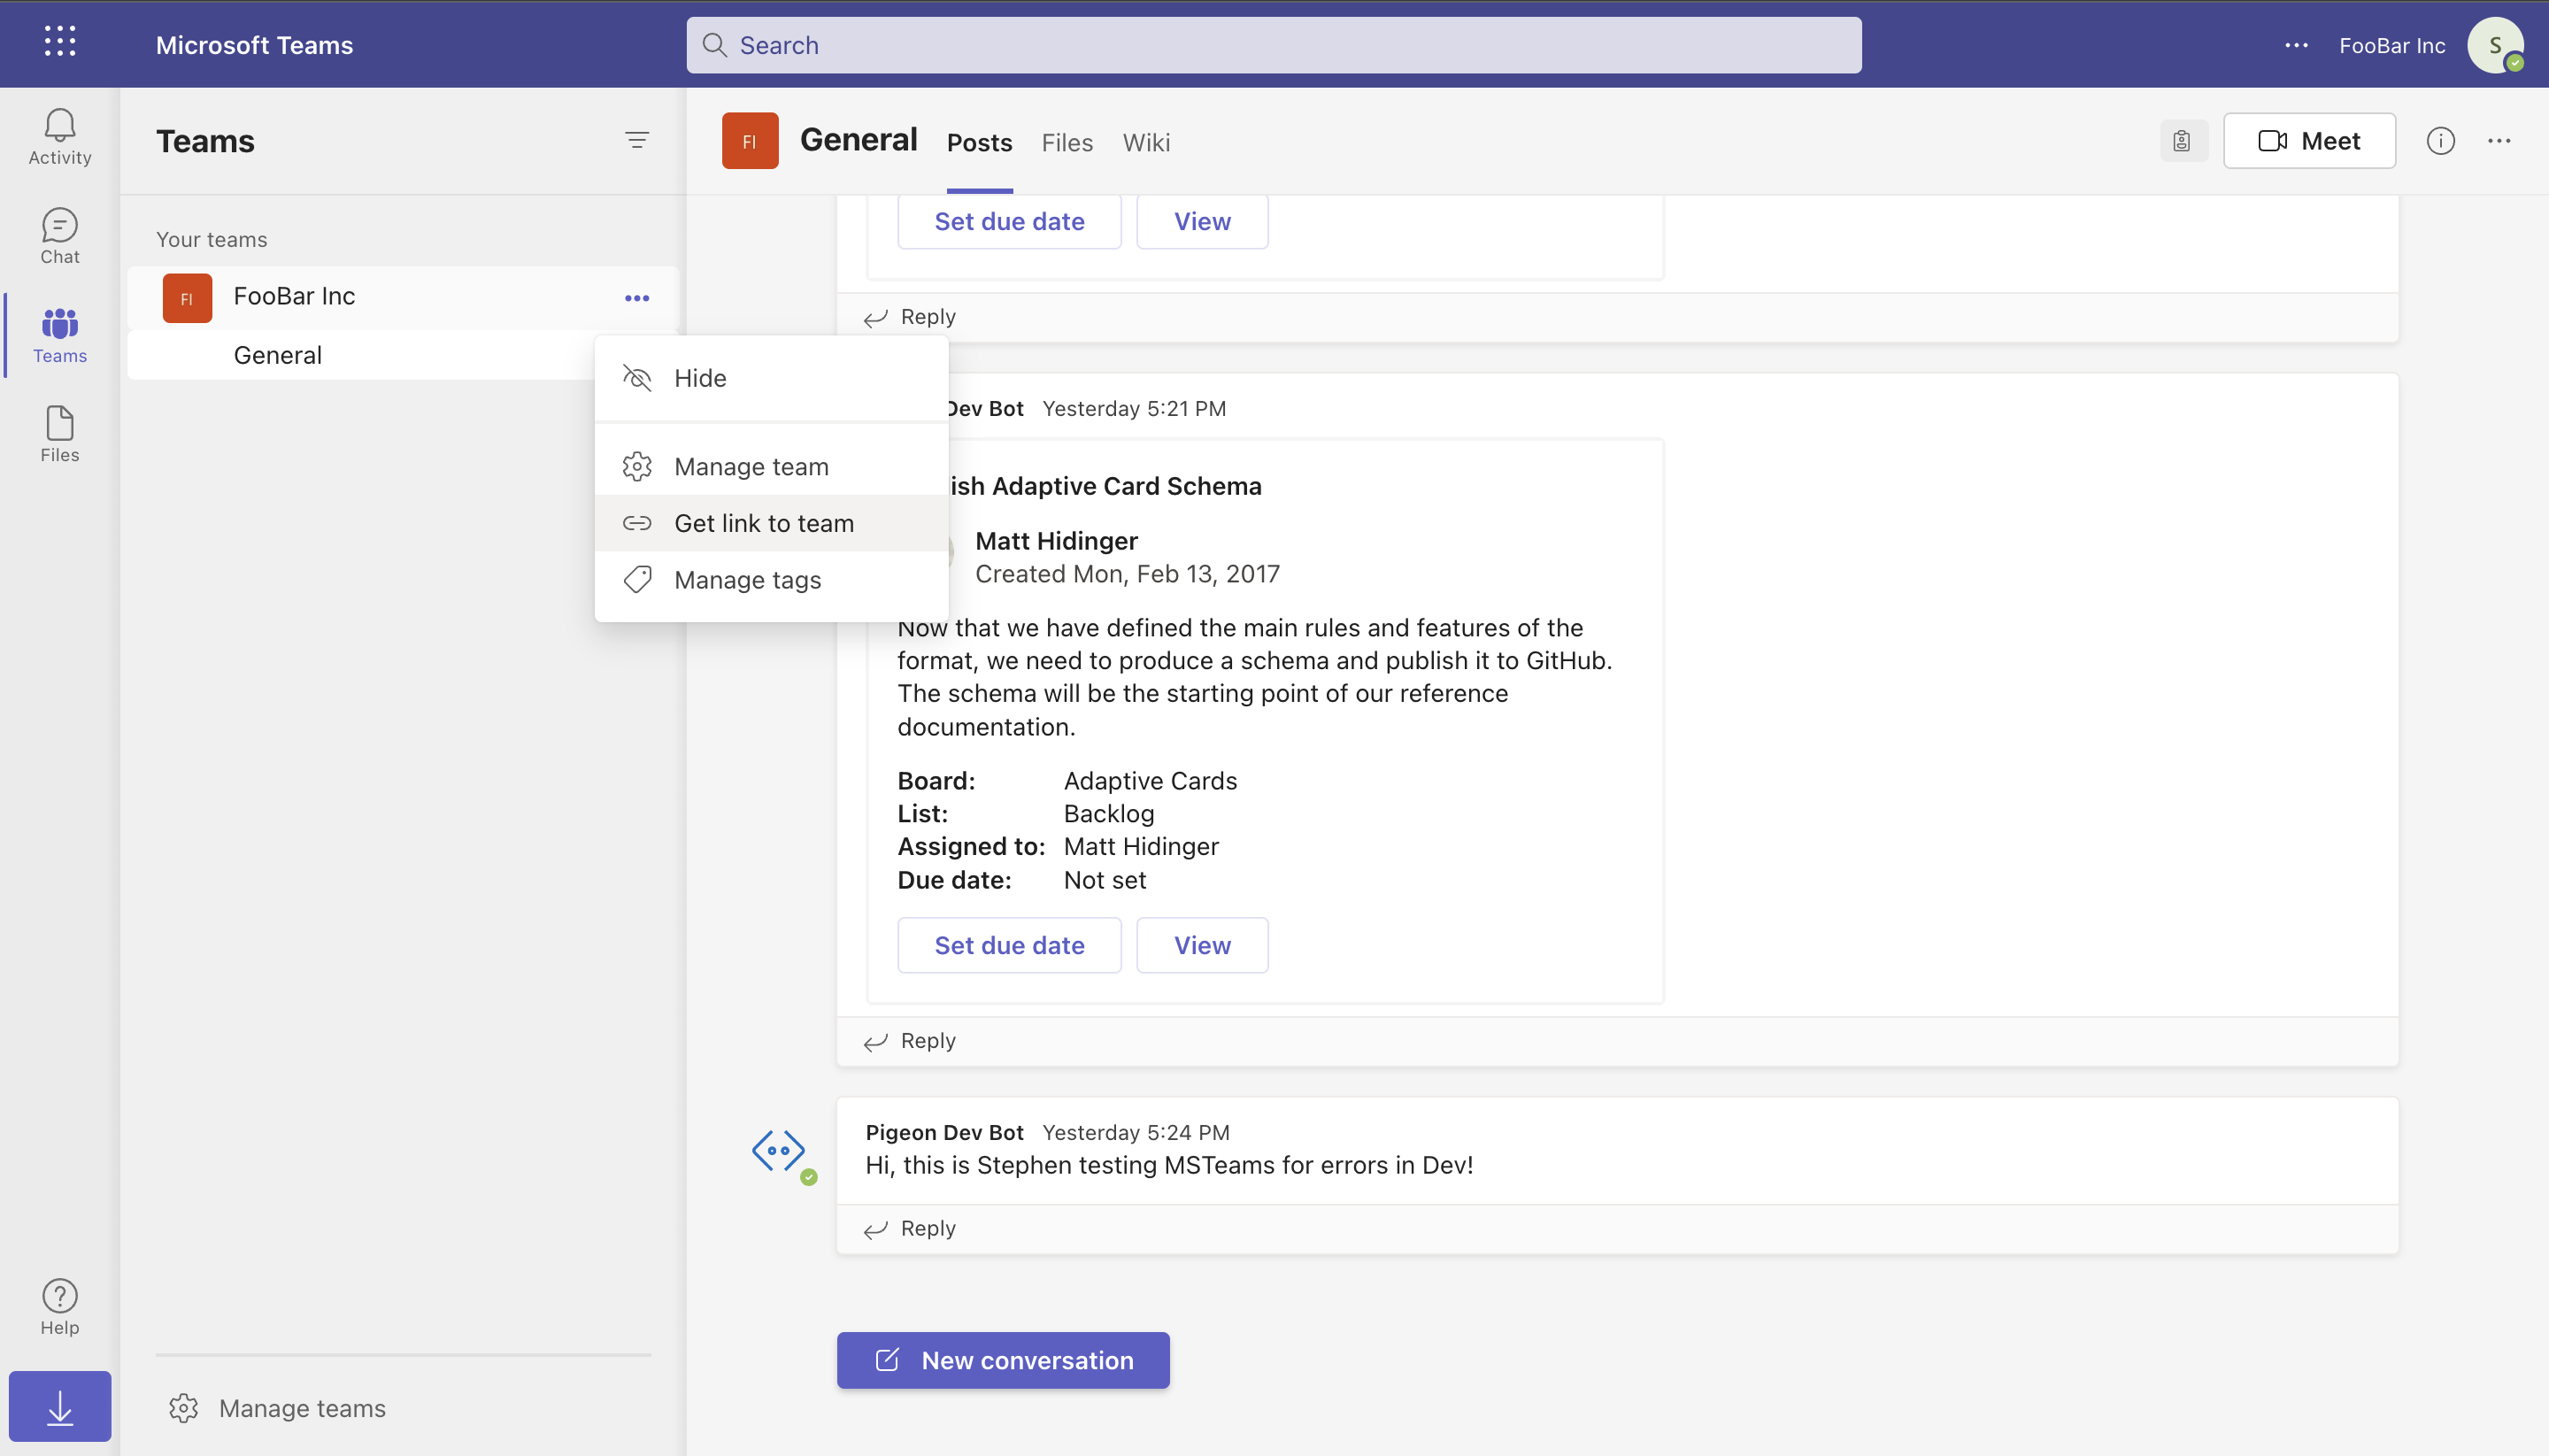
tenant_id, navigate to https://teams.microsoft.com/?tenantId and copy the tenantId query parameter from the redirected URL. If the parameter isn’t visible, click the three-dot menu next to your Team, select Get link to team, and locate the tenantId in the URL.For users in the Americas region, the standard service URL is
https://smba.trafficmanager.net/amer.To send messages using either
email or channel_name, your bot must have the following Microsoft Graph API permissions:ChannelSettings.Read.All(requires admin consent)TeamSettings.Read.All(requires admin consent)User.Read.All
user_id or channel_id using the Microsoft Graph API.Using a tenant_id
tenant_id now conditionally required based on operation type. Now only required for the following operations:
- send directly to a user when
user_idis provided - send directly to a user when
emailis provided - send to a channel when only a channel name is provided, requiring lookup of channel id from channel name
tenant_id extraction from service_url path segments (can be either specified on service_url, or as a body param, or both (but only if they are the same value)
tenant_id is only placed on provider:sent and provider:delivered event payloads if it is included in the request, as that is the only time it will be known. You should be able to respond to messages even if tenant_id is not known — it is not needed for this action.Thread Replies
Courier’s Microsoft Teams integration supports thread replies, allowing messages to be posted as replies to existing messages in channels rather than as new root-level messages. When Courier sends a message to Microsoft Teams, the Bot Framework returns reference data including anactivityId and conversationId in the provider:sent event. This reference data can be used to reply to that specific message in a threaded conversation.
Thread Reply Overview
The Flow:- Send a root-level message to any Teams channel
- Look up the sent event (via API, webhook, or Courier UI) to get the
activityIdandconversationId - Use those identifiers to send channel thread replies
Important Notes:
- Channel Threading Only: Thread replies are only supported in Teams channels, not in personal (1:1) conversations or group chats due to Microsoft Teams platform limitations.
- Works in All Channel Types: Thread replies work in standard channels, private channels, and shared channels.
- Reference Data Required: You need the
activityIdandconversationIdfrom a previous message’sprovider:sentevent. - Threading Validation: Courier validates thread reply configurations and provides clear error messages for invalid field combinations.
- Send Initial Message:
- Get Reference Data from provider:sent Event:
provider:sent event contains the reference data you need. You can access this through:
- Courier API: Query message details to get the
provider:sentevent data - Courier UI: View message details in the Messages section of your dashboard
- Webhooks (if configured): Receive reference data automatically when messages are sent
provider:sent event:
- Send Thread Reply:
Thread Reply Configuration
Getting Reference Data Reference data is available through multiple channels:- Courier API Query message details using Courier’s API to retrieve the reference data from the message logs.
-
Courier UI (Messages Log)
Navigate to your Courier dashboard and view the message details in the Messages section. The
provider:sentlog will contain the reference data. - Webhook Delivery (Optional) If you have webhooks configured, Courier automatically delivers reference data when messages are sent:
-
Required Fields:
reply_to_activity_id: The activity ID from the original message’s reference dataconversation_id: The conversation ID from the original message’s reference datatenant_id: Your Microsoft Teams tenant IDservice_url: Your Teams service URL (optional, uses default if not provided)
-
Field Restrictions:
When using
reply_to_activity_id, you cannot include:channel_idorchannel_name+team_id(channel targeting fields)user_idoremail(user targeting fields)
conversation_iddetermines the thread location automatically.
- “Thread replies require ‘conversation_id’”: Include the
conversation_idfrom the original message’s reference data. - “Thread replies cannot use channel targeting fields”: Remove
channel_id,channel_name, andteam_idwhen usingreply_to_activity_id. - “Thread replies cannot use user targeting fields”: Remove
user_idandemailwhen usingreply_to_activity_id.
When using threading fields, do not include channel targeting (
team_id, channel_name, channel_id) or user targeting (user_id, email) fields, as the conversation_id determines the message destination.Microsoft Teams Channel ID Reference
When sending messages to a Teams channel through Courier, theconversationId returned in delivered event webhooks is the channel ID. They are the same value.
Understanding the Relationship
In Microsoft Teams Bot Framework, a channel’s identifier serves as its conversation ID. When you send a message to a channel, you’re posting to a conversation that represents that channel. The Bot Framework returns this conversation identifier in the response, which Courier surfaces asconversation_context.conversationId in delivered event webhooks.
Sending an Initial Message
conversationId value 19:a52e21710de34c65b9f2e09ededaad2a@thread.skype is the channel ID for the “General” channel.
Replying in a Thread
To reply to this message, use both theactivityId and conversationId from the webhook:
conversationId:
conversationId remains constant because it represents the channel itself. Only the activityId changes with each new message.
Getting Channel IDs Directly from Teams
You can obtain a channel ID directly from the Teams application without sending a message first. Navigate to the Teams web app at https://teams.microsoft.com/v2/, select your target channel, and click the ellipsis (⋯) icon in the upper right corner. Choose “Get link to channel” to copy a URL like:/channel/ in URL-encoded format. Decode 19%3Aa52e21710de34c65b9f2e09ededaad2a%40thread.skype to get 19:a52e21710de34c65b9f2e09ededaad2a@thread.skype.
Sending Directly with conversation_id
When you know the channel ID upfront, you can send messages usingconversation_id instead of looking up the channel by name:
conversationId because it’s already the channel ID.
Technical Details
Channel IDs in Microsoft Teams follow the format19:{guid}@thread.skype or 19:{guid}@thread.tacv2 depending on the Teams infrastructure version. These identifiers are stable and unique per channel within a tenant. When combined with tenantId, they globally identify a specific channel.
The Bot Framework uses these channel IDs as conversation identifiers when posting to channels. Thread replies require both the conversationId (channel ID) and the reply_to_activity_id (the message being replied to). The URL construction for threaded replies uses a special format {conversationId};messageid={activityId}, but the stored conversationId in the response remains just the channel ID without any suffix.
For more information on Microsoft Teams integration with Courier, see https://www.courier.com/docs/external-integrations/direct-message/microsoft-teams
Advanced Features
Overrides
Overrides allow you to change the Azure Bot’s App ID and App Password directly within your Courier message payload:Adaptive Cards
Courier supports Microsoft Teams Adaptive Cards through Jsonnet blocks within the Template Designer. Adaptive Cards let you create interactive, visually appealing notifications for your users in Microsoft Teams.Using Jsonnet Blocks
Jsonnet blocks enable you to customize the appearance and functionality of Adaptive Cards sent through Microsoft Teams. Follow the steps below to create and send your first Adaptive Card:- In Courier’s Template Designer, add a new Microsoft Teams channel.
- Insert a Jsonnet block within your message.
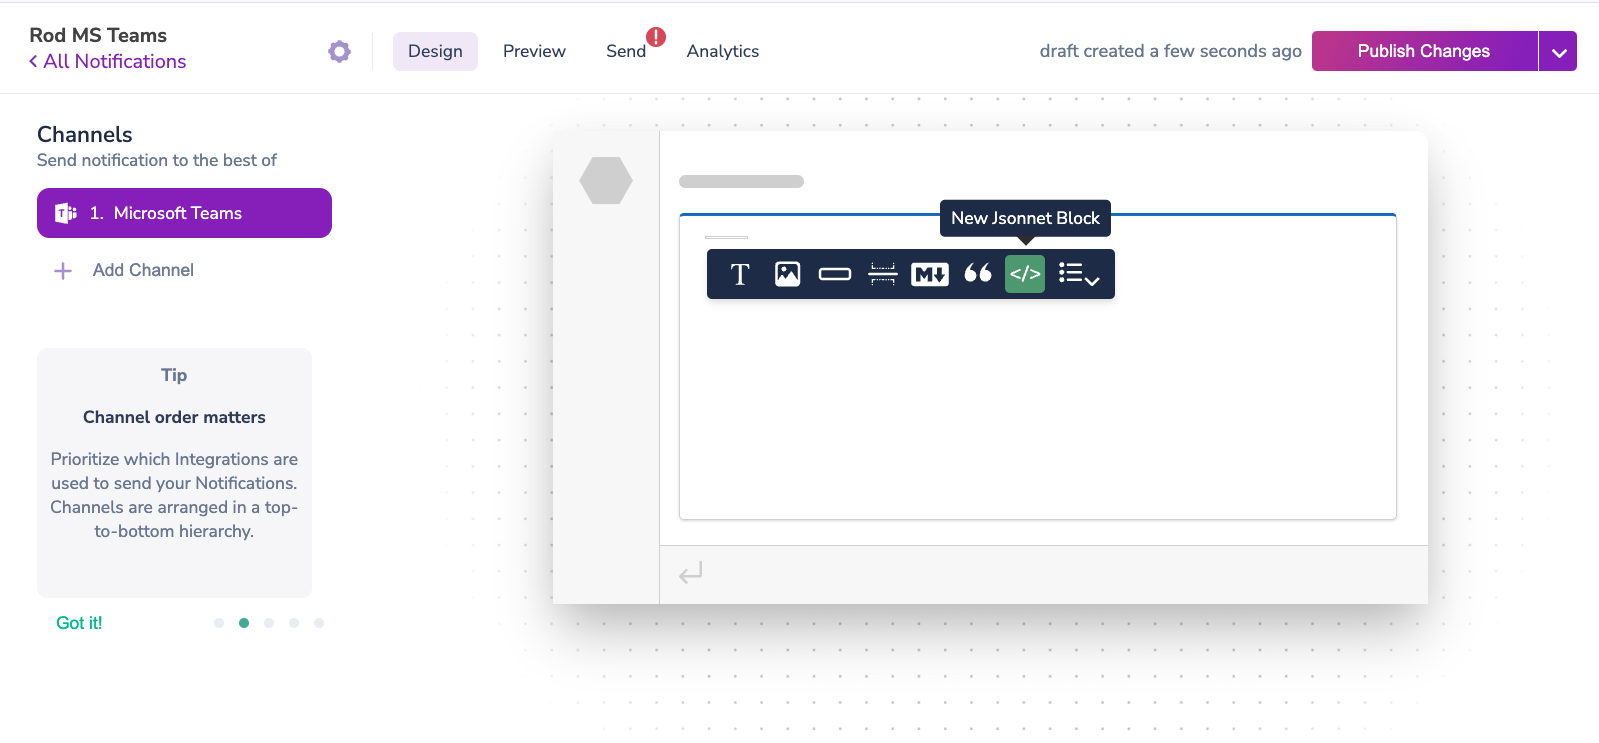
- Open the Adaptive Cards Designer and select or create a card layout.
- Copy the card JSON from the “Card Payload Editor” into your Courier Jsonnet block.
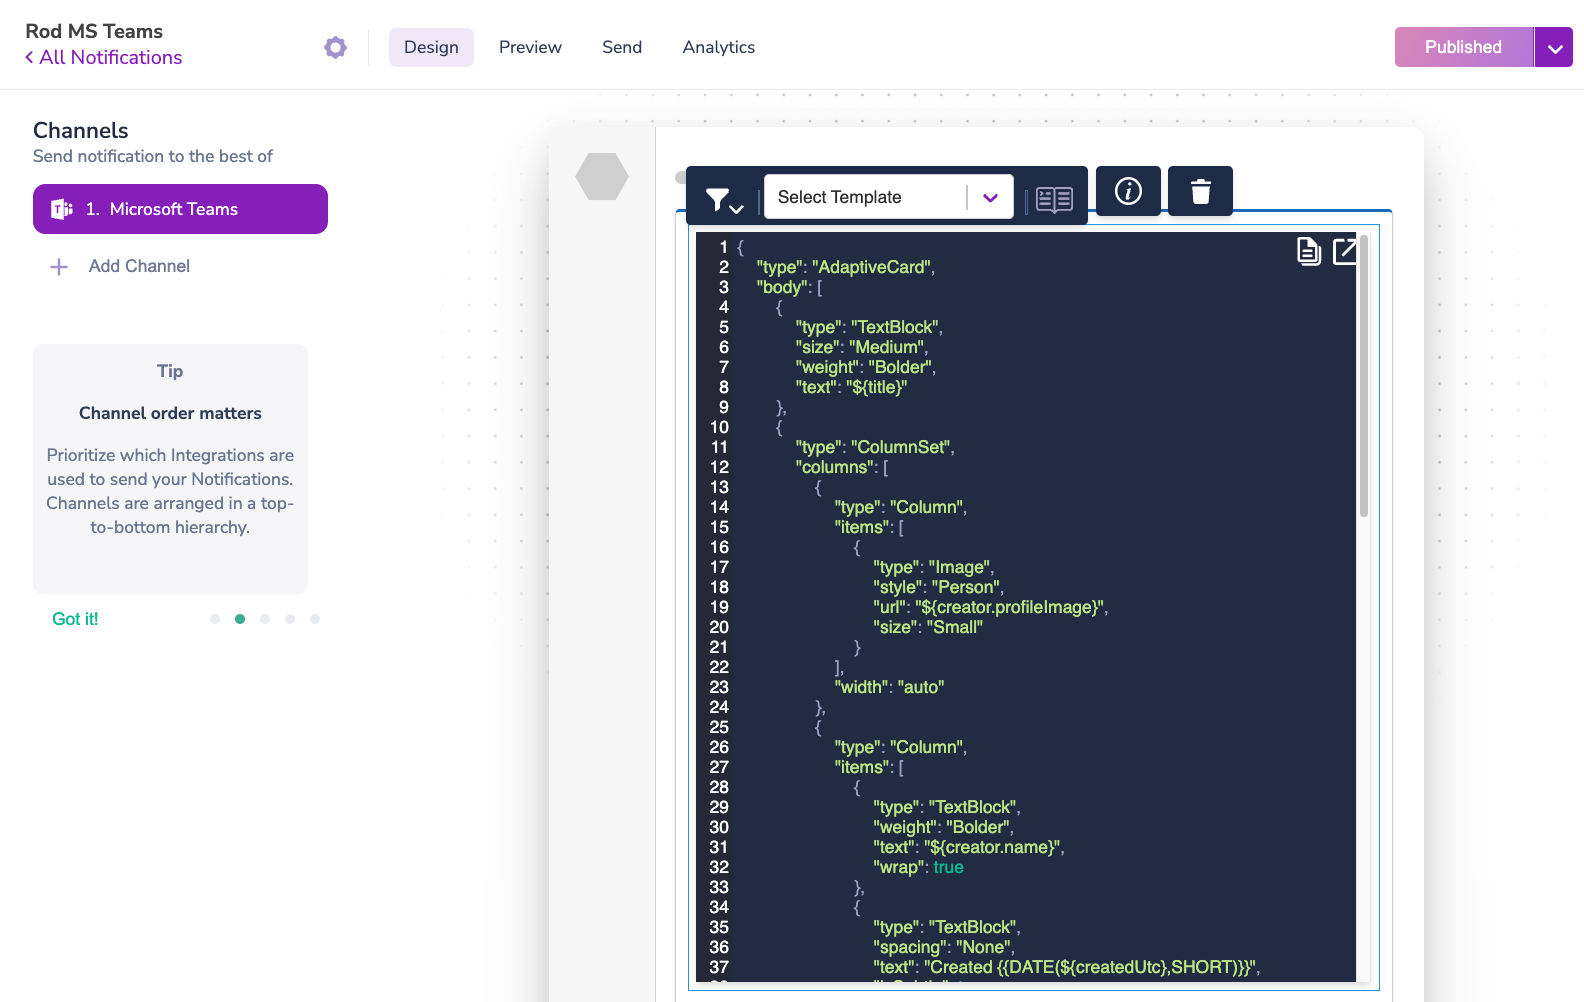
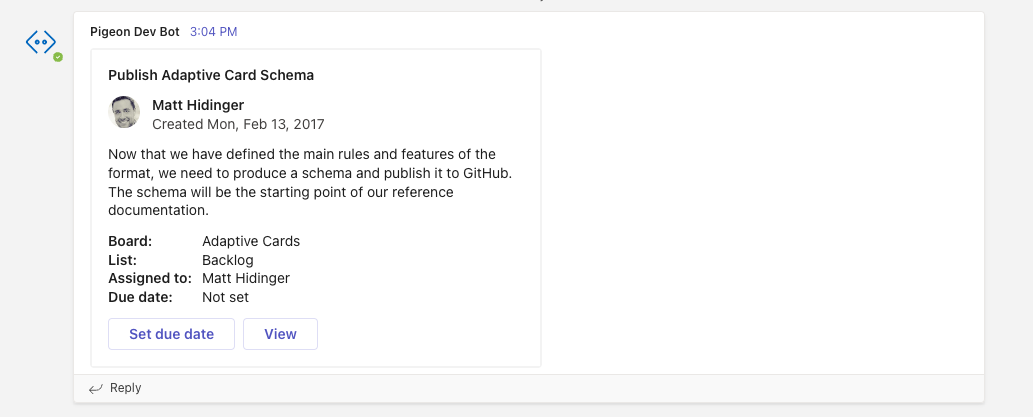
Sending an Adaptive Card
When sending your Adaptive Card, ensure your Courier message includes the necessary sample data from the Adaptive Cards Designer:ms_teams object with the appropriate fields (e.g., conversation_id). Once sent, your Adaptive Card will appear in Microsoft Teams:
Using @Mentions in Adaptive Cards
To include mentions in Adaptive Cards, you’ll need two key elements:<at>username</at>within the Jsonnet block.- A corresponding
entitiesobject within the Adaptive Card JSON payload, including the Teams user ID of the mentioned individual.
Troubleshooting
401 Authentication Error
If you seeAll Bot Framework authentication methods failed with status code 401:
- App not installed in the team (channel messages only): Uploading the app to Teams enables personal messaging, but for channel messaging the app must be installed in each specific team. See Step 6 for instructions. This is the most common cause when user messages succeed but channel messages fail.
- Wrong credentials in Courier: Courier requires the Application (client) ID and Client Secret from the Azure Bot App Registration (Step 4), not the Teams App ID from the Developer Portal (Step 1). These are different values.
- Single-tenant App Registration: In Azure Portal > App registrations > [Your Bot] > Authentication, ensure “Supported account types” is set to “Accounts in any organizational directory” (Multitenant). The Azure default is single-tenant, which breaks Bot Framework authentication.
- Expired client secret: Navigate to Azure Portal > App registrations > [Your Bot] > Certificates & secrets and check the expiration date. If expired, create a new secret and update it in Courier’s Teams integration settings.
- Missing
tenant_id: Ensure your message profile includestenant_idin thems_teamsobject. Without it, tenant-scoped authentication cannot be attempted.
Messages to Users Work but Channel Messages Fail
This almost always means the app is not installed in the team that owns the target channel. See item 1 above and Step 6 for installation instructions.Credential Confusion Between Azure App Registrations
The setup process creates two Azure App Registrations:- Step 2 App Registration: Used in the Teams Developer Portal configuration (Step 3). This is the parent application.
- Step 4 Bot App Registration: Used in Courier’s integration settings (Step 5). This provides the bot credentials.