A push notification is a type of communication that can be used to deliver messages on mobile and web applications. It can be used to keep users engaged and improve the application's experience. Furthermore, push notifications can deliver various promotions and personalized communications.
This article will walk you through the three best options for sending push notifications in your Cordova application while discussing the pros and cons of each approach to give you a better understanding.
Cordova is a leading open-source mobile development framework that builds cross-platform mobile applications and Progressive Web Apps. The implementation of push notifications in Cordova can be done in many ways. I will introduce the top three options (Firebase (FCM), One Signal, and WanderPush), discuss their pros/cons and follow it up with an implementation guide for each.
1. Using Firebase Cloud Messaging (FCM)
Firebase is one of the most popular platforms used to create web and mobile applications. It offers a cross-platform messaging solution called Firebase Cloud Messaging (FCM), enabling free message sending. In addition, FCM offers many push notification capabilities, such as user grouping and customization.
Pros of Using FCM
- A wide range of services and features.
- Free basic plan.
- Concise documentation.
- Quick and easy integration and setup.
Cons of Using FCM
- Limited data migration
- Android-centered & less support for iOS
- Real-Time synchronization issues.
- Limited querying capabilities.
Tutorial: How to Implement Push Notifications with FCM
This approach uses Firebase and cordova-plugin-FCM plugin to implement push notifications.
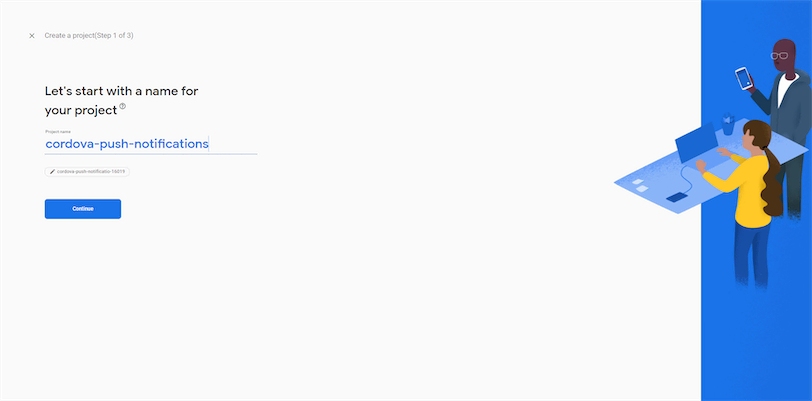
Step 1 - Creating a new Firebase project
First, you need to create a Firebase account and a new Firebase project. Then, you can use your existing Google account to sign in to the Firebase console. If you are using Firebase for the first time, you will see a screen like the one below. If not, you will see your existing project list.
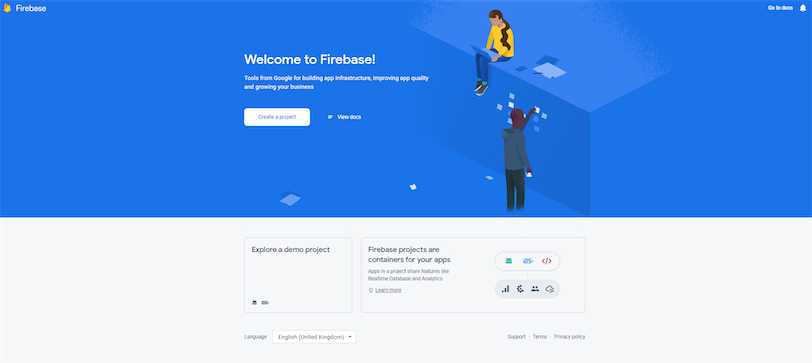
Then, you can create a new Firebase project by clicking the Create a Project button.
Step 2 - Enable Cloud Messaging
After creating the project, select the Cloud Messaging service under the Engage section from the left menu.
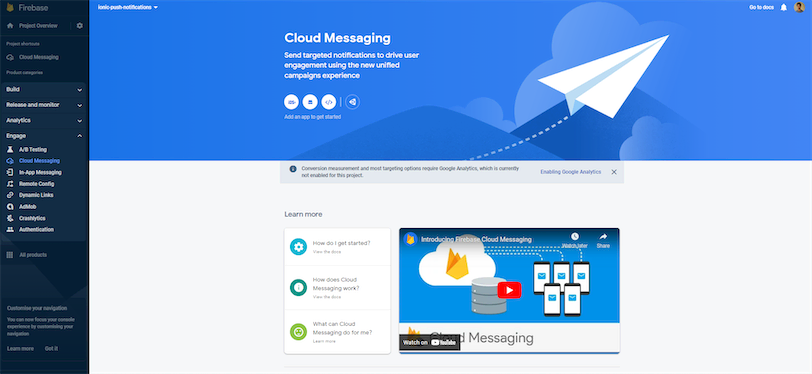
You will see four options to add a new application: iOS, Android, Web, and Unity. For this example, I will be using the Android option.
After clicking the Andriod option, you will be redirected to a new wizard. There you need to enter the package name of your Cordova application.
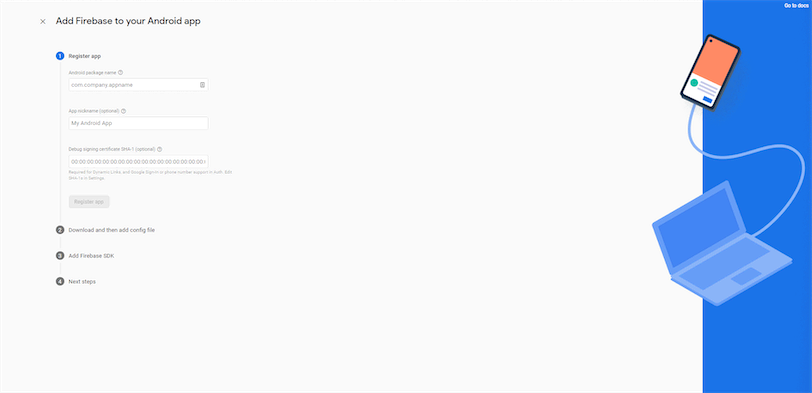
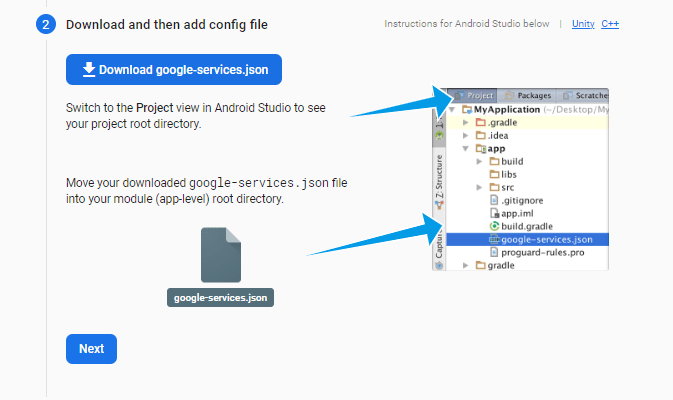
Then, it will give you a file named google-services.json. Make sure to download and add it to your project folder.
Then, follow the steps given by the wizard to add the Firebase SDK and finish the wizard.
Step 3 - Installing the Cordova FCM plugin
You need to install the below plugins to your project.
1
cordova plugin add cordova-plugin-fcmStep 4 - Updating the code
After installing the plugin, you can update your component with the below functions to enable push notification receiving for the application.
1
2
3
4
5
6
7
8
9
10
11
12
13
14
15
16
17
18
19
20
21
22
23
24
25
26
27
28
// Get Token
// This function will return null if the token has not been established yet.
FCMPlugin.getToken(function(token){
  alert(token);
});

// Receive Refresh Token
// This callback will be fired every time a new token is generated, including the first time.
FCMPlugin.onTokenRefresh(function(token){
  alert( token );
});

// Subscribe to topic
FCMPlugin.subscribeToTopic('topic');

// Unsubscribe to topic
FCMPlugin.subscribeToTopic('topic');

// Reveice Push Notifiction Data
FCMPlugin.onNotification(function(data){
  if(data.wasTapped){
   //Notification was received on device tray and tapped by the user.
   alert( JSON.stringify(data) );
  }else{
   //Notification was received in foreground. Maybe the user needs to be notified.
   alert( JSON.stringify(data) );
  }
});
Step 5 - Sending Push Notifications
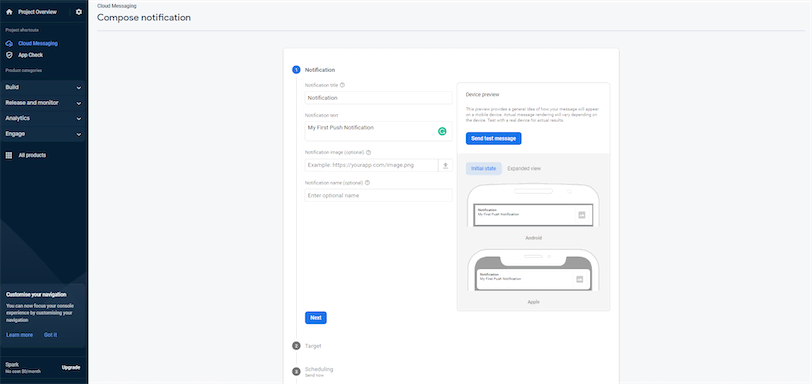
Now, your application is ready to receive push notifications. You can go to the Firebase console and easily create push notifications.
2. Using OneSignal
OneSignal is a notification service that allows developers to easily integrate push notifications into their web and mobile applications. It is highly scalable and comes with features like real-time reporting, segmentation, and automated messaging. OneSignal also allows you to send SMS, emails, and in-app communications in addition to push alerts. OneSignal has four pricing tiers: Free, Growth, Professional, and Enterprise.
Pros of Using OneSignal
- Easy to integrate.
- Omnichannel support is available.
- Excellent documentation.
Cons of Using OneSignal
- It costs a lot more than the alternatives.
- Support is only offered in English.
- Monitoring performance might be difficult.
Tutorial: How to Implement Push Notifications with One Signal
This approach uses OneSignal, onesignal-cordova-plugin, and Firebase to implement push notifications.
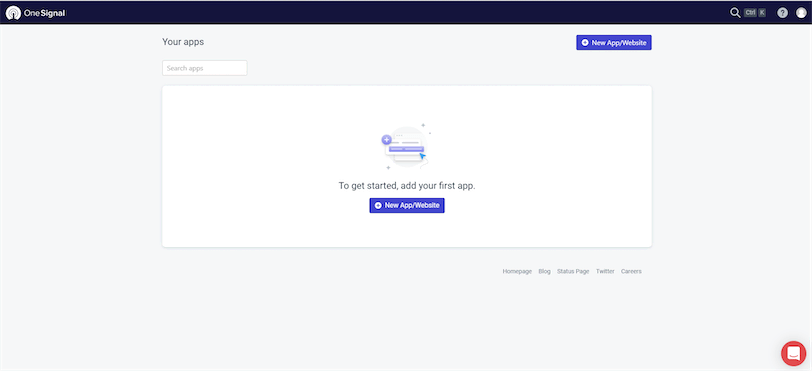
Step 1 - Creating a OneSignal account
You can easily create a free OneSignal account by visiting their registration page. After registration, go to the Apps page, and you will see a UI like the one below:
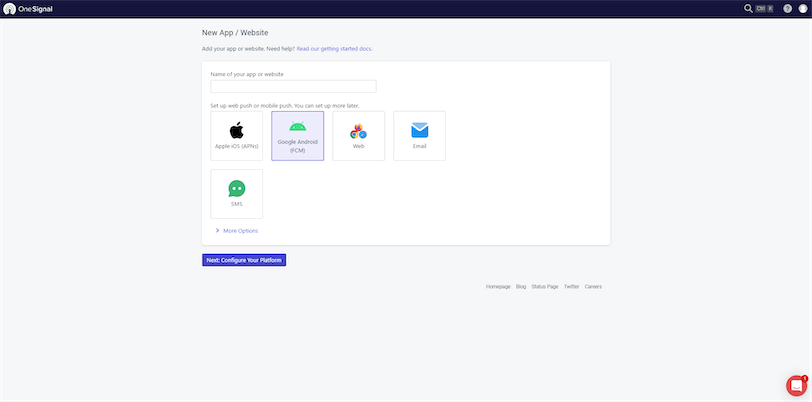
Step 2 - Creating a new OneSignal app
Then, click on the New App/Website button to create a new app. You will see a list of application platforms supported by OneSignal. For this example, I will use Google Andriod.
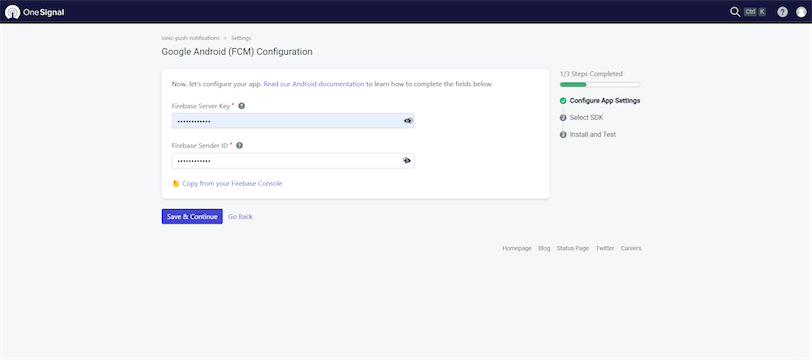
 After that, you must enter Firebase Server Key to configure the application. If you already have a key, you can copy a key from the Firebase console. If not, follow this guide to create a new Firebase Server key.
Next, select Cordova as the target SDK.

You will be given an App ID on the following screen. Save it since you'll need to include it in your application.
Step 3 - Installing plugins
You need to install onesignal-cordova-plugin to your project.
1
npm install onesignal-cordova-pluginStep 4 - Updating the code
After installation, update the onDeviceReady() function in the index.js file located inside the www folder with the below code:
1
window.plugins.OneSignal.setAppId("YOUR-APP-ID");Step 5 - Sending Push Notifications
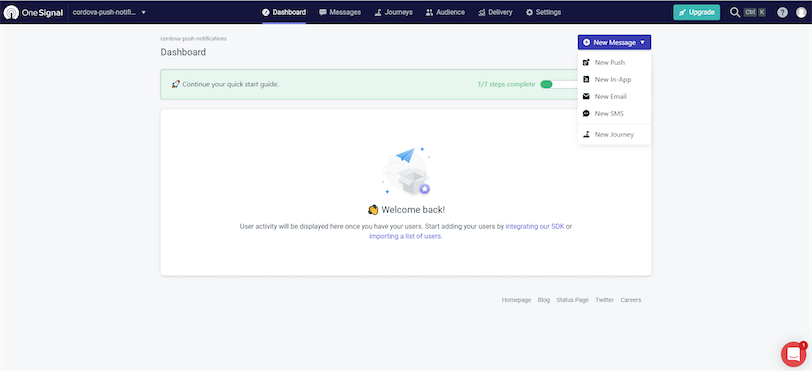
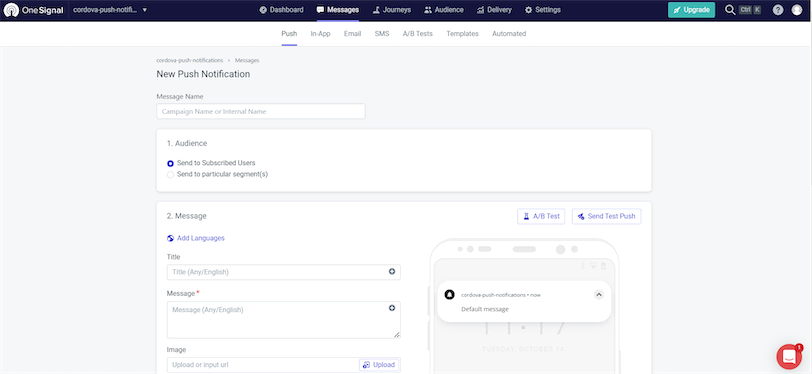
Now, your application is ready to receive push notifications. You can go to the OneSignal console and create push notifications by selecting the New Push option under the New Message dropdown.
3. Using WonderPush
Another platform for sending push alerts that is similar to OneSignal is WonderPush. It features a RESTful API, a complete dashboard for creating alerts and analyzing their outcomes, and it complies with GDPR. It also supports all of the commonly used native mobile and web platforms.
WonderPush starts with a 14-day trial period and offers packages from 1 EURO per month afterward.
Pros of Using WonderPush
- Easy to set up new notifications.
- Supports segmentation and scheduling options.
- Easy automation.
- Great customer support.
Cons of Using WonderPush
- Subscription-based service.
- Support and tutorials are only available in English.
Tutorial: How to Implement Push Notifications with WonderPush
This approach uses WonderPush, wonderpush-cordova-sdk, and Firebase to implement push notifications.
Step 1 - Creating a WonderPush account
You can easily create a free WonderPush account by visiting their registration page. You will see a screen like the one below once you log in:
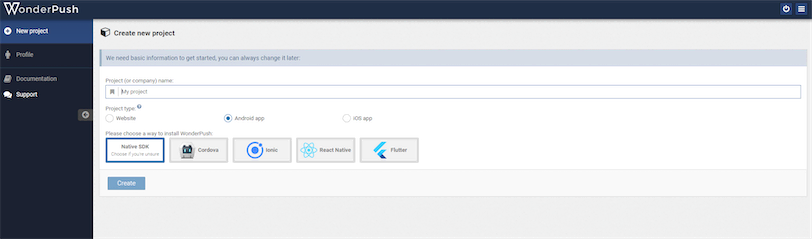
Step 2 - Creating a new WonderPush app
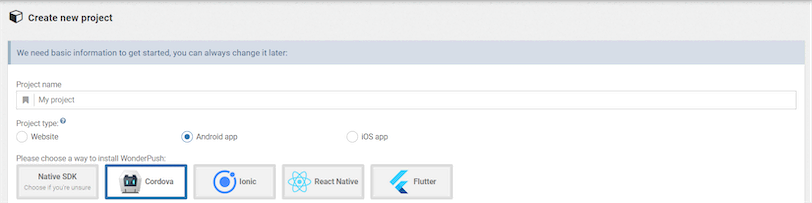
Then, enter a project name, select android as the project type, and Cordova as the SDK.
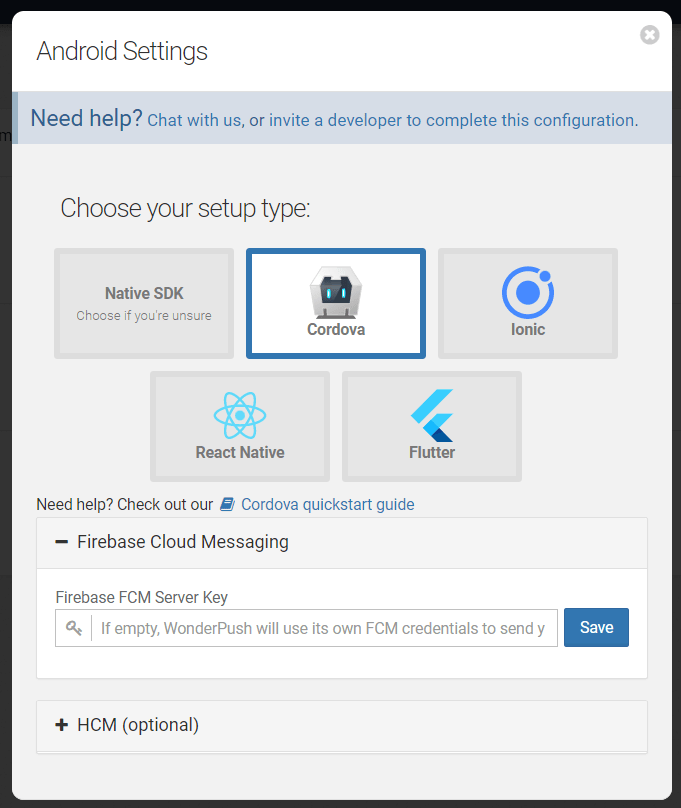
After that, you need to enter Firebase Server Key. If you already have a key, you can copy a key from the Firebase console. If not, follow this guide to create a new Firebase Server key.
Step 3 - Installing plugins
You need to install the following plugins:
1
2
cordova plugin add wonderpush-cordova-sdk --variable CLIENT_ID=YOUR_CLIENT_ID --variable CLIENT_SECRET=YOUR_CLIENT_SECRET
cordova plugin add wonderpush-cordova-sdk-fcm --variable SENDER_ID=YOUR_SENDER_ID
You can find the Client ID and Client Secret from the Platforms tab of the WonderPush Settings page.
Step 4 - Updating the code
Now, update your index.js file with the below code. It will create a push notification subscription for your application.
1
2
3
4
5
function onDeviceReady() {
  WonderPush.subscribeToNotifications();
}

document.addEventListener('deviceready', onDeviceReady);
Step 5 - Sending Push Notifications
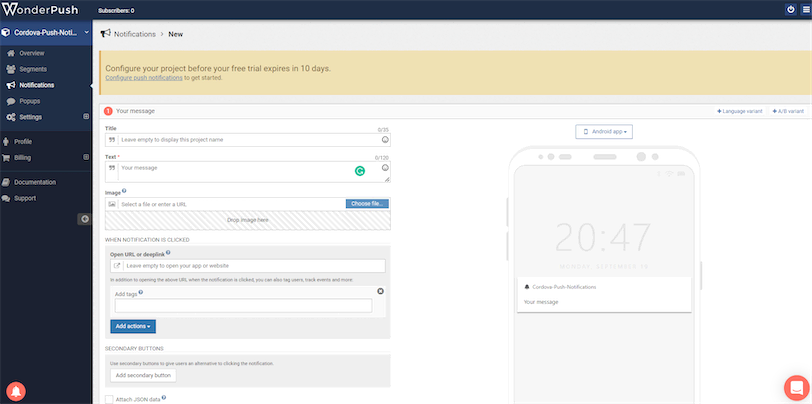
Now, your application is ready to receive push notifications. For that, you need to go to the WonderPush console, select the Notifications tab, and press Create notification button.
Wrapping It Up
This article discussed three methods for implementing push notifications with Cordova: FCM, OneSignal, and WonderPush. You can easily get started with any of these methods with a basic understanding of programming. I hope this article will help you to implement push notifications for your Cordova application and enhance the user experience.
