Since the advent of smartphones, app creators have wanted a way to reach their users, even when they weren't using the app. Thus, the concept of push notifications was born. A push notification is a message displayed on the user's phone that's triggered by something that happened in an application, even if it wasn't being actively used at the time. An example might be the notification that pops up when you get a message in Slack or a notification about a recent news headline from one of your news reader apps. Push notifications provide a way for apps to reengage users and keep them coming back.
When building applications with React Native, there are a few different ways to implement push notifications. This article examines some of the most popular methods to ensure your application is sending timely and relevant push notifications to users. The various tools covered here manage and send notifications to React Native applications. Sample code for a React Native application and a Node.js application that triggers these notifications are also included.
You can find an example Node application that can run in your browser and send notifications and a React Native app that can receive them in this GitHub repo. In this example, notifications are routed through OneSignal to an Android application built by React Native.
Firebase Cloud Messaging
Firebase Cloud Messaging (FCM) is a completely free cross-platform messaging solution that lets you send messages between platforms. When using FCM to send notifications, the Firebase SDK delivers them to the notification area of the user's phone. This makes it very easy to get up and running with notifications if you already have an app where you want to add this functionality.
Luckily, there is a Firebase package specifically for React Native, which makes implementing FCM even easier. To get started, you'll need a Firebase account. You'll also need to include the JavaScript package in your application and add the messaging component using the following code:
1
2
3
4
5
6
7
8
# Install and set up the app module
yarn add @react-native-firebase/app

# Install the messaging module
yarn add @react-native-firebase/messaging

# If you're developing your app using iOS, run this command
cd ios/ && pod install
You'll notice that there are iOS-specific instructions as well. Since React Native can create both Android and iOS applications, there are some platform-specific instructions.
If you're building an Android application, you'll need to make sure you download and include a configuration file. For more information, see the React Native Firebase docs.
If you are creating an iOS app and looking to use FCM, there are some additional steps for setup. In addition, on iOS, you must ask the user's permission before displaying notifications. You can do this using the React Native module's requestPermission method:
1
2
3
4
5
6
7
8
9
10
11
12
import messaging from '@react-native-firebase/messaging';

async function requestUserPermission() {
  const authStatus = await messaging().requestPermission();
  const enabled =
    authStatus === messaging.AuthorizationStatus.AUTHORIZED ||
    authStatus === messaging.AuthorizationStatus.PROVISIONAL;

  if (enabled) {
    console.log('Authorization status:', authStatus);
  }
}
Once you are set up, have the various packages that you need installed and have requested the required permissions, you need to save the user's Firebase token so that you can use it to generate notifications. This is important to ensure that the correct users receive the correct notifications when you want to send them. You can do this using the following code:
1
2
3
4
5
6
7
8
9
10
11
12
13
14
15
16
17
18
19
20
21
22
23
24
25
26
27
28
29
30
31
32
33
34
35
36
37
38
import React, { useEffect } from 'react';
import messaging from '@react-native-firebase/messaging';
import auth from '@react-native-firebase/auth';
import firestore from '@react-native-firebase/firestore';
import { Platform } from 'react-native';

async function saveTokenToDatabase(token) {
  // Assume user is already signed in
  const userId = auth().currentUser.uid;

  // Add the token to the users data store
  await firestore()
    .collection('users')
    .doc(userId)
    .update({
      tokens: firestore.FieldValue.arrayUnion(token),
    });
}

function App() {
  useEffect(() => {
    // Get the device token
    messaging()
      .getToken()
      .then(token => {
        return saveTokenToDatabase(token);
      });

    // If using other push notification providers like Amazon SNS
    // you may need to get the APNs token instead for iOS:
    // if(Platform.OS == 'ios') { messaging().getAPNSToken().then(token => { return saveTokenToDatabase(token); }); }

    // Listen to whether the token changes
    return messaging().onTokenRefresh(token => {
      saveTokenToDatabase(token);
    });
  }, []);
}
Now that you're ready to start receiving notifications, with a sort of "Hello World" implementation, you can listen for a message to be received and use React Native's Alert API to display the notification as it's received:
1
2
3
4
5
6
7
8
9
10
11
12
13
import React, { useEffect } from 'react';
import { Alert } from 'react-native';
import messaging from '@react-native-firebase/messaging';

function App() {
  useEffect(() => {
    const unsubscribe = messaging().onMessage(async remoteMessage => {
      Alert.alert('A new FCM message arrived!', JSON.stringify(remoteMessage));
    });

    return unsubscribe;
  }, []);
}
Once the notification is received, you have several options for customizing how your user interacts with it. You could display it in the app, show it as a notification on the user's lock screen, or provide a badge on the application icon itself to indicate there are unread notifications. However, this example gives you an up-and-running version of an application that's able to display push notifications. For more information about how to customize the notification experience, you can check out the usage documentation for the React Native Firebase package or take a look at the documentation for Firebase Cloud Messaging.
OneSignal
OneSignal is an all-in-one solution for all types of customer messaging, from email and SMS to in-app notifications and more. It also makes push notifications very easy to implement in your React Native application.
If you are compiling your application for iOS, there are some specific steps that you'll need to take in Xcode, which you can find in OneSignal's Getting Started documentation.
Outside of that, however, the steps are very similar to how you would configure Firebase Cloud Messaging to send notifications. First, make sure you are signed up for a OneSignal account. Once you have that, you can add the OneSignal package to your project using Yarn (yarn add react-native-onesignal) or npm (npm install --save react-native-onesignal).
From there, it's on to writing the actual app code that will listen to OneSignal and be able to receive notifications:
1
2
3
4
5
6
7
8
9
10
11
12
13
14
15
16
17
18
19
20
21
22
23
24
import OneSignal from 'react-native-onesignal';

// OneSignal initialization
OneSignal.setAppId(ONESIGNAL_APP_ID);

// promptForPushNotificationsWithUserResponse will show the native iOS or Android notification permission prompt.
// It's recommended to remove the following code and instead use an in-app message to prompt for notification permission.
OneSignal.promptForPushNotificationsWithUserResponse();

// Method for handling notifications received while app is in the foreground
OneSignal.setNotificationWillShowInForegroundHandler(notificationReceivedEvent => {
  console.log("OneSignal: notification will show in foreground:", notificationReceivedEvent);
  let notification = notificationReceivedEvent.getNotification();
  console.log("notification: ", notification);
  const data = notification.additionalData
  console.log("additionalData: ", data);
  // Complete with null means don't show a notification.
  notificationReceivedEvent.complete(notification);
});

// Method for handling notifications opened
OneSignal.setNotificationOpenedHandler(notification => {
  console.log("OneSignal: notification opened:", notification);
});
With this code, you'll be able to receive notifications from OneSignal with some additional information displayed as part of the notification. Once you've configured the code, you can either send notifications from within your OneSignal dashboard or connect OneSignal to your platform of choice using one of their many integrations. For instance, if you have a WordPress site, you can install the OneSignal WordPress plugin to send a push notification to your app's users when a new post is published on WordPress.
Multichannel Push Notifications with Courier
If you're looking for something even simpler than some of the solutions outlined above, consider Courier. With Courier, you get a single platform that allows you to push notifications across multiple channels without having to write any notification-specific code. Whichever platform generates your notification events simply sends a message to Courier's REST API, and you then configure the rest from right within Courier. With one API call, you can send notifications to any of the platforms that it integrates with, and you can add new channels in minutes, easily change providers when necessary, and manage the routing between channels using a centralized platform.
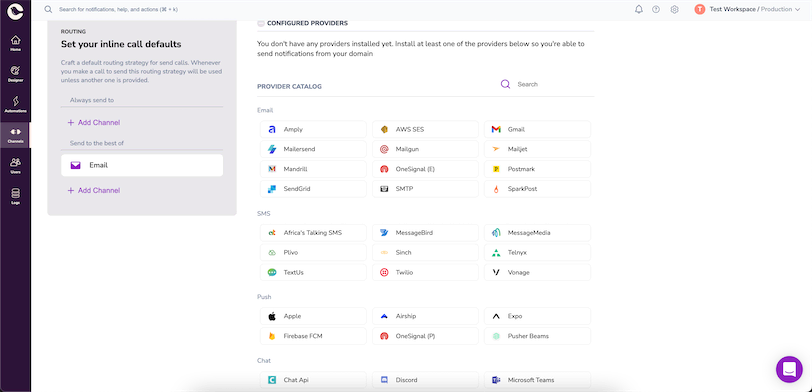
To get started with Courier, you first need to sign up for a Courier account. Once you've done that, you'll be prompted to install a provider from their list of available options. The provider you select will depend on the type of notification you want to deliver, but there are many options for push notifications.
After you've connected a provider, you then have to connect the application that will be triggering the notifications. There are many different applications you might connect to, but if you want to give your Node.js backend the ability to trigger notifications in your React Native application, you should use the courier-node package.
Include the package in your project with npm install @trycourier/courier, then drop the code to actually trigger a notification in your backend application.
Depending on what platform you're using to pass the notifications along, you might need some additional configuration steps. For example, in order to use Firebase Cloud Messaging, you'll need to find your Firebase token. This can be accessed by following the instructions from Google. Once you have this token, keep it handy, as you'll need to insert it with every request. The following example demonstrates how you would set up Courier to deliver a push notification via Firebase Cloud Messaging:
1
2
3
4
5
6
7
8
9
10
11
12
13
14
15
16
17
18
19
20
21
22
23
24
25
26
27
28
29
import { CourierClient } from "@trycourier/courier";

const courier = CourierClient({ authorizationToken: "<AUTH_TOKEN>" }); // get from the Courier UI

// Example: send a basic message to an email recipient
const { requestId } = await courier.send({
  "message": {
    "template": "ABCDEFGHIJKLMNOPQRSTUVWXYZ",
    "to": {
      "firebaseToken": "<YOUR_TOKEN_GOES_HERE>"
    },
    "data": {
      "Nick": "Mario",
      "Room": "PortugalVSDenmark"
    },
    "providers": {
      "firebase-fcm": {
        "override": {
          "body": {
            "notification": {
              "title": "Portugal vs. Denmark",
              "body": "great match!"
            }
          }
        }
      }
    }
  }
});
Once you have Courier in place, expanding this notification-generating event to include multiple channels becomes very straightforward. This allows your notifications to reach even more places and ensures your users always have the information they need, when they need it.
Wrapping Up
Sending push notifications and making sure they are not only delivered on time but accurately and without duplicates is a big challenge for any developer.
Fortunately, there are platforms such as Firebase Cloud Messaging, OneSignal, and Courier to help. You can rely on these platforms to handle push notification management and delivery for your React Native application, allowing you to focus on building the core logic and functionality of your application.
