Brands in Email Notifications
Courier's Brands feature enables you to create email notifications with a consistent look and feel.
White-Label Your Email Notifications
You can manage multiple brands, create reusable styling, and white-label email notifications sent on behalf of your customers to their end-user recipients, or if you have multiple brands internally.
Brands API
Courier Brands are fully API enabled. Developers can get, create, update and delete brands programmatically using the Brands API.
The Default Brand
- The default brand, along with any custom brand, can be customized and renamed.
- The default brand cannot be deleted.
Customizing your default brand is important because:
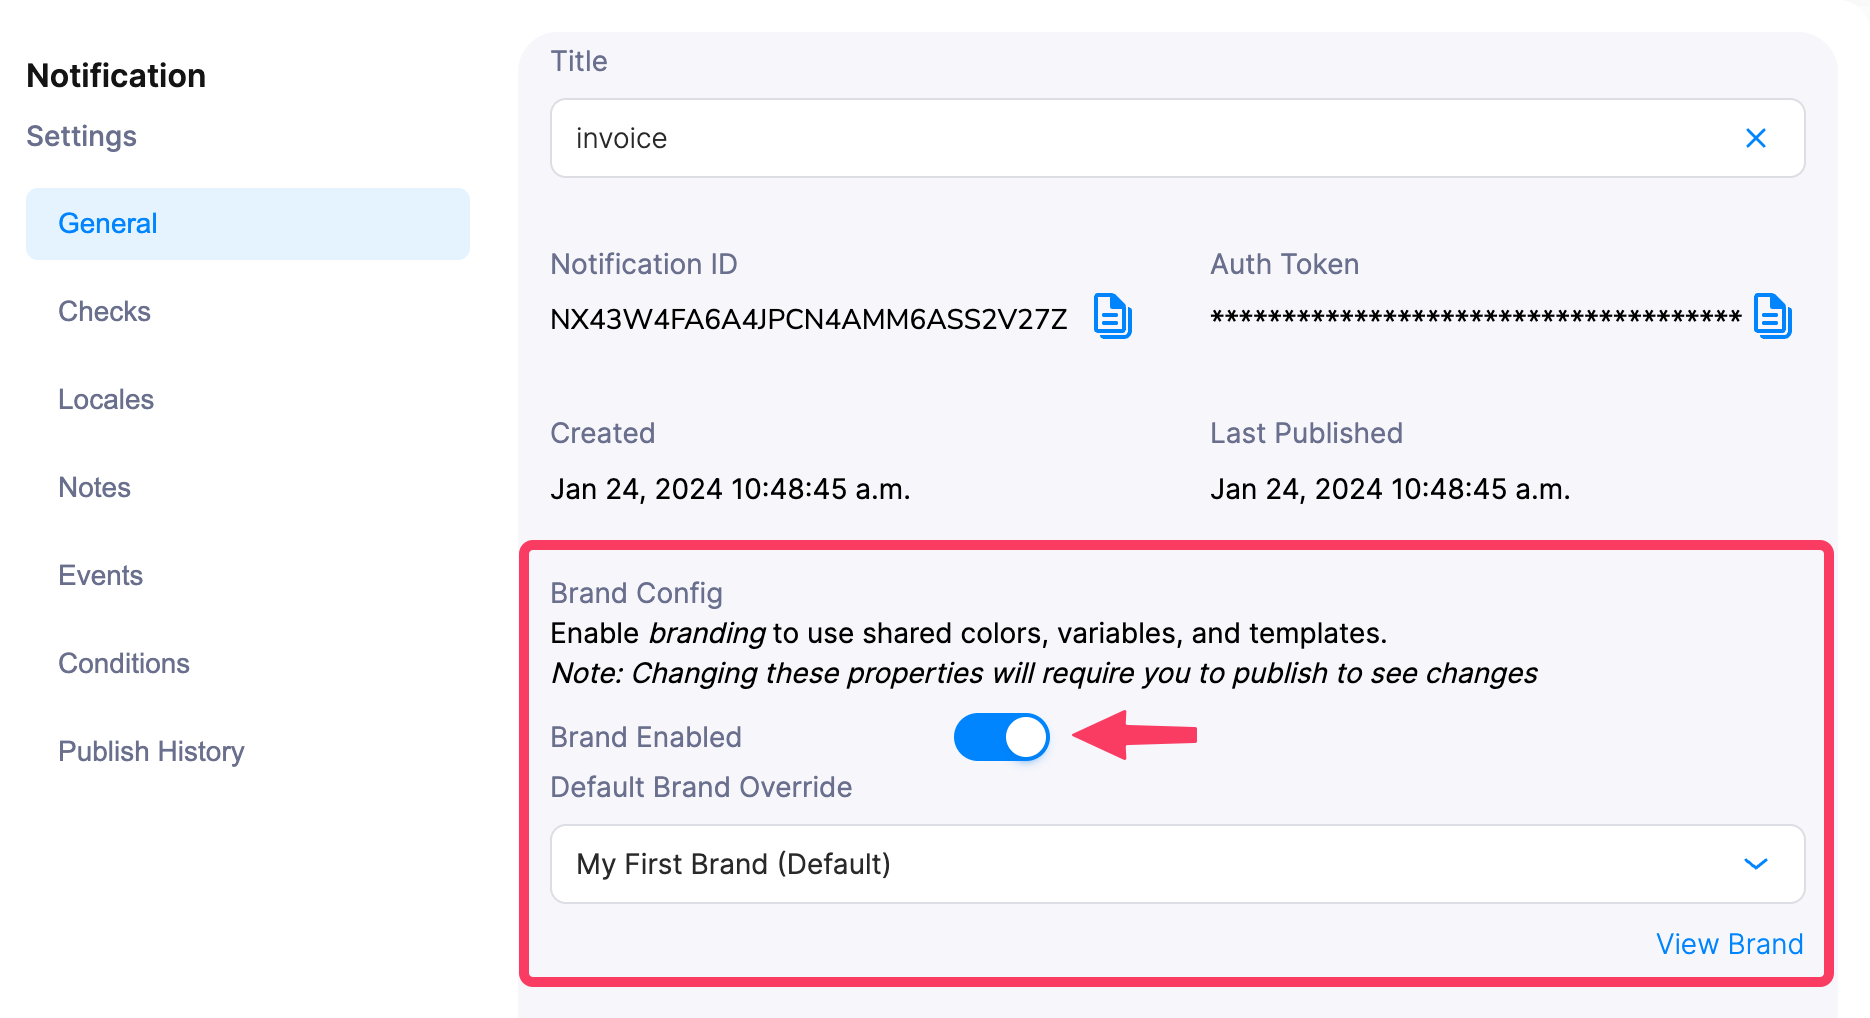
- Every email notification you create uses the Default Brand unless you manually disable Brands in the Notification settings.
- If you enable brands on a notification, your Default Brand will be the fallback for any Send API call that does not specify a brand in the user profile.
Create a New Brand
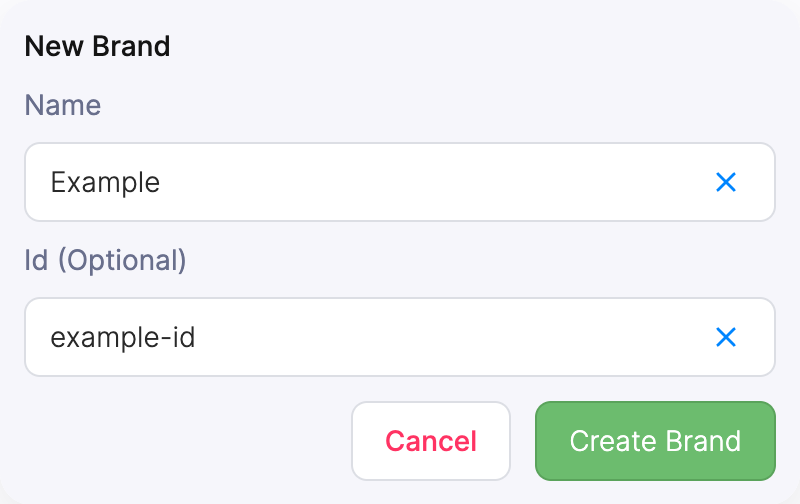
- To create a new brand open the notification Designer, select Brands in the top menu and click New Brand.
- Giving your Brand an optional
brand_idwill allow your developers to manage your brand programmatically using the Brands API.
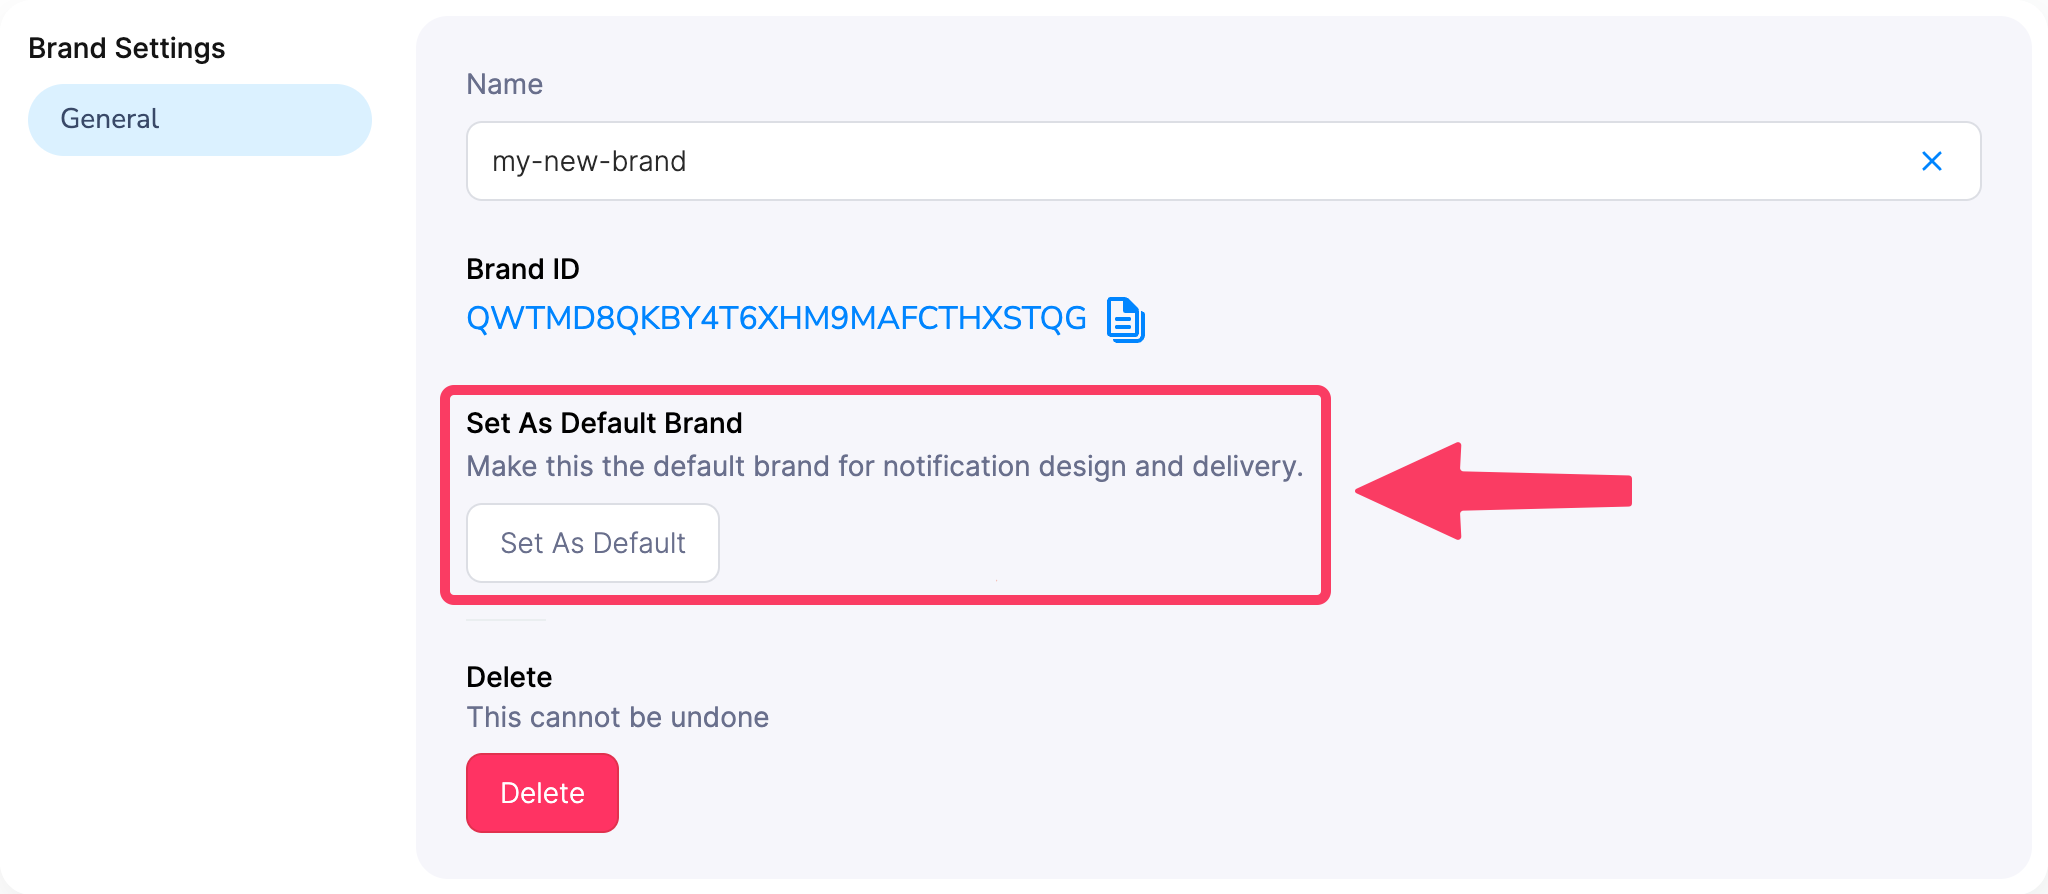
Set a Custom Brand as your Default
To set a custom brand as your default, open the brand settings and click Set As Default.
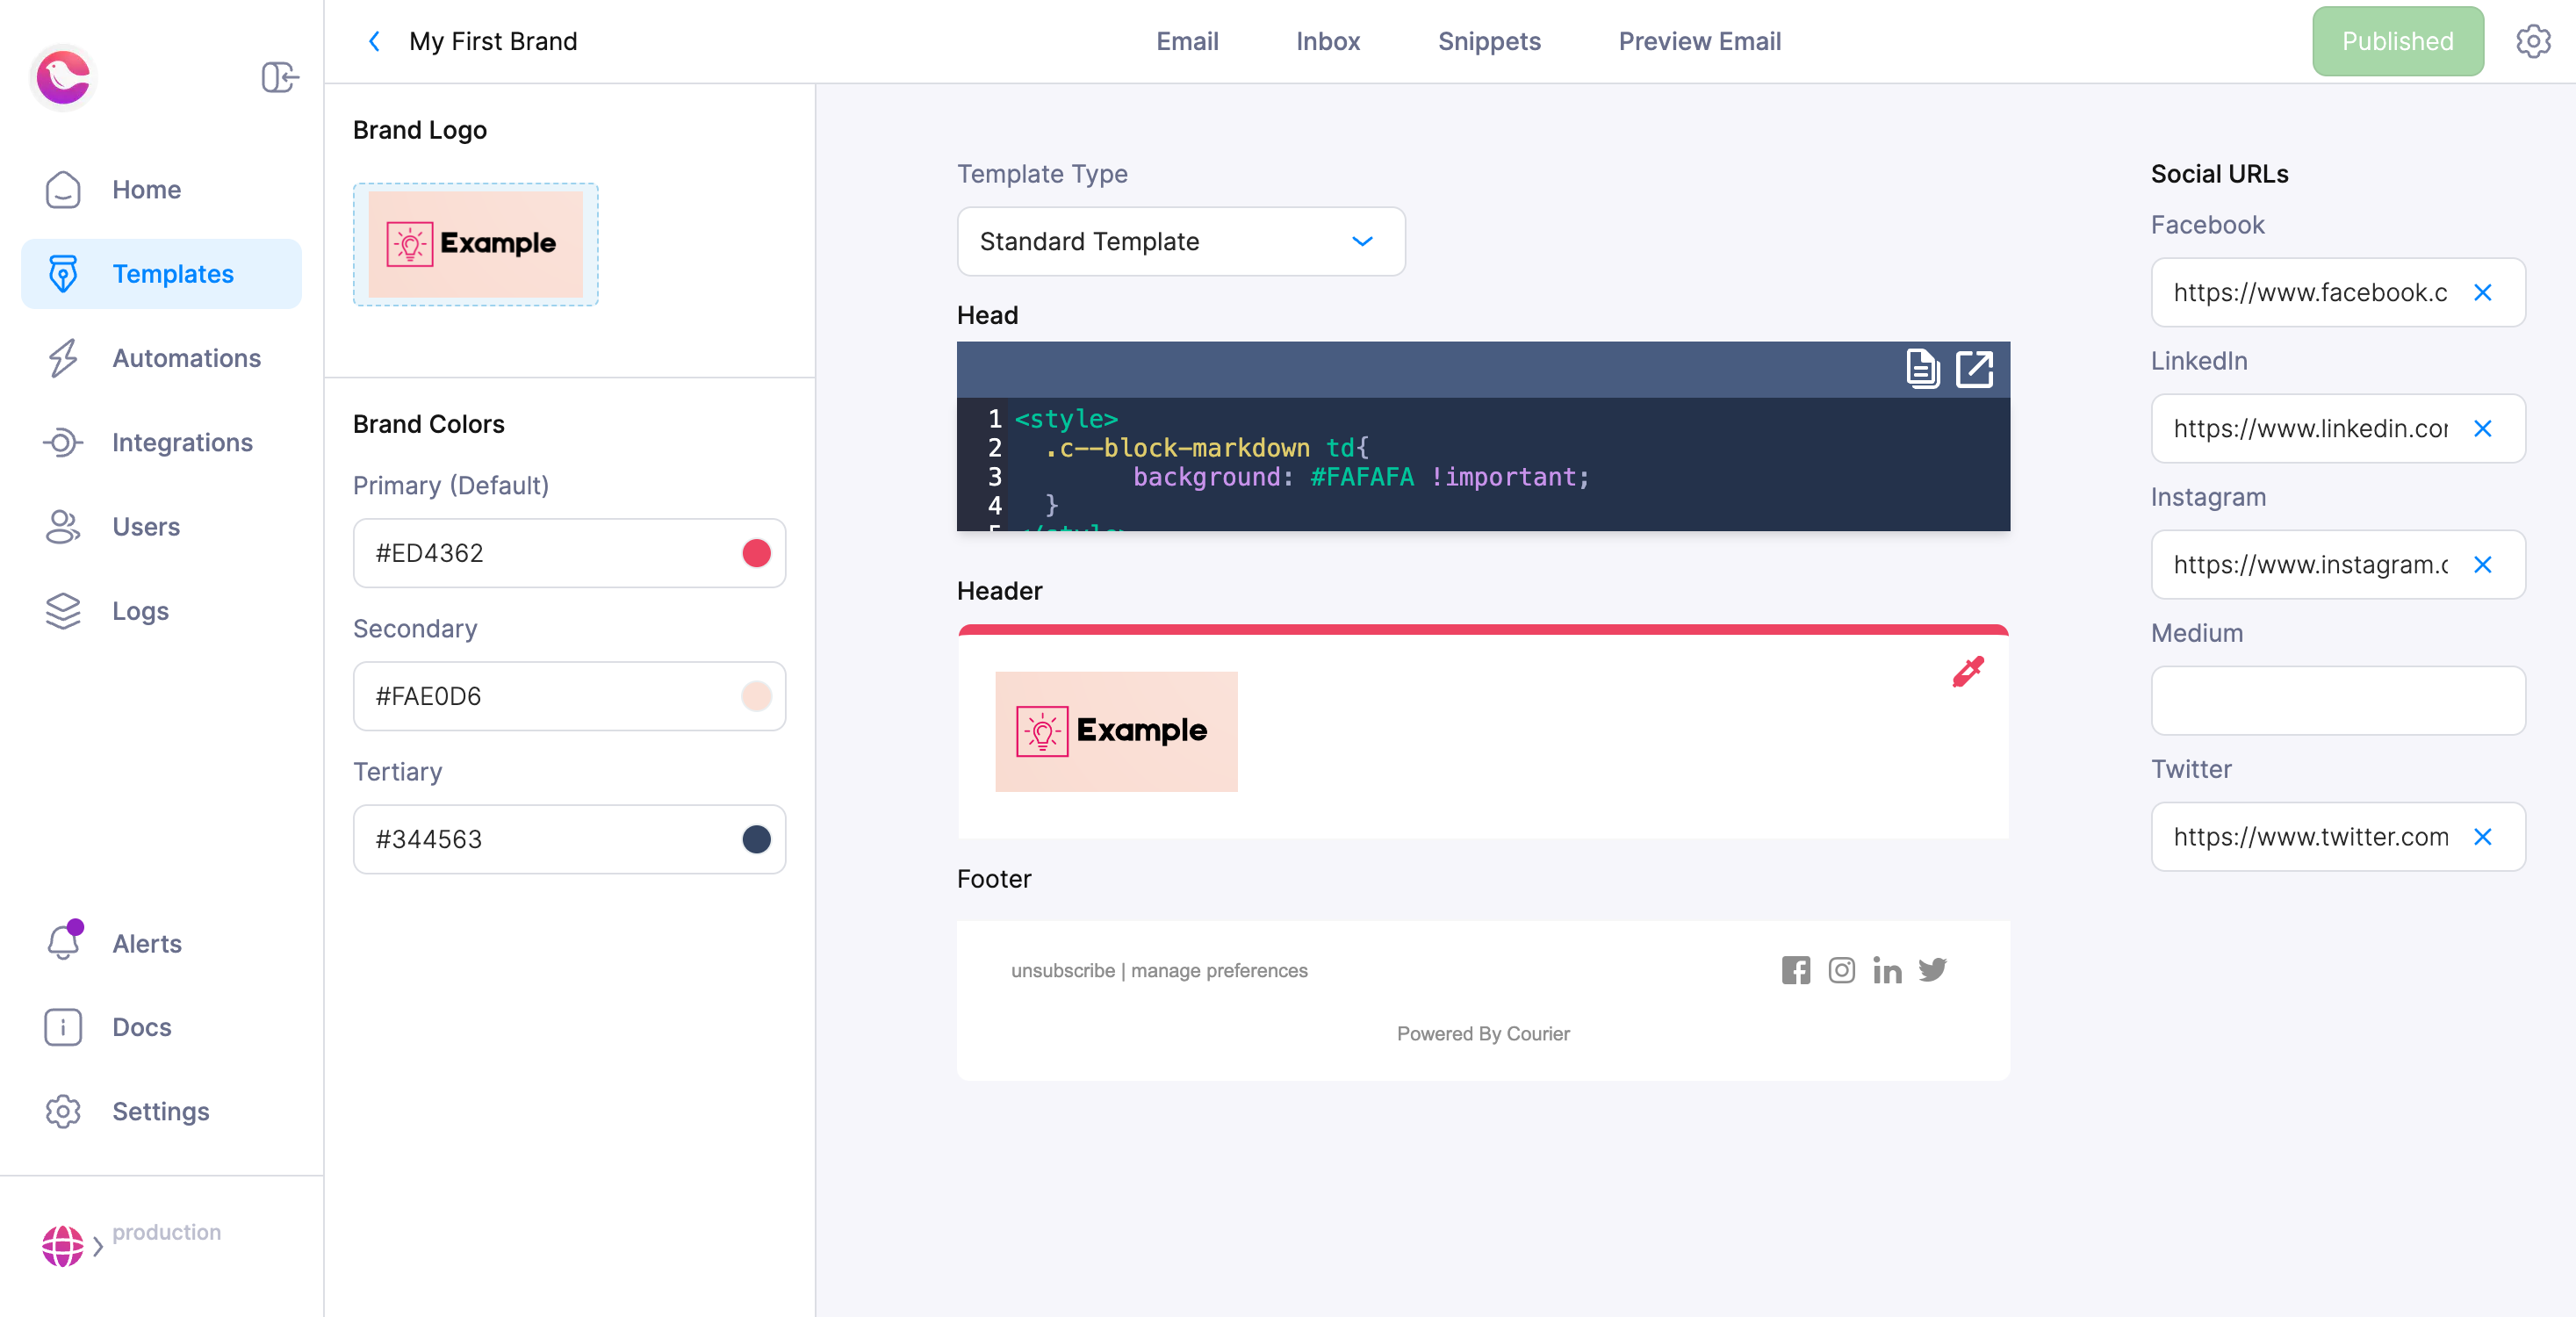
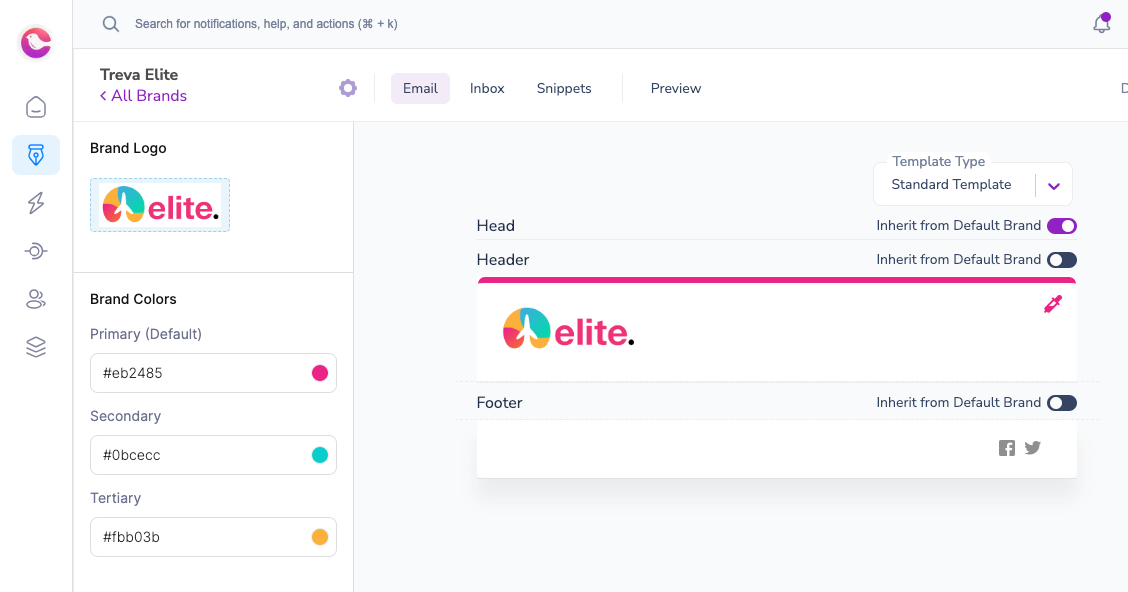
Customize Your Brands
Standard Template
Create and customize your Standard Template Brands in the following ways:
- Name
- Logo
- Brand colors (Primary, Secondary, Tertiary)
- Brand Header color
- Brand Footer Social URLs
- The logo must be a JPEG, PNG, or GIF
- The defined width for email notification logos is 140px. There is no defined height.
- The maximum file size is 5MB
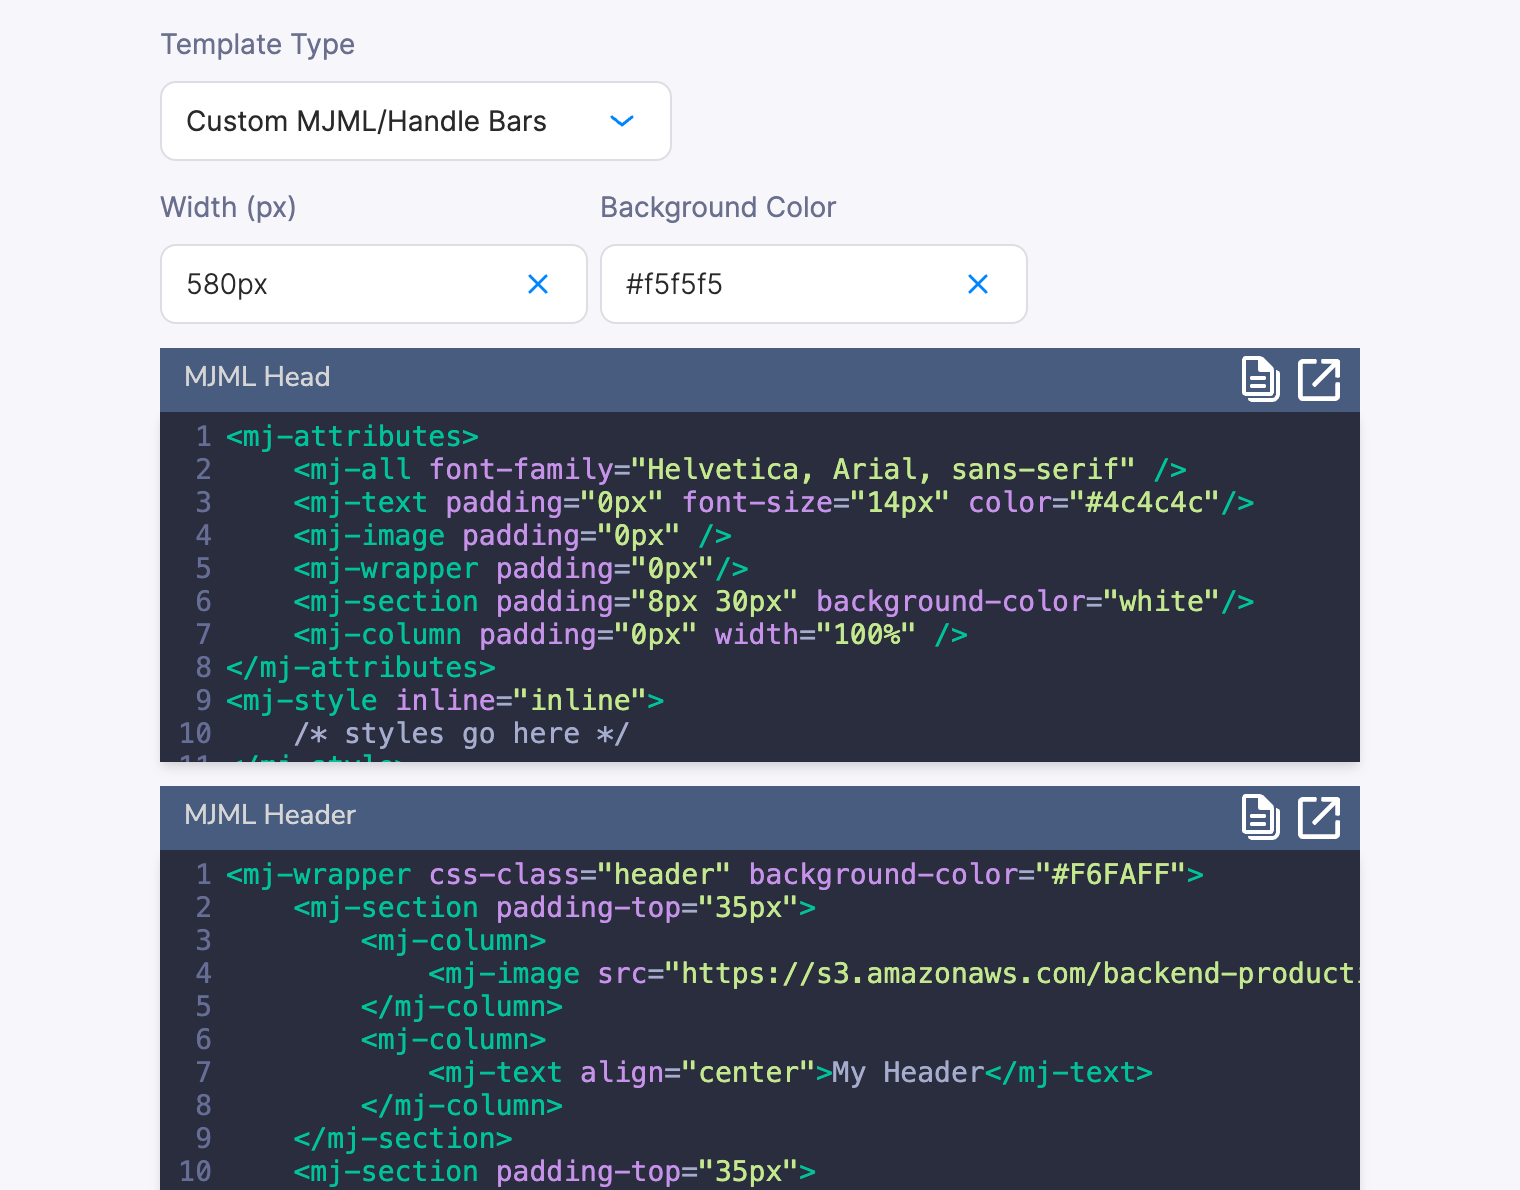
Custom MJML/Handlebars Template
Use a Custom MJML/Handlebars Template to customize the header, footer and background color using HTML, MJML or Handlebars.
Custom CSS style
You can customize the <style> element in the Head section of your Brands. In addition to the normal CSS class names, you can define the CSS for Courier blocks using Courier's CSS Classnames.
Re-use Custom Styling in Multiple Brands
You can re-use custom styling across multiple brands in two different ways.
- Inherit from Default Brand if both the default brand and the custom brand use the standard brand type.
- Re-use CSS using Brand Snippets if you want to share styling between standard and custom brand types.
Inherit From Default Brand
Use the Inherit from Default Brand toggle to inherit the Head, Header, or Footer from the Default brand.
Re-use CSS using Brand Snippets
Use Brand Snippets to share custom styles between standard and custom brand templates (Handlebars & MJML).
- In your default brand, create a brand snippet to contain your reusable CSS styling. You can define the CSS for Courier blocks using Courier's CSS classnames. Brand snippets in your Default brand can be referenced in custom brands as long as the snippet name is unique.
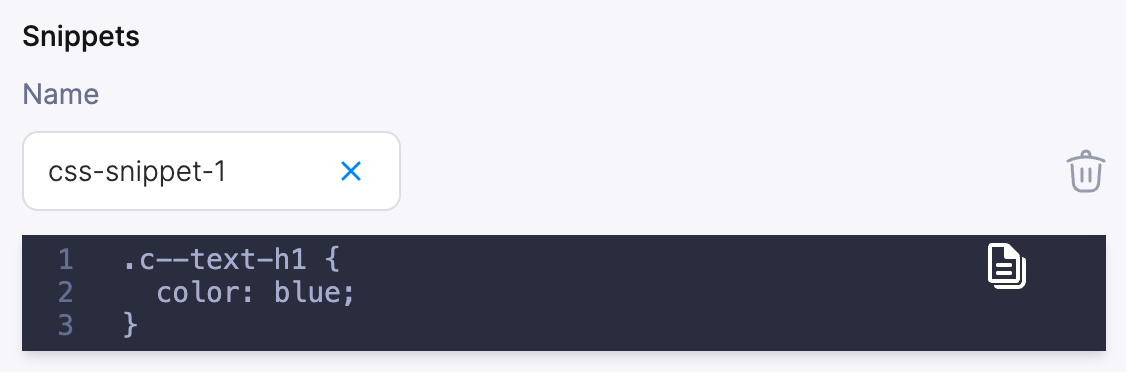
- In a custom brand, add the CSS snippet in the
Headsection, wrapped by<style>tags:
<style>
    {{>css-snippet-1}}
</style>
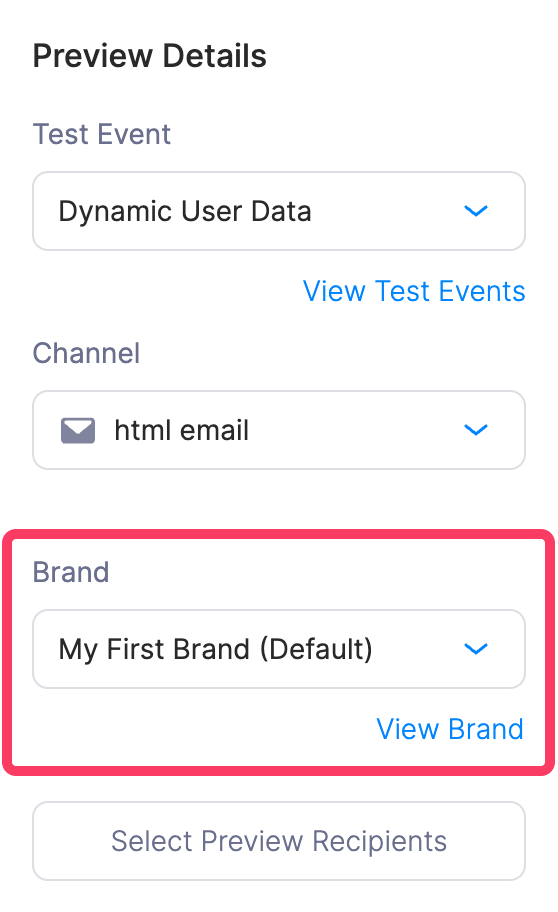
Preview your Brand-Enabled Email Notifications
To preview what your email notification will look like with different brands applied, open the Preview and then select the Brand from the Preview Details > Brand menu.
Reference Brand Attributes With Variables
You can reference brand attributes using variables e.g. {{var "brand.social.facebook"}}. Here is the schema for the brand information accessible via variables:
export const getBrandVariables = (
    brand?: IBrand
): {
    id?: string;
    colors?:
    |
    {
        primary: string;
        secondary: string;
        tertiary: string;
    } | {};
    email?: {
        header: {
            barColor?: string;
            logo: {
                href?: string;
                image?: string;
            };
        };
    };
    social?: {
        facebook?: string;
        instagram?: string;
        linkedin?: string;
        medium?: string;
        twitter?: string;
    };
}
Send a Branded Email Notification
- The Notification must have Brand Enabled switched on in the Notification Settings.
- (optional) Include a Brand ID in the Send API call. If no Brand ID is provided, Courier will send using the Default Brand. See the Send API documentation for details.