Introduction
A notification system is a must in a customer-driven web application to alert users of certain events occurring in the application. Even though the most common approach is to use in-app notifications, the user has to frequently visit the application to stay informed. As a result, developers adopted emails, a readily accessible channel to the users, to create event-driven notifications such as account confirmations, payment confirmations, etc.
This article will evaluate four ways of sending an email using C# to ensure that you select the best event-driven email notification service for your C# application to keep the users informed on key application events.
Fundamentals of Email Sending
Before sending emails in a C# application, knowing the fundamentals will help streamline the process.
Templated Emails vs. Plain Text Emails
Templated Emails
A templated email consists of an HTML body with CSS styling. It is commonly used to communicate with end-users.
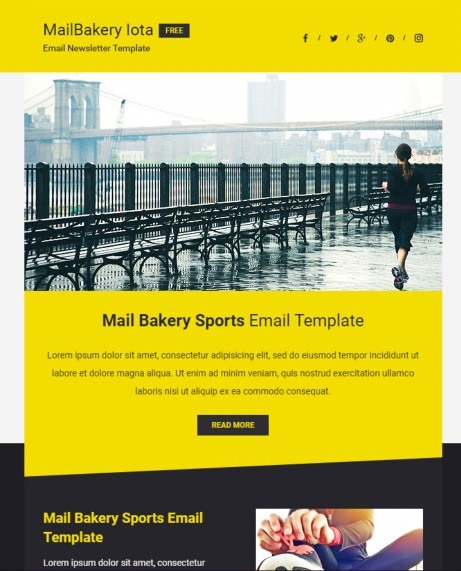
Figure 01 - Representation of a template email
Plain Text Emails
A plain text email consists of a textual email body. It is used in applications to notify internal users of system errors.
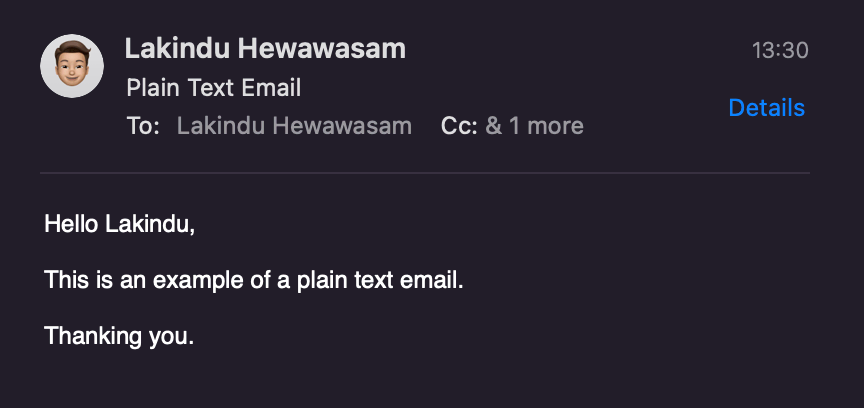
Figure 02 - Representation of plain text email
Input Sanitization for Emails
When sending emails based on user inputs, it's vital to sanitize user inputs to remove unnecessary HTML attributes from the input fields of your forms, which helps to send emails securely.
Now that the fundamental concepts are covered let's dive into the four methods that can be used to send emails in a C# application.
1. Sending an email using SMTP
The standard approach to send an email using C# is SMTP (Simple Mail Transfer Protocol). It is a network protocol used to send emails over the internet. Additionally, it allows you to relayemails across multiple networks. Therefore, SMTP is widely used in many applications to send emails.
Pros
There are certain advantages of using SMTP to send emails in your C# application.
- It is pre-built into the .NET Framework via the
System.Net.MailNamespace. Therefore, it is effortless to get started. - You only require SMTP credentials to get started.
- The built-in SMTP library assigns the required headers for sending the email.
Cons
However, sending emails with SMTP creates some drawbacks.
- SMTP communicates back and forth between the client and the SMTP server. Therefore, it adds latency overheads that delay the process.
- It opens and closes an SMTP connection per email. Hence, sending bulk emails is not recommended with SMTP as it can cause performance issues.
Demonstration
If the added latency is not an issue, and you need a quick setup process, refer to this section to send a templated email via the Gmail SMTP Server.
First, you will need to create a Google account to get started. Then, you will need to visit your account settings and enable less secure devices to communicate with your Google account. It is crucial because it will create authentication errors if you do not do this.
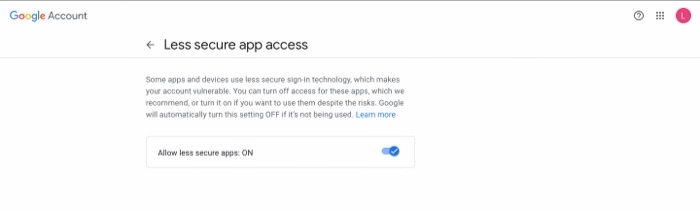
Figure 03 - Enabling less secure app access in Google
Afterward, you can use the snippet below to send templated emails via the Gmail SMTP server.
1
2
3
4
5
6
7
8
9
10
11
12
13
14
15
16
17
18
19
20
21
22
23
24
25
26
27
28
29
30
31
32
33
34
35
36
37
38
39
40
using System;
using System.Net.Mail; // this namespace is required to send emails with SMTP

namespace EmailSending
{
    class Email{
        static void main (string[] args)
        {
            try
            {
                MailMessage newMail = new MailMessage();
                // use the Gmail SMTP Host
                SmtpClient client = new SmtpClient("smtp.gmail.com");

                // Follow the RFS 5321 Email Standard
                newMail.From = new MailAddress("SENDER-EMAIL", "SENDER-NAME");

                newMail.To.Add("<<RECIPIENT-EMAIL>>");// declare the email subject

                newMail.Subject = "My First Email"; // use HTML for the email body

                newMail.IsBodyHtml = true;newMail.Body = "<h1> This is my first Templated Email in C# </h1>";

                // enable SSL for encryption across channels
                client.EnableSsl = true;
                // Port 465 for SSL communication
                client.Port = 465;
                // Provide authentication information with Gmail SMTP server to authenticate your sender account
                client.Credentials = new System.Net.NetworkCredential("<<SENDER-EMAIL>>", "<<SENDER-GMAIL-PASSWORD>>");

                client.Send(newMail); // Send the constructed mail
                Console.WriteLine("Email Sent");
            }
            catch (Exception ex)
            {
                Console.WriteLine("Error -" +ex);
            }
        }
    }
}
The snippet above successfully sends an email via the Google SMTP server.
Note: I recommend you disable your antivirus guard when running this code locally. I have personally experienced issues where the antivirus guard caused errors while emailing using SMTP.
2. Sending an email using a Transactional Email API - SendGrid
If your application has to notify users of important events such as payment confirmations or request submissions, sending emails using SMTP will not work for you because SMTP opens and closes a connection per email and creates performance overheads. Therefore, it is highly inefficient.
The best approach is to use a transactional email API.
Pros
- Since sending emails over an API eliminates the need for a local SMTP server, it's faster and reduces latencies.
- The Email APIs have authorized domains. Therefore, SMTP clients do not flag emails sent from APIs as spam.
- Most email APIs offer analytics to monitor click-through and bounce rates of the sent emails.
- Email APIs can rapidly scale up and down based on your demand, unlike SMTP authentication. Therefore, even if you serve 10,000 emails daily, the API will remain active to deliver all 10,000 emails.
Cons
However, email APIs do have their disadvantages.
- The email APIs have a high learning curve.
- Some email APIs are language-dependent.
For developers seeking to use email APIs for C# applications, SendGrid is an excellent and easy-to-use email API with a free plan that allows you to send 100 emails per day. Additionally, it offers domain verification that ensures your emails are not flagged as spam, and it provides analytics for all emails sent using SendGrid.
Demonstration
Follow this walkthrough to send an email using SendGrid.
Setting up SendGrid
First, create a SendGrid account (with the free plan). Afterward, you will need to create a sender identity, which will help create a verified email sender to send emails.
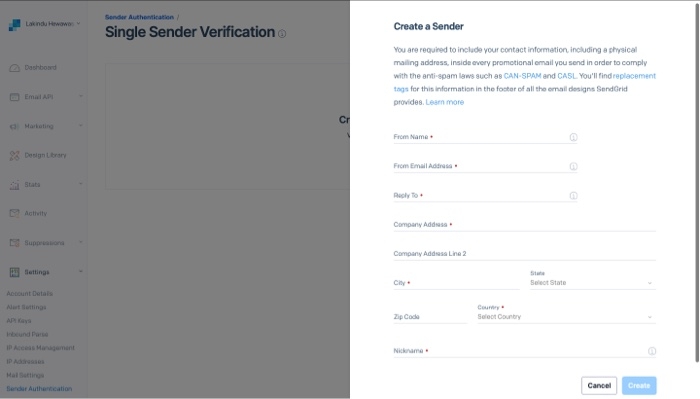
Figure 04 - Creating the sender identity on SendGrid
Afterward, an API key must be created. This API key will be used by the C# application to communicate with the SendGrid API to send emails using the verified sender identity.
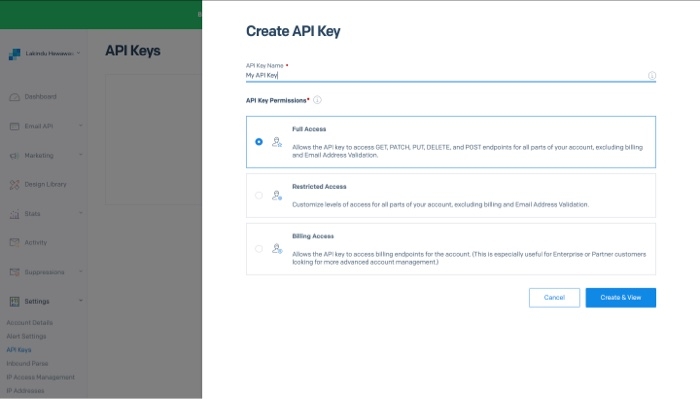
Figure 05 - Creating the API key for SendGrid
Provide Full Access permission scope for the API Key for testing.
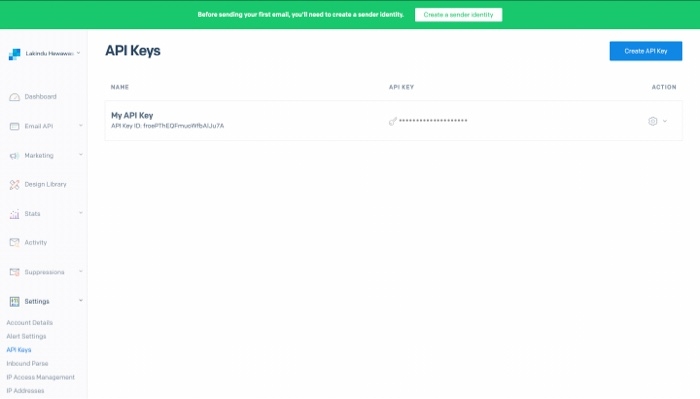
Figure 06 - Created API Key
Sending the Email
Next, install SendGrid to your C# application using NuGet with the command displayed below.
1
dotnet add package SendGrid // add the sendgrid packageAfterward, add the code shown below to a C# file to send the email successfully.
1
2
3
4
5
6
7
8
9
10
11
12
13
14
15
16
17
18
19
20
21
22
23
24
25
26
27
28
29
30
31
32
33
34
35
36
37
38
39
40
41
using System;
using System.Threading.Tasks; // use TPL for asynchronous operations
using SendGrid; // SendGrid
using SendGrid.Helpers.Mail; // used for MailHelper

class Program
{
    static void Main(){
        SendMail().Wait();
        Console.WriteLine("Email Sent");
    }
    static async Task SendMail() {

    // Your SendGrid API Key you created above.
    string apiKey = "SENDGRID-API_KEY";

    // Create an instance of the SendGrid Mail Client using the valid API Key
    var client = new SendGridClient(apiKey);

    // Use the From Email as the Email you verified above
    var senderEmail = new EmailAddress("verified-sender@email.com", "Verified Sender Email");

    // The recipient of the email
    var recieverEmail = new EmailAddress("reciever@email.com", "Reciever Name");

    // Define the Email Subject
    string emailSubject = "Hello World! This is my Subject";

    // the plain text content for Plain Text Email Clients
    string textContent = "and easy to do anywhere, even with C#";

    // HTML content -> for clients supporting HTML, this is default
    string htmlContent = "<strong>and easy to do anywhere, even with C#</strong>";

    // construct the email to send via the SendGrid email api
    var msg = MailHelper.CreateSingleEmail(senderEmail, recieverEmail, emailSubject, plainTextContent, htmlContent);

    // send the email asyncronously
    var resp = await client.SendEmailAsync(msg).ConfigureAwait(false);
  }
}
The code above sends an email using the SendGrid Email API. Ensure that the sender email is the same email that you verified earlier.
To confirm if the email was delivered, visit the SendGrid dashboard and navigate to "your activity." This dashboard also provides analytics on the email, allowing you to see if the user read or discarded the email.
3. Sending an email using a Transactional Email API - Amazon SES
Amazon SES (Simple Email Service) is a cost-effective and scalable email service offered by AWS to send transactional emails quickly.
Pros
Compared to SendGrid, Amazon SES is more advantageous.
- It allows applications to send 62,000 complimentary messages per month, while SendGrid only allows 100 messages per day.
- SES is built to scale effectively with no noticeable latency. Therefore, it is capable of sending over 1000 messages at once!
- All it takes is one click to set up DKIM verification in SES. Therefore, your emails can be sent from a verified sender, which prevents emails from being flagged as spam unnecessarily.
Cons
There is one main disadvantage of using SES for sending transactional emails.
- SES does not offer analytics out of the box. To do so, you would have to set up AWS Pinpoint. It adds complexity for users that require email analytics.
If you don't require analytics for your emails and want to send bulk emails per month, Amazon SES is perfect for you!
Demonstration
The walkthrough below shows how to send transactional emails using the AWS SES API.
Before getting started:
- Make sure to create an AWS Account (on the free tier).
- Obtain the access keys.
- Configure a shared credentials file so the C# application can communicate with AWS via the SDK.
Afterward, visit the Amazon SES dashboard in your AWS Account. Initially, you will have access only to the sandbox environment. When sending emails with sandbox, verifying both the sender and receiver emails via SES is essential.
Later on, a request can be made to AWS for production access.
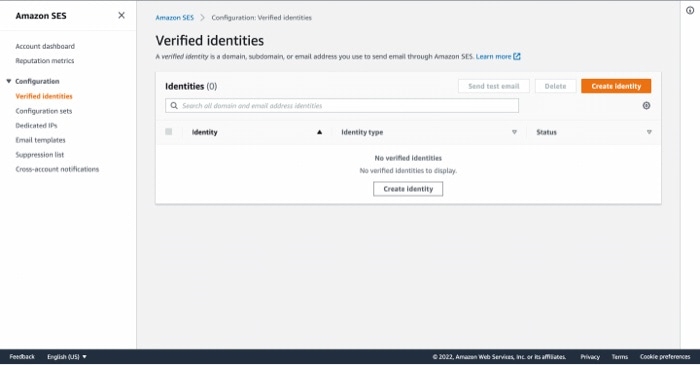
Figure 07 - Verified Identities on SES
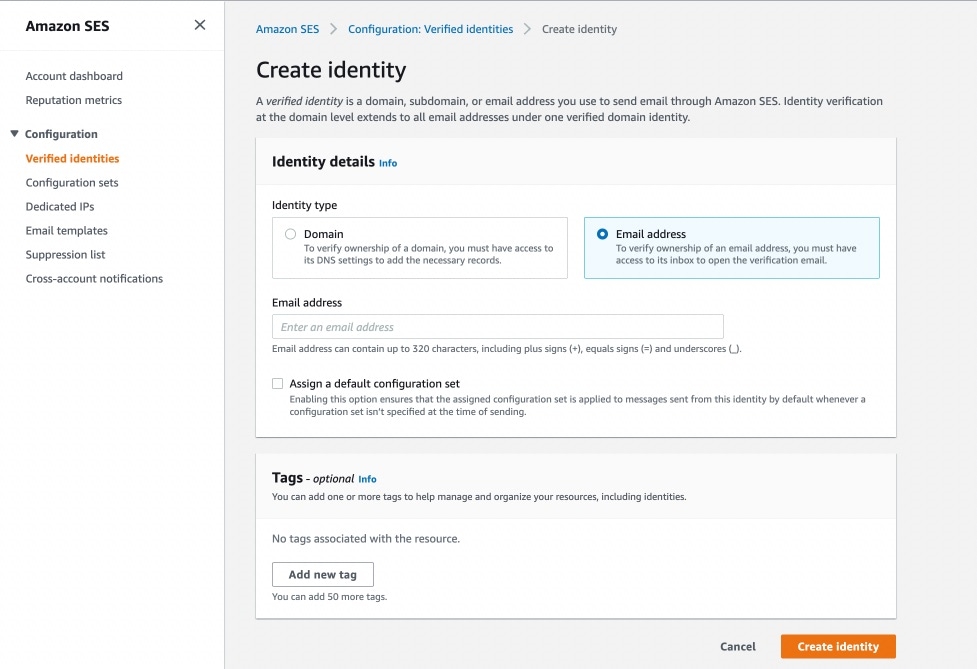
Figure 08 - Creating an email identity on SES
After setting up the sender and recipient identity, you can install the AWS SES Package in the C# application by executing the command below.
1
2
// run on dotnet cli
dotnet add package AWSSDK.SimpleEmail --version 3.7.0.132
To send templated emails, make sure to create and upload the templates to SES beforehand.
Finally, the code below can be used to send transactional emails to users via the Amazon SES SDK.
1
2
3
4
5
6
7
8
9
10
11
12
13
14
15
16
17
18
19
20
21
22
23
24
25
26
27
28
29
30
31
32
33
34
35
36
37
38
39
40
41
42
43
44
45
46
47
48
49
50
51
52
53
54
55
56
57
58
59
60
61
62
// import the SES SDK
using Amazon;
using Amazon.SimpleEmail;
using Amazon.SimpleEmail.Model;
using System;
using System.Collections.Generic;

namespace EmailSenderNameSpace {
   class EmailSender {
        // use the verified sender identity
        static readonly string senderEmail = "<VERIFIED-SENDER-EMAIL>";

        // the recipient email address of the email (verify if sandbox)
        static readonly string recievier = "<RECIPIENT-EMAIL>";

        // configure the email subjectstatic readonly string subject = "Sending Email using SES";

        // configure the message for non-html email clients
        static readonly string textMessage = "Hello World, from SES!";

        // configure the HTML message (default)
        static readonly string emailMessage = "<h1>Hello World!</h1>";

       static void Main(string[] args){
        // create the email client for SES, use the Region you configured SES in
        var client = new AmazonSimpleEmailServiceClient(RegionEndpoint.USEast1);

          var sendRequest = new SendEmailRequest
          {
             // verified sender
             Source = senderEmail,
             Destination = new Destination
               {
                 // configure recipients
                 ToAddresses = new List<string> { recievier },
                 Message = new Message
                   {
                     // email subject
                     Subject = new Content(subject),
                     Body = new Body
                      {
                        // HTML body for HTML Renderers
                        Html = new Content
                         {
                            Charset = "UTF-8",
                            Data = emailMessage
                         },
                        // Plain text for non-html renderes
                        Text = new Content
                         {
                            Charset = "UTF-8",
                            Data = textMessage
                         }
                      }
                  },
            }
            // send the configured email via SDK
            client.SendEmail(sendRequest);
            Console.WriteLine("Email Sent");
       }
   }
}
Ensure to replace the sender and recipient addresses with your verified identities and set your SES region's region.
Note: Even if a templated email is sent with missing parameters and won't reach the receiver, SES will still display it as a successfully sent email event.
4. Sending an email using a Multi-Channel Notification Service - Courier
The first three ways discussed are suitable for applications relying only on email. But, what if a new notification channel such as Text Messages get set up in the future? Then, developers would have to integrate new libraries and set up everything from scratch, which is time-consuming.
This is where multi-channel notification services such as Couriercome into play. Courier streamlines your notification flow by allowing you to configure multiple notification channels and communicate with all the channels with one API.
Pros
Using Courier is highly advantageous. Some of these advantages are:
- It allows users to get notified across multiple channels with one API.
- From a developer's perspective, the codebase decreases as all notification channels are managed under one API.
- Courier allows you to add new notification channels to a template from the dashboard, which makes it easy for anyone to use Courier.
- Courier provides analytics for notifications across all notification channels.
- Courier integrates with third-party transactional APIs such as Amazon SES and SendGrid to help manage notifications from a centralized location.
Cons
The biggest drawback of using Courier in a C# application is that there is no developer SDK available at the moment. So for the moment, the only way to interact with Courier is by sending HTTP Requests through their REST API.
However, if not having an SDK is not a problem for you, you can create a free account at Courier and send 10,000 emails monthly.
Demonstration
Refer to the walkthrough below to email Gmail in your C# application with Courier.
To start, create a free account on Courier (if you haven't already).
Upon successful creation, navigate to "Integrations" in the Courier Dashboard and click on "Gmail" under Email Providers to set up the email notification channel.
Next, click "Sign in with Google" and authorize Courier to send emails through the authorized Google account.
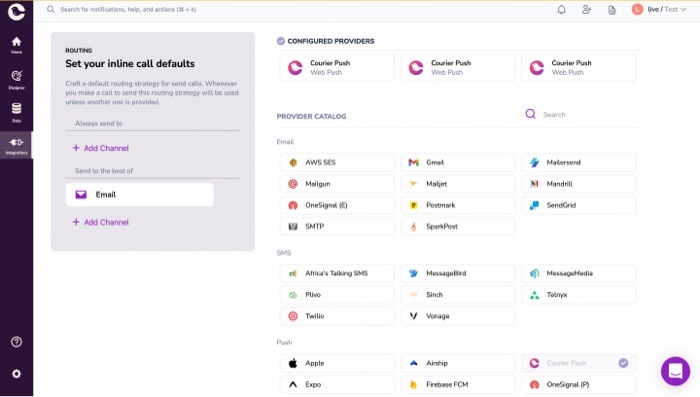
Figure 09 - Setting up the email notification channel
If you set it up correctly, you will see the output below.
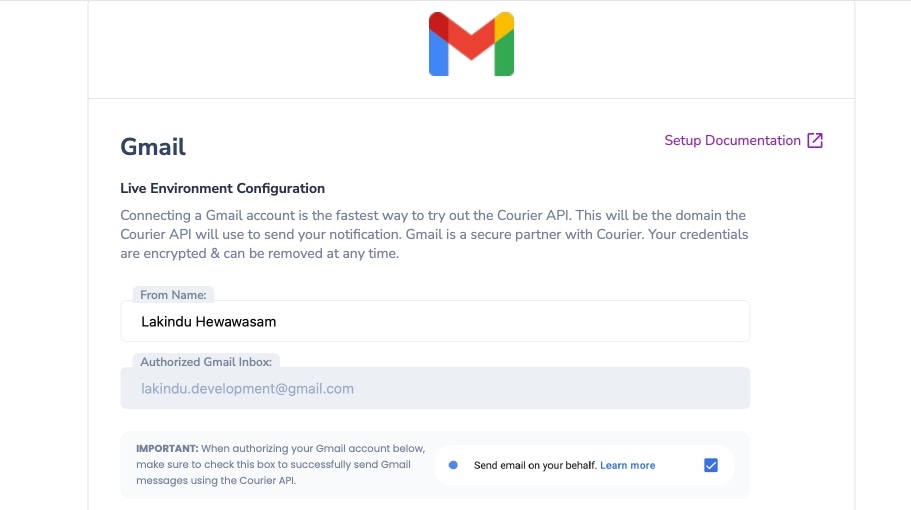
Figure 10 - Setting up Google with Courier
Afterward, we can create a notification in Courier. To do so, navigate to the dashboard and click "Designer" and click "Create Notification". You should see the output below.
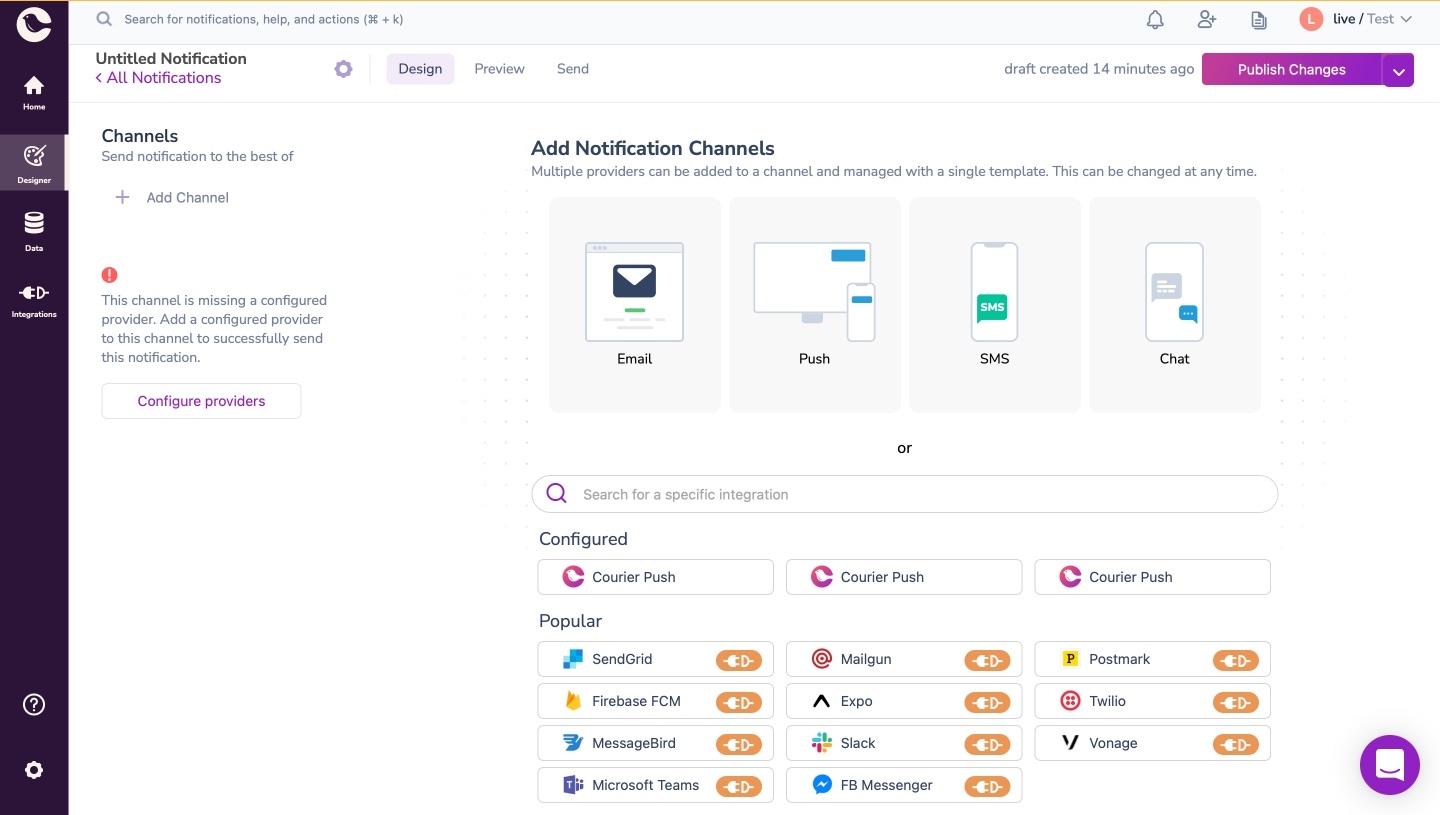
Figure 11 - Creating a notification on Courier
Then, add a channel to the notification by selecting "Email." It will choose the Gmail account that was authorized earlier. Afterward, click on the channel to view the template.
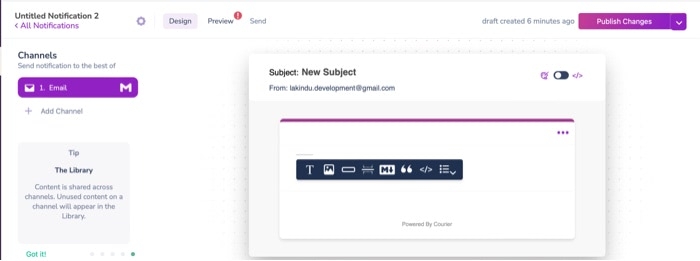
Figure 12 - Previewing the template with the authorized sender
You can customize the template according to your requirements, but I will add a "Hello World" message in the body for the demonstration.
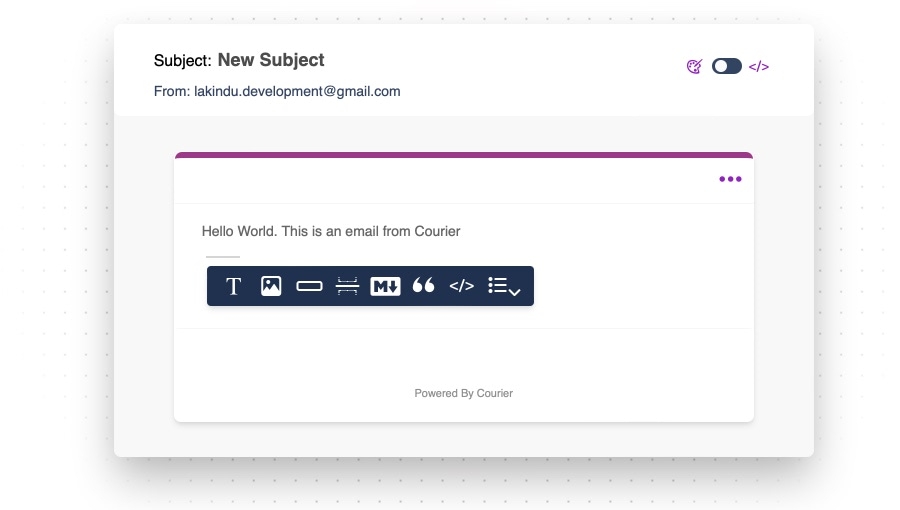
Figure 11 - Creating the email template
After creating the template, publish the changes.
Finally, you can use the Courier REST API (obtain Courier Auth Token from the template) to send the email via Gmail using the code below.
1
2
3
4
5
6
7
8
9
10
11
12
13
14
15
16
17
18
19
20
21
22
23
24
25
26
27
28
29
using System;
using System.Net.Http;
using System.Threading.Tasks;

namespace CourierEmailDemo {
  class EmailSender {
    // create an HTTP Clientstatic HttpClient client = new HttpClient();
        // Courier Send Email To Recipient Endpointstatic string apiEndpoint = "https://api.courier.com/send";
        // Your courier authentication token (Bearer Token)static string token = "Bearer " + "AUTH-TOKEN";

        static async Task Main(string[] args)
        {
            await sendEmail();
        }

        static async Task sendEmail() {
            // attach the Auth Token
            client.DefaultRequestHeaders.Add("Authorization", token);

            // construct the JSON Payload to send to the API
            string payload = "{ \"message\": { \"routing\": {\"method\": \"single\",\"channels\": []},\"channels\": {},\"providers\": {},\"metadata\": {\"tags\": [],\"utm\": {}     }, \"to\": {\"data\": {},\"preferences\": {},\"email\": \"YOUR-EMAIL-ADDRESS\"},\"template\": \"YOUR-TEMPLATE-NOTIFICATION-ID\"}}";

            // construct the JSON Post ObjectHttpContent content = new StringContent(payload, Encoding.UTF8, "application/json");

            // Send the emailvar resp = await client.PostAsync(new Uri(apiEndpoint), content);
            Console.WriteLine(resp);
      }
  }
}
Update the code with your authentication token, Template (notification) ID, and recipient email to successfully send the email with Courier via the authorized Gmail account.
Visit the "Data" section in the Courier Dashboard to obtain timely analytics on the emails.
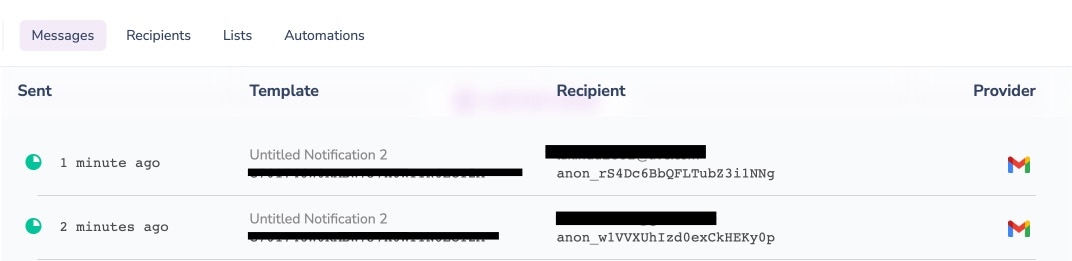
Figure 12 - Observing analytics for emails
Conclusion
This article explored four different ways to send an email using C#. There is no clear winner here as the service you opt for solely depends on your use case. However, the multi-channel notification service - Courier stands out from the rest with its capability to deliver event-driven notifications across multiple channels seamlessly and efficiently.
I hope this article helps you select the best approach to send emails in your C# applications.
Thank you for reading.
