WordPress is a well-known, PHP-based, free content management system (CMS) that is recognized as one of the most effective website builders currently available. According to W3Techs' usage statistics, WordPress powers 43 percent of all websites. WordPress is also a highly flexible CMS designed for both large and small websites and adaptable to a wide range of uses, including websites for blogging, e-commerce, business, membership, e-learning, and so on.
Some types of WordPress websites inevitably have to send notifications to their users. For example, a business owner might want to send separate notifications to existing and inactive users, or a tutor might want to send regular notifications to all registered students.
This article provides step-by-step instructions on implementing email, SMS, WhatsApp, and browser notifications on your WordPress site.
Prerequisites
To get started with this guide, you need to have:
- Installed a recent stable version of PHP (7.2 or higher)
- An active and functional WordPress site on a live server or your local machine
- A Courier account with an active API key
Email Notifications Guide
The following section demonstrates how to implement email notifications on your WordPress site using Courier.
Step 1: Integrate with Your Preferred Courier Email Provider
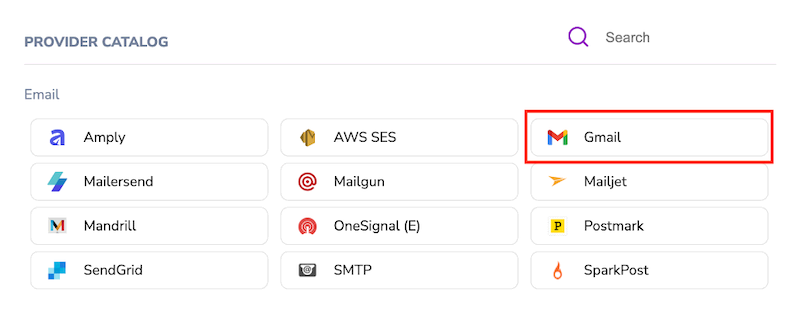
Log in to your Courier account, go to the Channels dashboard, and integrate with your preferred email provider from the list of available providers (for example, Mailgun, Gmail, or Sendgrid). You can also integrate multiple email providers.
This email notifications tutorial uses the Gmail provider. Click the Gmail button to integrate with it:
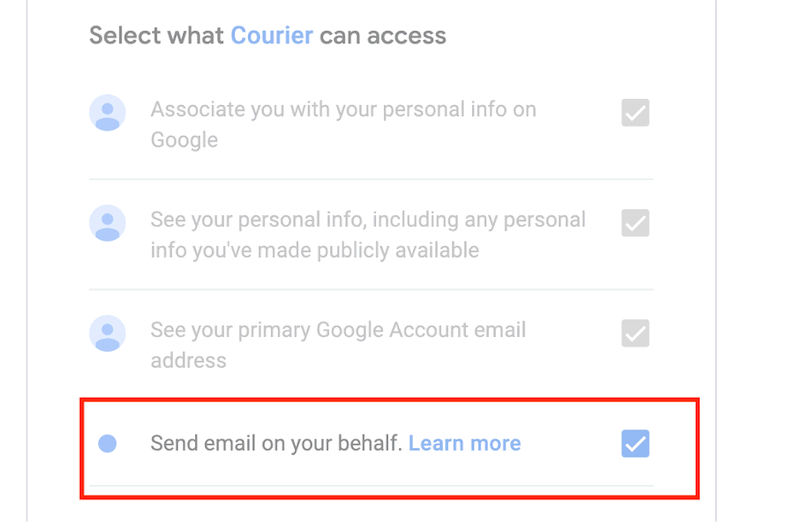
Click the Sign in with Google button at the bottom left of the Live Environment Configuration section. Once you select your Google account, you'll see a dialog asking you to grant Courier permission to access your Google account. Ensure that the box for Send email on your behalf is checked:
Add a From Name to the Live Environment Configuration section, then scroll down and click the Save button.
Step 2: Create an Email Notification
Go to the Notifications dashboard by clicking Designer in the left-hand navigation.
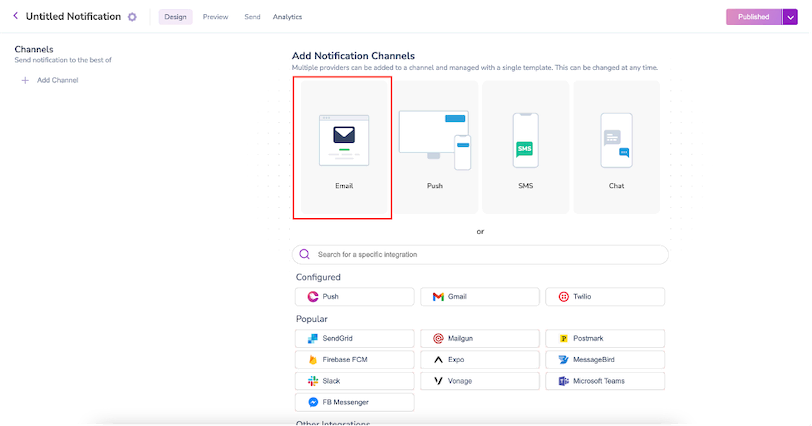
Create a new notification and select the Email notification channel with the configured provider:
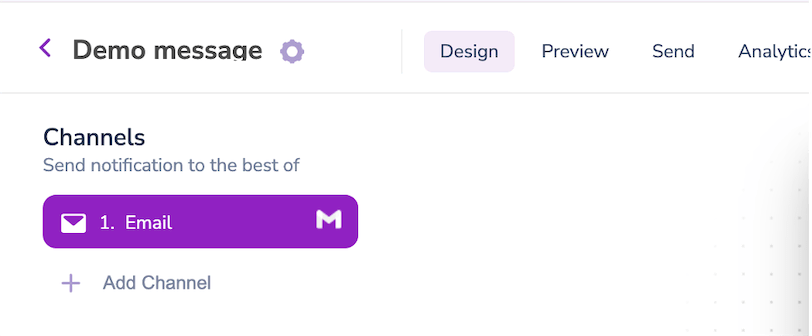
You can change the notification channel and connect to any other desired email providers by hovering over Email in the list of channels on the left side of the page and clicking the gear icon for Channel Settings. Click the Email channel itself to customize the notification message:
Now, click the Settings icon in the top right of your Courier dashboard, go to Events, and create a new event. Connect the event to any of your created email notifications, then click Save:
Step 3: Send the Email Notification
Find the code block for the part of your WordPress site where you want to add the email notification. It could be after a successful payment or after a successful membership renewal.
Write the Send API snippet below into your code:
1
2
3
4
5
6
7
8
9
10
11
12
13
14
15
16
17
18
19
20
21
22
23
24
<?php
$client = new Client();
$headers = [
  'Accept' => 'application/json',
  'Authorization' => 'Bearer {{API_KEY}}',
  'Content-Type' => 'application/json'
];
$body = '{
  "message": {
    "to": {
      "email": "{{EMAIL}}"
    },
    "template": "{{EVENT_NAME}}",
    "routing": {
      "method": "single",
      "channels": [
        "email"
      ]
    }
  }
}';
$request = new Request('POST', 'https://api.courier.com/send', $headers, $body);
$res = $client->sendAsync($request)->wait();
$resBody = $res->getBody();
In the above code:
API_KEYis either your Courier test or live key, eg,pk_test_HET164R23K2MENQC1W4Y5AERZ5.EVENT_NAMEis the event's name created in the second step of the email notification tutorial, eg,Demo.EMAILis the recipient's email address, eg,johndoe@gmail.com.
Once the code snippet above is executed, the notification attached to the event name will be sent to the recipient's email address.
SMS Notifications Guide
This section demonstrates how to implement SMS notifications on your WordPress site using Courier.
Step 1: Integrate with Your Preferred Courier SMS Provider
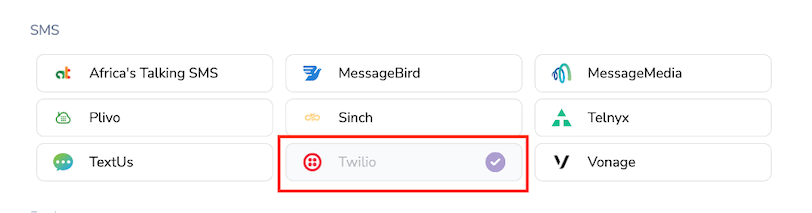
Log in to your Courier account, go to the Channels dashboard, and integrate with your preferred SMS provider from the list of providers available (for example, Twilio, MessageBird, or Africa's Talking SMS). You can also integrate multiple SMS providers.
This SMS notifications tutorial uses the Twilio provider. Click the Twilio button to integrate with it:
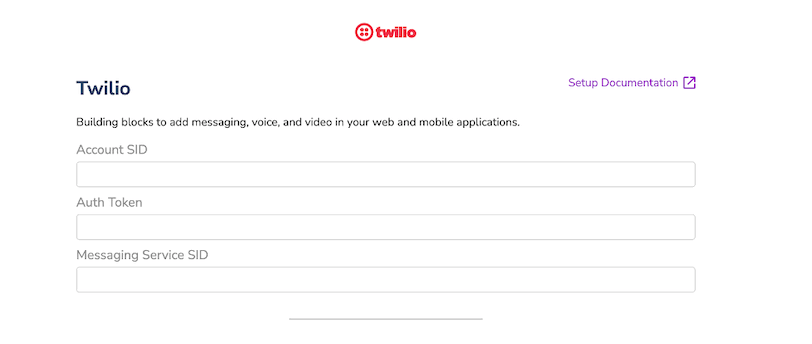
Register a Twilio account or log in to get your account SID, auth token, and messaging service SID. For more clarification on how to get your Twilio IDs, watch this short video. Then, fill out the fields below in Courier:
Ensure that your Twilio messaging service SID has one or more sender numbers. Follow this link to learn how to buy a Twilio phone number.
Step 2: Create an SMS Notification
Go to the Notifications dashboard by clicking Designer in the left-hand navigation.
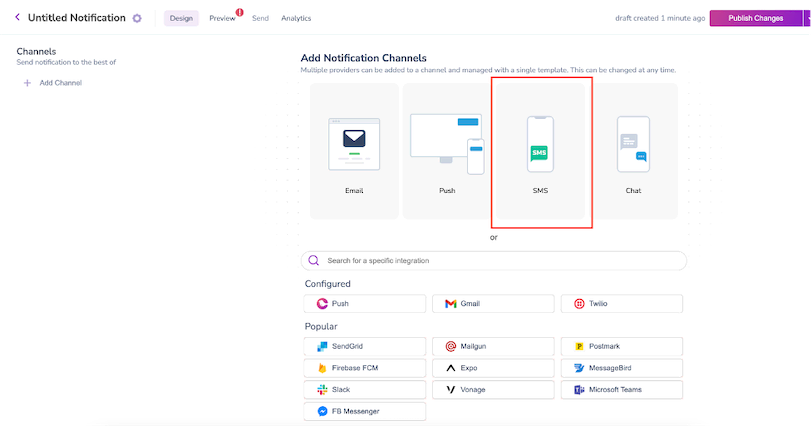
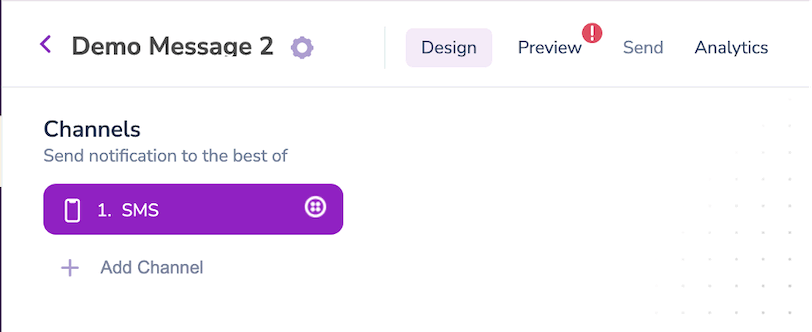
Create a new notification and select the SMS notification channel with the configured provider:
You can change the notification channel and connect to any other desired SMS providers by hovering over SMS in the list of channels on the left side of the page and clicking the gear icon for Channel Settings. Click the SMS channel itself to customize the notification message:
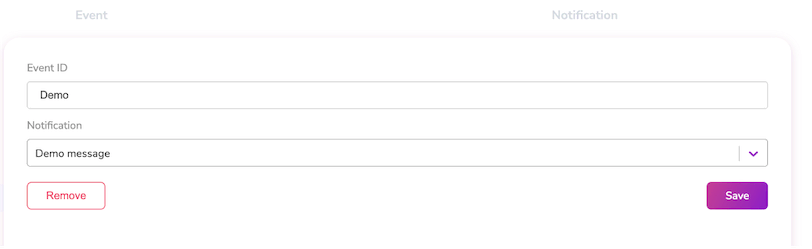
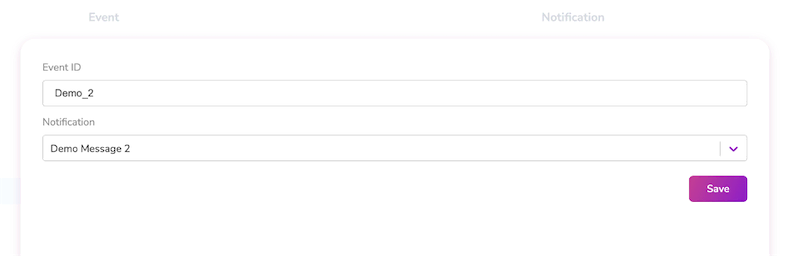
Create a new event under Settings > Events, then connect the event to any of your created SMS notifications and click Save:
Step 3: Send the SMS Notification
Find the code block for the part of your WordPress site where you want to add the SMS notification. It could be after a successful sign-up or after a successful order purchase.
Write the Send API snippet below into your code:
1
2
3
4
5
6
7
8
9
10
11
12
13
14
15
16
17
18
19
20
21
22
23
24
<?php
$client = new Client();
$headers = [
  'Accept' => 'application/json',
  'Authorization' => 'Bearer {{API_KEY}}',
  'Content-Type' => 'application/json'
];
$body = '{
  "message": {
    "routing": {
      "method": "single",
      "channels": [
        "sms"
      ]
    },
    "to": {
      "phone_number": "{{PHONE_NUMBER}}"
    },
    "template": "{{EVENT_NAME}}"
  }
}';
$request = new Request('POST', 'https://api.courier.com/send', $headers, $body);
$res = $client->sendAsync($request)->wait();
$resBody = $res->getBody();
In the above code:
API_KEYis either your Courier test or live key, eg,pk_test_HET164R23K2MENQC1W4Y5AERZ5.EVENT_NAMEis the event's name created in the second step of the SMS notification tutorial, eg,Demo_2.PHONE_NUMBERis the recipient's phone number, which must include the country code.
The sample code snippet above sends an SMS notification. Once it's executed, the notification attached to the event name will be sent to the recipient's phone number.
WhatsApp Notifications Guide
This section demonstrates how to implement WhatsApp notifications on your WordPress site using Courier.
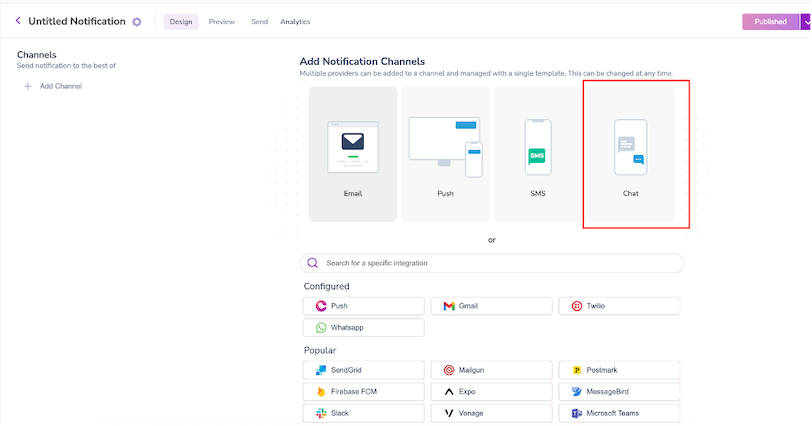
Step 1: Integrate with Your Preferred Courier Chat Provider
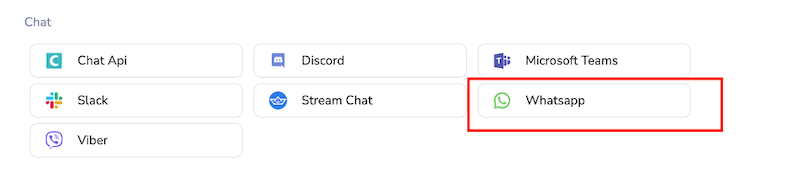
This tutorial uses WhatsApp, though you can integrate with one or more of your preferred chat providers. Log in to your Courier account, go to the Channels dashboard, and click the WhatsApp button to integrate with the WhatsApp chat provider:
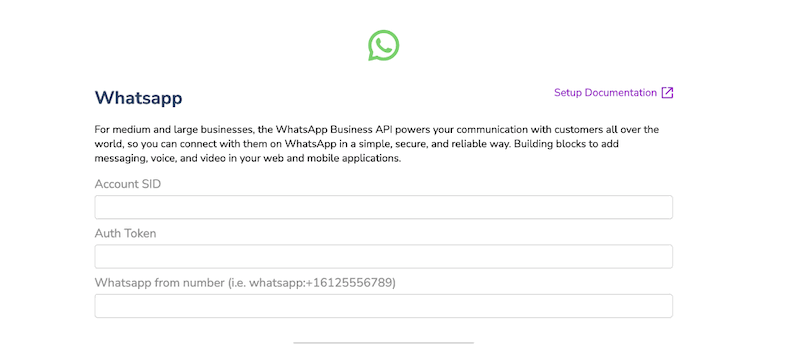
To use the WhatsApp provider, you need an active Twilio account that's enabled for WhatsApp. Copy your Twilio account SID and auth token as well as the WhatsApp number connected to Twilio. You can learn more about setting up the Twilio API for WhatsApp here.
In Courier, paste the retrieved values into the appropriate input fields and click the Install Provider button at the bottom of the page:
Step 2: Create a WhatsApp Notification
Go to the Notifications dashboard by clicking Designer in the left-hand navigation.
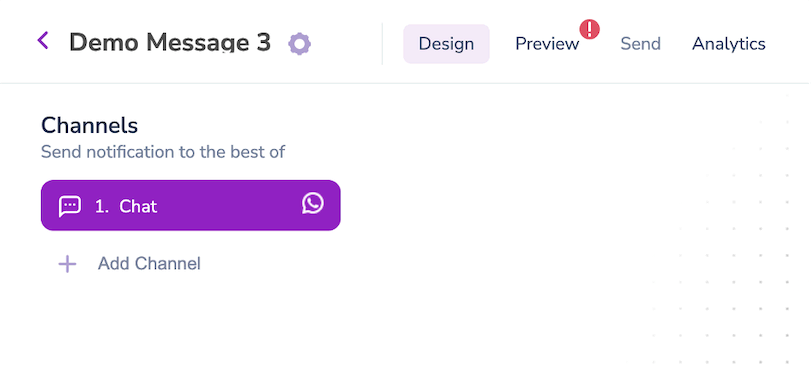
Create a new notification and select the Chat notification channel with the configured provider:
As before, you can click the channel on the left side of the page to customize the notification message:
You can also connect to your desired chat providers by accessing Channel Settings like you did for the other notification types. If it's not already selected, make sure to add the WhatsApp provider.
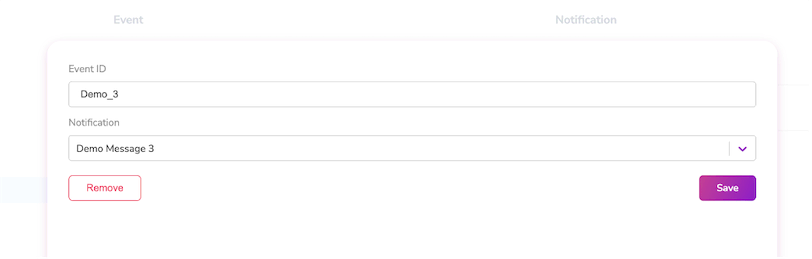
Create a new event under Settings > Events, then connect the event to any of your created chat notifications and click Save:
Step 3: Send the WhatsApp Notification
Find the code block for the part of your WordPress site where you want to add the WhatsApp notification. It could be after a successful order purchase or after a new membership renewal.
Write the Send API snippet below into your code:
1
2
3
4
5
6
7
8
9
10
11
12
13
14
15
16
17
18
19
20
21
22
23
24
<?php
$client = new Client();
$headers = [
  'Accept' => 'application/json',
  'Authorization' => 'Bearer {{API_KEY}}',
  'Content-Type' => 'application/json'
];
$body = '{
  "message": {
    "routing": {
      "method": "single",
      "channels": [
        "direct_message"
      ]
    },
    "to": {
      "phone_number": "{{PHONE_NUMBER}}"
    },
    "template": "{{EVENT_NAME}}"
  }
}';
$request = new Request('POST', 'https://api.courier.com/send', $headers, $body);
$res = $client->sendAsync($request)->wait();
$resBody = $res->getBody();
In the above code:
API_KEYis either your Courier test or live key, eg,pk_test_HET164R23K2MENQC1W4Y5AERZ5.EVENT_NAMEis the event's name created in the second step of the WhatsApp notification tutorial, eg,Demo_3.PHONE_NUMBERis the recipient's WhatsApp number, which should include the country code.
The sample code snippet above sends a WhatsApp notification. Once it's executed, the notification attached to the event name will be sent to the recipient's WhatsApp number.
Browser Notifications Guide
This section demonstrates how to implement browser (push) notifications on your WordPress site using Courier.
Step 1: Integrate with Your Preferred Courier Push Provider
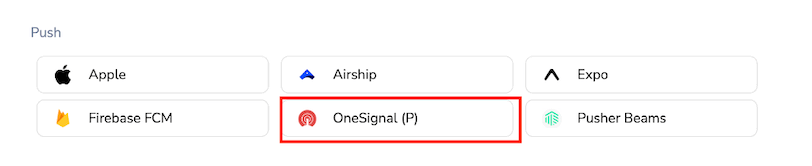
Log in to your Courier account, go to the Channels dashboard, and integrate with your preferred push provider from the list of providers available. It's also possible to integrate with multiple push providers.
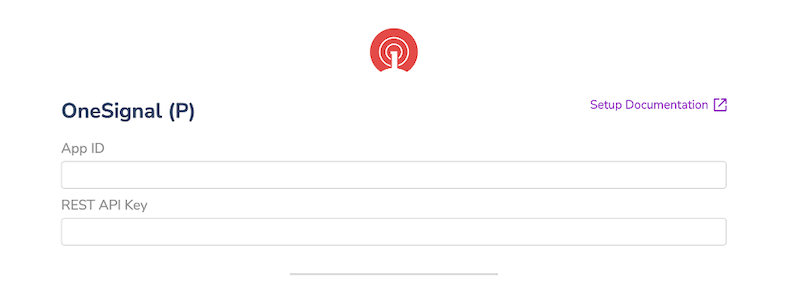
This tutorial uses the OneSignal (P) provider. Click the OneSignal (P) button to integrate with it:
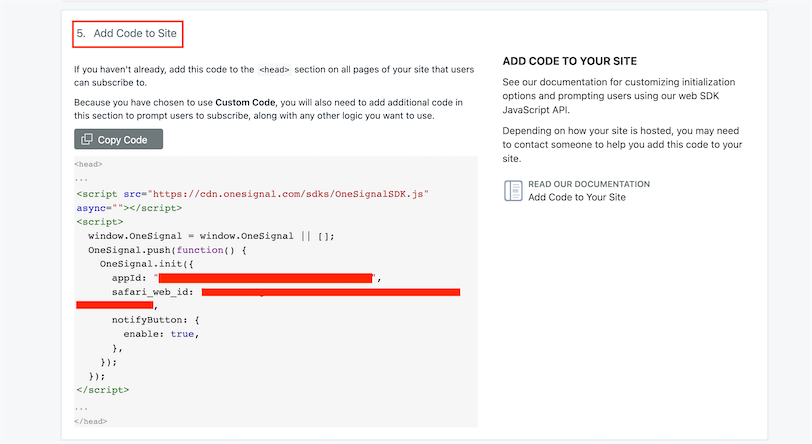
Register a OneSignal account or log in and follow the quick start guide to set up a Web Push Platform with the Custom Code option.
When prompted, download the OneSignal SDK file and upload it to the root folder of your site, then copy the code snippet provided by OneSignal:
In your WordPress admin area, go to Plugins, click Add New, search for WPCode – Insert Headers and Footers + Custom Code Snippets – WordPress Code Manager, and install the plugin. You can read more about the WPCode plugin here.
After it's installed and activated, go to the WordPress Code Manager, then Code Snippets, click Header & Footer, add the OneSignal code snippet you copied earlier to the header, and save.
If you are new to OneSignal, you'll then be required to add your first user. To do that, visit your site to view the OneSignal Bell Prompt. Click it and subscribe to push notifications. Check out the official documentation for more information on how to complete your OneSignal account setup.
Finally, copy the generated OneSignal app ID and REST API key. If needed, follow these instructions for more information on getting your ID and key. Paste the values into Courier:
Step 2: Create a Browser Notification
Go to the Notifications dashboard by clicking Designer in the left-hand navigation.
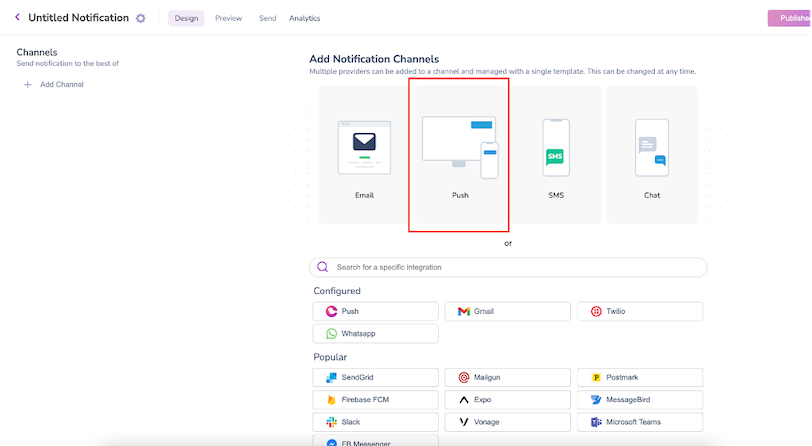
Create a new notification and select the Push notification channel with the configured provider:
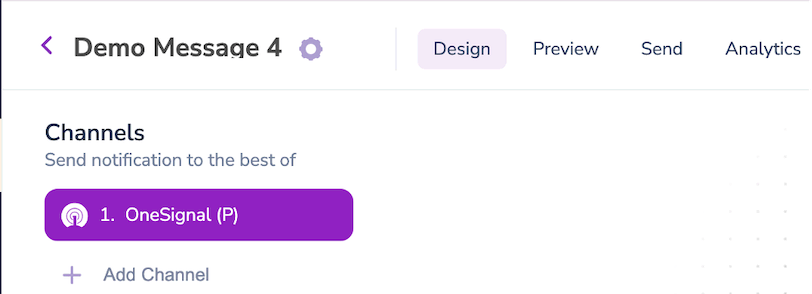
Once again, click the channel on the left side of the page to customize the message of the notification however you like:
You can change the notification channel and connect to other available push providers under Channel Settings by hovering over the channel name and clicking the gear icon.
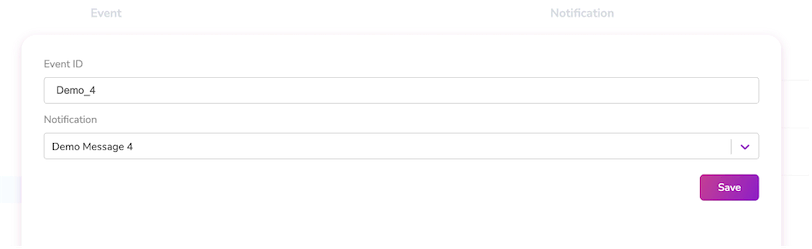
Create a new event under Settings > Events, then connect the event to any of your created push notifications and click Save:
Step 3: Send the Browser Notification
Find the code block for the part of your WordPress site where you want to add the browser (push) notification. It could be after a successful newsletter subscription.
Write the following Send API snippet into your code, noting that the snippet will only work for notifications connected to the OneSignal (P) provider:
1
2
3
4
5
6
7
8
9
10
11
12
13
14
15
16
17
18
19
20
21
22
23
24
<?php
$client = new Client();
$headers = [
  'Accept' => 'application/json',
  'Authorization' => 'Bearer {{API_KEY}}',
  'Content-Type' => 'application/json'
];
$body = '{
  "message": {
    "routing": {
      "method": "single",
      "channels": [
        "push"
      ]
    },
    "to": {
      "oneSignalPlayerID": "{{ONE_SIGNAL_PLAYER_ID}}"
    },
    "template": "{{EVENT_NAME}}"
  }
}';
$request = new Request('POST', 'https://api.courier.com/send', $headers, $body);
$res = $client->sendAsync($request)->wait();
$resBody = $res->getBody();
In the above code:
API_KEYis either your Courier test or live key, eg,pk_test_HET164R23K2MENQC1W4Y5AERZ5.EVENT_NAMEis the event's name created in the second step of the browser notification tutorial, eg,Demo_4.ONE_SIGNAL_PLAYER_IDis the OneSignal Player ID, a UUID that OneSignal creates per user device, eg,f1aaabc2-9a17-4237-adda-38319ea2de45.
Read the OneSignal API reference to learn more about getting all device details, including the Player ID, via API.
Extras: Sending Dynamic Content
This section demonstrates how to include dynamic content in any of the created notifications.
Step 1: Create Variable(s) in Your Notification
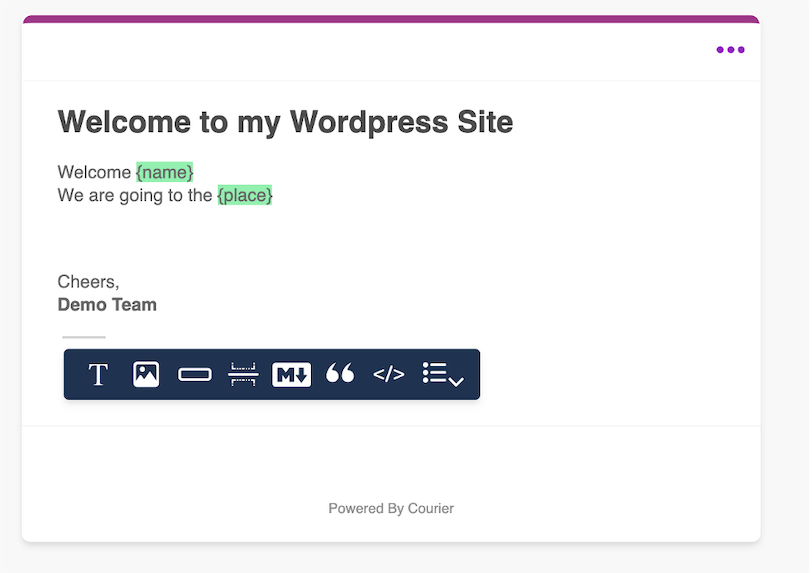
While designing your notification, all dynamic content should be contained in single curly braces. For example, the message in the screenshot below has two dynamic pieces of content, name and place:
Step 2: Add the Created Variable(s) to the Send API
Add a data object containing each variable as a child to the message object:
1
2
3
4
"data": {
  "name": "John Doe",
  "place": "Paradise"
},
Your raw data structure should now look like the code snippet below:
1
2
3
4
5
6
7
8
9
10
11
12
13
14
15
16
17
18
{
  "message": {
    "to": {
      "email": "{{EMAIL}}"
    },
    "template": "{{EVENT_NAME}}",
    "data": {
      "name": "John Doe",
      "place": "Paradise"
    },
    "routing": {
      "method": "single",
      "channels": [
        "email"
      ]
    }
  }
}
Conclusion
This article described how your WordPress site can use Courier to send email, SMS, WhatsApp, and browser (push) notifications. Any PHP-powered website can also send notifications by following the instructions in this article. Additionally, Courier includes support and SDKs for some of the most well-known programming languages, including Python, JavaScript, PHP, and Ruby.
Courier provides a great way to implement feature requests that require notifications. It's a robust notification management solution that enables you to design and send notifications through push (browser and mobile) notifications, direct messages like Slack and WhatsApp, SMS, and email using any programming language of your choice.
