How to Send Android Push Notifications with Firebase Cloud Messaging and Courier

Adam Searle
August 31, 2023
Implementing push notifications in Android usually means managing device tokens, handling Firebase Cloud Messaging (FCM) setup, and building logic for delivery, localization, and user preferences. The Courier Android SDK removes that overhead. It provides a unified way to authenticate users, manage tokens, and send push notifications through Courier’s API and your existing FCM setup.
In this tutorial, you’ll set up the Courier Android SDK, configure Firebase Cloud Messaging, and send a test notification using the Courier API.
👉 View the Courier Android SDK on GitHub.
Setting up the development environment
Before writing code, make sure you have everything you need to run the Courier Android SDK.
- Courier account — Sign up if you don’t already have one.
- Android SDK 23 or later — In your app-level
build.gradle.kts, confirmandroid.defaultConfig.minSdk = 23. - Firebase account — Firebase handles push delivery for Android.
Add your app to Firebase, download the
google-services.jsonfile, and include the Firebase SDK in your Gradle build. If you already have a Firebase project, go to Project Settings → See SDK instructions for setup steps.
Note: This tutorial uses Android Studio (Giraffe or later) and Kotlin.
1. Add the JitPack repository
Add JitPack to your settings.gradle.kts:
pluginManagement {repositories {…maven { url = uri("https://jitpack.io") }}}dependencyResolutionManagement {repositories {…maven { url = uri("https://jitpack.io") }}}
2. Add the Courier dependency
dependencies {implementation("com.github.trycourier:courier-android:5.2.12")}
3. Initialize the SDK
package com.example.courierpushimport android.app.Applicationimport com.courier.android.Courierclass MyApplication : Application() {override fun onCreate() {super.onCreate()Courier.initialize(this)}}
Reference this class in your AndroidManifest.xml:
<applicationandroid:name=".MyApplication"android:allowBackup="true"… ></application>
With setup complete, your project is ready to use the Courier Android SDK for push notifications.
Push notification basics with Courier
Implementing push notifications on Android usually means managing FCM tokens, permissions, and user interactions. The Courier Android SDK automates these steps — handling token registration, delivery tracking, and permission checks for you.
For this tutorial, you’ll use Firebase Cloud Messaging (FCM) as your push provider.
FCM is reliable, widely supported, and integrates directly with Courier.
To connect FCM with Courier:
- In the Courier dashboard, set up Firebase Cloud Messaging (FCM) as a provider under Channels.
- Add and initialize the Firebase SDK in your Android app (see “Setting up the development environment” above).
Setting up FCM as a provider allows Courier to route notifications through Firebase, while the Firebase SDK enables your Android app to receive and display them.
Configuring Courier for push notifications
To receive push notifications in your Android app, you’ll need to:
- Create a
CourierServiceclass to handle incoming messages. - Register that service in your app’s
AndroidManifest.xml.
Create the CourierService file
Create a new Kotlin class file called MyCourierService.
This class extends CourierService (which itself extends FirebaseMessagingService) and handles incoming push notifications.
package com.example.courierpushimport com.courier.android.service.CourierServiceimport com.courier.android.notifications.presentNotificationimport com.google.firebase.messaging.RemoteMessageclass MyCourierService : CourierService() {override fun showNotification(message: RemoteMessage) {super.showNotification(message)// Customize how notifications appear in your app.// presentNotification() is a helper for quick setup.message.presentNotification(context = this,handlingClass = MainActivity::class.java,icon = android.R.drawable.ic_dialog_info)}}
CourierServiceautomatically manages token refreshes and handles FCM message events.
For production apps, replacepresentNotification()with your own notification builder.
Update the AndroidManifest.xml file
Declare your CourierService inside the <application> tag of your AndroidManifest.xml.
This allows Android to deliver FCM messages to your service.
<application>…<serviceandroid:name=".MyCourierService"android:exported="false"><intent-filter><action android:name="com.google.firebase.MESSAGING_EVENT" /></intent-filter></service>…</application>
The <intent-filter> ensures that Firebase routes incoming messages to MyCourierService.
If you want to track when users open or receive notifications, have your main activity extend CourierActivity. Courier will automatically track those events for you.
Sending push notifications using the Android SDK
Courier’s Android SDK uses a two-step process for push delivery:
- Register the user’s device with Courier.
- Send a message through the Courier API.
Register a user’s device with Courier
After initializing Courier, use the signIn() method to associate your app user with their device.
This automatically retrieves the device’s FCM token and syncs it with your Courier workspace.
class MyApplication : Application() {override fun onCreate() {super.onCreate()// Initialize CourierCourier.initialize(this)// Sign in to CourierCoroutineScope(Dispatchers.Main).launch {Courier.shared.signIn(accessToken = "<YOUR_AUTH_KEY>",clientKey = null,userId = "<YOUR_USER_ID>")}}}
This code signs the user into Courier and registers their FCM token for push notifications.
For push-only implementations, clientKey can remain null — it’s only needed when using Courier Inbox.
Replace <YOUR_AUTH_KEY> with your Courier API key and <YOUR_USER_ID> with the user’s ID from your system (which should match the user ID in the Courier dashboard).
Once signed in, Courier handles token refreshes and device association automatically.
Your app is now ready to receive and display push notifications through Courier and FCM.
Send a notification
With the device registered, you’re ready to send a push notification.
Notifications are sent through the Courier Send API, where you define the recipient, content, and delivery channel.
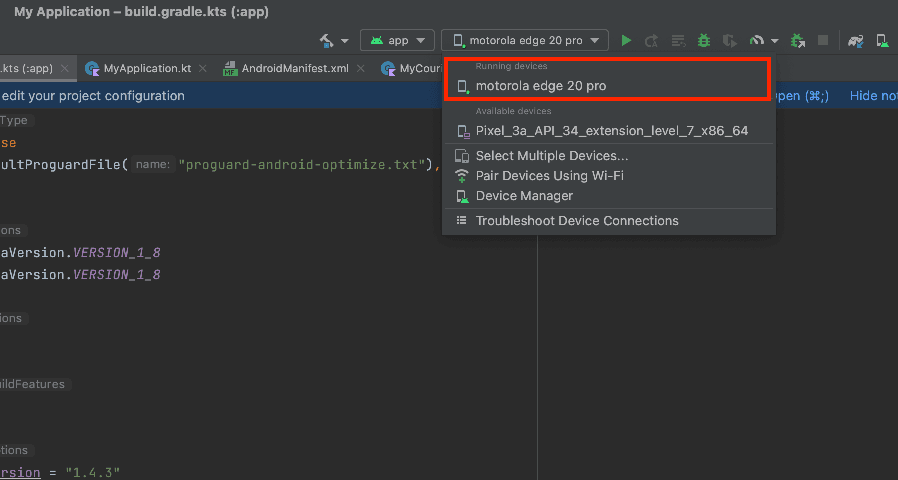
Before testing, make sure your environment is set up correctly:
- Connect a physical Android device.
- Enable Developer options on the device (see this example guide from Samsung).
- Run your app in Android Studio on that device.
- If prompted, enable notifications for your app in system settings.
Using the Send API
You can send a notification using any HTTP client.
Here’s an example using cURL:
curl --request POST \--url https://api.courier.com/send \--header 'Authorization: Bearer YOUR_AUTH_KEY' \--header 'Content-Type: application/json' \--data '{"message": {"to": { "user_id": "YOUR_USER_ID" },"content": {"title": "Hey there 👋","body": "Have a great day 😁"},"routing": {"method": "single","channels": ["firebase-fcm"]}}}'Replace:- `YOUR_AUTH_KEY` with your [Courier API key](https://app.courier.com/settings/api-keys)- `YOUR_USER_ID` with the user ID that was registered via `Courier.shared.signIn()` in your app.If setup was successful, your test notification will appear on the device.---### Sending via templatesYou can also send messages using predesigned templates from the [Courier Template Designer](https://www.courier.com/docs/platform/content/template-designer/template-designer-overview).Templates let you manage content visually while keeping your code clean.```javascriptcurl --request POST --url https://api.courier.com/send --header 'Authorization: Bearer YOUR_AUTH_KEY' --header 'Content-Type: application/json' --data '{"message": {"to": { "user_id": "YOUR_USER_ID" },"template": "YOUR_TEMPLATE_ID","data": {"username": "John Doe"}}}'
Use the template’s ID or alias, and include dynamic variables in the data object to populate your template.
Best practices
- Use server-side sending — Never send directly from the client app. Keep your API keys secure on the backend.
- Leverage templates — Design and reuse notifications across channels.
- Test with physical devices — Emulators don’t always deliver push notifications consistently.
- Track message delivery — Use Courier Message Logs to monitor delivery and troubleshoot issues.
Advantages of the Courier Android SDK
The Courier Android SDK simplifies how developers implement and manage Android push notifications. Instead of maintaining Firebase Cloud Messaging (FCM) logic or building custom token management services, Courier provides a single system for notification delivery, user tracking, and device management through its SDK and API.
This approach allows engineering teams to deliver reliable, scalable push notifications without the infrastructure overhead.
Automated token management
Every Android device that receives push notifications has a Firebase Cloud Messaging (FCM) token. Managing those tokens—refreshing, storing, and syncing them—is critical for ensuring messages reach the right users. But doing this manually becomes difficult to scale and prone to errors.
The Courier Android SDK automatically synchronizes FCM tokens with Courier. When tokens change or users reinstall the app, Courier updates them behind the scenes. This ensures accurate user-device mapping, fewer delivery failures, and less backend code to maintain.
Benefits of automated token management
- No manual token storage or refresh logic
- Consistent delivery across devices
- Built-in error handling and retries
- Reduced maintenance and operational overhead
User tracking and session management
The SDK also provides simple user identification and session tracking. When a user signs in, Courier associates their push token with their account. When they sign out, that association is cleared, ensuring users only receive messages that apply to their active session.
// Identify a userCourier.identify(userId);// Log out a userCourier.logout();
This keeps notification targeting accurate, even across multiple devices or reinstalls, and ensures compliance with user notification preferences.
Conclusion
The Courier Android SDK removes the complexity of implementing and maintaining Android push notifications. It handles token synchronization with Firebase Cloud Messaging (FCM), manages user sessions, and provides an API for sending and tracking messages across devices.
With Courier, Android developers can:
- Send push notifications quickly using a single API
- Automatically manage tokens and device registration
- Track delivery and engagement in real time
- Scale their notification system without additional infrastructure
To learn more, visit the Courier Android SDK on GitHub or sign up for a free Courier account to start building.
Frequently Asked Questions (FAQ)
What is the Courier Android SDK used for?
The Courier Android SDK helps developers send and manage push notifications in Android apps. It integrates directly with Firebase Cloud Messaging (FCM) to handle token registration, delivery routing, and user tracking automatically, removing the need for custom backend logic.
How does Courier integrate with Firebase Cloud Messaging (FCM)?
Courier connects to Firebase Cloud Messaging (FCM) through the Courier dashboard.
When you configure FCM as a provider and initialize the Courier SDK in your app, Courier automatically manages FCM device tokens, syncs them with user profiles, and routes push notifications reliably through Firebase.
Can I use the Courier Android SDK without Firebase?
No. Firebase Cloud Messaging (FCM) is required for Android push notifications. Courier uses FCM under the hood to deliver messages to devices while managing authentication, tokens, and routing through its API.
How do I send a push notification with Courier?
You can send push notifications using the Courier Send API or the Courier Dashboard.
Use the /send endpoint to define recipients, content, and delivery channels. Courier handles routing and delivery through your configured Firebase Cloud Messaging (FCM) provider.
Example:
bash
curl -X POST https://api.courier.com/send   -H "Authorization: Bearer YOUR_AUTH_KEY"   -H "Content-Type: application/json"   -d '{
    "message": {
      "to": { "user_id": "YOUR_USER_ID" },
      "content": { "title": "Hello!", "body": "Test notification" },
      "routing": { "method": "single", "channels": ["firebase-fcm"] }
    }
  }'
Does Courier handle Firebase tokens automatically?
Yes. The Courier Android SDK automatically manages Firebase Cloud Messaging (FCM) tokens.
It handles token creation, refresh, and synchronization with Courier’s backend, ensuring that each user’s device stays correctly linked without requiring manual database management.
How do I authenticate users in the Courier Android SDK?
You can authenticate users with the signIn() method.
Courier links the FCM token from the current device to the specified user ID in your Courier workspace.
Courier.shared.signIn(accessToken = "<YOUR_AUTH_KEY>",clientKey = null,userId = "<YOUR_USER_ID>")
Can Courier track message delivery and engagement?
Yes. Courier tracks every stage of message delivery, including sent, delivered, failed, and clicked events.
You can view these details in the Courier Dashboard or access them programmatically through the API for analytics and observability.
What are the benefits of using the Courier Android SDK over plain FCM?
Courier provides higher-level abstractions on top of Firebase Cloud Messaging (FCM), including:
- Automatic token management and synchronization
- User-based delivery tracking
- Cross-channel routing (email, SMS, chat, in-app)
- Real-time delivery logs and analytics
- Template-based message design
This lets teams scale notification systems faster without maintaining FCM or backend routing logic.
How secure is the Courier Send API?
The Courier Send API uses HTTPS and Bearer token authentication.
All requests should originate from a secure backend environment—never directly from a mobile client—to prevent API key exposure.
Can I send personalized or localized push notifications?
Yes. Courier supports dynamic data variables and templates, enabling localized or personalized messages.
You can pass custom data in your API request and reference it in your Courier templates.
Does the Courier Android SDK support in-app notifications?
Yes. In addition to push notifications, the SDK supports Courier Inbox—a native in-app notification center for Android.
Inbox provides synchronized, read-state-aware notifications across devices and integrates seamlessly with Courier’s API.
What Android versions does Courier support?
The Courier Android SDK supports Android SDK version 23 (Android 6.0, Marshmallow) and higher.
It’s fully compatible with Kotlin, Android Studio Giraffe and later, and modern Gradle builds.
Is Courier free to use for Android push notifications?
Yes. Courier offers a free plan suitable for testing Android push notifications, Firebase Cloud Messaging integration, and SDK setup.
You can sign up to get an API key and start sending messages without a paid subscription.
Similar resources

Best in-app notification centers in 2026
A developer-focused comparison of the best in-app notification centers in 2026. We cover build vs buy, then compare prebuilt UI components, real-time delivery, platform coverage, channel support, and pricing across Courier Inbox, Novu, MagicBell, Liveblocks, Braze, CleverTap, Airship, OneSignal, and Customer.io.
By Emily Lane
July 07, 2026

Top 10 push notification providers in 2026
Comparing Courier, Firebase Cloud Messaging, Apple Push Notification service, Amazon SNS, OneSignal, Expo, Airship, Braze, CleverTap, and Pushwoosh on platform reach, reliability, developer experience, and pricing, each checked against its own documentation.
By Emily Lane
July 06, 2026

Is texting patients a HIPAA violation?
The short answer: texting patients is fine until an unsecured text carries protected health information. This post draws the line with side-by-side SMS examples, covers the minimum-necessary rule and when a BAA is required, and shows the template pattern that makes it structurally impossible to leak PHI into a text.
By Emily Lane
June 21, 2026
© 2026 Courier. All rights reserved.