Create an Automated Notification System Using Python and Courier

Adam Searle
June 12, 2023
Product notifications keep users engaged and informed about important updates related to web and mobile applications. However, building an effective notification system for your app that sends timely and personalized messages can be challenging. Courier's development platform for notifications simplifies this process by consolidating various communication APIs, data, and development tools in one place.
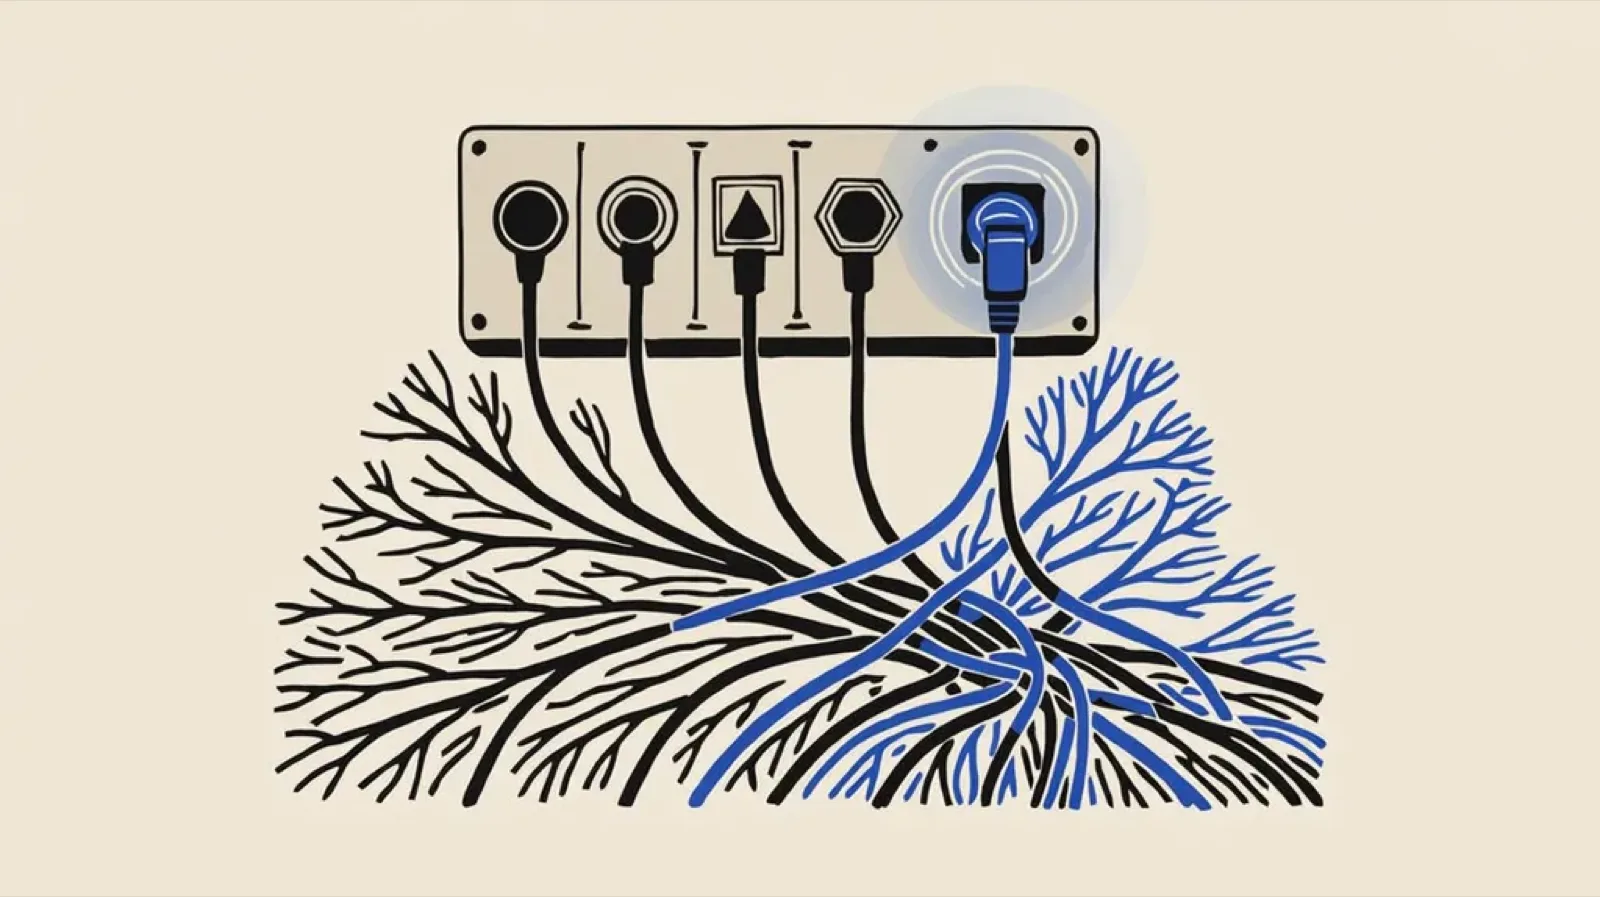
With Courier, you can create a best-in-class notification system that works across product features and use cases to send notifications over email, push, Slack, MS Teams, a notification center in your web or mobile app — or any other channel
In this article, we'll guide you through using Python and Courier to create an automated notification system that sends real-time updates to users. Note that we’ll just be looking at a simple use case for this tutorial. However, this will establish the foundation for a notification system that can be used for virtually any scenario. Some of the features available include:
- Powerful API primitives to handle the complex delivery logic that’s behind every great user notification,
- Advanced send rules to throttle, batch, and digest messages
- Access to 50+ channels and providers so you can reach users where they are
- Consolidated notification logs and delivery status analytics to quickly identify and remediate issues
- A drop-in notification inbox & preferences center for your app
- Out of box integrations with observability, authentication, and customer data platforms
- Web-based notification designer to build and manage templates across channels
- Channel and provider failover so your messages always get through
Prerequisites
- Create a Courier account.
- Install the latest version of Python.
- Install the trycourier package using
pip install trycourier. You can find additional documentation for the package by following the link above.
Step 1 — Integrate a communication provider
- Go to the Courier channel tab and click Add Channel.
- Choose your preferred communication channel. For this example, we'll use email.
- Select your preferred communication service provider. We'll use Gmail in this case.
- Continue and authorize your Gmail account to integrate with your Courier account. This authorized Gmail account will serve as the automated email sender.
Step 2 — API keys
To connect your Python application to your Courier account, you need API keys.
- Go to the Courier API Keys page in the Settings tab.
- Retrieve both production and test keys. You will use these keys when setting up the Python application.
Step 3 — Design the notification content using Courier Designer (optional)
Courier provides a convenient feature that enables you to create and customize notification content for email, SMS, push notifications, and chat apps such as Slack and Microsoft Teams.
The process of designing a custom notification using Courier is simple, making it easier for you to tailor your messages according to your audience and communication needs.
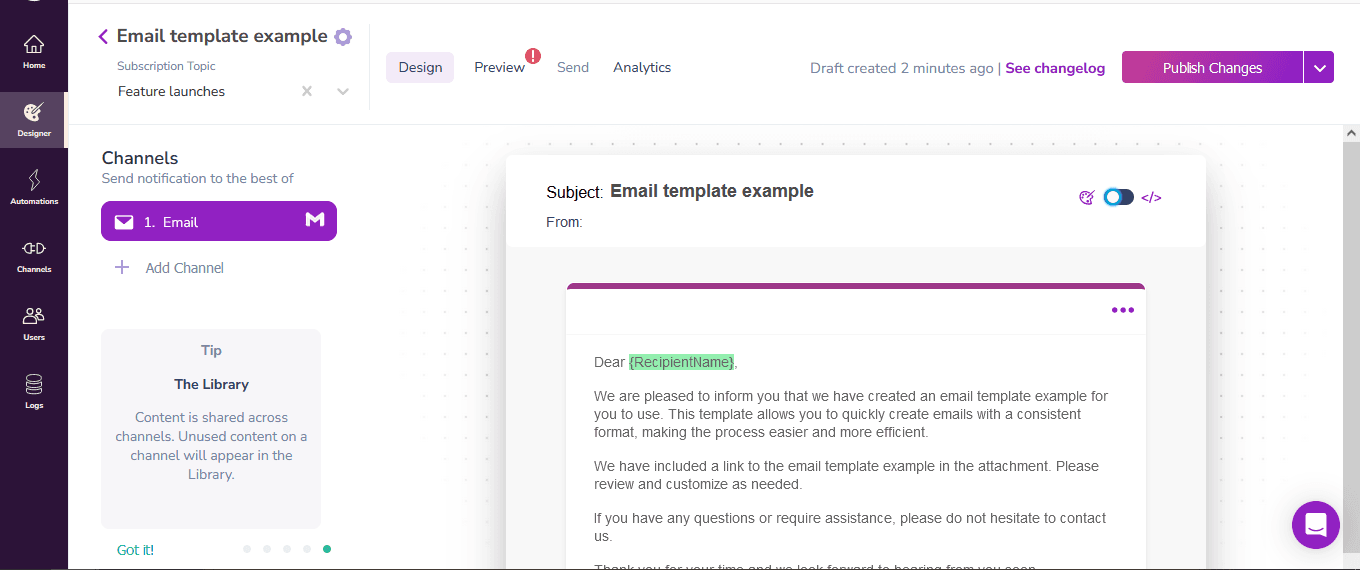
- Go to the Courier Designer tab and click Create Template.
- After integrating with your email provider, click on the provider to continue.
- Use Courier's notification builder to customize the email content. Click Publish Changes to publish the new notification.
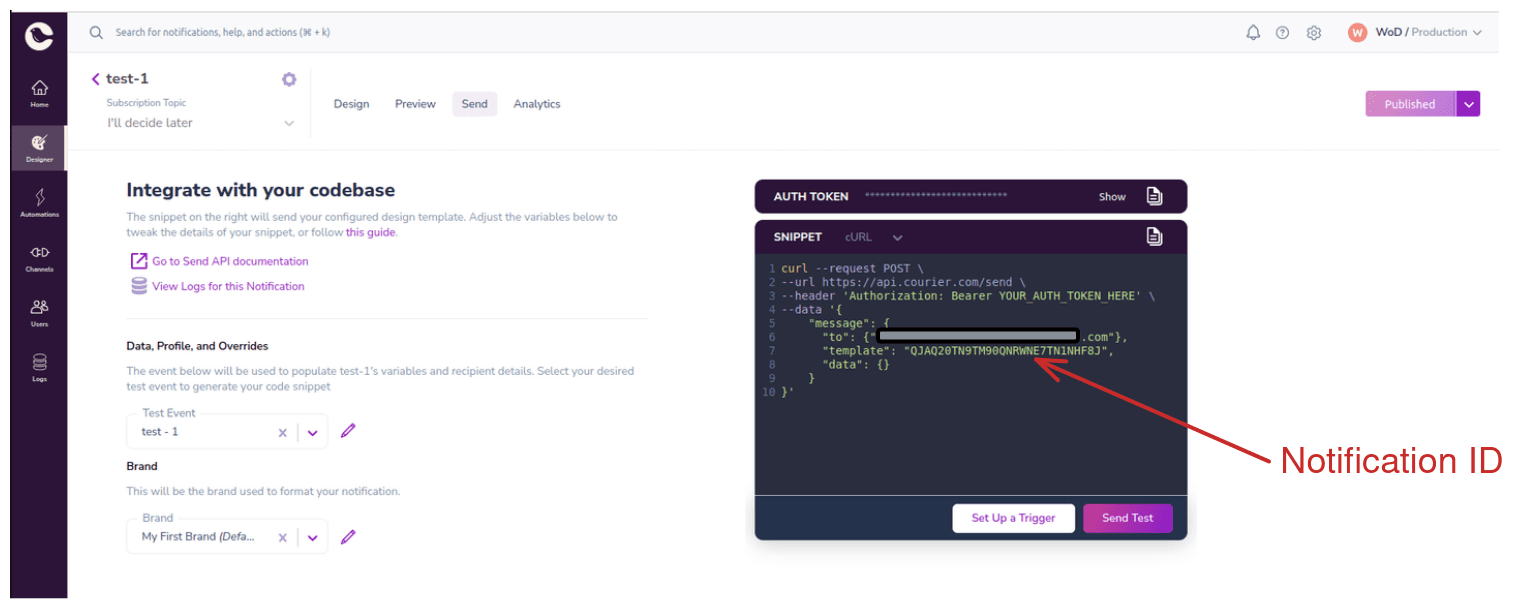
Step 4 — Send a simple notification with Python
First let’s look at an example of how to send a simple notification using Python and Courier.
Create a file named app.py and add the following code. You can find the default code snippet for your notification in the Send tab of the Courier notification designer.
from trycourier import Courierclient = Courier(auth_token="API KEY GOES HERE") # Replace with production API keyresp = client.send_message(message={"template": "QJAQ20TN9TM90QNRWNE7TN1NHF8J", # Replace with the actual notification ID"to": {"email":"someone@example.com" # Replace with the recipient email address},})
This code imports the Courier library, initializes the client with your API key, and sends a message using a specified template to a recipient's email address. Replace the API key, notification ID, and email address with your own values.
Step 5 — Customize the notification workflow by adding client profiles
You can send notifications to multiple recipients simultaneously using Courier client profiles. First, you should go through the process from step 3 again, in order to create a second notification, as this demo sends two notifications with a delay in between.
from trycourier import Courierclient = Courier(auth_token="API KEY GOES HERE") # Replace with production API keyresp = client.profiles.add("PROFILE_ID", # Add an ID that can be used to uniquely identify the recipient{"email": "someone@example.com", # Replace with the email address of the recipient"name": "Someone Name" # Replace with the name of the recipient})
This code creates a new client profile in Courier using the profiles.add method. You need to provide a unique profile ID, email address, and name to create the profile. For this tutorial, you will need to do this two times, for two separate users. You can, if you prefer, easily add a user directly from the Courier dashboard.
Now let’s use the client profile's ID as a recipient when sending notifications.
from trycourier import Courierclient = Courier(auth_token="API KEY GOES HERE") # Replace with production API keyresp = client.automations.invoke(automation={'steps': [{# This notification will be sent to the email address of "PROFILE_ID_1""action": "send","template": "QJAQ20TN9TM90QNRWNE7TN1NHF8J", # Replace with your 1st actual notification ID"recipient": "PROFILE_ID_1", # Replace with your actual PROFILE_ID},{"action": "delay","duration": "1 minute",},{# This notification will be sent to the email address of "PROFILE_ID_2""action": "send","template": "X0G40J35NP4MS0GRWD67Q0CTBJA0", # Replace with your 2nd actual notification ID"recipient": "PROFILE_ID_2", # Replace with your actual PROFILE_ID},],},)
This code demonstrates how to invoke an automation with multiple steps using Courier's automations.invoke method. The steps include sending a notification to two different recipients with unique profile IDs, and a delay of 1 minute between the notifications.
Step 6 — Automate the Notification Workflow with Courier's Scheduling Capability
Next, we're going to demonstrate how to schedule a notification to be sent periodically using Courier's in-built scheduling functionality. If you want to know more about Courier Automations, check out this post.
To setup a scheduled notification using Courier, you will have to use the Courier Automations platform. Here is how to do it. \ Open Courier Automations in your Courier account from the dashboard.
- Click on the New Automation button to start a new automation workflow.
- Drag the Schedule trigger from the triggers section onto the canvas.
- Set your desired scheduling method. Courier offers three scheduling methods:
a) Recurrence: Schedule the automation to be invoked on a repeated schedule, similar to how one would schedule a repeat event in a calendar application.
b) Date: Schedule the automation to be invoked one time on a specific future date.
c) Cron: Similar to Recurrence but with more specificity using crontab expressions. - After setting up your schedule trigger, add the Send action to the canvas.
- Choose your recipient(s) and set the Template field with your notification.
- If you want to send another notification after a delay, add the Delay action followed by another Send action.
- Save your automation.
- You can then head to the
invoketab to invoke the most recent published version of the automation template. For example:
curl --request POST \--url https://api.courier.com/automations/81d5fdde-6f35-4932-b3ff-8c31e1a2b223/invoke \--header 'Accept: application/json' \--header 'Authorization: Bearer <YOUR_API_KEY>' \--header 'Content-Type: application/json' \--data '{}'
This setup will automate your notification. The notification(s) will be sent according to the schedule you have configured within Courier Automations.
Sent notification details
When the application runs, it sends a request to Courier containing all the necessary information about the notification, including the content, recipient email details, additional data, routing options, and message delay duration. Courier processes the request and routes the notification to the appropriate channel — in this case, email. And while we’re showing this over email, it’s just as easy using Courier Automations to build a workflow that sequences the notification to a web and mobile notification center, Slack or MS Teams DM, push notification, etc, based on delivery status and timing rules so that users are more likely to get the notification.
To check the status of a notification, visit the Courier Logs page. You'll see a list of all notifications sent from your account and can click on any one to view more details.
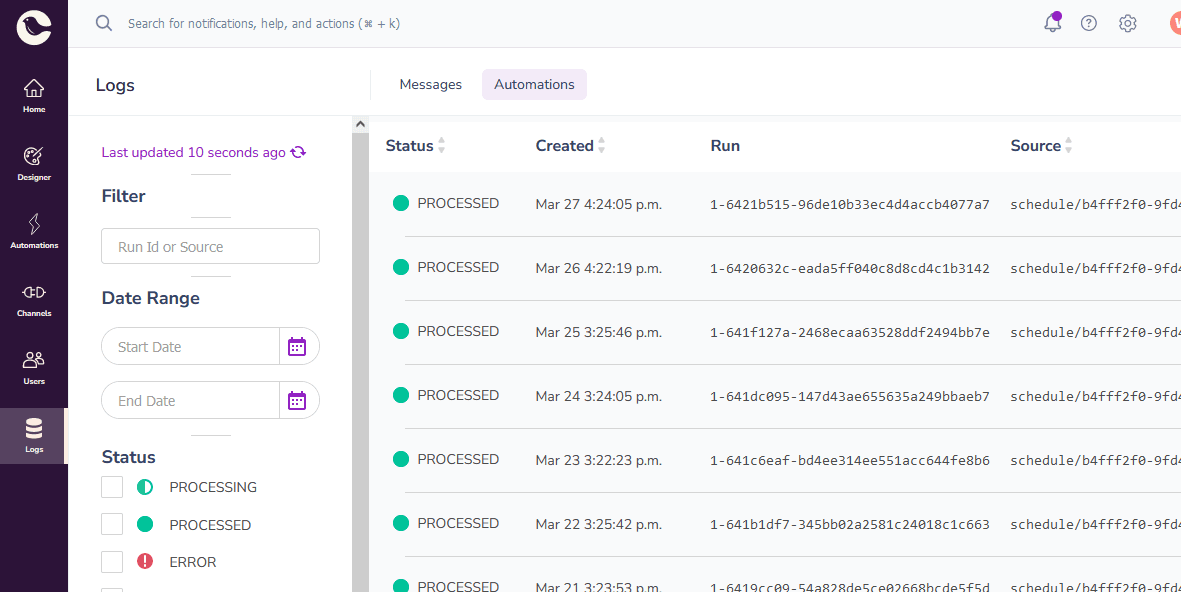
The Courier Logs page automatically updates with the notification status, allowing you to check whether the notification was sent or not. You can also see the time when the recipient opened the notification. Or look into error details of notifications that aren’t delivered so you can quickly debug.
Wrapping up
In this article, we've walked you through the process of creating an automated notification system using Python and Courier, a powerful combination that can streamline communication within your organization and elevate the user experience for your customers.
By following the steps we've outlined, you'll be well-equipped to create a customized notification system that meets your unique requirements. To learn more about the notification features available, check out Courier for free today or contact us if you want to talk through your unique requirements.
Similar resources
Build with AI: let your agent handle notifications end to end
Courier's Build with AI toolkit gives coding agents direct access to your notification infrastructure. Four integration points, one goal: let your agent send messages, debug deliveries, manage users, and follow notification best practices without context-switching. Works with Claude Code, Cursor, and any agent that can run shell commands or call MCP tools.

How to Use Claude Code on Mobile to Design, Test, and Ship Multichannel Notifications
A walkthrough of using Claude Code's mobile app with Courier's MCP server and CLI to design, test, and ship a multichannel product announcement from a phone. Covers the full workflow: drafting the content outline, creating notification templates using Courier's elemental format, building channel-specific variants for email, Slack, push, and SMS, customizing brand styling through the API, iterating on design with test sends, getting team approval, and publishing with custom routing rules. The whole thing took a couple hours, mostly cold start and design iterations.

Transactional, Product, and Marketing Notifications: What Are the Differences?
Understanding the difference between transactional, product, and marketing notifications is essential for developers building notification infrastructure. Transactional notifications confirm user actions and require no opt-in. Product notifications drive feature adoption through education. Marketing notifications promote sales and require explicit consent. This guide explains the legal requirements, best practices, and when to use each notification type to build compliant systems users trust.Retry
© 2026 Courier. All rights reserved.