How to Send Transactional Emails Using SendGrid with Notification Infrastructure

Transactional emails are automated emails triggered by a user (or group of users) taking action on your web or mobile application. Some examples include password reset emails, confirmation emails for purchases or reservations, welcome and onboarding emails, and shipping notifications.
Often transactional emails require more advanced logic like honoring user notification preferences, batching/digesting frequent messages, internationalization, provider failover, and routing across other channels like Push, Slack, and SMS. That’s why it’s important to pair your email provider with Courier’s notification infrastructure. This way it’s easy to build in the full set of features required for production and to expand, monitor, and scale your transactional email over time.
Today we’ll look at a simple use case for building transactional notifications with Twilio SendGrid via Courier’s API. The examples in this tutorial use Courier's Node.js SDK; however, Courier also provides SDKs for other languages including Python, Java, PHP and Ruby.
(Need more context on transactional emails before diving in? Check out our guide to transactional emails.)
How to send transactional emails with Twilio SendGrid using Courier
Step 1. Integrate SendGrid with Courier
Log in to your SendGrid account and go to Settings → API Keys. Click Create API Key and then give your key a name. Now, choose Restricted Access and toggle the Mail Send setting, and then click Create & View. Your API key will now be displayed. Copy it and put it somewhere safe as it cannot be shown to you again.
Next, log into Courier and go to the Channels page. To send via SendGrid, look for SendGrid in the Provider Catalogue under Email and click on it. Enter your SendGrid API key, along with the email address that you want your SendGrid messages to be sent from. This must be an email account that you have access to, as you'll be required to click a link in an email to verify that it is your account.
There is also the option to create a test configuration, which means there will be a test API key that your test systems can use.
After you’ve filled out this form, click Install Provider.
Step 2. Design your transactional email template
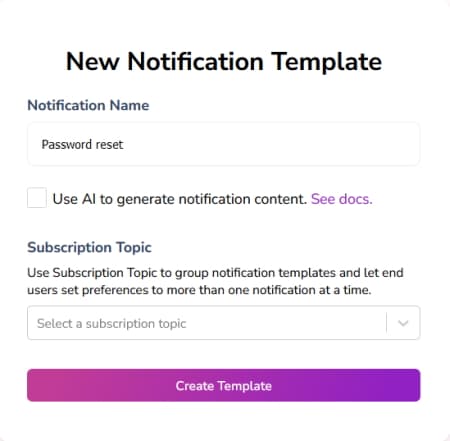
In the Courier app, navigate to Designer and click Create Template. Choose a name for your template.
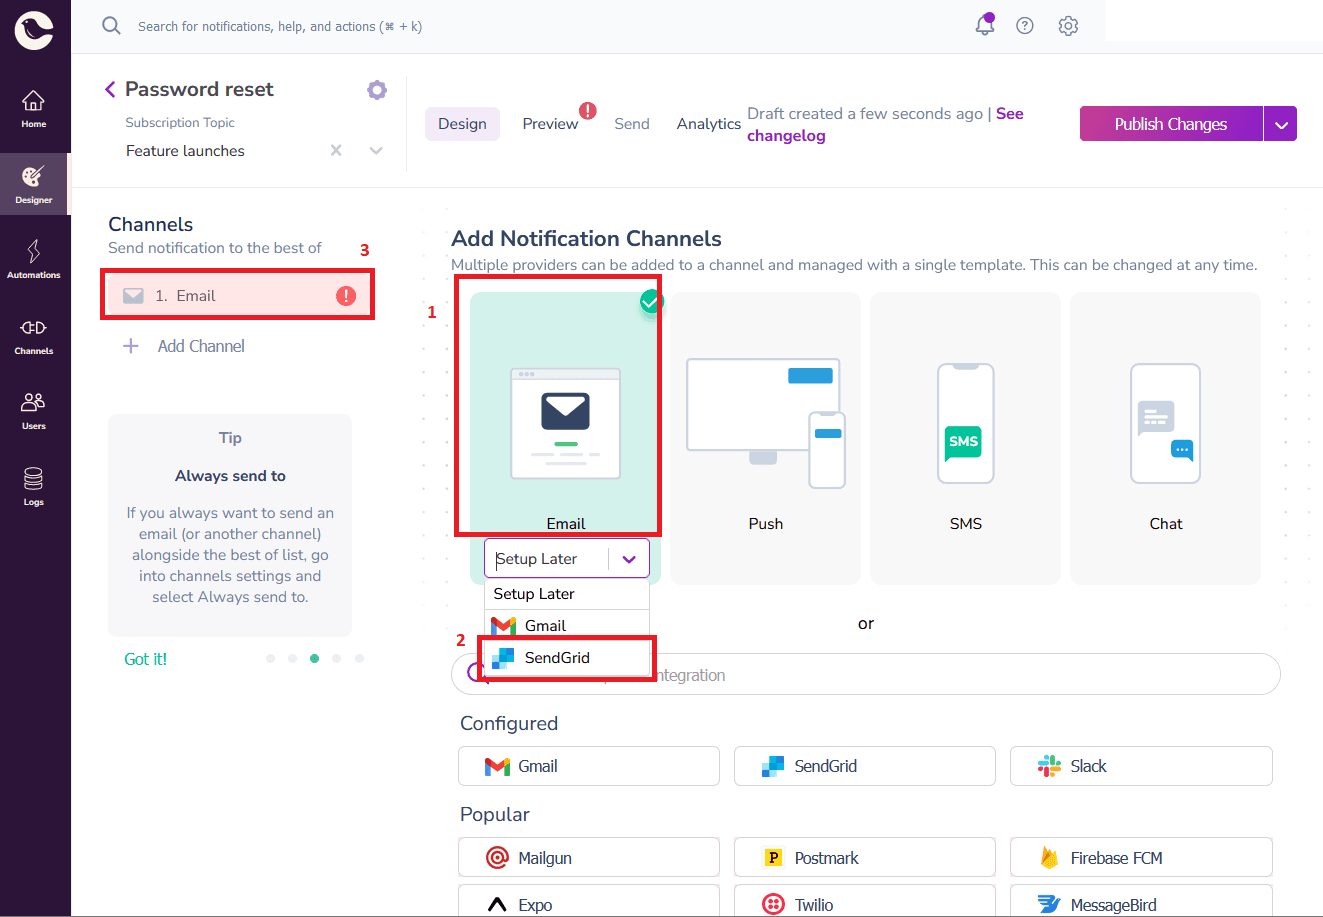
Next, select SendGrid as the provider for your message. Select the email notification channel, and choose SendGrid as the provider. This will add an email channel to your list of channels on the left-hand side. Click the email channel to add the content to your email template.
To write the content for your SendGrid notification template, use the drag-and-drop, no-code editor. To add variables to your notification, add them inside curly braces, which Courier highlights in green.
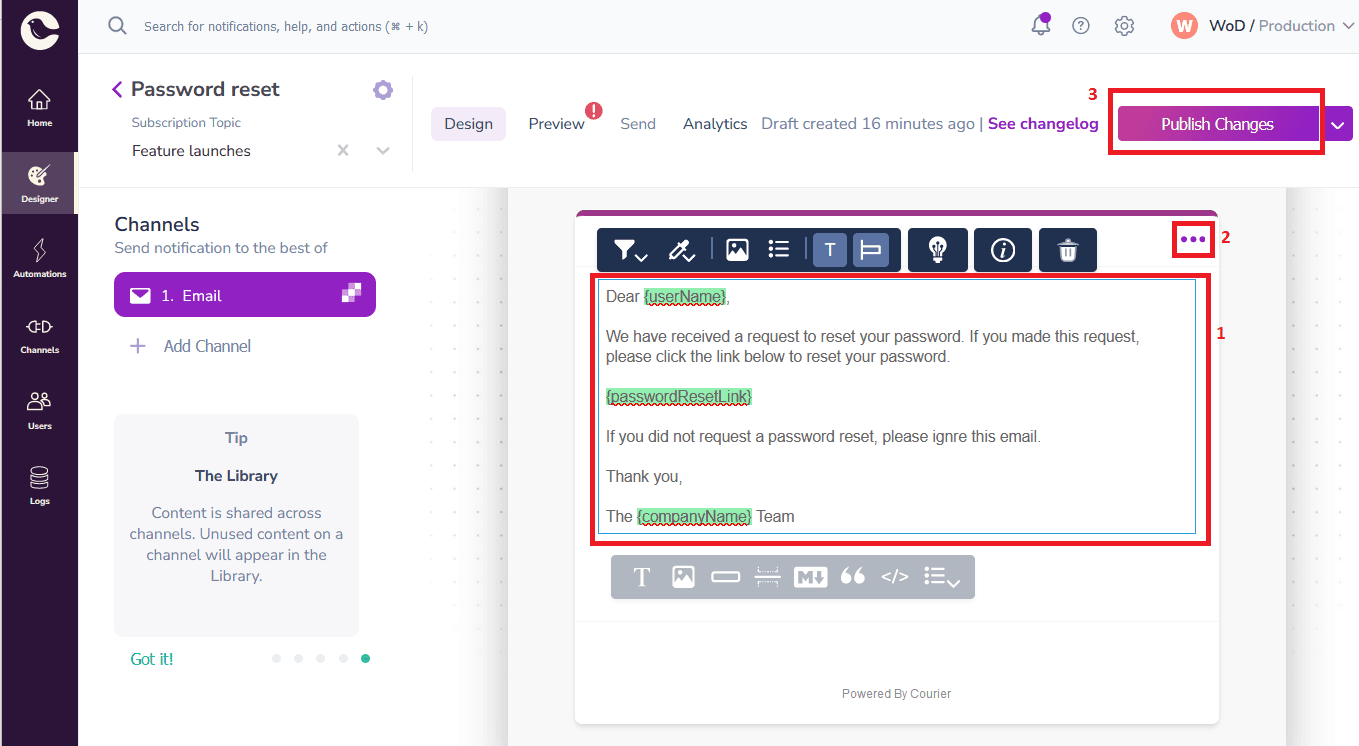
To edit the branding of your emails, click the three dots at the top right of the editor and select View brand. Here, you can make branding changes such as adding a company logo or changing colors and fonts, if you wish.
Once you have designed your email, finalize it by clicking the Publish Changes button at the top right of the page.
Step 3. Test and verify your email before sending
To verify your email template design, select the Preview tab and click Create Test Event. You'll now see some JSON, with the variables from your template listed in the data section. Try changing their values, and then click Create Test Event.
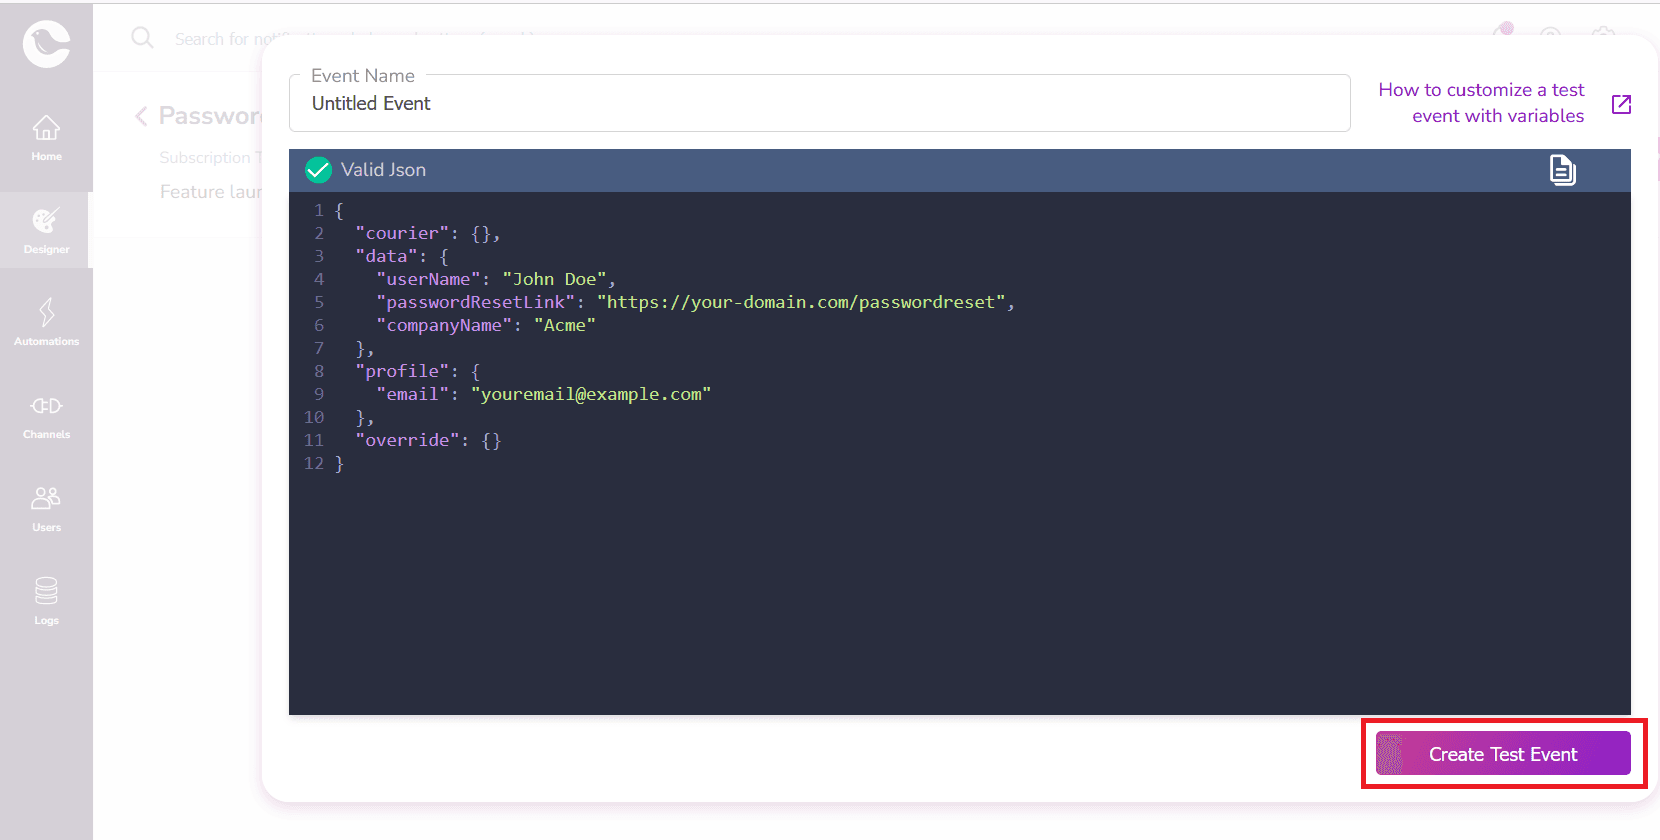
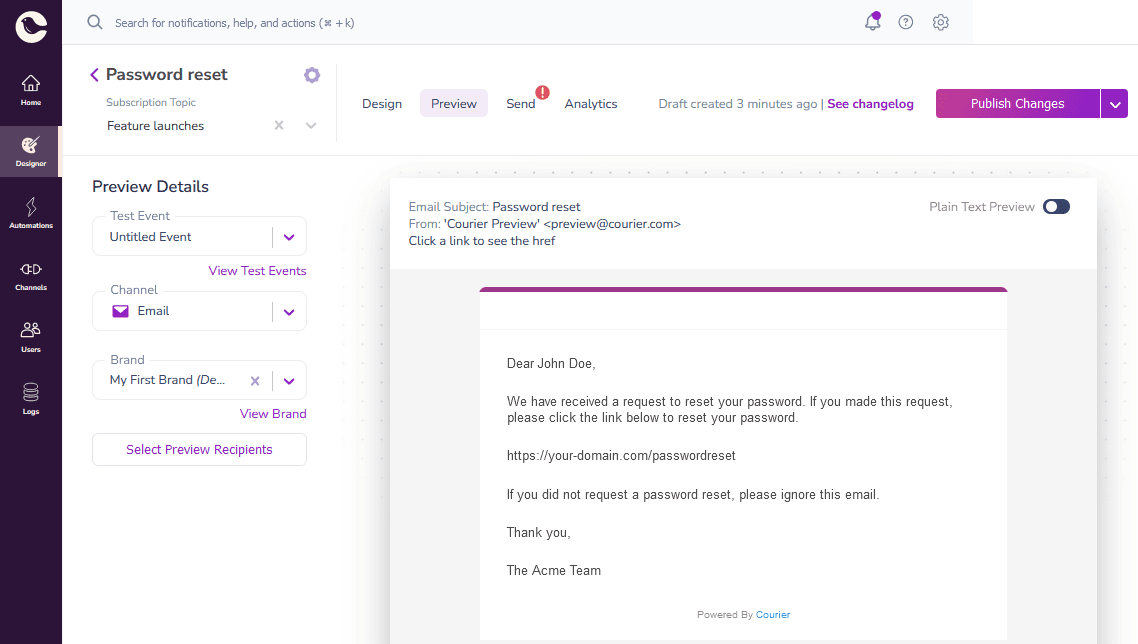
You'll now see an example of how your email will appear, complete with your chosen variable values:
Before sending transactional emails to real users, you should also test them to ensure they work correctly. Click the Send tab and then click Send Test. You should now receive an email sent to the email address inside the to section of the JSON below:
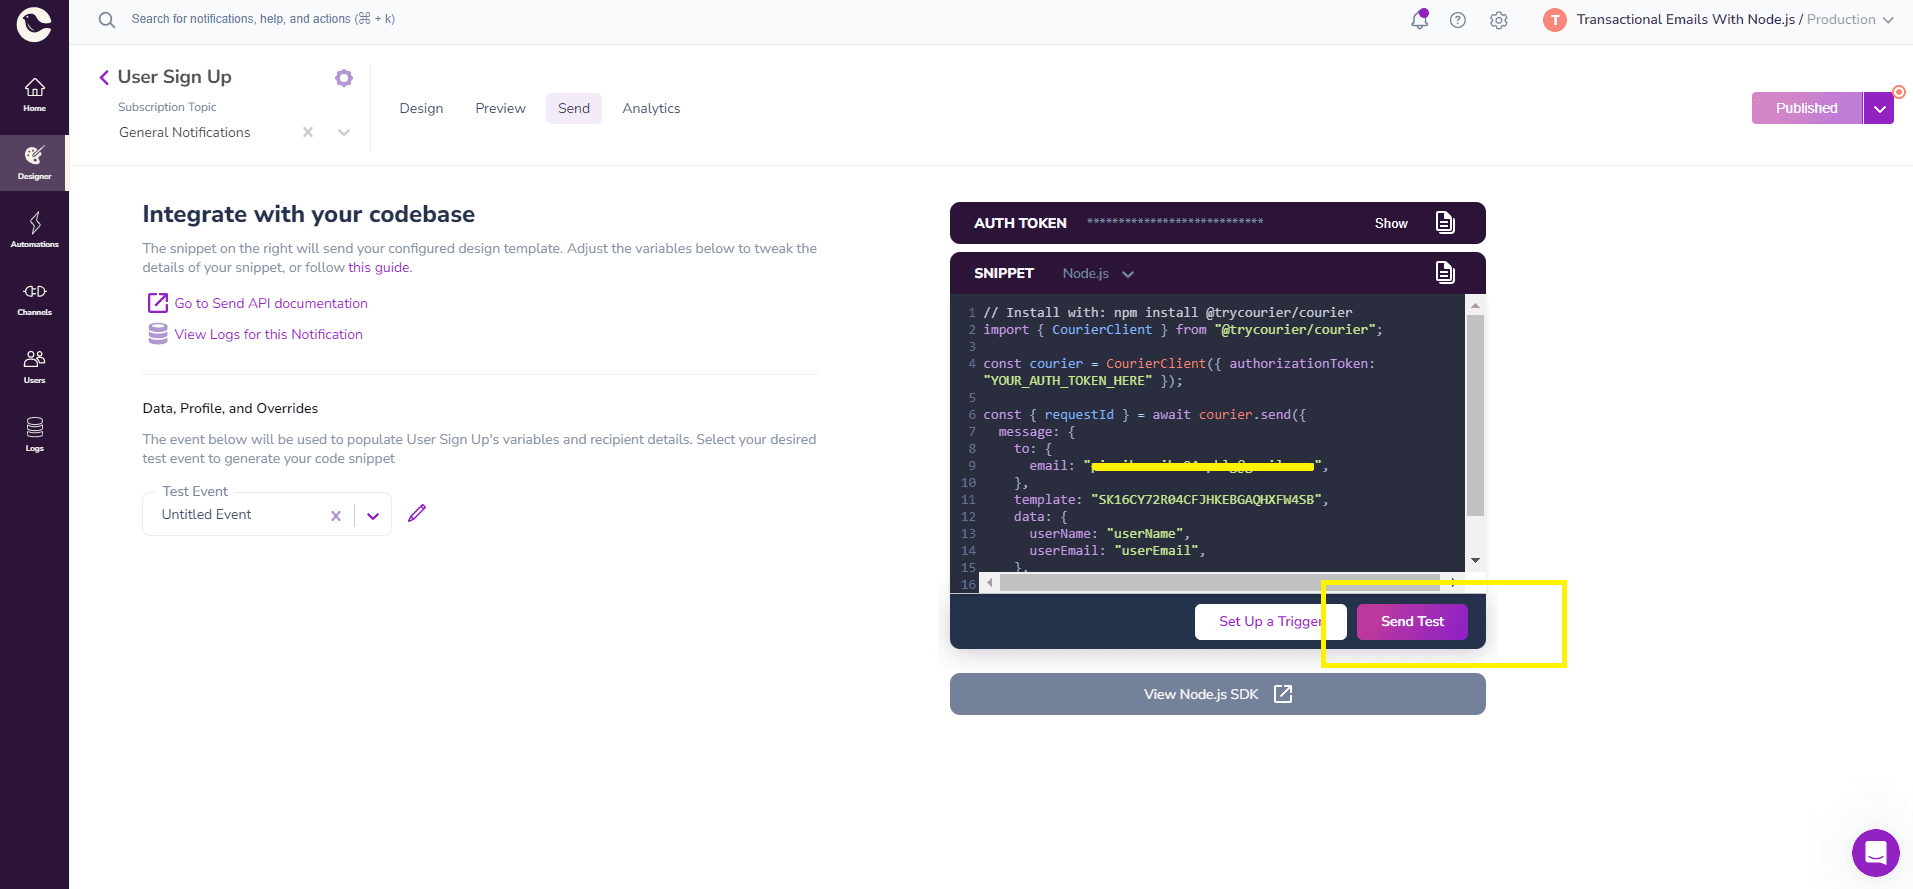
Note that this page also contains your Courier Auth Token. Copy this now, for use in your application code later.
Once you’ve received the test email and verified that everything in it is correct, you are now ready to use the provided code snippet in your back-end application to send your notification emails.
Step 4. Sending the transactional email from your application
In this tutorial, we will use Node.js, for which Courier provides an SDK. To get the Node.js code snippet that you need, select Node.js from the drop-down box at the top of the snippet on the Send Test page in Courier.
First, install the @trycourier/courier package via npm:
npm install @trycourier/courier
Now, copy the Node.js snippet into your Node project, and fill in the variables to use real values (such as John Doe).
const { CourierClient } = require("@trycourier/courier");const courier = CourierClient({ authorizationToken: "<AUTH_TOKEN>" });const { requestId } = courier.send({message: {to: {email: "<EMAIL_ADDRESS>",},template: "<NOTIFICATION_ID>",data: {userName: "John Doe",passwordResetLink: "https://your-domain.com/passwordreset",companyName: "Acme",},},});
Note that the data section is the part where you can add all the variables you want to reference inside your email template.
Replace <AUTHTOKEN> with your recently copied Courier Auth Token, <EMAIL_ADDRESS> with your own email address, and replace <NOTIFICATION_ID> with the ID of your template, which can be found inside your notification template in Courier by going to the notification template settings. Once you have run the code and verified that the email is sent correctly, you will want to replace your email address with a variable containing your user’s email address.
Debugging any issues with your transactional emails
To debug issues such as your transactional emails failing to send, view your message logs to troubleshoot. You can view the status of each message, including whether it was sent, is stuck in a queue, was not sent due to rate limits being reached, or was considered undeliverable.
You can filter your logs by provider, so you can easily learn if there is a specific issue with your SendGrid messages in particular. Or you can filter by notification template, email address, or trace ID. If you need more help with mail sending issues, read our documentation or contact Courier support for assistance.
Conclusion
Using SendGrid and Courier to send transactional emails with Node.js is a straightforward process that only needs a few lines of code to implement. By following the steps outlined in this tutorial, you can easily send personalized, targeted messages to your customers. We hope this tutorial will be helpful in getting you started with sending transactional emails using Courier. If you have any questions or feedback, please join our community!
Similar resources

Build with AI: let your agent handle notifications end to end
Courier's Build with AI toolkit gives coding agents direct access to your notification infrastructure. Four integration points, one goal: let your agent send messages, debug deliveries, manage users, and follow notification best practices without context-switching. Works with Claude Code, Cursor, and any agent that can run shell commands or call MCP tools.

How to Use Claude Code on Mobile to Design, Test, and Ship Multichannel Notifications
A walkthrough of using Claude Code's mobile app with Courier's MCP server and CLI to design, test, and ship a multichannel product announcement from a phone. Covers the full workflow: drafting the content outline, creating notification templates using Courier's elemental format, building channel-specific variants for email, Slack, push, and SMS, customizing brand styling through the API, iterating on design with test sends, getting team approval, and publishing with custom routing rules. The whole thing took a couple hours, mostly cold start and design iterations.

Transactional, Product, and Marketing Notifications: What Are the Differences?
Understanding the difference between transactional, product, and marketing notifications is essential for developers building notification infrastructure. Transactional notifications confirm user actions and require no opt-in. Product notifications drive feature adoption through education. Marketing notifications promote sales and require explicit consent. This guide explains the legal requirements, best practices, and when to use each notification type to build compliant systems users trust.Retry
© 2026 Courier. All rights reserved.