How to Send Push Notifications with Flutter, Firebase, Node.js, and Courier
Adam Searle
June 29, 2023
Table of contents
Push Notifications Made Easier with Courier, Firebase, Flutter, and Node.js
Step 1 — Creating a Firebase project
Step 2 — Adding Firebase to your Flutter project
Step 3 — Implementing push notifications in the Flutter app
Step 4 — Configuring the push provider
Step 5 — Managing user state
Step 6 — Manually syncing FCM tokens
Step 7 — Testing push notifications
Step 8 — Sending the notification from the Node.js back end
Build Smarter Push Notification Systems with Courier, Firebase, Flutter, and Node.js
Push Notifications Made Easier with Courier, Firebase, Flutter, and Node.js
In mobile development, push notifications are critical for driving user engagement, supporting a complete in-app experience, and boosting retention. But integrating reliable push notifications across platforms can quickly become complicated—juggling tools like Firebase, managing device tokens, building APIs, and handling backend logic.
That’s where Courier comes in.
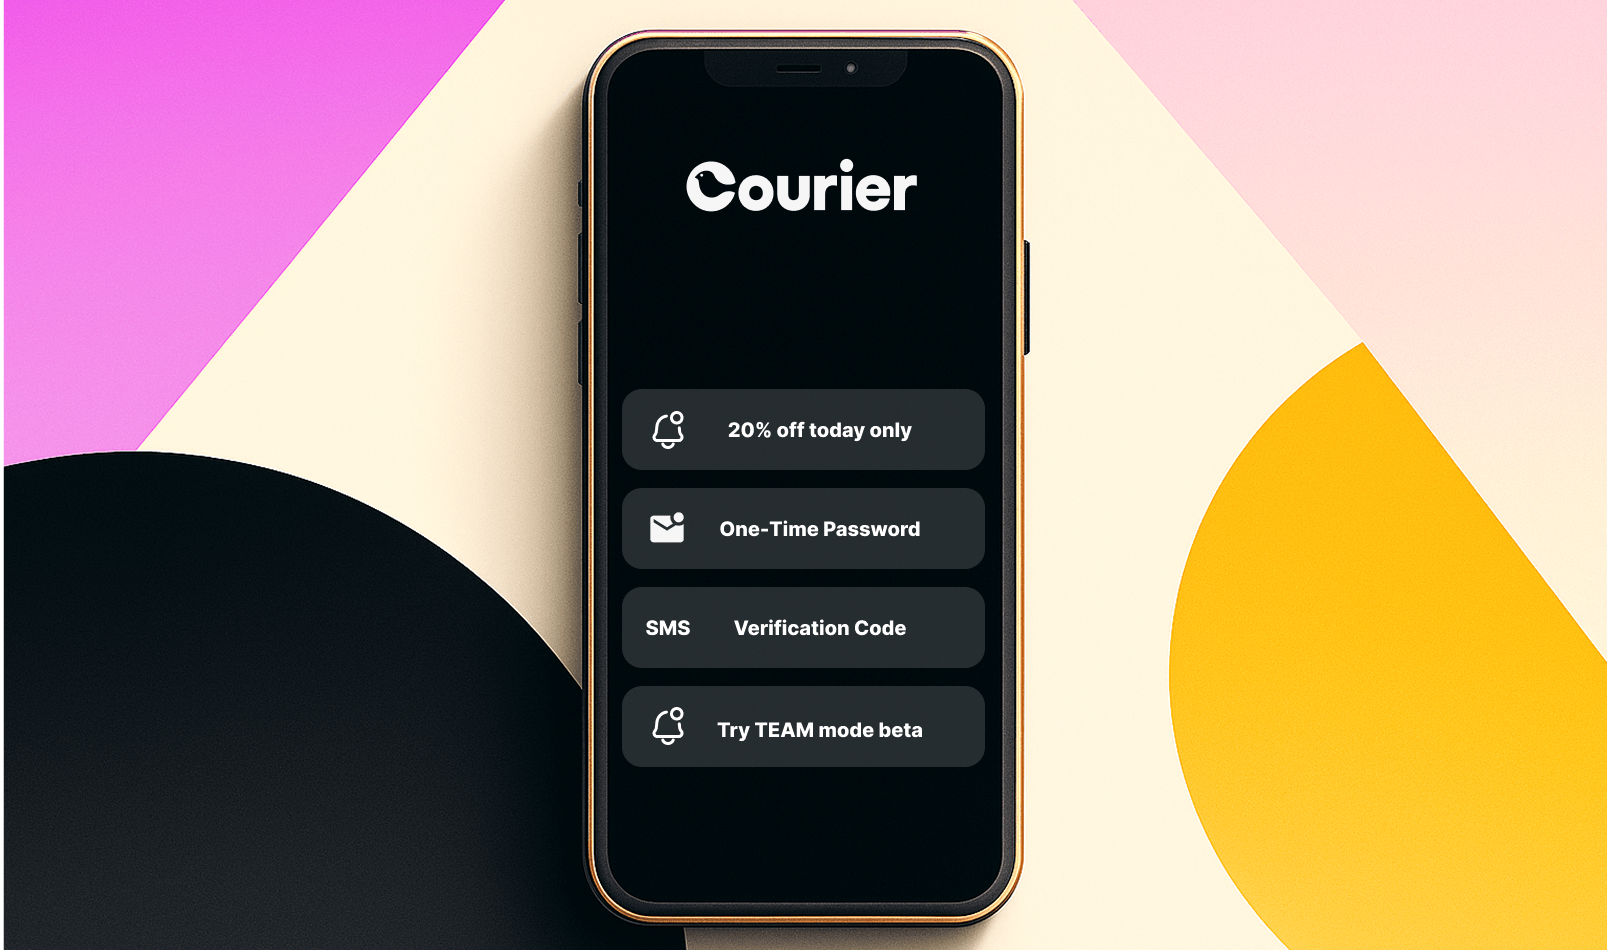
Courier is a modern notification platform and API that makes it easy to send, personalize, and automate push notifications. With Courier, you can connect your app to Firebase Cloud Messaging (FCM), trigger timely, personalized push notifications, and even build multi-channel automation flows across email, SMS, chat, and in-app messages—all from one system.
By using Courier, developers can manage the full notification workflow independently—without the usual back-and-forth between mobile teams, backend teams, and project managers. This means faster builds, smoother launches, and fewer communication bottlenecks.
In this guide, we’ll show you how to send and automate push notifications using Flutter, Firebase, Node.js, and Courier. We'll focus on push for mobile apps (Android and iOS), but we'll also cover how Courier can deliver push "toast" notifications for web apps, with synchronized delivery and read status across platforms.
You can find the detailed video guide to the steps found in this article on YouTube and complete code examples on GitHub.
Step 1 — Creating a Firebase project
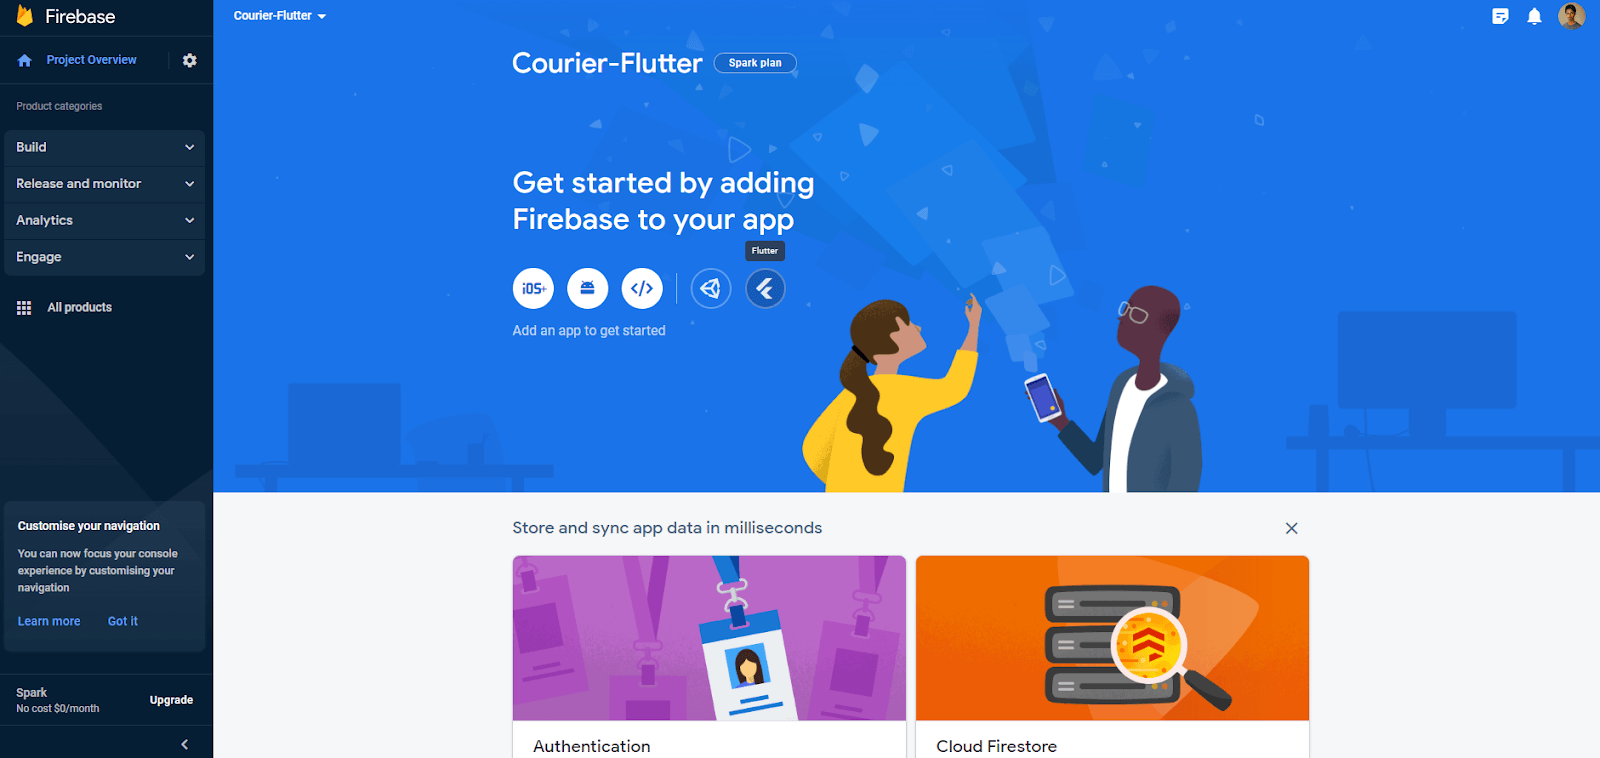
To begin with, you will need to create a Firebase project. If you do not have a Firebase account yet, visit the Firebase website and click on the Get started button.


Step 2 — Adding Firebase to your Flutter project
Once you’ve created your project, you will be redirected to a UI like the one below. Click on the Flutter icon to add Firebase to your Flutter app.
Then, follow the instructions to learn how to add Firebase to your Flutter app.
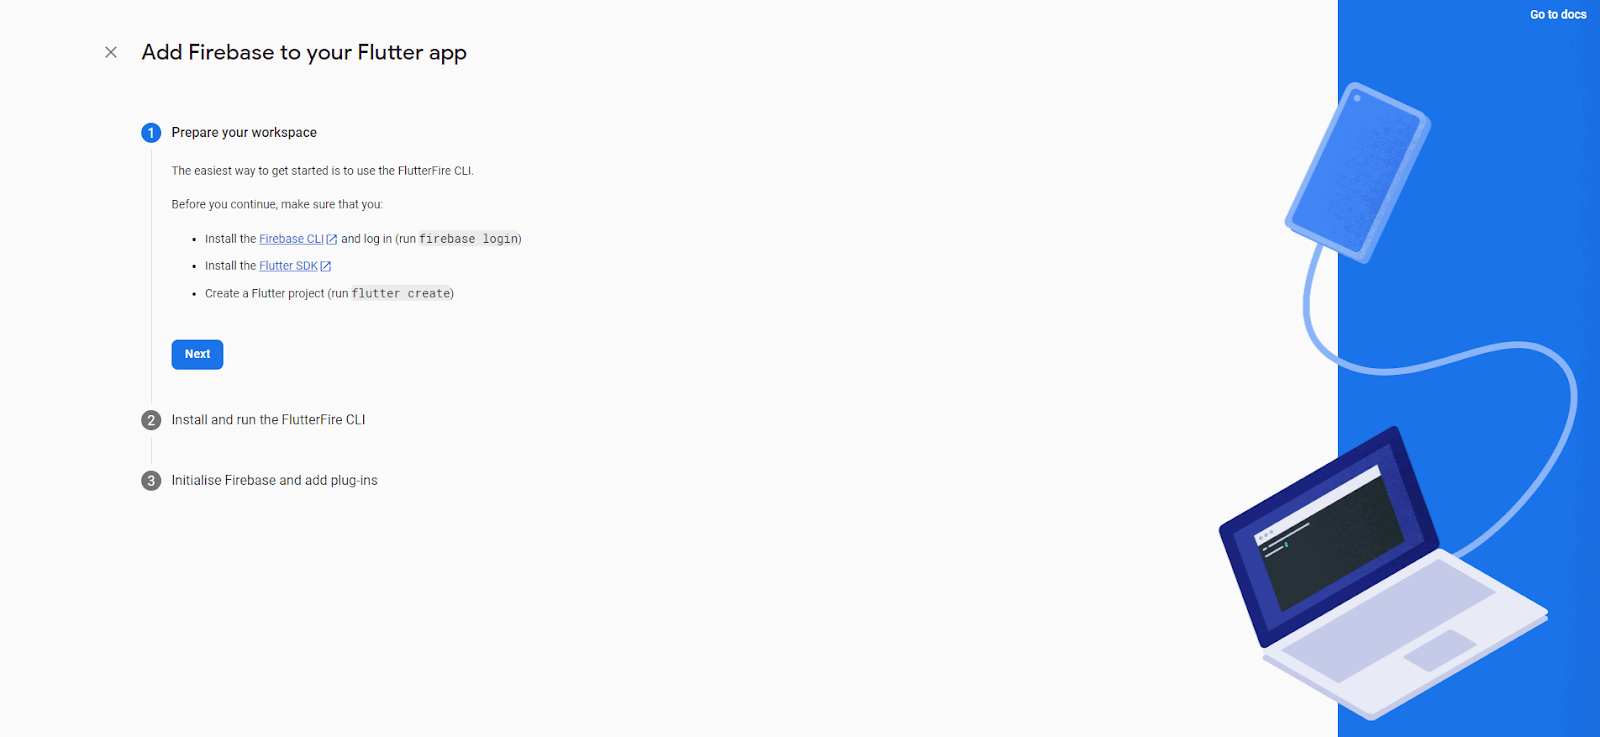
Once you’ve added Firebase to your Flutter app, your main.dart file should look similar to this:
Copied!
import 'package:courier_flutter/courier_flutter.dart';import 'package:courier_flutter/courier_provider.dart';import 'package:courier_flutter/ios_foreground_notification_presentation_options.dart';import 'package:firebase_core/firebase_core.dart';import 'package:firebase_messaging/firebase_messaging.dart';import 'package:flutter/material.dart';import 'package:flutter_decode/firebase_options.dart';Future<void> main() async {WidgetsFlutterBinding.ensureInitialized();await Firebase.initializeApp(options: DefaultFirebaseOptions.currentPlatform,);runApp(const MyApp());}
Step 3 — Implementing push notifications in the Flutter app
Setting up push notifications in a Flutter app involves configuring settings for both iOS and Android platforms separately. This is because each platform has unique requirements and APIs for notifications.
Let's start with the setup for iOS.
iOS setup
- Run the command
flutter pub add courier_flutterto add the SDK to your project. - Open the
iosfolder and runRunner.xcworkspacefrom Xcode to access the iOS side of the Flutter project. - Go to Runner Target and set the minimum deployment to iOS 13.0.
- Return to the Flutter project and navigate to the
iosfolder in the terminal. Then, runcd ios && pod update. - Now, open the AppDelegate file in Xcode, navigate to Runner > AppDelegate, and extend the file with
CourierFlutterDelegate. - Don't forget to add
import courier_flutterat the top of your AppDelegate file. Your file should look like this:
Copied!
import UIKitimport Flutterimport courier_flutter@UIApplicationMain@objc class AppDelegate: CourierFlutterDelegate {override func application(_application: UIApplication,didFinishLaunchingWithOptions launchOptions: [UIApplication.LaunchOptionsKey: Any]?) -> Bool {GeneratedPluginRegistrant.register(with: self)return super.application(application, didFinishLaunchingWithOptions: launchOptions)}}
- To enable push notifications, navigate to Runner Target > Signing and Capabilities > Capabilities_ and click on Push Notifications.
- In addition, you need to add a Notification Service Extension to track when a notification is delivered to the device. You can download the Courier Notification Service Extension here.
- Unzip it, open it in the terminal, and run
sh make_template.sh. - Add a new target in Xcode and select the Courier Notification Service.
- Once you've added the extension, you can monitor notifications even when the app is completely closed. To do this, go to the General tab and change the development info to iOS 13.0.
- Finally, add the below code snippet to
podfileand runpod installin your Flutter project's iOS directory.
Copied!
target 'CourierService' douse_frameworks!pod 'Courier-iOS'end
Now that we have completed the setup for iOS, let's proceed with the setup for Android.
Android setup
First, open the Android folder of your Flutter project using Android Studio.
Then add support for Jitpack by updating android/build.gradle.
Copied!
allprojects {repositories {google()mavenCentral()maven { url 'https://jitpack.io' } // Add this line}}
- In
app/build.gradle, change the minimum Android Flutter version to 21 and the compilation SDK version to 33. - Run Gradle sync.
- Update
MainActivityto extend theCourierFlutterActivityto ensure that Courier can handle incoming push notifications properly. - Next, you need to create a new Notification Service by adding a new file to your project. This code will allow your app to receive and process push notifications reliably and efficiently.
Copied!
import android.annotation.SuppressLintimport com.courier.android.notifications.presentNotificationimport com.courier.android.service.CourierServiceimport com.google.firebase.messaging.RemoteMessage// It's OK to do SuppressLint because CourierService will handle token refreshes automatically .@SuppressLint("MissingFirebaseInstanceTokenRefresh")class YourNotificationService: CourierService() {override fun showNotification(message: RemoteMessage) {super.showNotification(message)// TODO: This is where you will customize the notification that is shown to your users// For Flutter, there is usually no need to change the handlingClass// See// https://developer.android.com/develop/ui/views/notifications/build-notification// for more details on customizing an Android notification.message.presentNotification(context = this,handlingClass = MainActivity::class.java,icon = android.R.drawable.ic_dialog_info)}}
Next, add the Notification Service entry in your AndroidManifest.xml file.
Copied!
<manifest><application><activity>..</activity><serviceandroid:name=".YourNotificationService"android:exported="false"><intent-filter><action android:name="com.google.firebase.MESSAGING_EVENT" /></intent-filter></service>..</application></manifest>
- Finally, run the project to make sure that there are no build issues.
Step 4 — Configuring the push provider
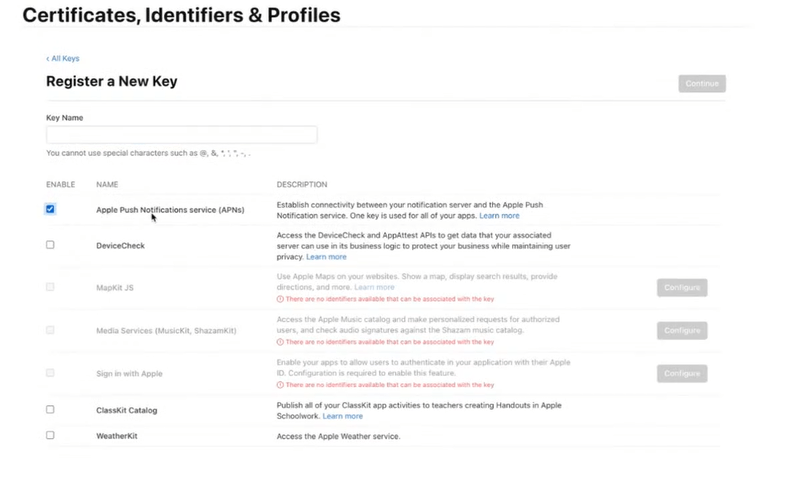
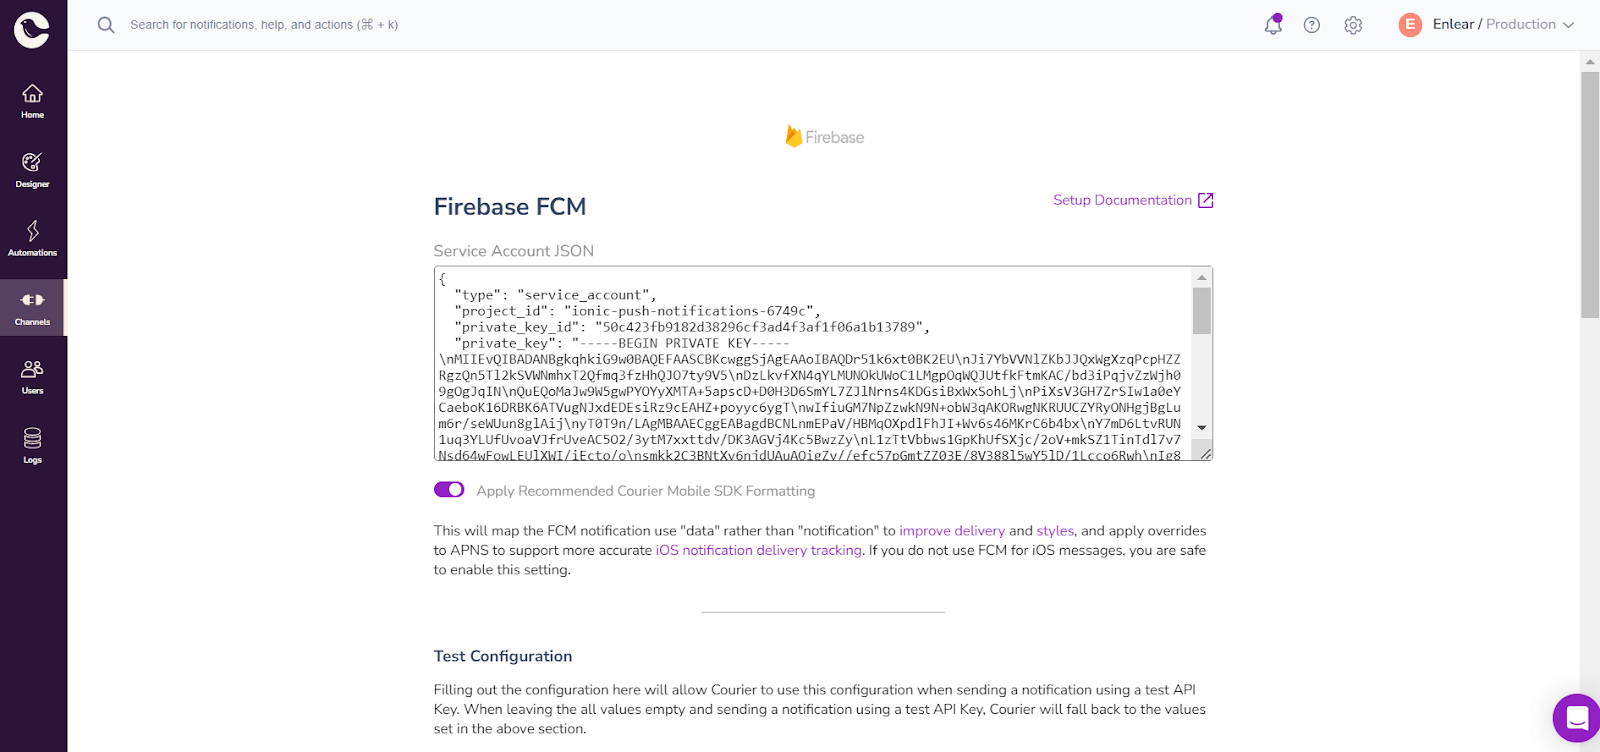
To configure the push provider, first, you need to connect the Apple push notification key to Firebase and then link the Firebase project to Courier. Here's how to do it:
- First, in your Apple developer account, go to Certificates, Identifiers & Profiles. Create a new Apple Push Notification service (APNs) key and download it.
- Next, open your Firebase project and go to Project Settings > Cloud Messaging > Apple App Configuration. Click on your app and upload the APN key to the APNs Authentication Key list.
- Fill in the Key ID and Team ID from the Apple console.
- Then, go to Project Settings > Service Accounts and generate a new private key. Copy the code that's provided.
- Finally, in your Courier account, navigate to Channels > Firebase FCM. Paste the private key code you copied earlier and save it.
Step 5 — Managing user state
You can use the code snippets below to manage your application's user states on both iOS and Android. This is a Flutter-wide operation and isn't specific to either platform.
The following saves accessToken and userId to native local storage, allowing them to persist between app sessions.
Copied!
await Courier.shared.signIn(accessToken: accessToken, // You can use Courier Auth KeyuserId: userId,);await Courier.shared.signOut();
Step 6 — Manually syncing FCM tokens
For the iOS application, you need to sync the FCM tokens manually. For that, use the below code:
Copied!
// Notification permissions must be authorized on iOS to receive pushesfinal requestedNotificationPermission = await Courier.shared.requestNotificationPermission();print(requestedNotificationPermission);final fcmToken = await FirebaseMessaging.instance.getToken();if (fcmToken != null) {await Courier.shared.setFcmToken(token: fcmToken);}// Handle FCM token refreshesFirebaseMessaging.instance.onTokenRefresh.listen((fcmToken) {Courier.shared.setFcmToken(token: fcmToken);});
Step 7 — Testing push notifications
Courier allows you to send a push notification to a user ID directly from the SDK.
Copied!
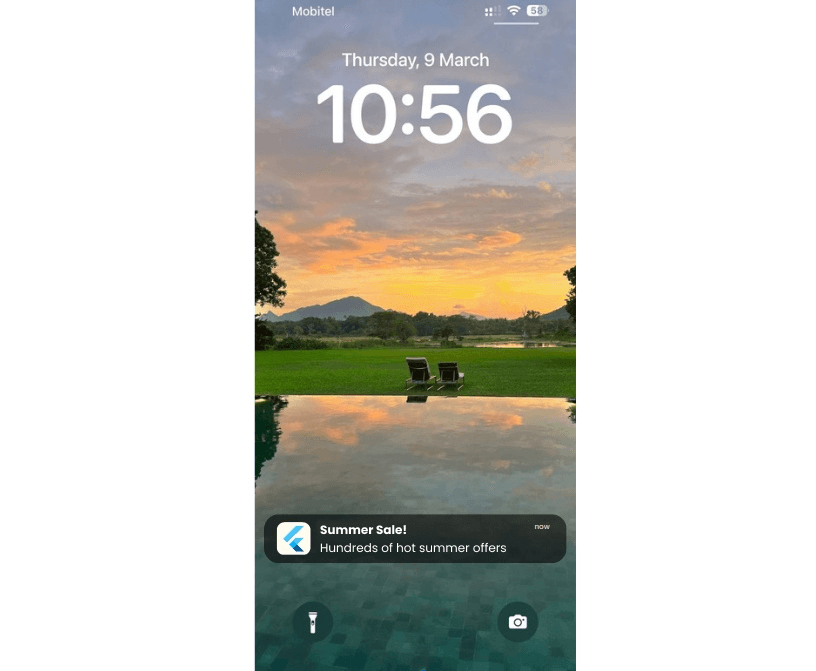
final notificationPermission = await Courier.shared.getNotificationPermissionStatus();print(notificationPermission);// Notification permissions need to be 'authorized' on iOS in order to receive pushesfinal requestedNotificationPermission = await Courier.shared.requestNotificationPermission();print(requestedNotificationPermission);// This configures how iOS will display the notification when the app is running in the foreground// If you pass [] it won't present anything// but Courier.shared.onPushNotificationDelivered will still be calledCourier.shared.iOSForegroundNotificationPresentationOptions = [iOSNotificationPresentationOption.banner,iOSNotificationPresentationOption.sound,iOSNotificationPresentationOption.list,iOSNotificationPresentationOption.badge,];// This will be called if a push notification arriveswhile the app is running in the foregroundCourier.shared.onPushNotificationDelivered = (push) {...};// This will be called if the user clicks on a push notificationCourier.shared.onPushNotificationClicked = (push) {...};// This will send a test pushfinal messageId = await Courier.shared.sendPush(authKey: 'a_courier_auth_key_that_should_only_be_used_for_testing',userId: 'example_user',title: 'Summer Sale!',body: 'Hundreds of hot summer offers',isProduction: false, // false == sandbox / true == production(only affects APNs pushes). providers: [CourierProvider.apns, CourierProvider.fcm],);
Now you can run your Flutter project and send push notifications to both iOS and Android devices.
Step 8 — Sending the notification from the Node.js back end
The Courier JavaScript SDK can be used to easily send push notifications to a selected user. For example, the code below sends a push notification to the specified user ID.
Copied!
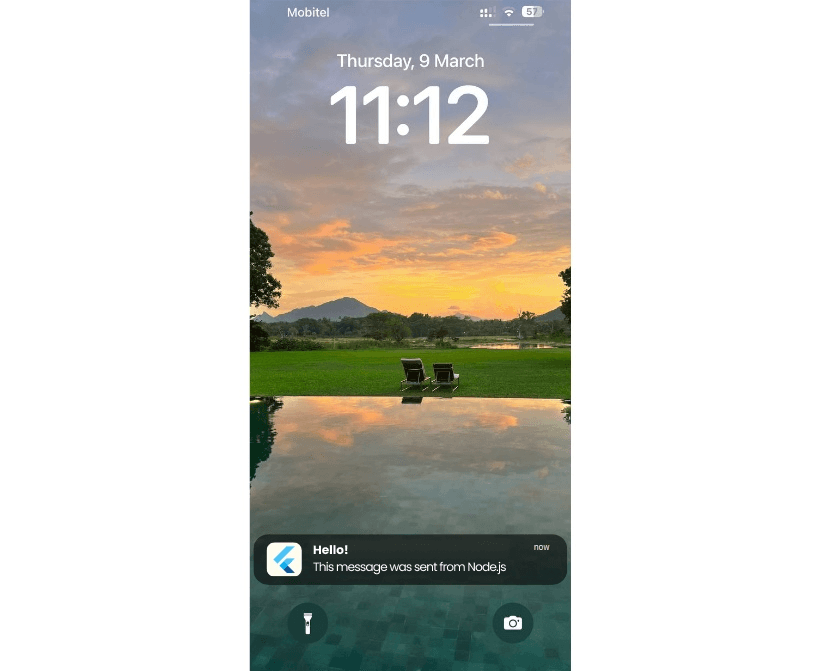
const Courier = require('@trycourier/courier')const courier = Courier.CourierClient({ authorizationToken: "AUTH_TOKEN" });async function test() {const userId = "courier_user"const title = "Hello!"const body = "This message was sent from Node.js"const { requestId } = await courier.send({message: {to: {user_id: userId,},content: {title: title,body: body,},routing: {method: "single",channels: ["firebase-fcm"],},},});console.log(requestId)}
You can use the user state management code snippet given in step 5 to capture the user IDs. Courier will store each user's ID and push notifications token separately. You can find the user details from the Courier User tab.
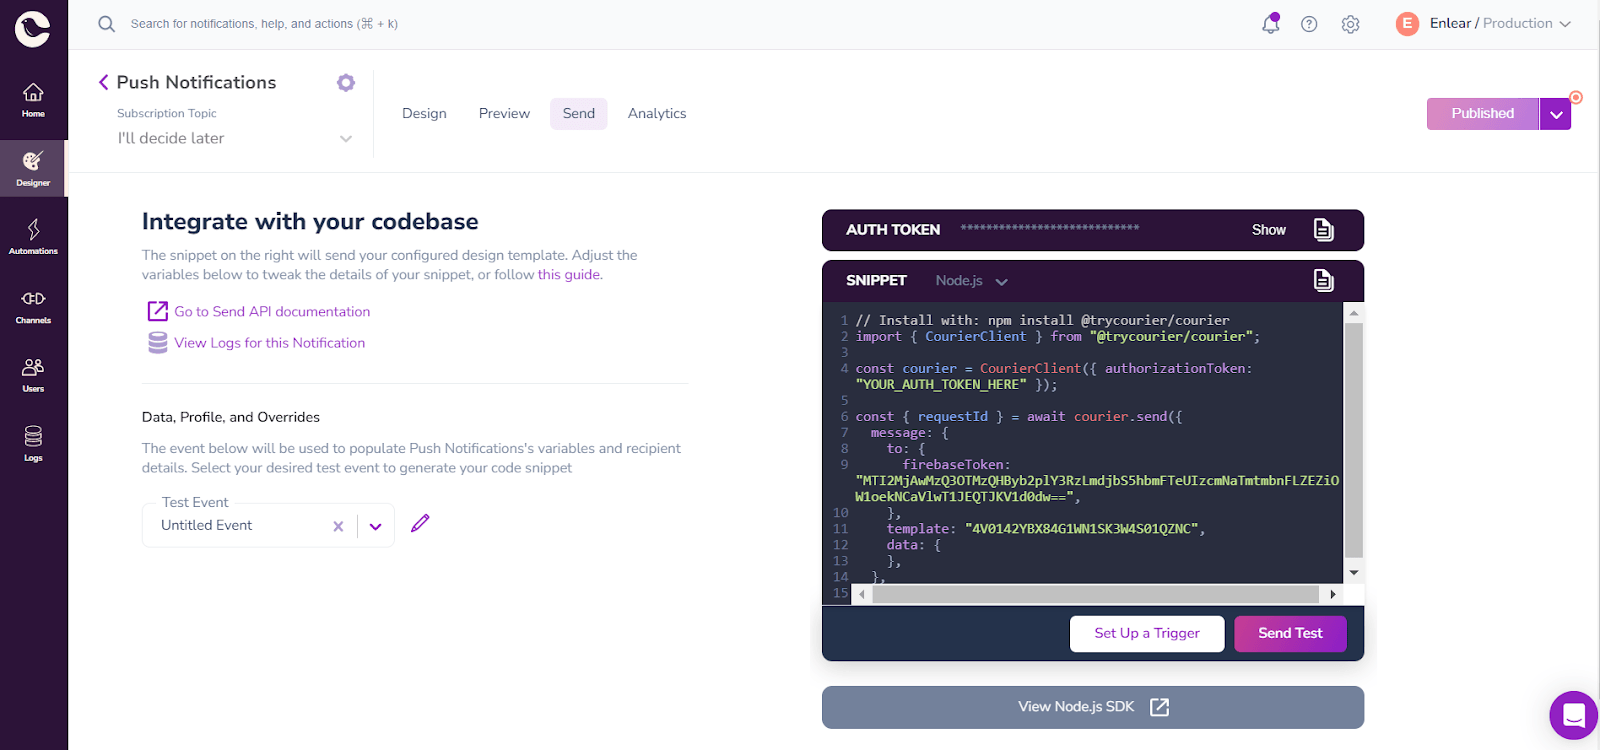
Furthermore, you can use the Courier Designer tab to create notification templates without any code.

Once you publish the notification, Courier will provide an auto-generated code snippet for your favorite language with the template ID in the Send tab.
Copied!
// Install with: npm install @trycourier/courierimport { CourierClient } from "@trycourier/courier";const courier = CourierClient({ authorizationToken: "AUTH_TOKEN" });const { requestId } = await courier.send({message: {to: {firebaseToken: "FIREBASE_TOKEN",},template: "4V0142YBX84G1WN1SK3W4S01QZNC",data: {},},});
Build Smarter Push Notification Systems with Courier, Firebase, Flutter, and Node.js
Integrating push notifications doesn't have to be complicated or time-consuming.
With Courier’s powerful notification platform, you can easily connect your Flutter app to Firebase, manage tokens automatically, and send highly personalized mobile push notifications — without heavy back-end infrastructure.
By combining Courier, Firebase, Flutter, and Node.js, you gain full control over your mobile messaging experience:
- Streamline your development workflow
- Reduce engineering dependencies
- Deliver real-time, multi-channel notifications that drive user engagement
Whether you’re building for iOS, Android, or web, Courier helps you move faster — with a flexible API, cross-platform SDKs, and powerful automation features ready out of the box.
Ready to simplify your notification strategy and ship faster?
Explore Courier’s documentation or request a demo today.
Similar resources
Build with AI: let your agent handle notifications end to end
Courier's Build with AI toolkit gives coding agents direct access to your notification infrastructure. Four integration points, one goal: let your agent send messages, debug deliveries, manage users, and follow notification best practices without context-switching. Works with Claude Code, Cursor, and any agent that can run shell commands or call MCP tools.
By Kyle Seyler
April 07, 2026

How to Use Claude Code on Mobile to Design, Test, and Ship Multichannel Notifications
A walkthrough of using Claude Code's mobile app with Courier's MCP server and CLI to design, test, and ship a multichannel product announcement from a phone. Covers the full workflow: drafting the content outline, creating notification templates using Courier's elemental format, building channel-specific variants for email, Slack, push, and SMS, customizing brand styling through the API, iterating on design with test sends, getting team approval, and publishing with custom routing rules. The whole thing took a couple hours, mostly cold start and design iterations.
By Kyle Seyler
April 06, 2026
Transactional, Product, and Marketing Notifications: What Are the Differences?
Understanding the difference between transactional, product, and marketing notifications is essential for developers building notification infrastructure. Transactional notifications confirm user actions and require no opt-in. Product notifications drive feature adoption through education. Marketing notifications promote sales and require explicit consent. This guide explains the legal requirements, best practices, and when to use each notification type to build compliant systems users trust.Retry
By Kyle Seyler
October 23, 2025
© 2026 Courier. All rights reserved.