

- Page settings apply to the whole preference page: its brand, heading, description, and channel names.
- Sections group related topics under a heading you name yourself, such as “Account notifications” or “Marketing.”
- Topics are the categories users opt in or out of. You name and configure each one, and every topic lives in a section.
- Templates map to a topic, so every send respects the user’s choice automatically, with no extra logic in your code.
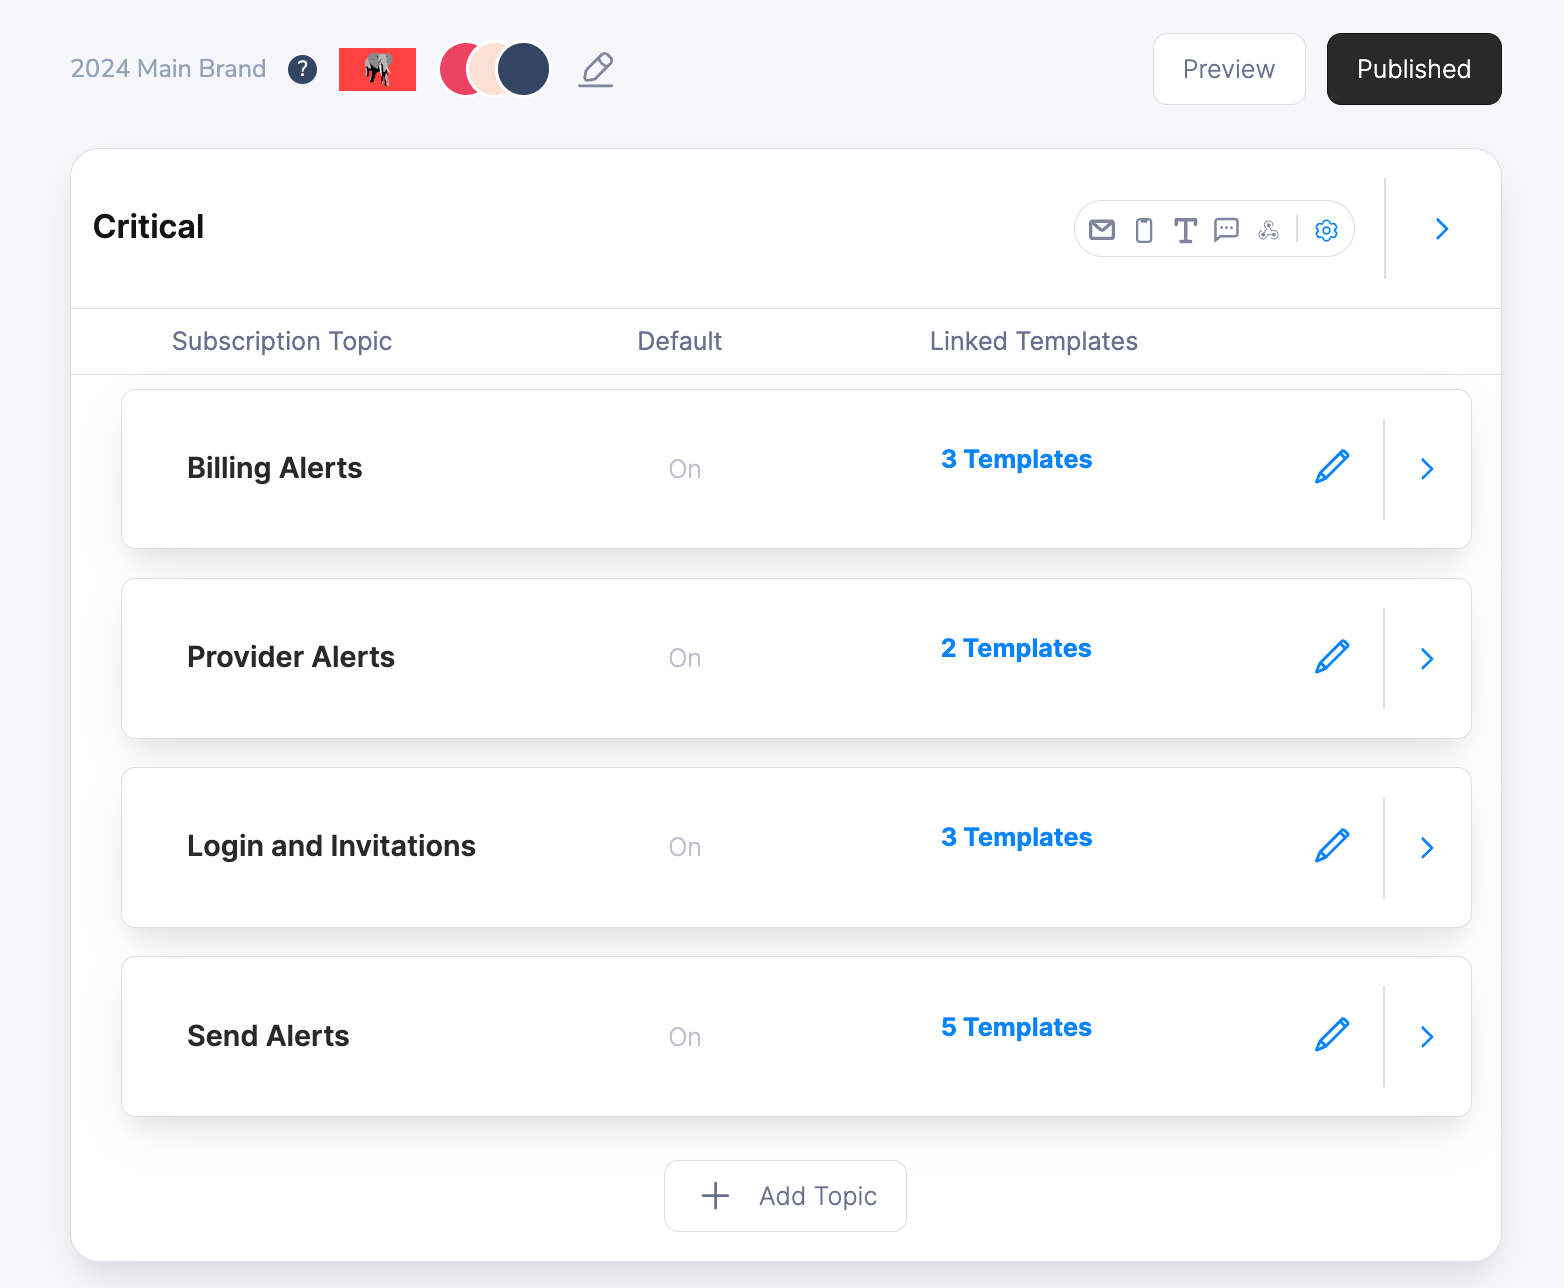
An example preference page. Every part, from the branding to the topics, is customizable.
Page settings
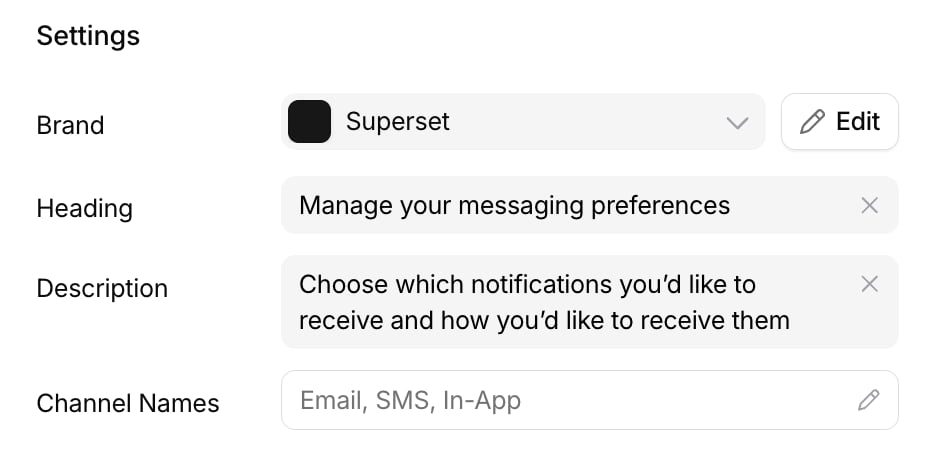
These settings apply to the whole page, across every section and topic.- Brand: the applied to the page, with your logo and colors.
- Heading: the title at the top of the page, like “Manage your messaging preferences.”
- Description: the subtitle under the heading.
- Channel names: the labels users see for each channel across the page. Rename them to match your product’s voice, for example “In-App” to “Inbox” or “Push” to “Mobile Push”.
Sections and channel selection
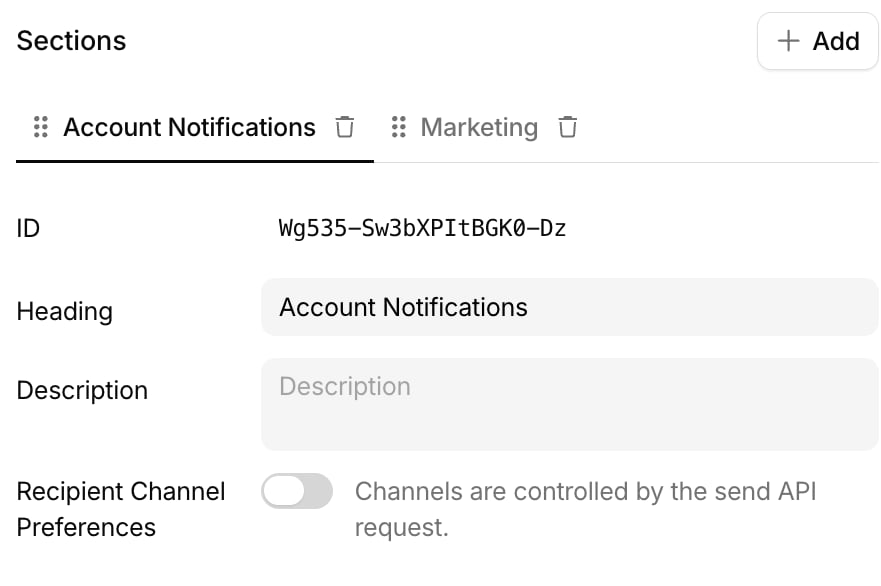
Sections group related topics under their own heading and set which channels users can adjust for the topics inside. Add as many as you need, name each one yourself (the “Account notifications” and “Marketing” tabs above are examples), and reorder them to control how they appear. Each section has:- ID: the section’s unique identifier, generated automatically by Courier and used in the API.
- Heading: the section title users see.
- Description: optional text shown under the heading.
Channel selection
Turn on channel selection for a section to let users choose how they receive its notifications, from the channels you make available (email, SMS, push, in-app, and more). Users see the channel names you set in page settings, not the raw values. In the API, channels use thecustom_routing enum: direct_message, email, inbox, push, sms, webhook.
When a user customizes their channels, those choices appear in the custom_routing array from the . The array only populates for sections where you’ve enabled channel selection:
Subscription topics
Subscription topics are the categories users control independently. You name and customize each one, for example marketing, security, or product updates. Each topic lives in a section and groups related notifications a user might want to receive or skip.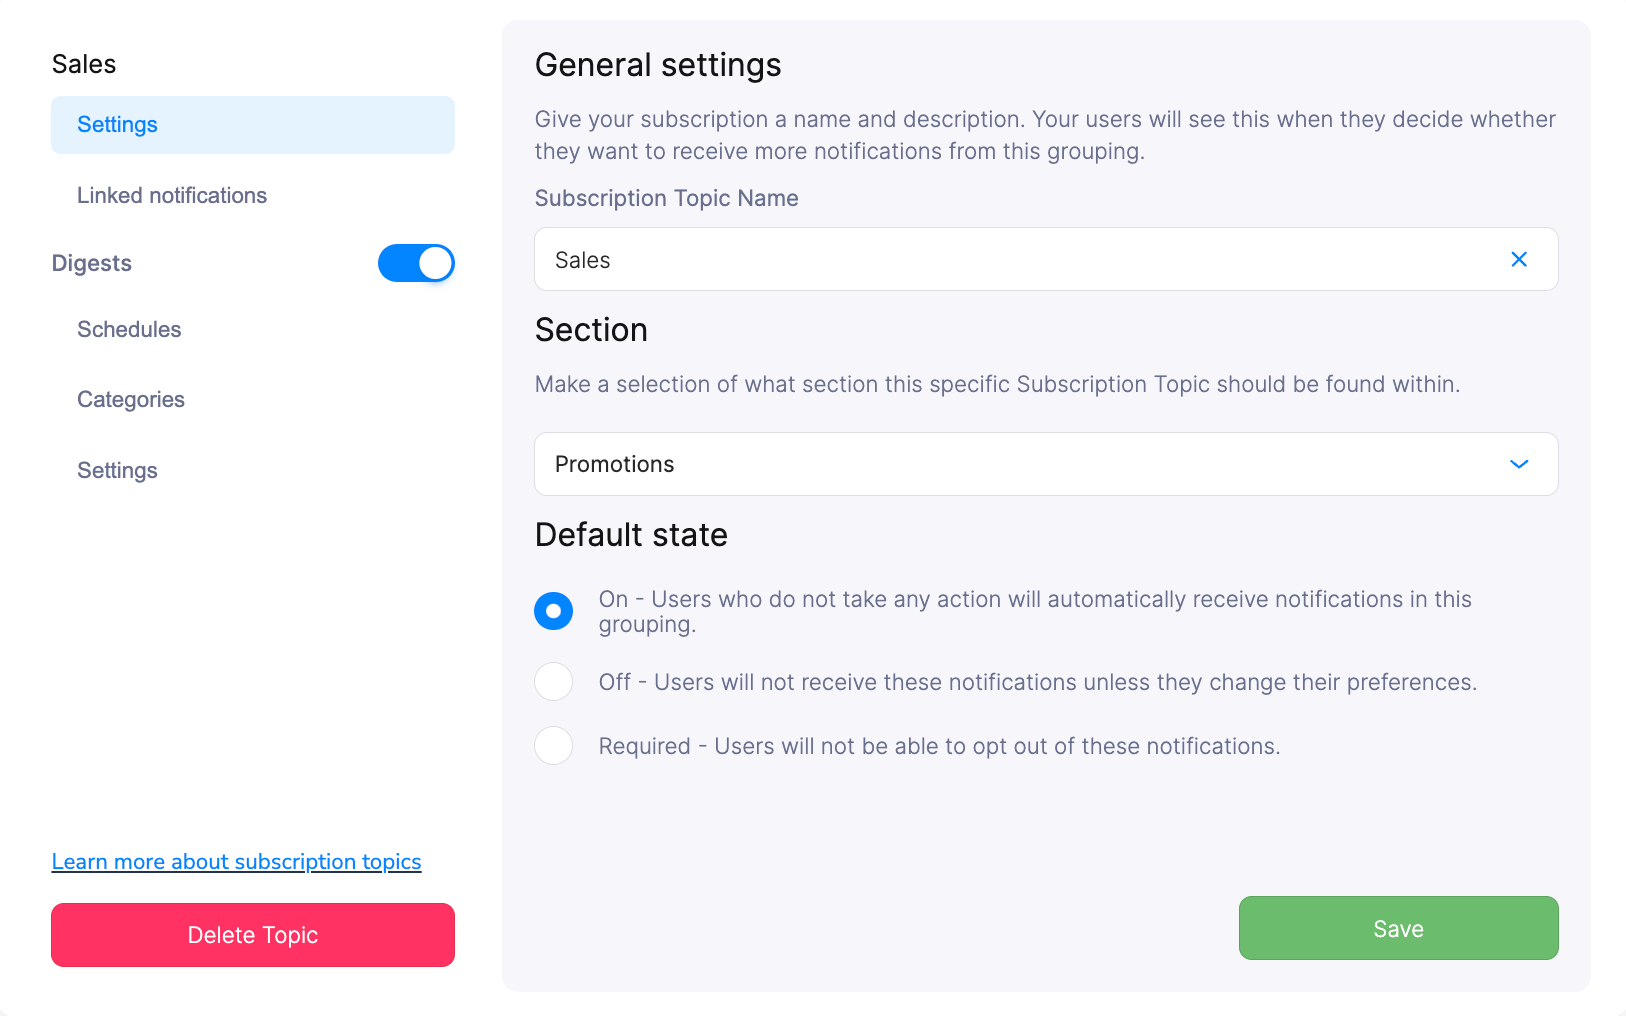
Topic configuration
Each topic has:- Name: the user-facing label for the category.
- Section: which section the topic belongs to.
- Default state: how users start out, described below.
Default states
The default state sets how a topic behaves before a user changes it:- On: users receive these notifications unless they opt out.
- Off: users receive nothing until they opt in.
- Required: users can’t opt out. Use it for critical notifications like security alerts.
{$.urls.unsubscribe} or {{var "urls.unsubscribe"}}) still render and the confirmation page still loads, but opting out does nothing and the user stays subscribed. Leave unsubscribe links out of templates mapped to Required topics so users aren’t misled.
Topic data
Attach arbitrary metadata to a topic through the API and use it to build . For example:- Filter topics by metadata.
- Drive custom logic for how preferences display or apply.
- Store your own topic descriptions.
Map templates to topics
Mapping a template to a topic is what makes Courier enforce the user’s preference whenever that template sends. Each template maps to a single topic, and you set the mapping on the template itself, in Design Studio or through the API.In Design Studio
Open a template in , go to its , and choose a subscription topic. You can change it anytime.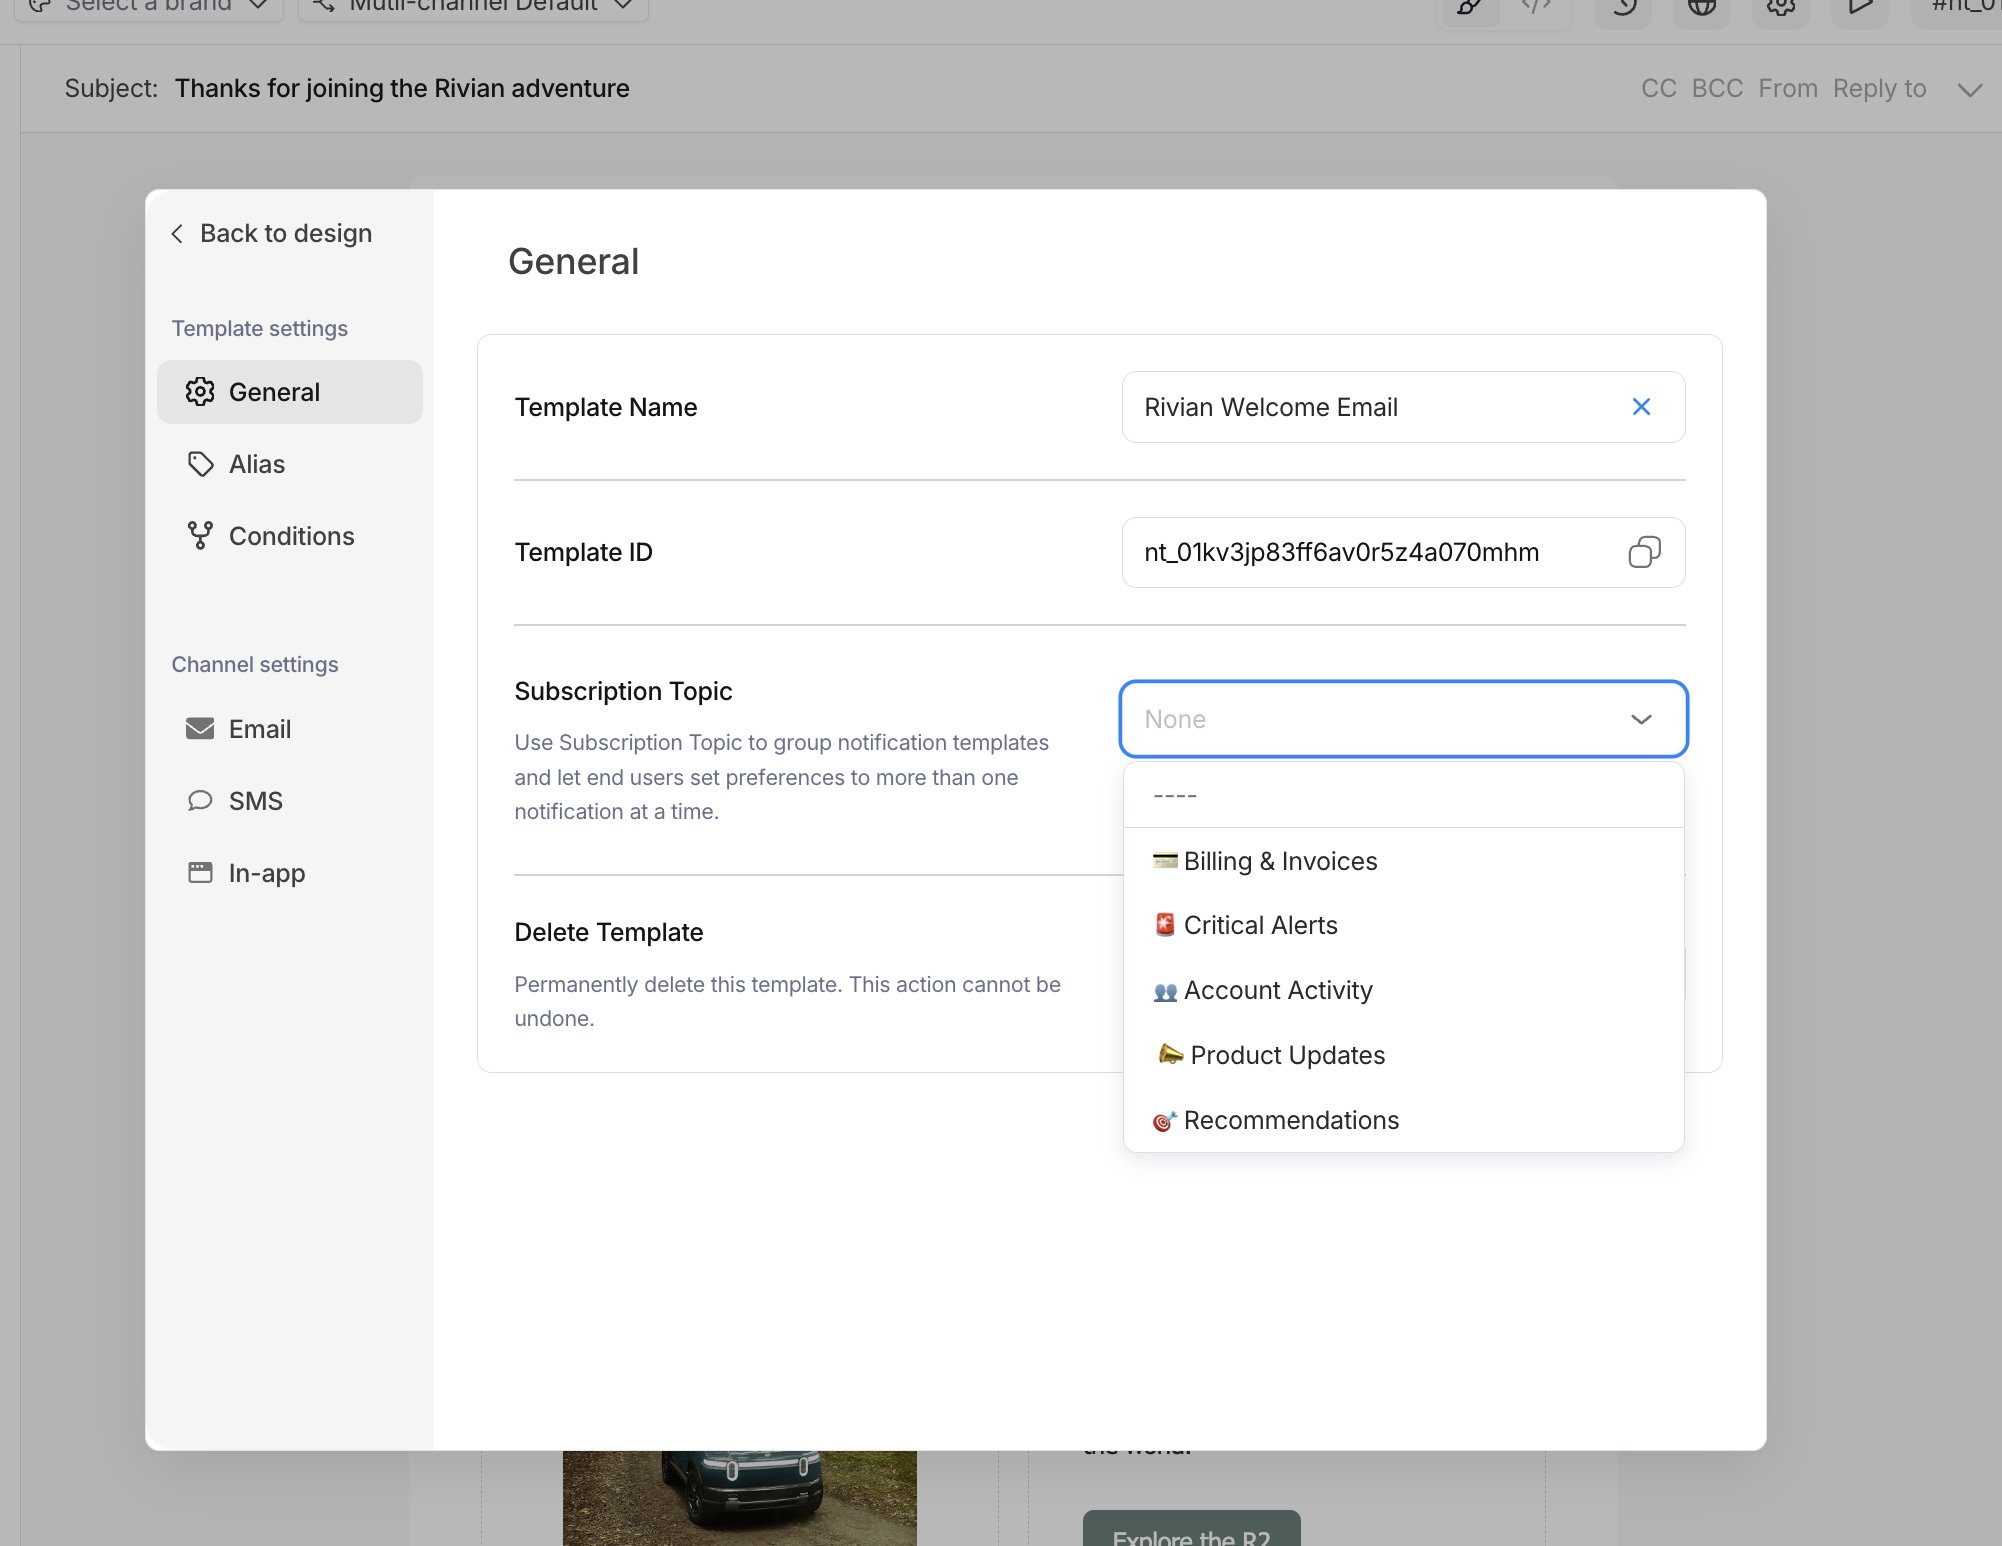
Assigning a subscription topic to a template in Design Studio
Through the API
A template’s topic is thesubscription field on the , set to { "topic_id": "<TOPIC_ID>" } or null. Include it when you :
cURL
subscription, then send the full payload back.
Digests
A topic can deliver its notifications as a digest: batched into one message on a schedule instead of sent one at a time. You set this up in the topic’s digest settings by linking a digest template and defining the schedules users choose from, like Instant, Daily, or Weekly. See the .Unsubscribe headers
When a user opts out of a topic, Courier can add aList-Unsubscribe header to outgoing emails for that topic, so users can unsubscribe from their email client. List-Unsubscribe is a standard header, so you enable it in your email provider’s settings, like SendGrid or Mailgun.
Drafts, preview, and publishing
Editing preferences never affects users right away. Every change saves as a draft, and users keep seeing the last published version until you publish. The editor gives you three controls:- Save keeps your latest changes as a draft.
- Preview Page opens the preference page exactly as a user would see it, with your unpublished changes and a “Draft mode” banner so you know it isn’t live yet.
- Publish makes the draft the version users see. After publishing, View Page opens the live page.