For simpler use cases, Courier offers a digest feature in the Send API that doesn’t require automations.
Configure Digests in the Preferences Editor
Configure a digest with at least one schedule in the Preferences Editor. Create a new subscription topic or open an existing one’s settings.Schedule a Digest
In the digest section, click Schedules to define when the digest releases. At least one schedule is required, but you can configure multiple to give users a choice. Multiple schedules appear as options in the hosted preferences page.The date-time picker uses local timezone. Users viewing hosted preferences or using front-end preference components see times in their local timezone.
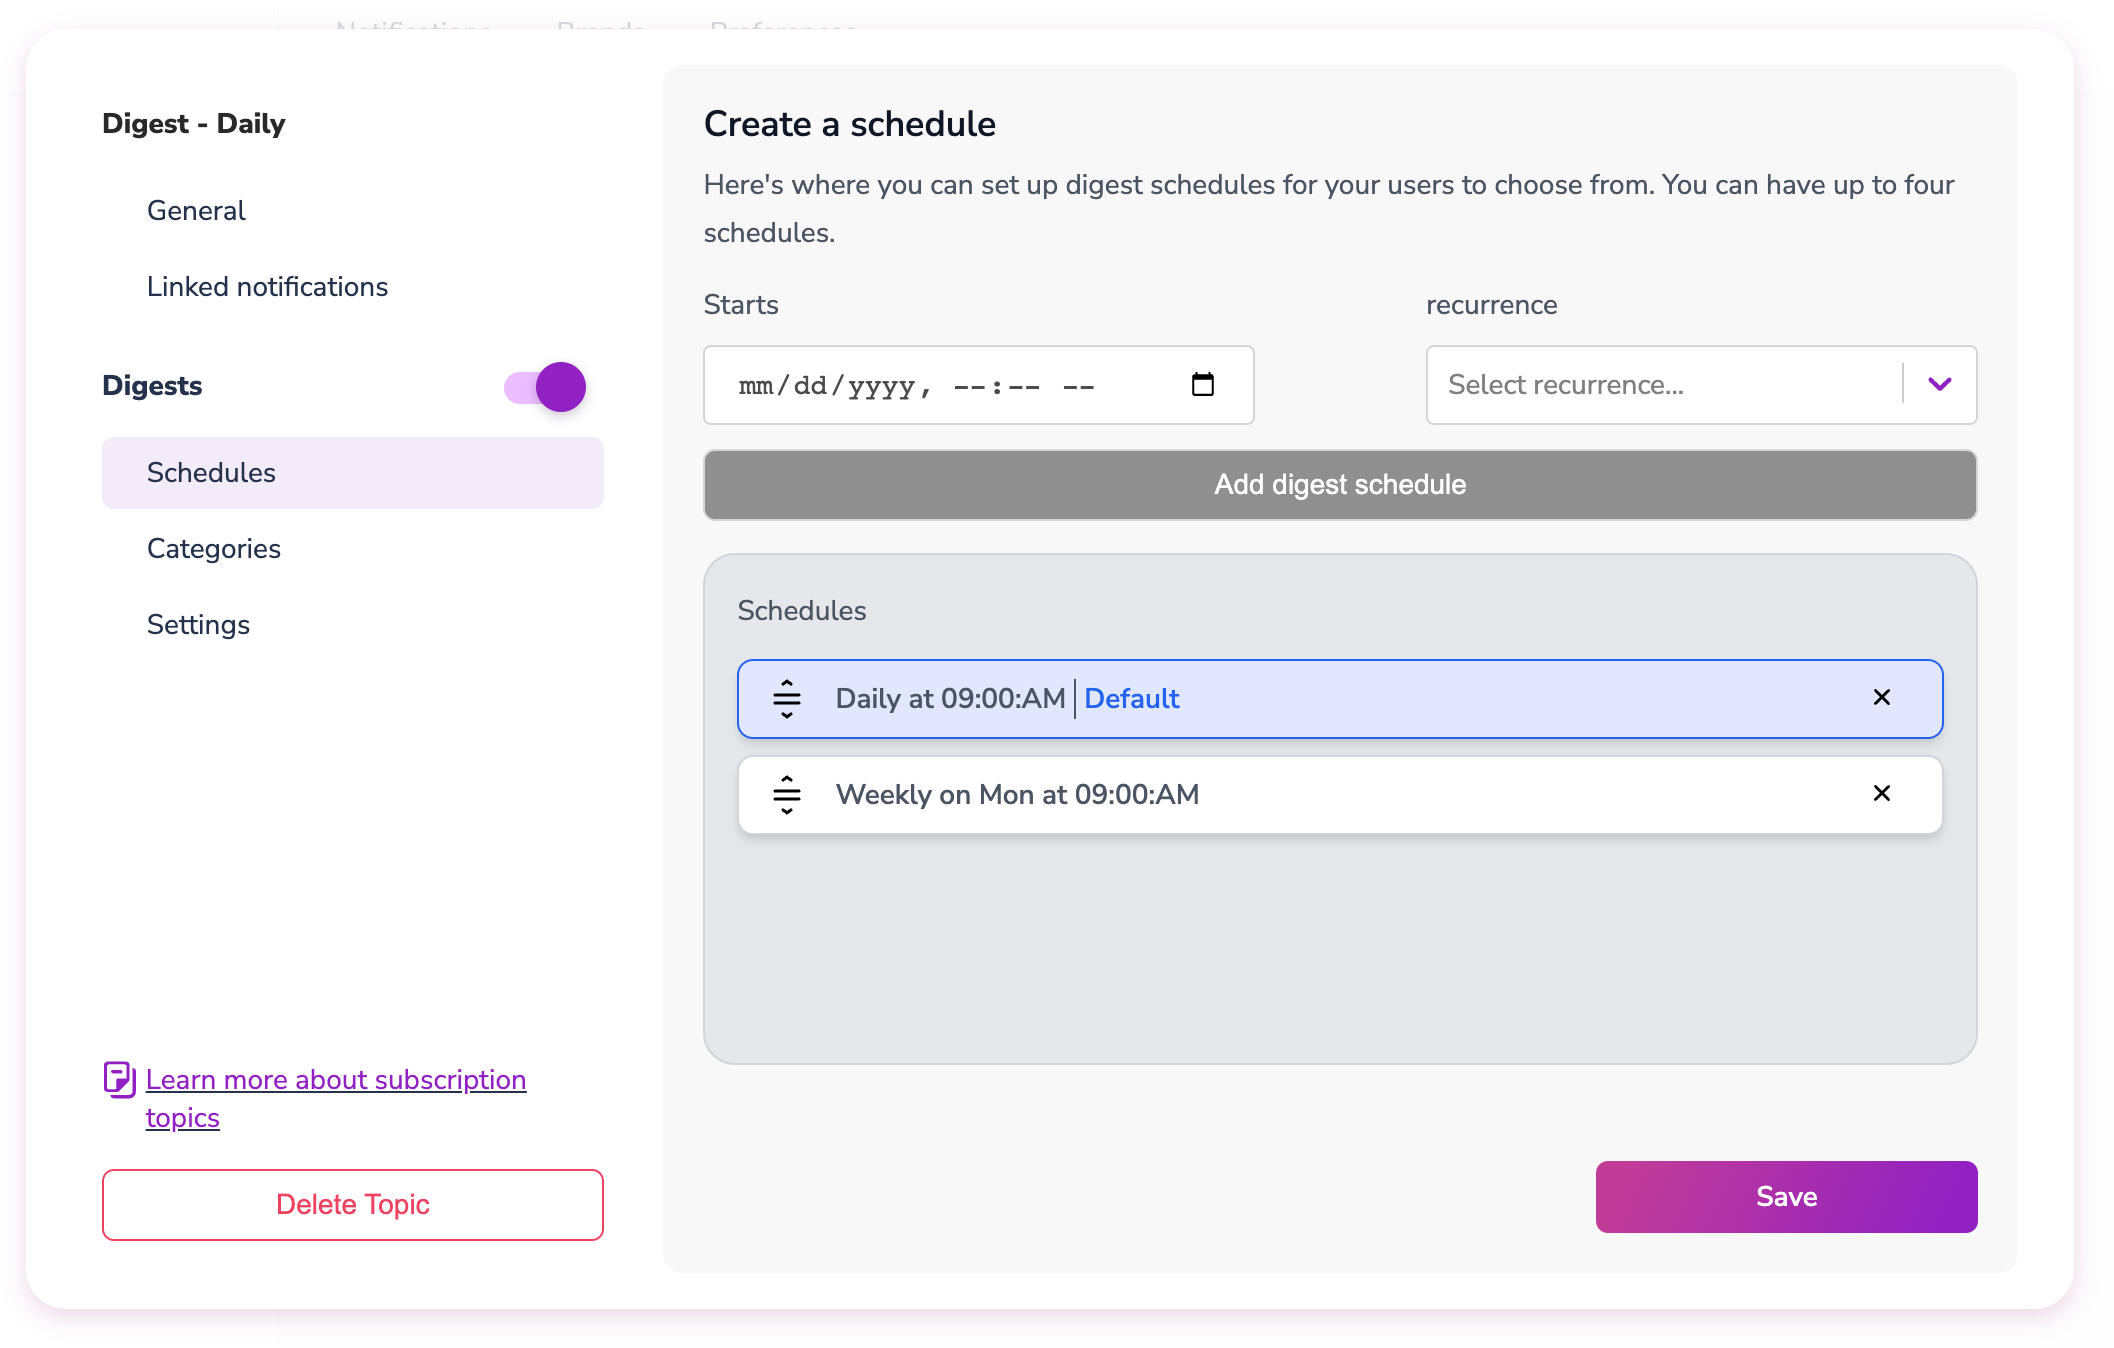
Schedule ID Format
When working with digest APIs, schedule IDs use the formatsch/{uuid}. You can find the schedule ID in the browser’s network panel when viewing the Schedules section of a subscription topic - look for the pk field in the response.
The schedule ID includes the
sch/ prefix. When using this ID in API URLs, you must URL-encode the forward slash as %2F.| Raw Schedule ID | URL-Encoded for API |
|---|---|
sch/a3726ea9-3453-465f-93ad-632061ba8f59 | sch%2Fa3726ea9-3453-465f-93ad-632061ba8f59 |
sch/549ef749-7c87-4eea-b695-2e2d23c025ff | sch%2F549ef749-7c87-4eea-b695-2e2d23c025ff |
Configure Digest Categories
Categories separate different types of data within the same digest. For example, a weekly blog engagement digest might have separate categories for likes and comments.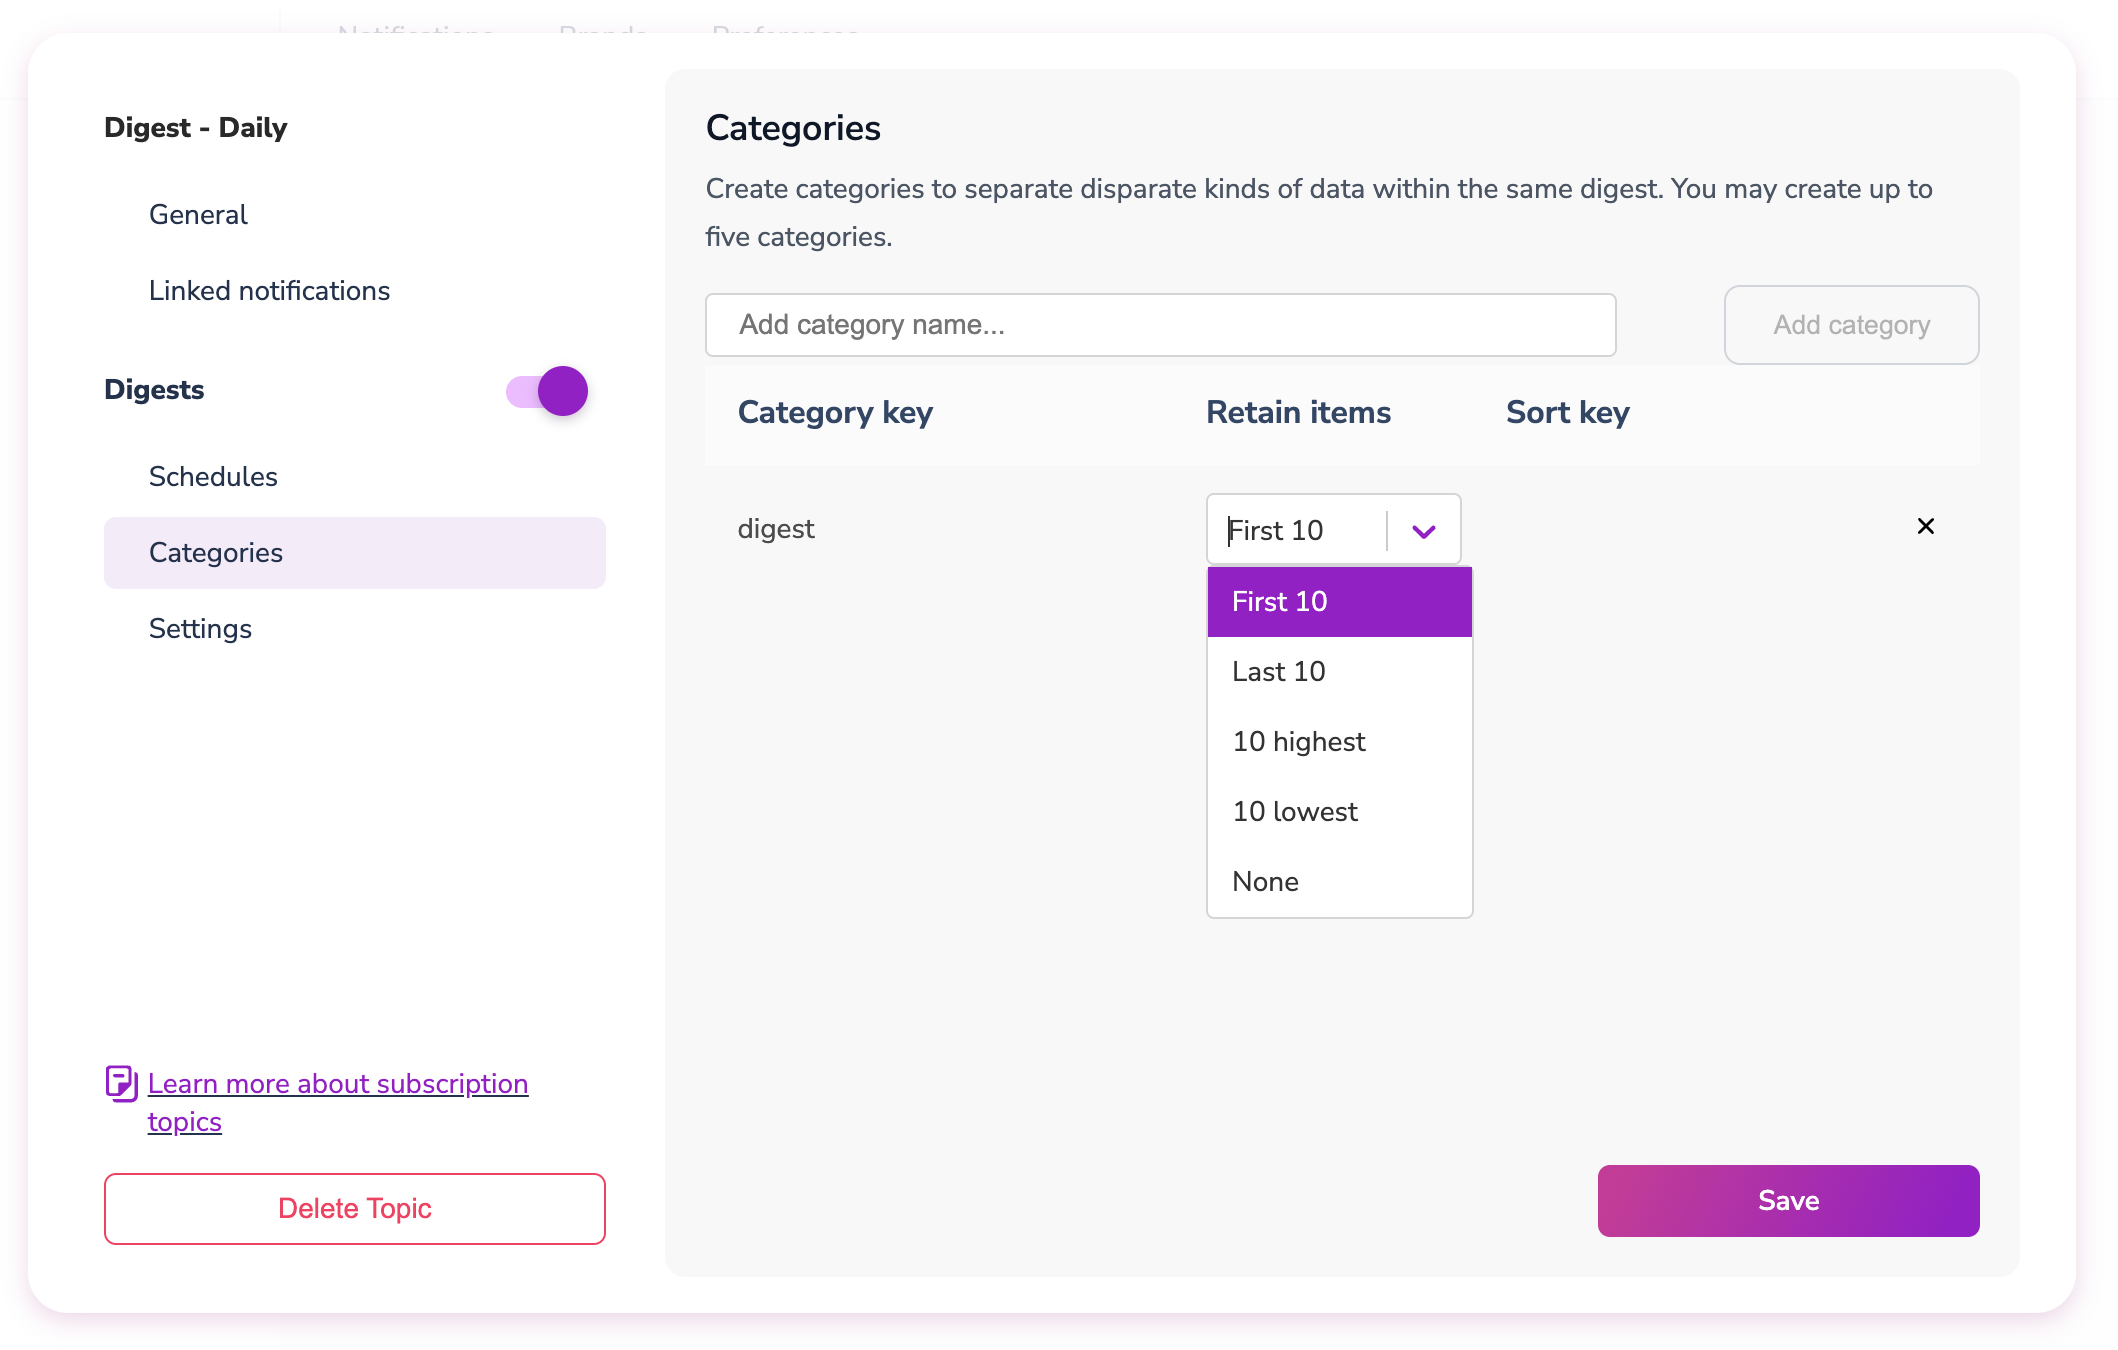
retain setting that controls which events are kept when the digest releases:
| Retain Option | Description |
|---|---|
| First 10 | The first 10 events received (default) |
| Last 10 | The most recent 10 events |
| 10 Highest | Top 10 sorted by sort_key (descending) |
| 10 Lowest | Bottom 10 sorted by sort_key (ascending) |
sort_key (a data attribute in the event used for sorting).
When the digest releases, each category is delivered in this format:
count: Total number of events received (may exceed 10)items: The retained events based on your retain setting (max 10)
Configure Other Digest Settings
The Invoke when empty toggle sends digests to users in an audience even if no events were received during the schedule window. This is useful for fetching custom data in the automation and sending it regardless of event activity.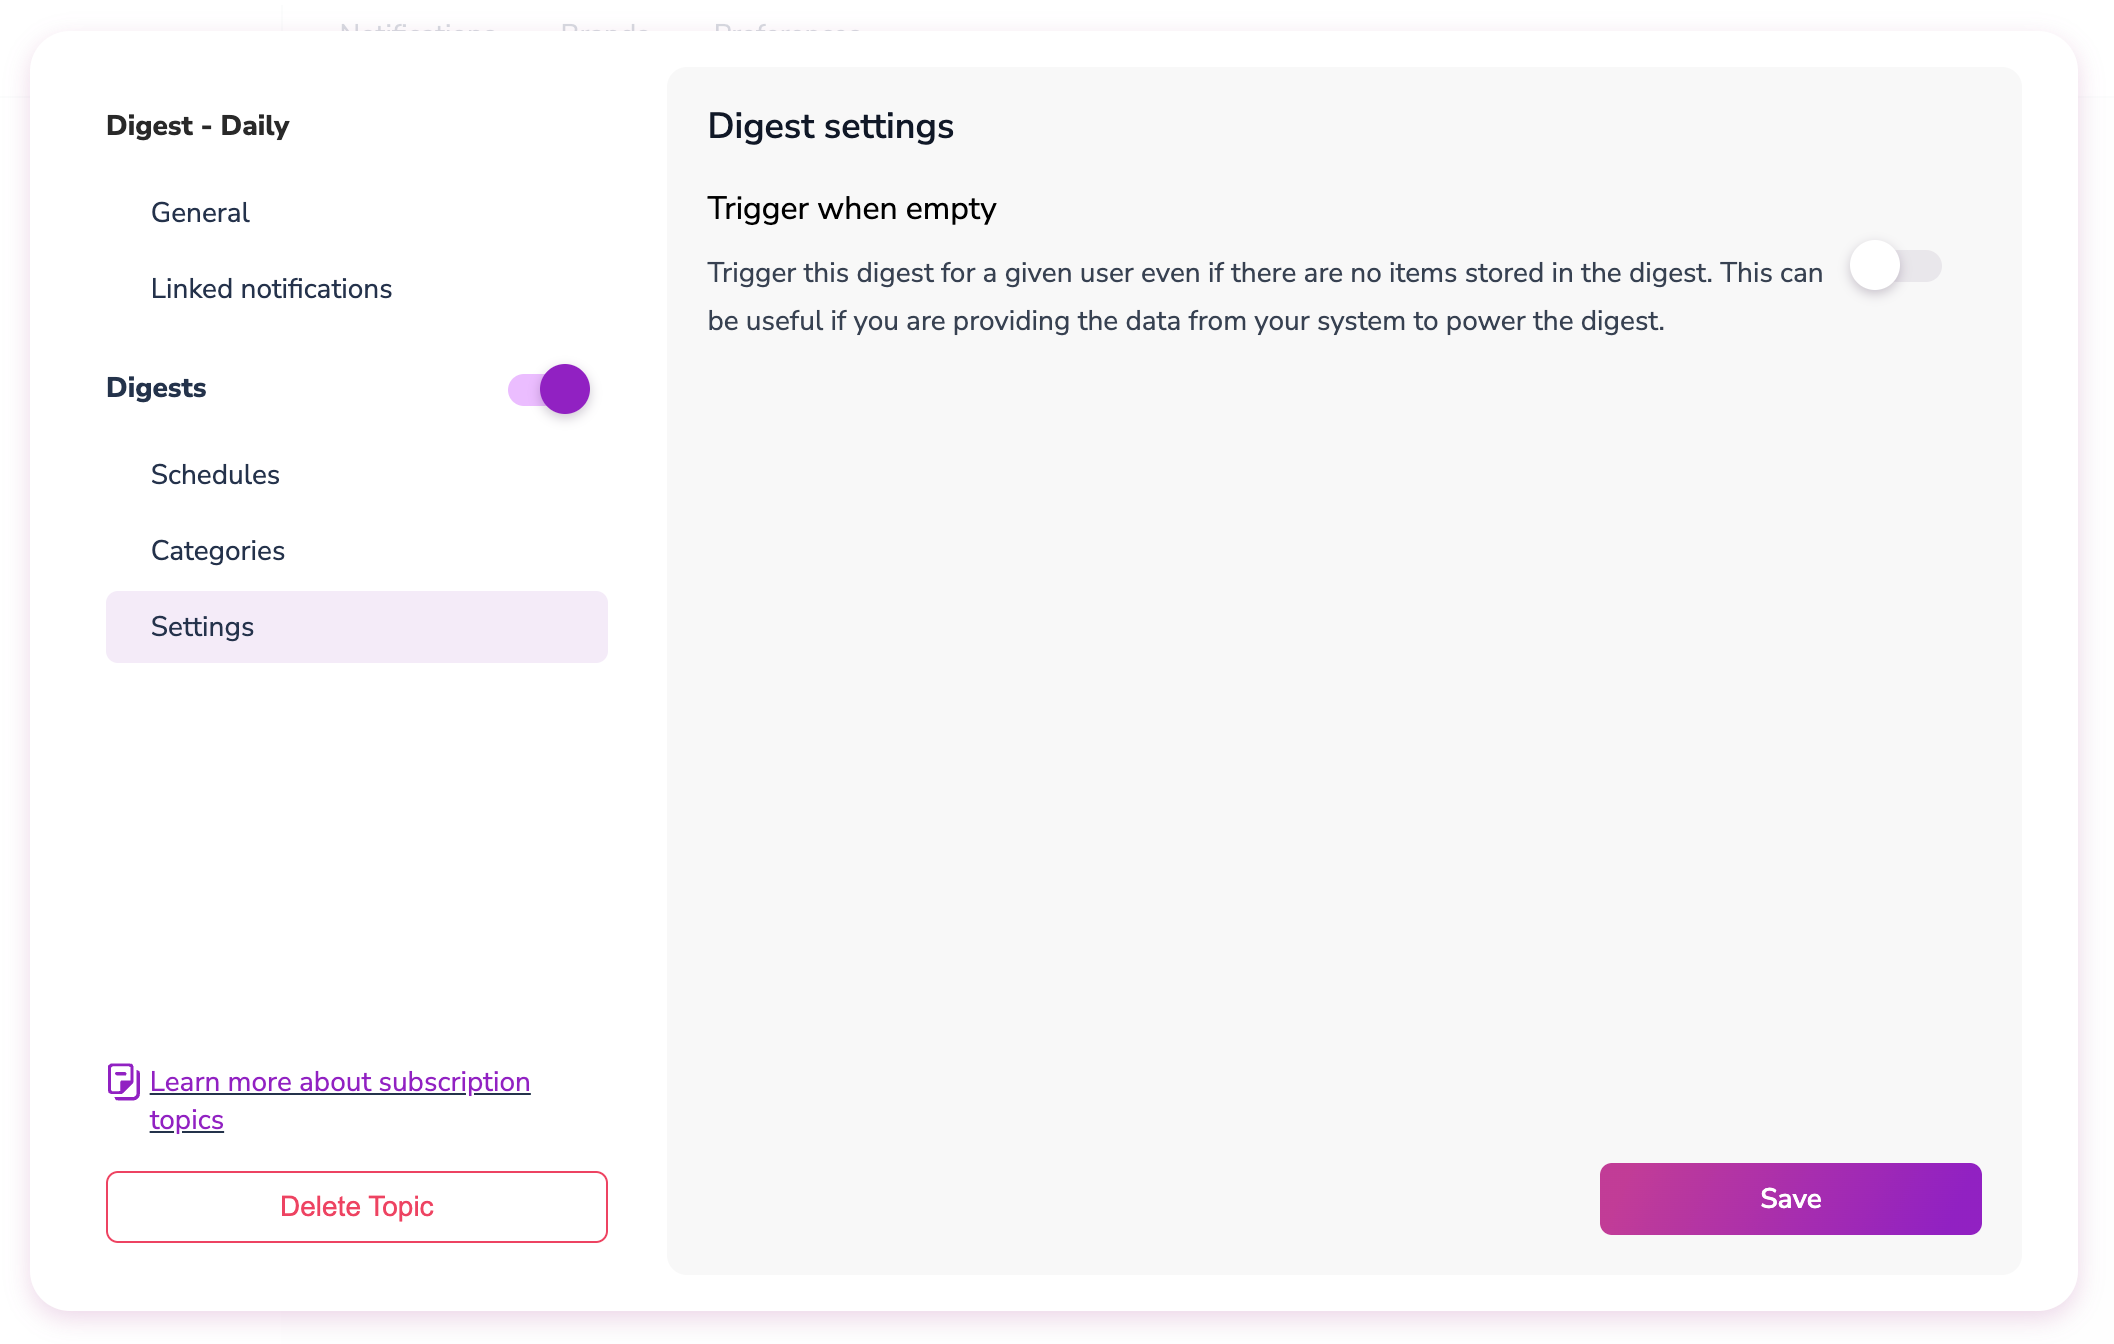
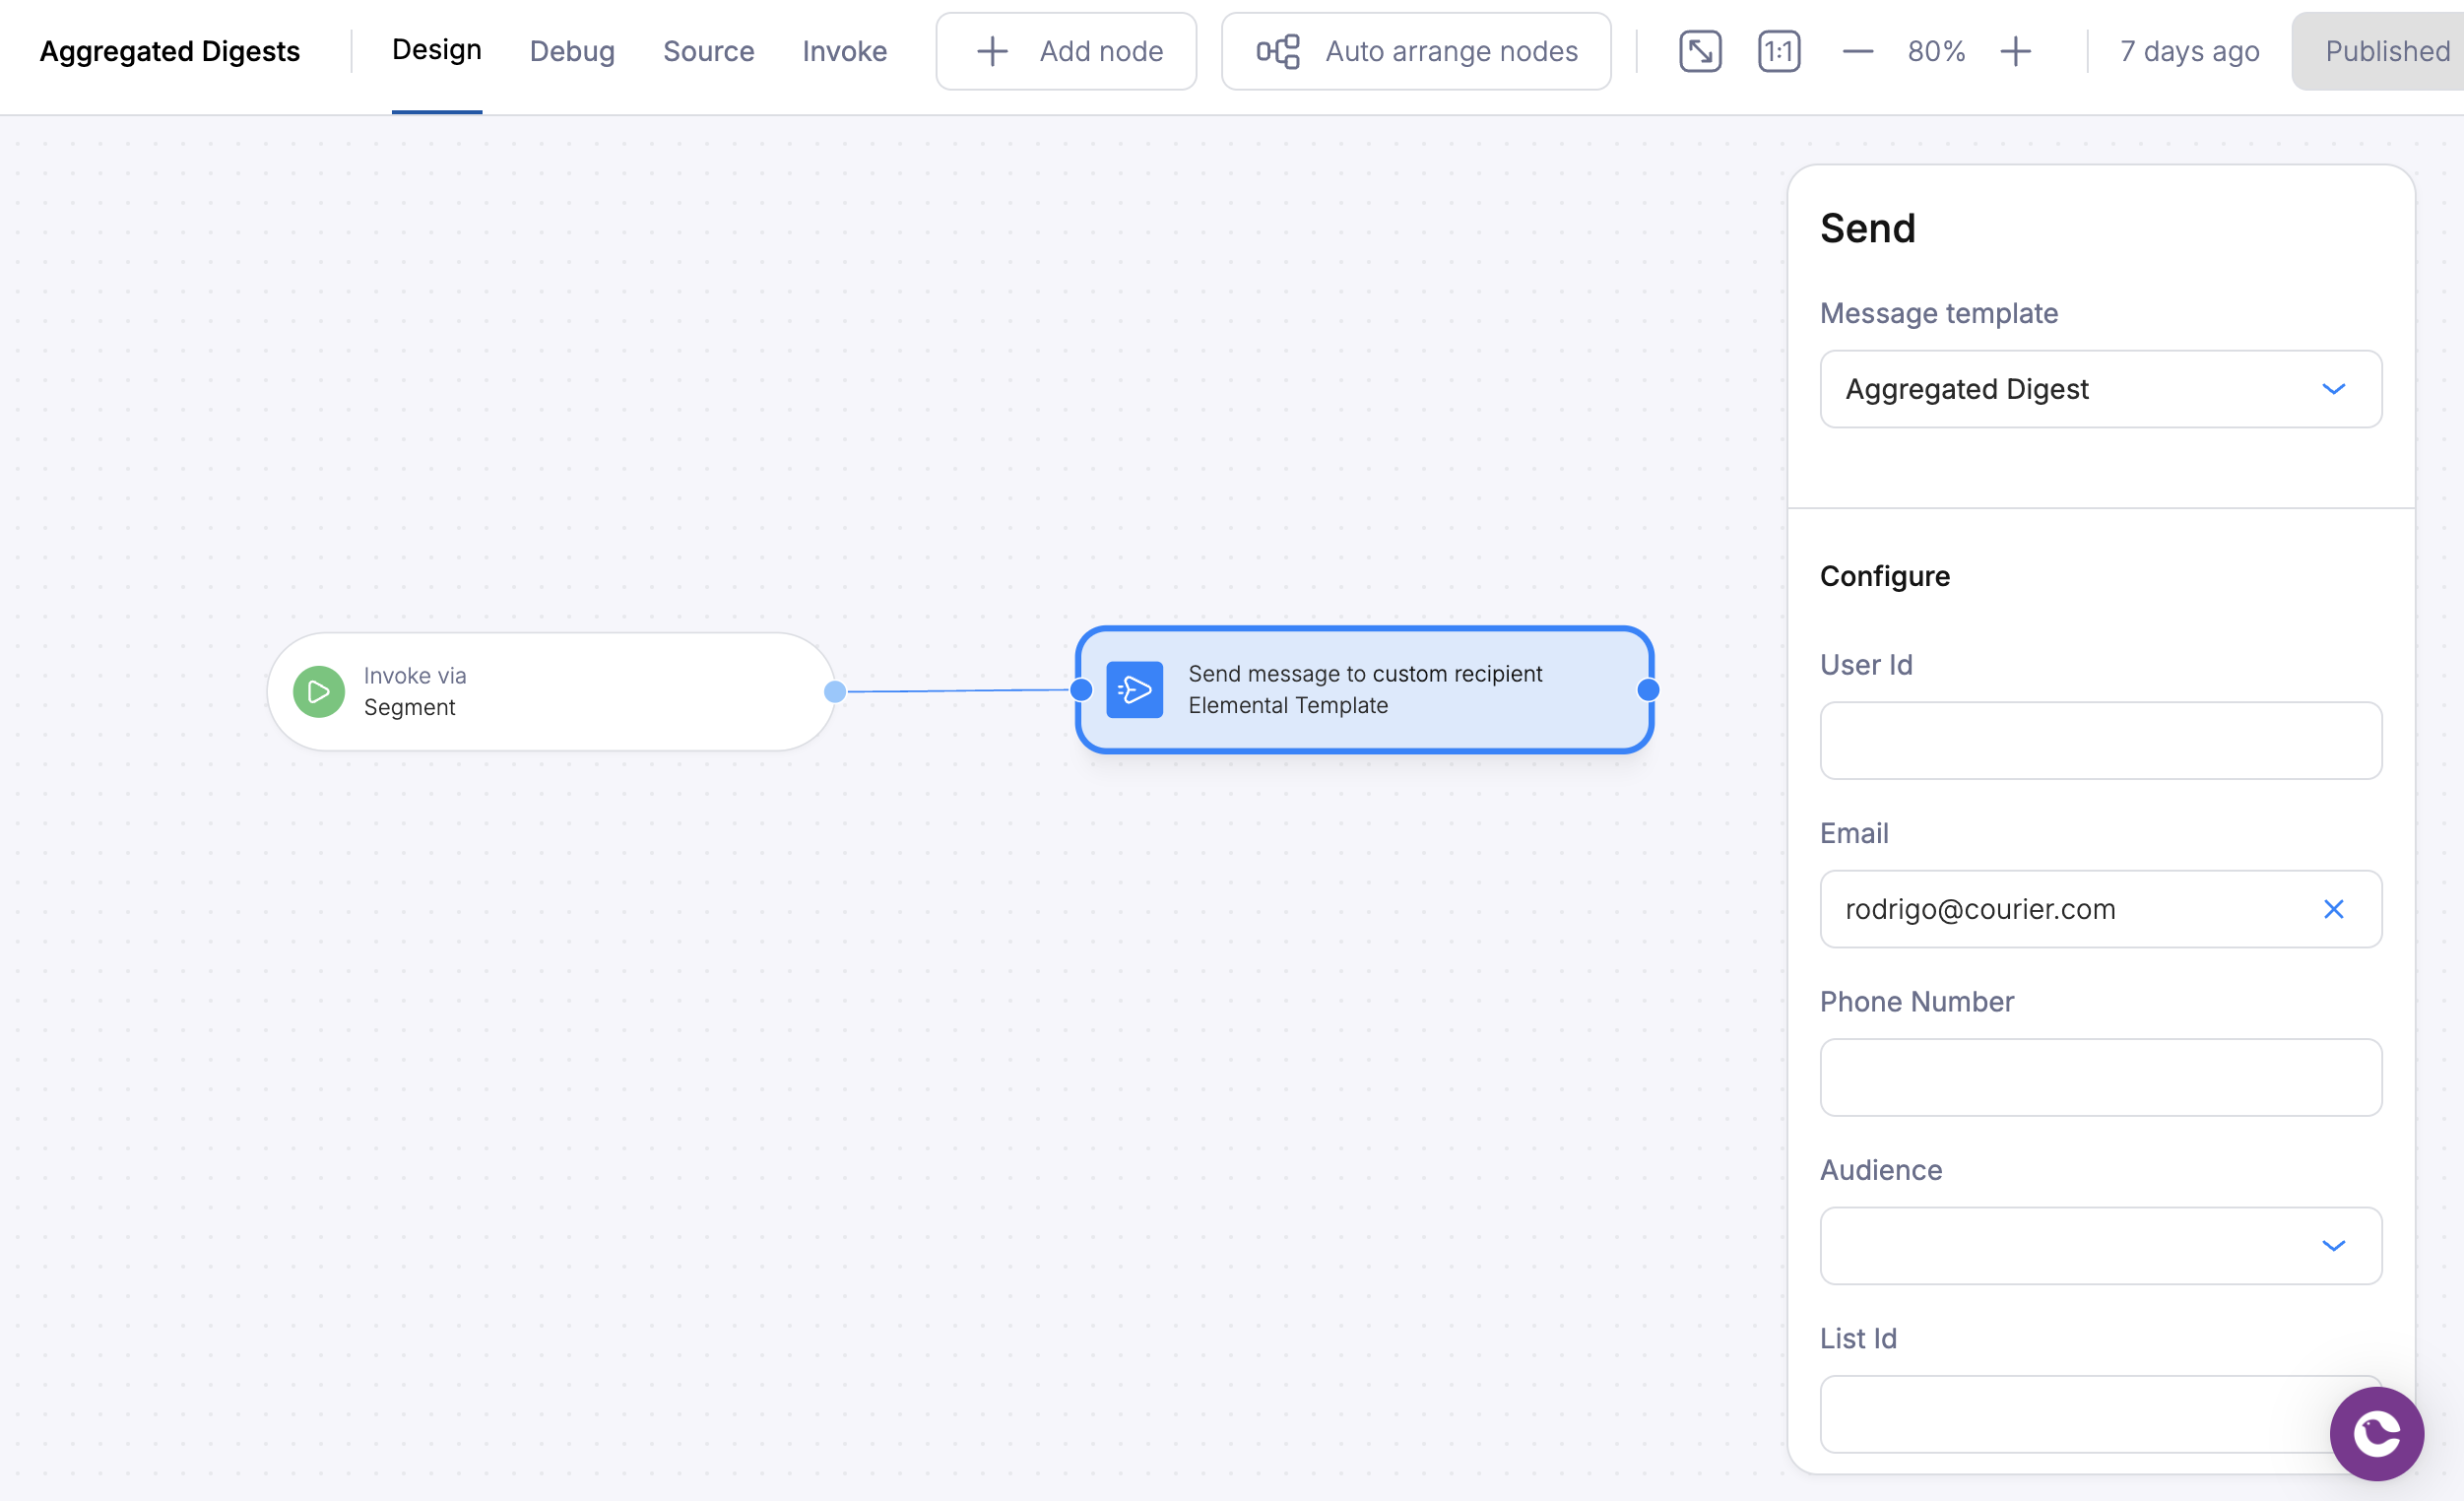
Mapping a Template to a Digest
Link a notification template to the digest so all accumulated events trigger through an automation. From the digest settings in preferences, map the notification template you want to use.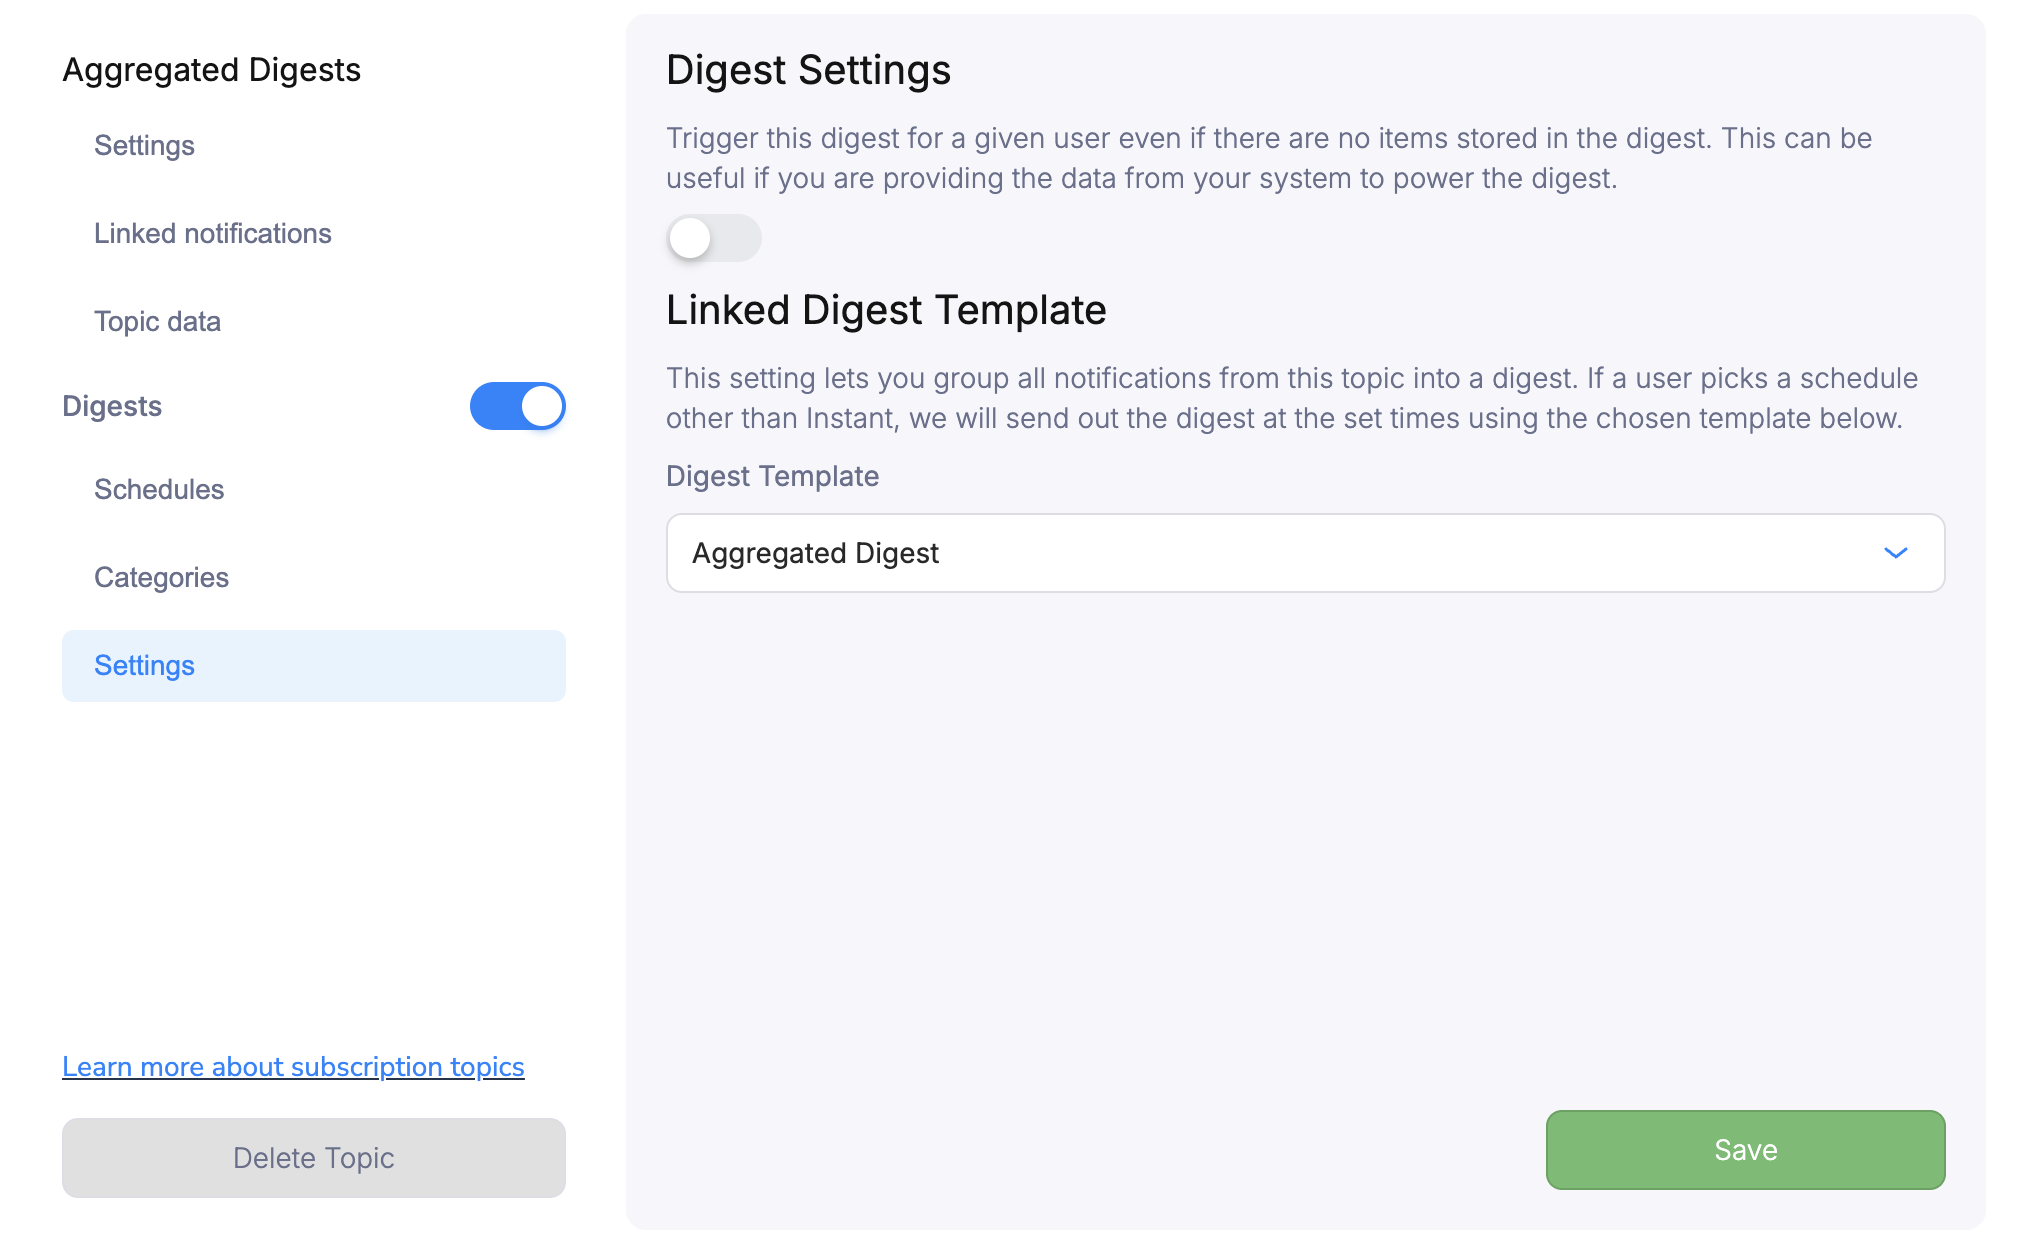
Working with Digests in Automations
Two automation nodes handle digest events: one to collect events, one to release them.Digest Event Collection
Add an Add to Digest node to your automation:- Right-click the canvas and select “Add to Digest”
- Choose the subscription topic where you configured the digest
- Events accumulate per user, identified by
user_idoruserIdin the event data
Both
user_id and userId are accepted in the event data for user identification.Digest Release
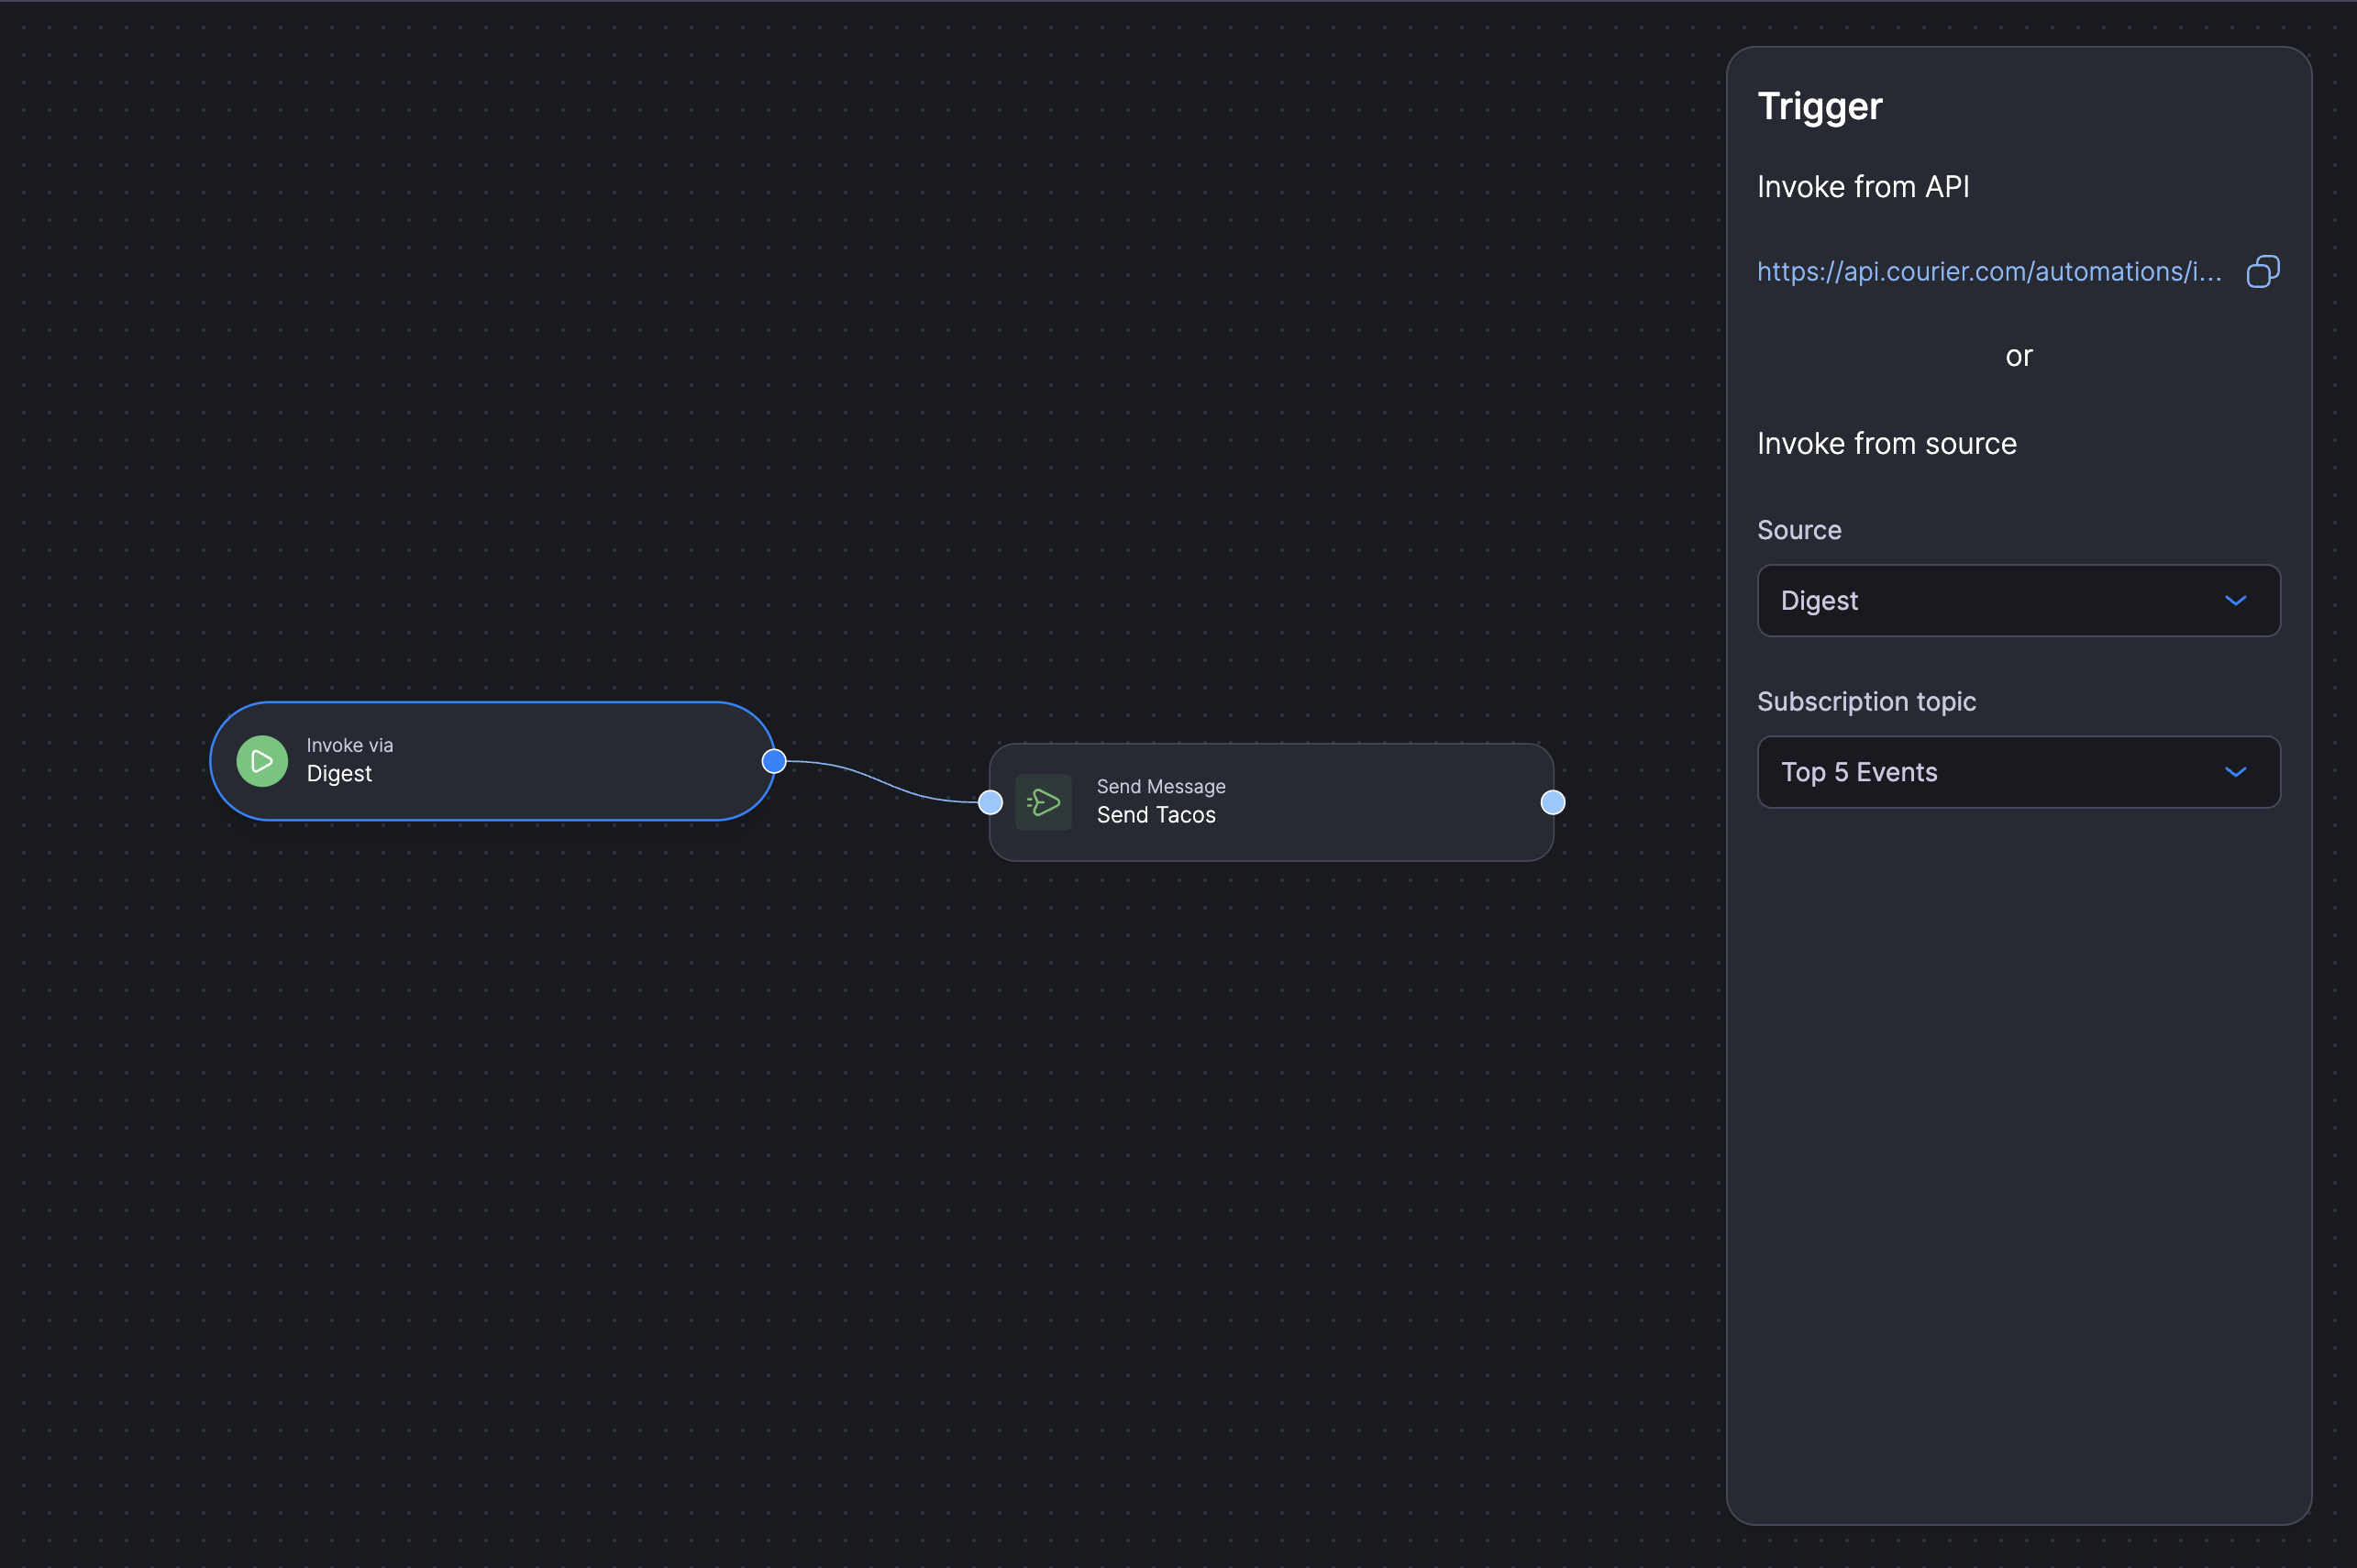
Create a separate automation to process and send the compiled digest:- Select the trigger node and choose Digest from the Trigger section
- Select the same subscription topic used for event collection
- The automation fires at scheduled intervals, processing each user’s accumulated data
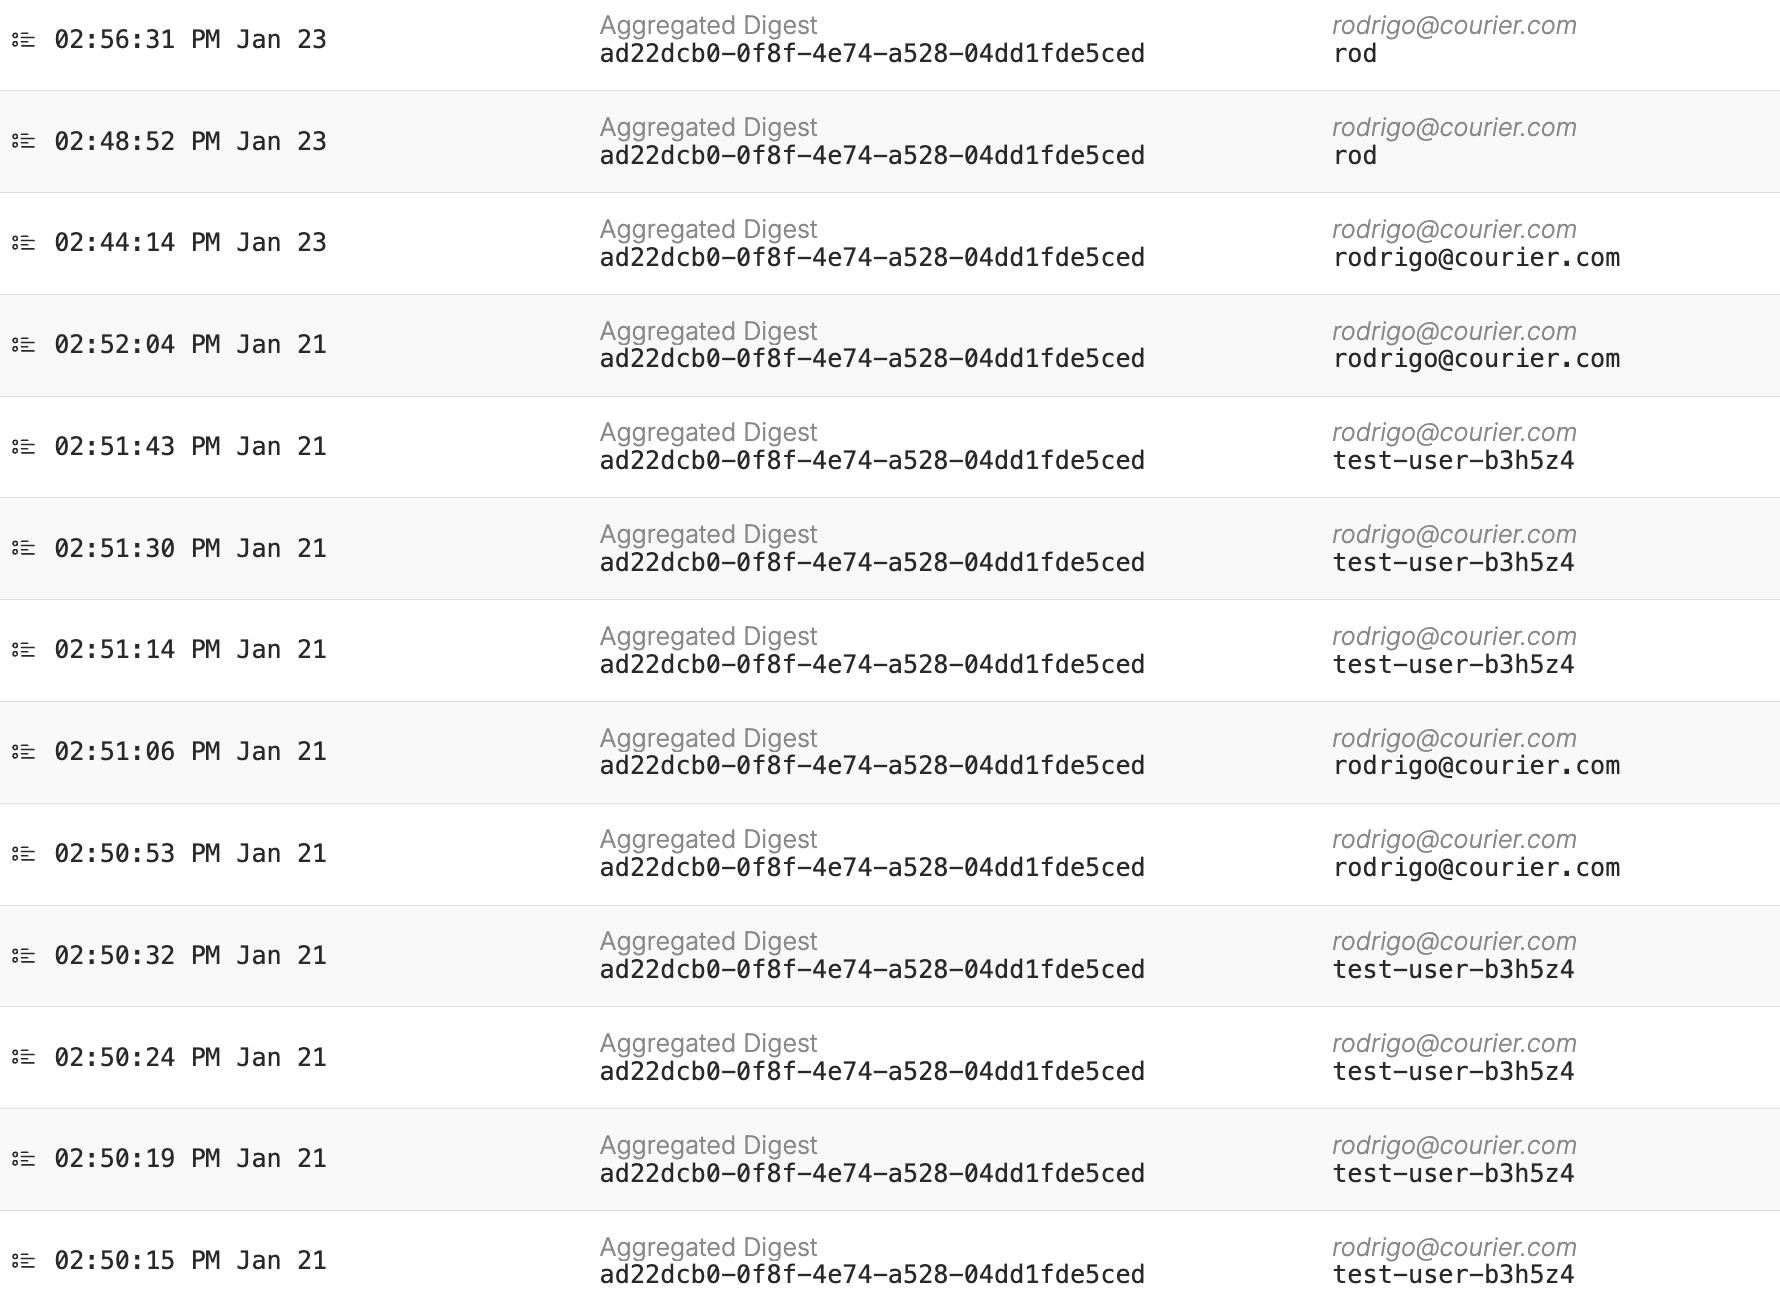
Testing Digests
- Send test events by invoking your collection automation (see Adding Events via API)
- Verify accumulation by listing digest instances; confirm
event_countincrements andstatusisIN_PROGRESS - Trigger a release using the manual trigger endpoint; check that your template receives the digest payload
- Verify the email contains the expected digest items and category data
Timing Considerations
List Subscriptions and Digest Events
If your automation subscribes a user to a list and then immediately sends a digest event, the subscription may not have propagated before the event is processed. This can cause the event to be dropped because the user isn’t yet recognized as a subscriber for the topic. To avoid this race condition:- Add a short delay (a few seconds) between the subscription call and the first digest event
- Or subscribe users to lists as a separate, earlier step in your workflow rather than inline with digest event submission
Scheduled vs Instant Delivery
Scheduled digests batch events until the next scheduled release time. If you send a digest event at 9:05 AM and the schedule is “Daily at 9:00 AM,” that event won’t be delivered until the following day at 9:00 AM. This is expected behavior; the event is accumulating in a new digest instance. To test digests without waiting for the schedule, use the manual trigger endpoint or add a shorter schedule (every 5-15 minutes) during development.Managing Digests via API
If the Preferences Editor UI is unavailable or you need programmatic control over digest schedules, you can manage digests through the API.Listing Digest Instances
Check which users have accumulated events for a given schedule:event_count, status (IN_PROGRESS or CLOSED), and the user_id.
Releasing a Digest Early
Trigger an immediate release without waiting for the scheduled time:IN_PROGRESS instances for the schedule and invokes the digest trigger automation for each user.
Adding Events via API
You can submit digest events by invoking the collection automation directly:Use the collection automation’s ID (the one with the “Add to Digest” node), not the trigger automation’s ID. Invoking the trigger automation directly bypasses the digest system and produces empty results.