Use this file to discover all available pages before exploring further.
The Courier React Native SDK provides prebuilt components and APIs for building notification experiences in React Native. It handles authentication, token management, and real-time message delivery across iOS and Android from a single codebase.
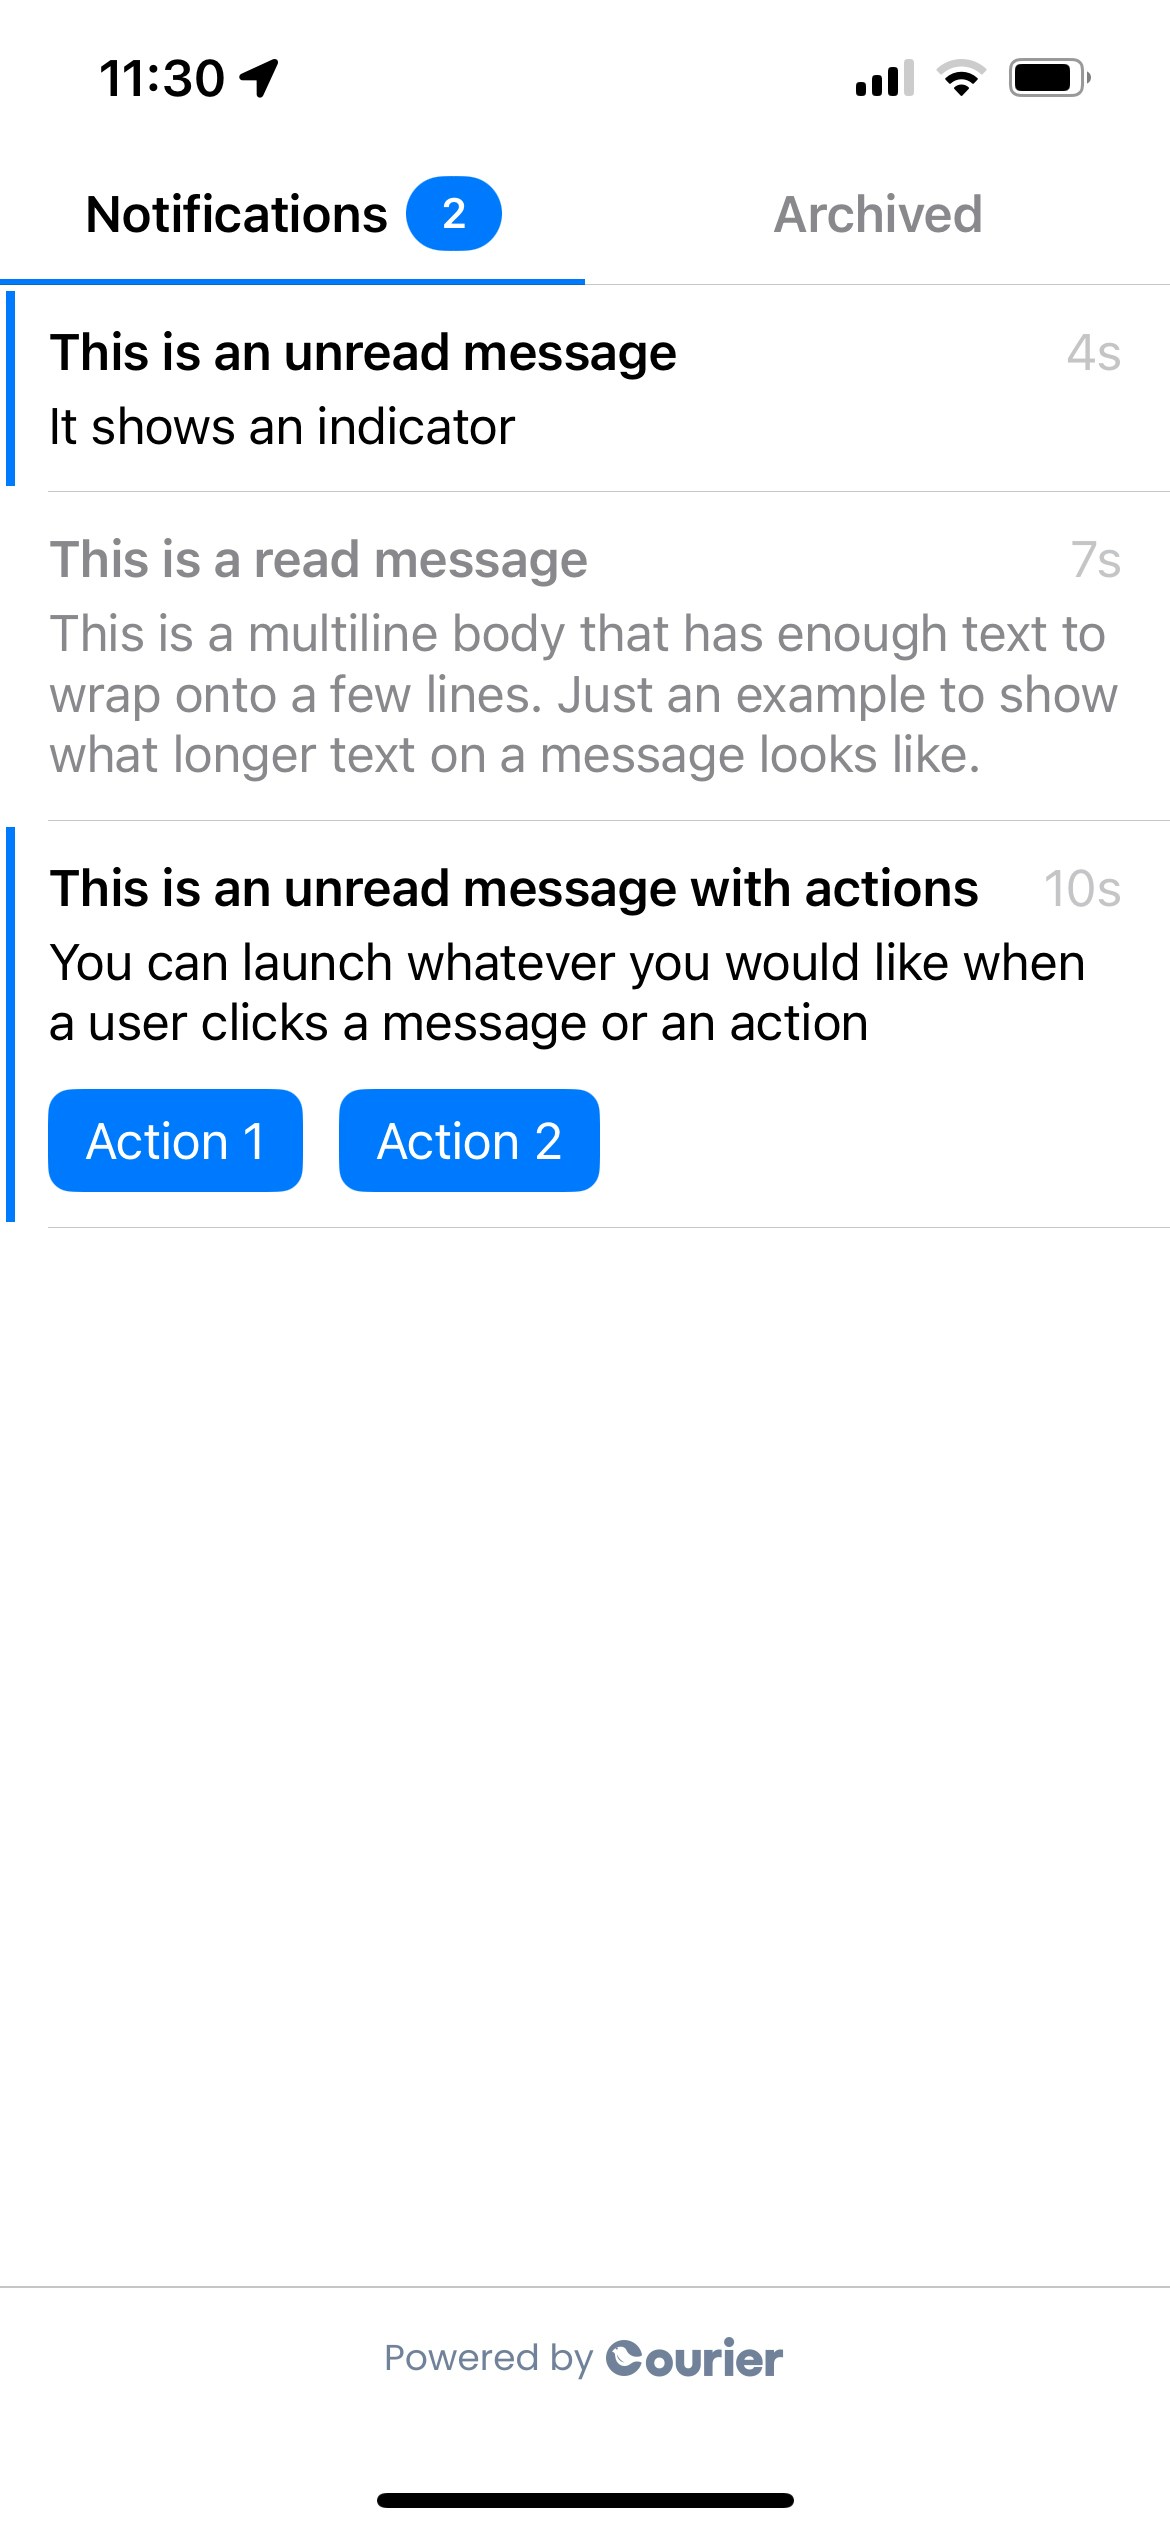
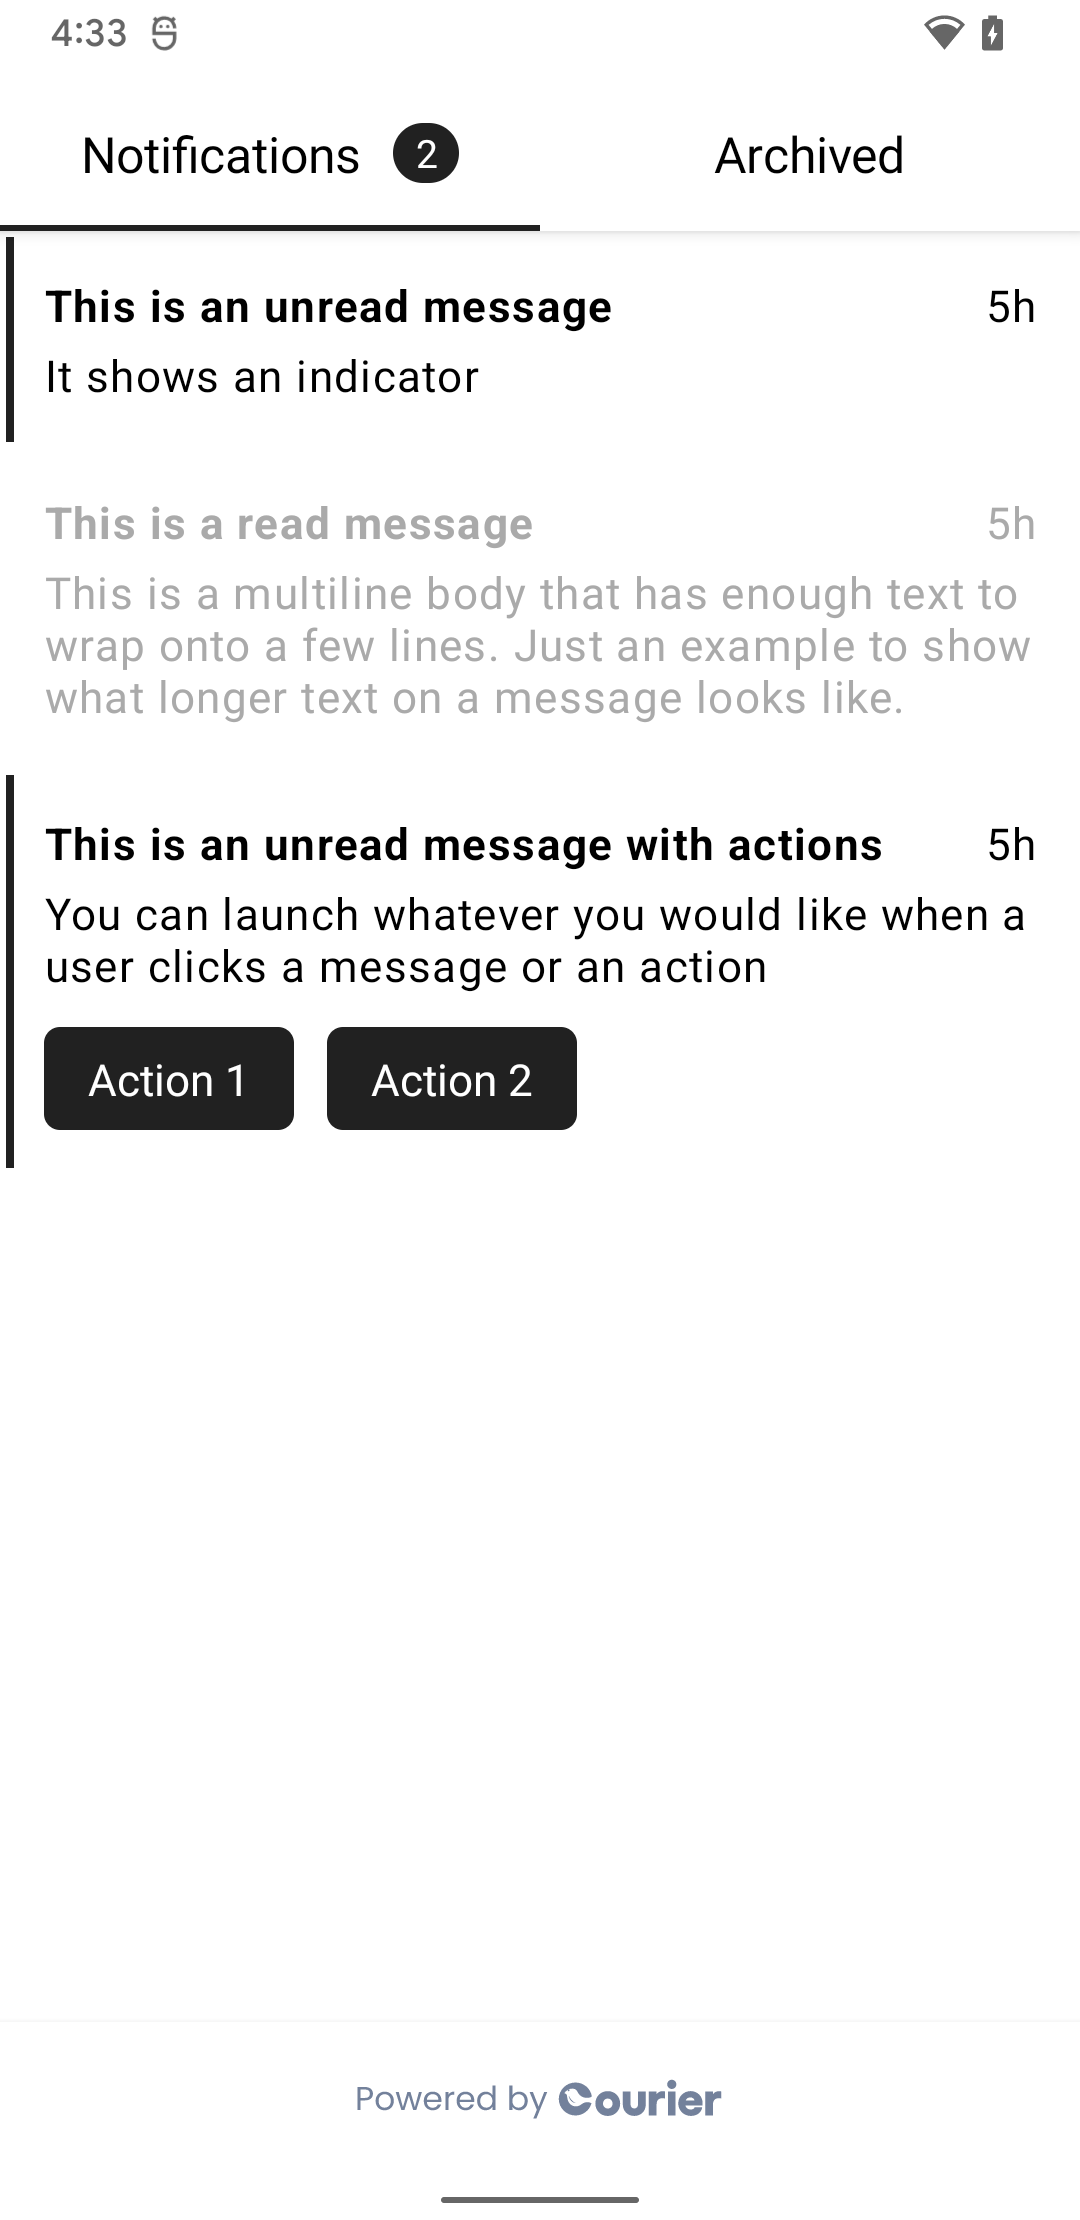
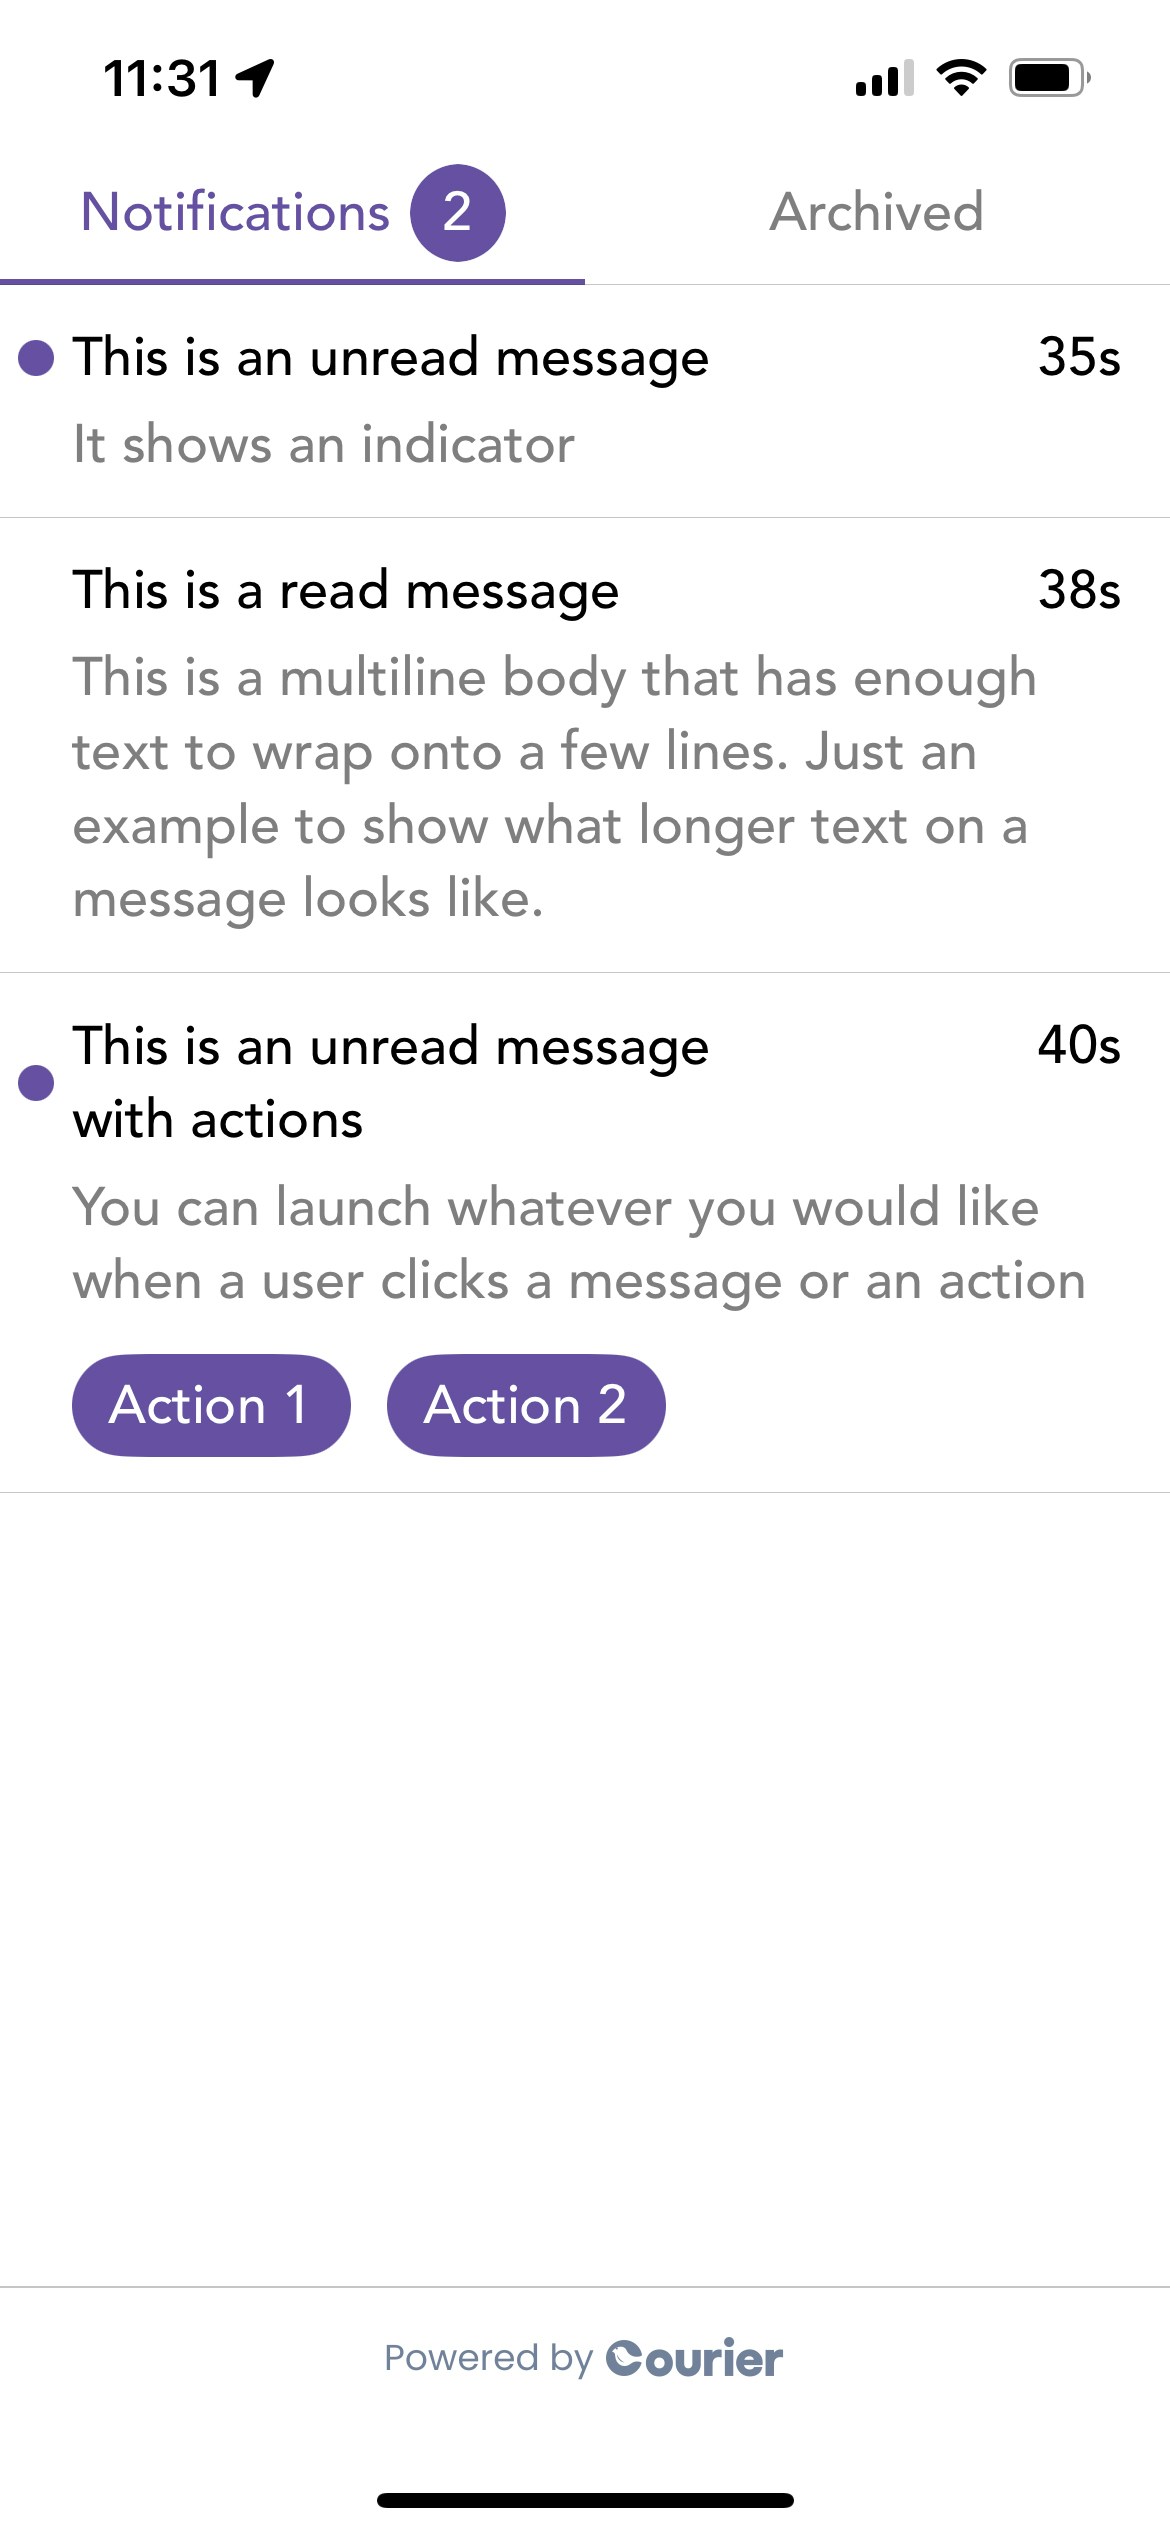
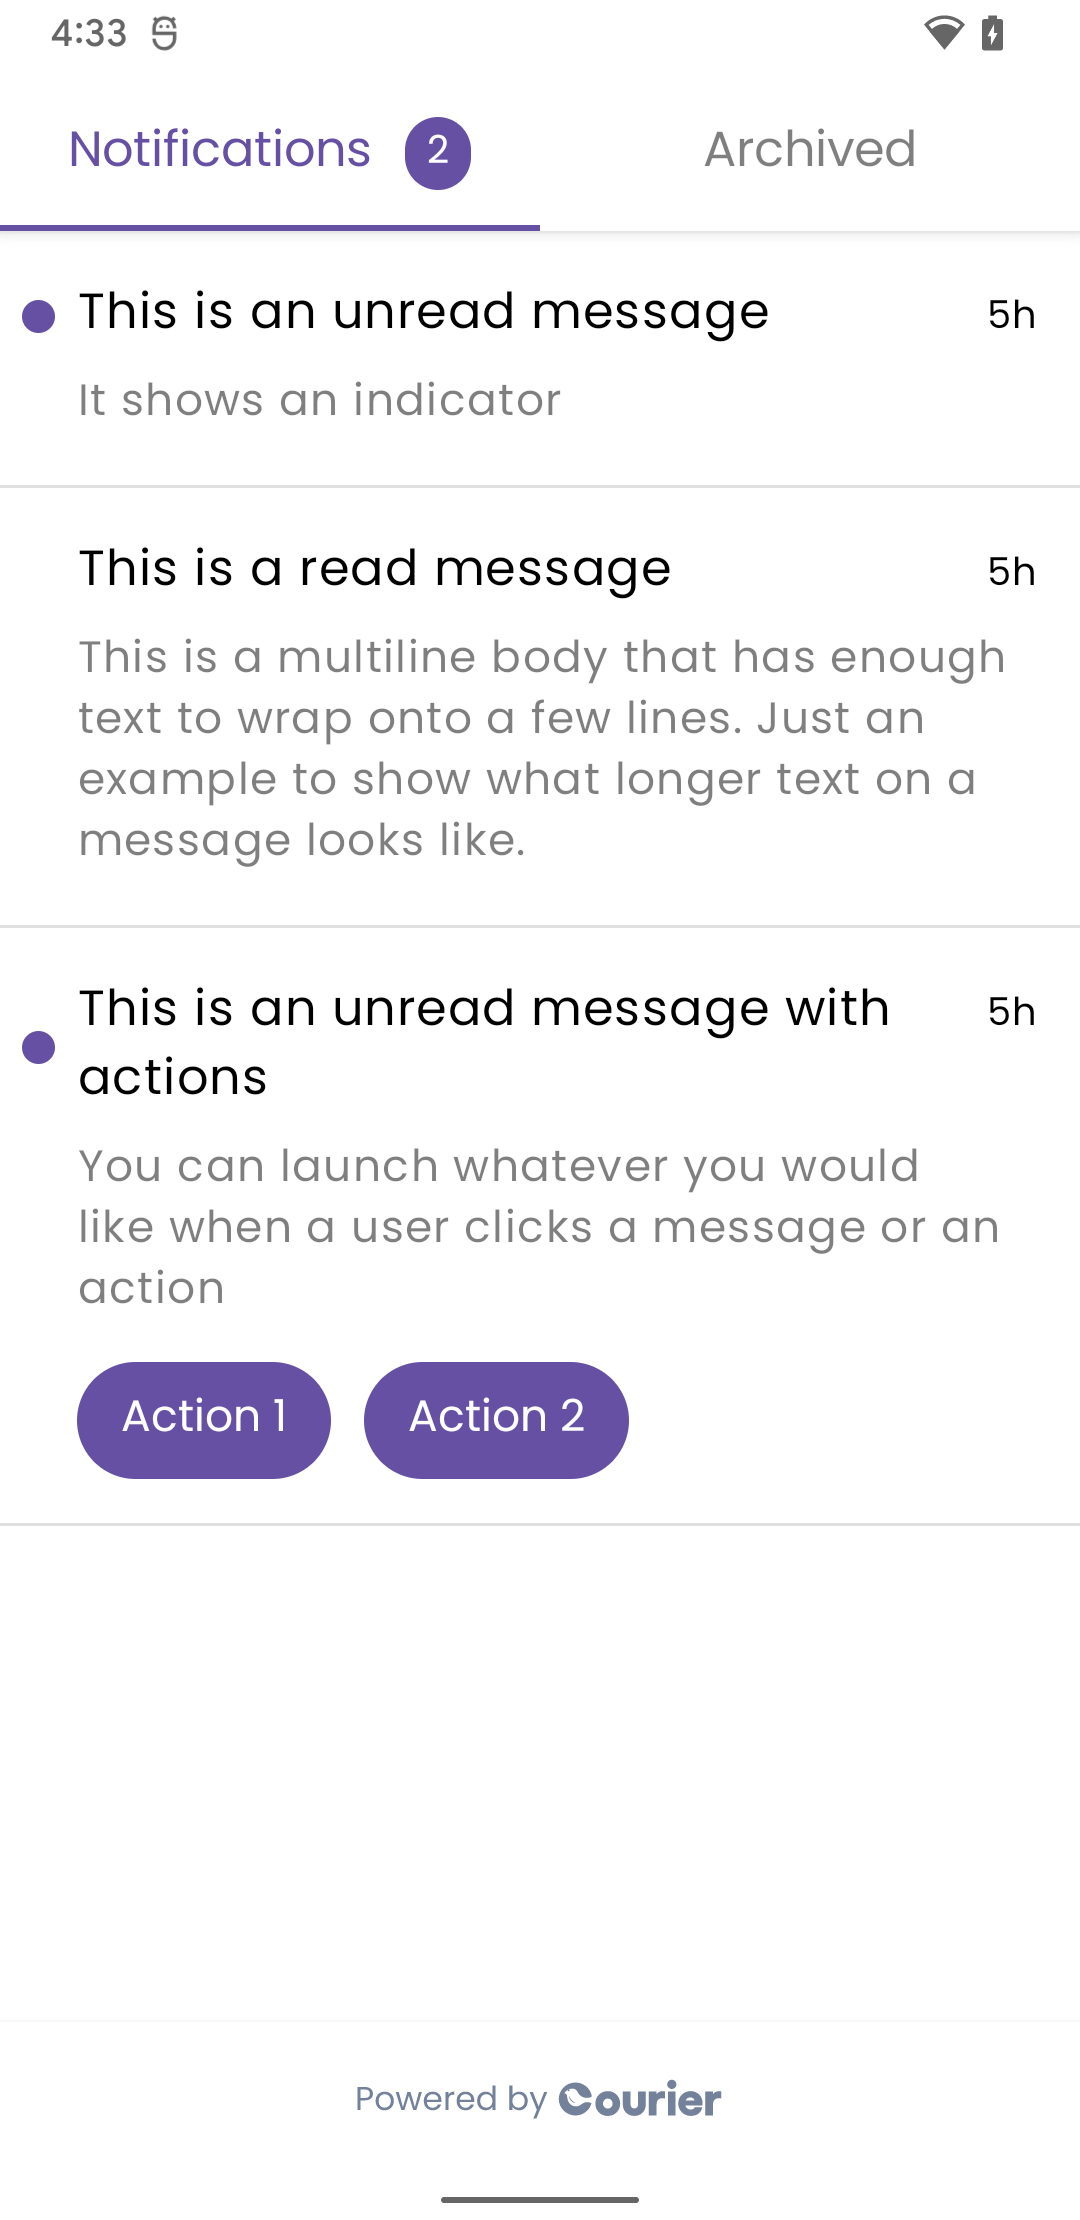
Inbox — prebuilt notification center with theming and custom rendering
Push Notifications — automatic token syncing and delivery tracking for APNS and FCM
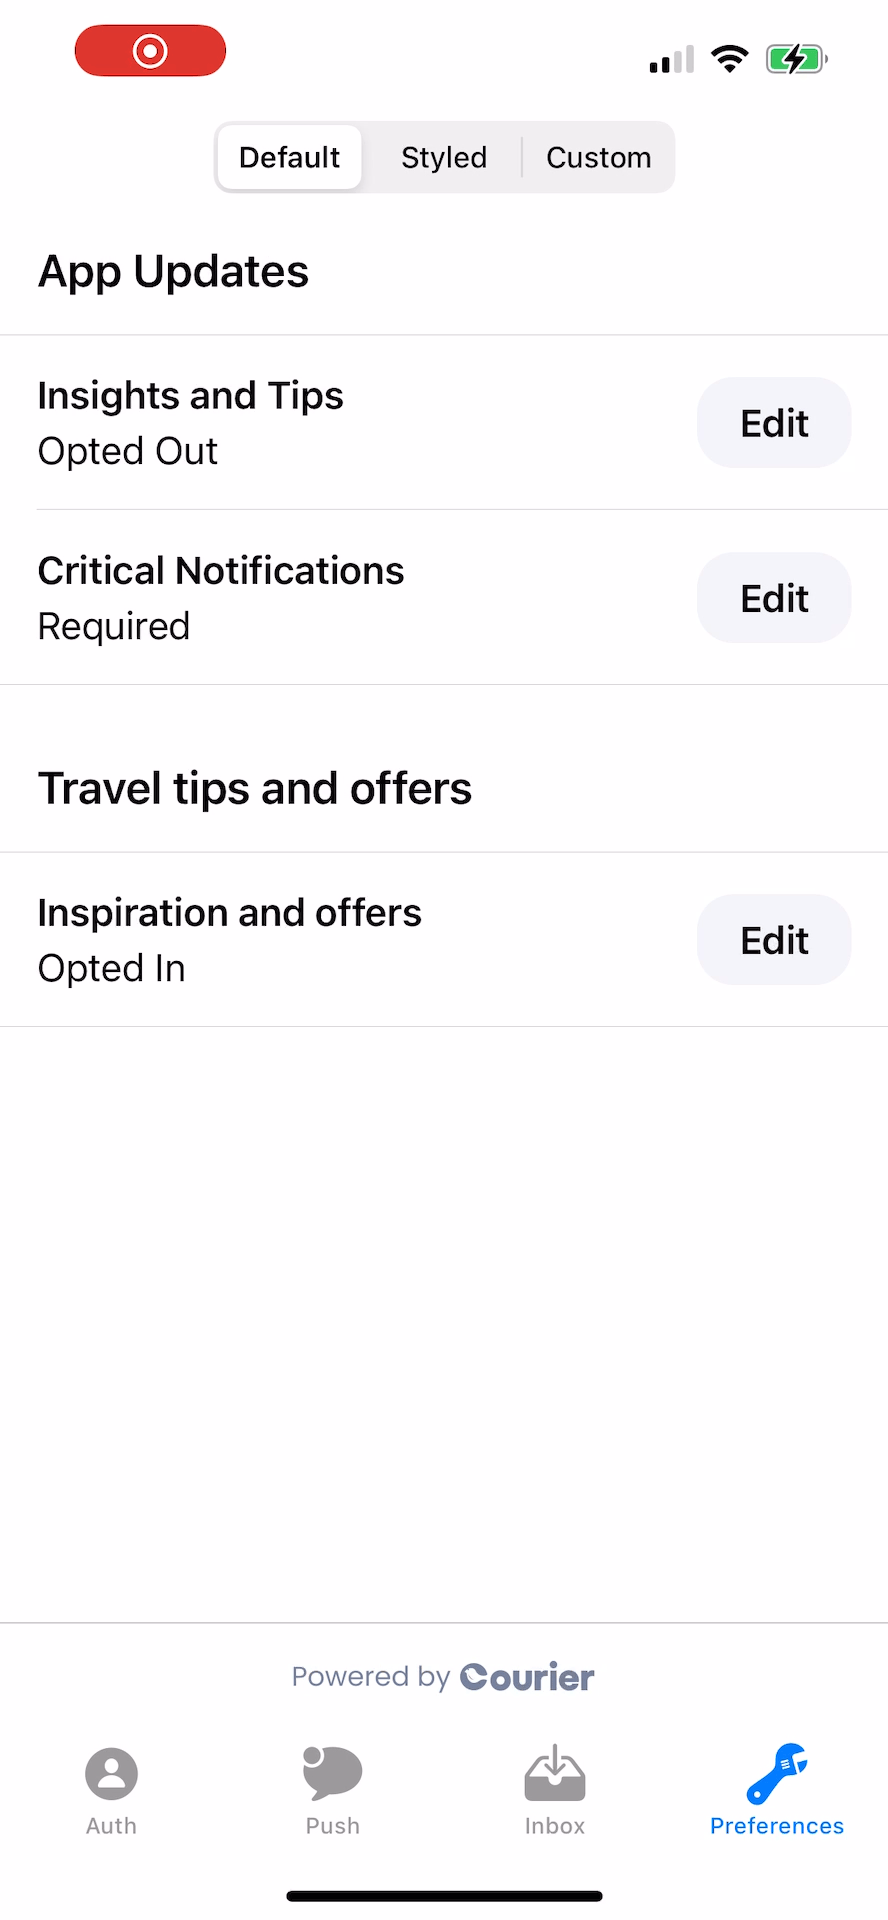
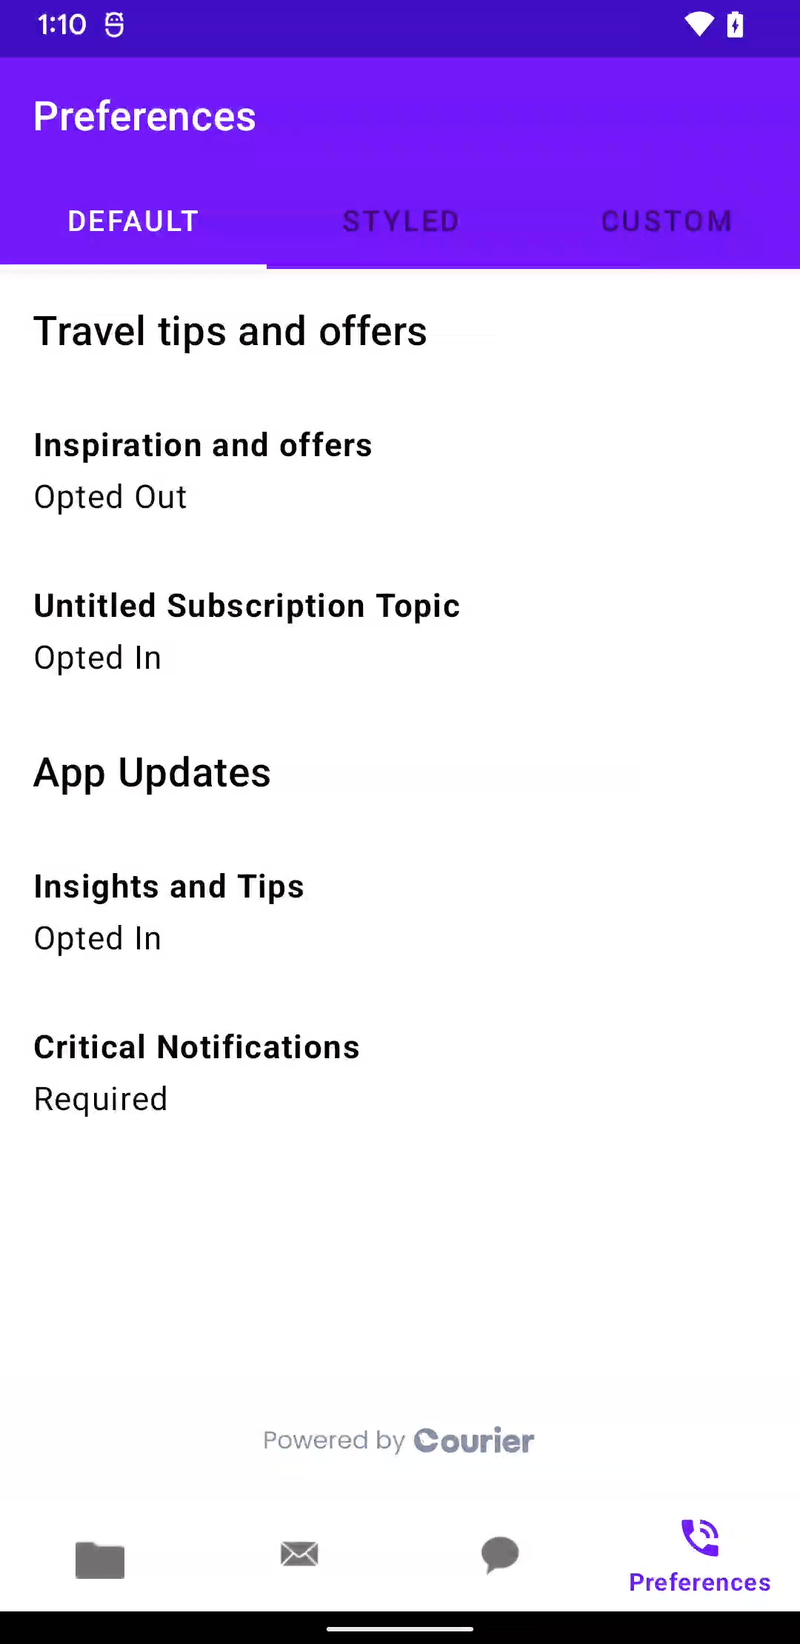
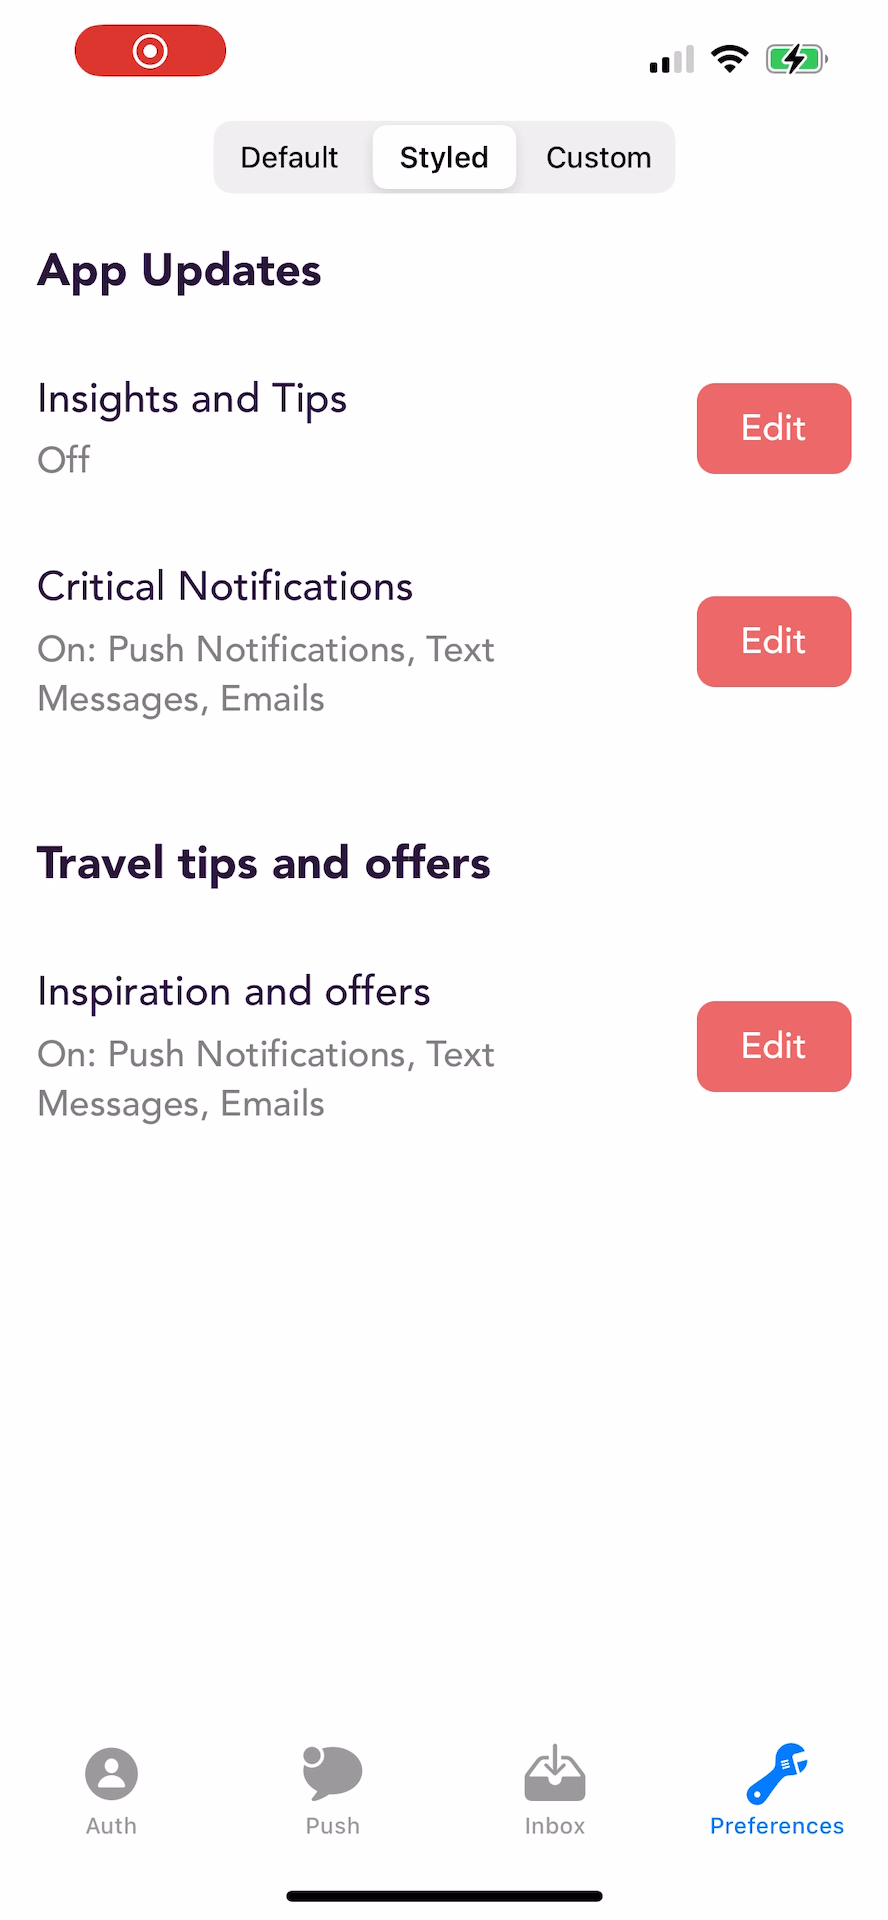
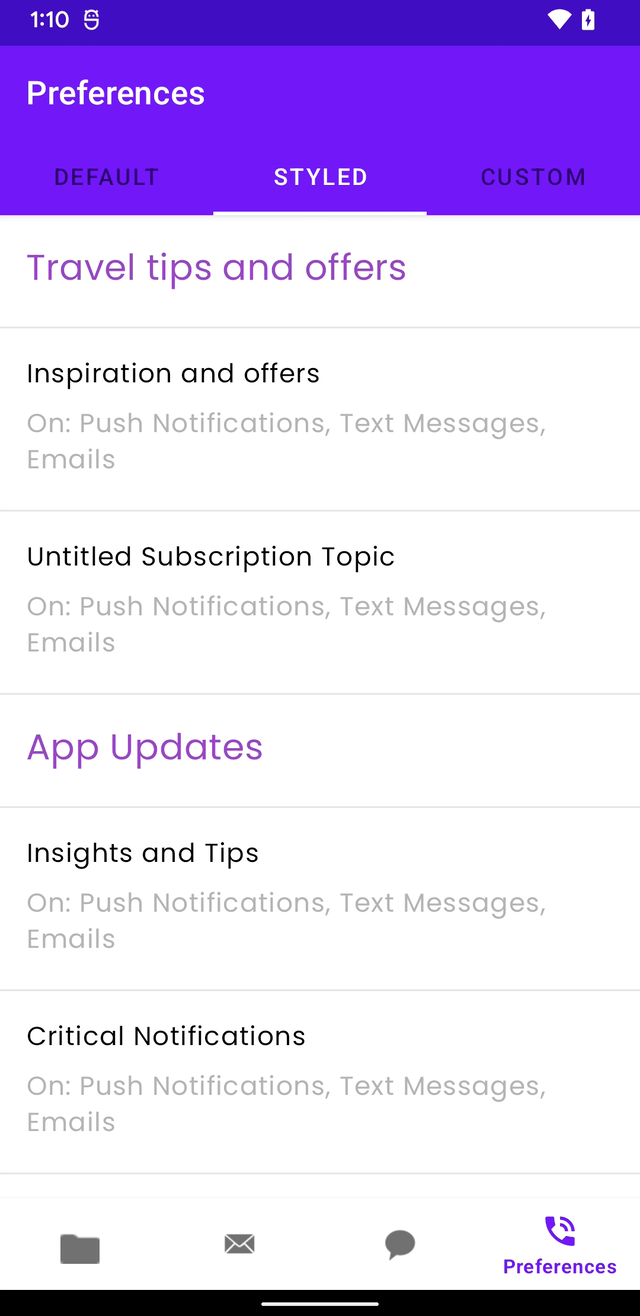
Preferences — prebuilt UI for users to manage their notification settings
All SDK features (Inbox, Push, Preferences) require a signed-in user. Authentication is JWT-based; your backend generates a token and the SDK manages credentials across app sessions.
Pass the JWT to the SDK where you manage user state. Credentials persist across app sessions. If the token expires, generate a new one from your backend and call signIn again; the SDK does not handle token refresh automatically.
import Courier from "@trycourier/courier-react-native";await Courier.shared.signIn({ userId: "your_user_id", accessToken: jwt,});
Pass a theme object to customize the inbox appearance. The theme supports separate iOS and Android style properties, custom fonts, colors, and button styles.
In Xcode: select your target > Signing & Capabilities > add Push Notifications.
2
Forward APNS callbacks to Courier
Update your AppDelegate.h so it inherits from CourierReactNativeDelegate. The SDK registers for remote notifications, syncs the APNS token to Courier, and forwards delivery / click events to your JavaScript listeners.
Firebase is now a separate dependency. Starting with Courier React Native 6.x (Android 6.x), the SDK no longer bundles Firebase Messaging as a transitive dependency. Your app must add its own Firebase BoM and firebase-messaging artifact so you can subclass FirebaseMessagingService.
1
Set up Firebase
Register your app in Firebase, download google-services.json, and place it in android/app/. Follow the Firebase Android setup guide for the rest.In android/build.gradle:
Subclass Firebase’s FirebaseMessagingService directly and forward both callbacks to Courier. The SDK caches the FCM token, uploads it to Courier when a user is signed in, and broadcasts delivery events through its event bus.
package your.app.package;import androidx.annotation.NonNull;import com.courier.android.Courier;import com.courier.android.notifications.CourierPushNotificationIntent;import com.courier.android.notifications.RemoteMessageExtensionsKt;import com.google.firebase.messaging.FirebaseMessagingService;import com.google.firebase.messaging.RemoteMessage;public class YourNotificationService extends FirebaseMessagingService { @Override public void onMessageReceived(@NonNull RemoteMessage message) { super.onMessageReceived(message); // Tell the Courier SDK that a push was delivered Courier.Companion.onMessageReceived(message.getData()); // Build the PendingIntent that opens MainActivity and carries the original payload CourierPushNotificationIntent notificationIntent = new CourierPushNotificationIntent( this, 0, MainActivity.class, message ); String title = message.getData().get("title"); if (title == null && message.getNotification() != null) { title = message.getNotification().getTitle(); } String body = message.getData().get("body"); if (body == null && message.getNotification() != null) { body = message.getNotification().getBody(); } RemoteMessageExtensionsKt.presentNotification( notificationIntent, title, body, android.R.drawable.ic_dialog_info, "Notification Service" ); } @Override public void onNewToken(@NonNull String token) { super.onNewToken(token); // Register/refresh the FCM token with Courier Courier.Companion.onNewToken(token); }}
Prompt the user to allow notifications (iOS shows a system dialog; Android 13+ requires runtime permission). You can also check the current permission status without prompting.
// Set how iOS handles foreground deliveryCourier.setIOSForegroundPresentationOptions({ options: ["sound", "badge", "list", "banner"]});const status = await Courier.requestNotificationPermission();const current = await Courier.getNotificationPermissionStatus();
Once you’ve completed the setup above, send a test push using the Send API with push as the routing channel. See the APNS sending guide or FCM sending guide for complete examples.
If you are using Expo, additional setup is required for push notification token syncing. You’ll need to update your AppDelegate (iOS) and MainActivity (Android) with Courier-specific code since Expo manages these files differently.See the full Expo setup guide on GitHub for step-by-step instructions for both platforms.
For advanced use cases, CourierClient is a low-level wrapper around the Courier API. Each client holds its own credentials, so you can spin up as many as you need.
import { CourierClient, getCourierApiUrlsForRegion } from "@trycourier/courier-react-native";const client = new CourierClient({ jwt: "...", // Optional. Required for most authenticated calls clientKey: "...", // Optional. Used only for Inbox client-key auth userId: "your_user_id", connectionId: "...", // Optional. Used for the inbox websocket tenantId: "...", // Optional. Scopes the client to a tenant apiUrls: getCourierApiUrlsForRegion("eu"), // Optional. Use for EU-hosted workspaces showLogs: true // Optional. Defaults to your build configuration});const options = client.options;// Tear the client down when you no longer need itclient.remove();