Implementing Squarespace Push Notifications [Top 3 Ways]
This step-by-step guide will show you how to set up web push notifications for your Squarespace website using PushEngage, WonderPush & OneSignal.
Updated Jun 30, 2026
Squarespace is one of the top platforms used for website building. It's a website builder that provides beautiful design templates for business and creativity. In addition, you can use Squarespace to create your website regardless of your experience level.
This guide will walk you through the three best options for sending push notifications in Squarespace applications while discussing the pros and cons of each approach to give you a better understanding.
There are numerous methods for implementing push notifications in Squarespace. PushEngage, OneSignal, and WonderPush are the three leading platforms we'll cover in this guide.
1. Using WonderPush
WonderPush is a notification service that allows developers to quickly integrate push notifications into their web and mobile applications. It comes with a RESTful API and a complete dashboard for creating alerts and analyzing their outcomes. WonderPush starts with a 14-day trial period and offers packages from 1 EURO per month afterward.
Pros of Using WonderPush
- Easy to set up new notifications.
- Supports segmentation and scheduling options.
- Easy automation.
- Great customer support.
- Complies with GDPR.
Cons of Using WonderPush
- Subscription-based service.
- Support and tutorials are only available in English.
Tutorial: How to Implement Push Notifications with WonderPush
Step 1 - Creating a WonderPush Account
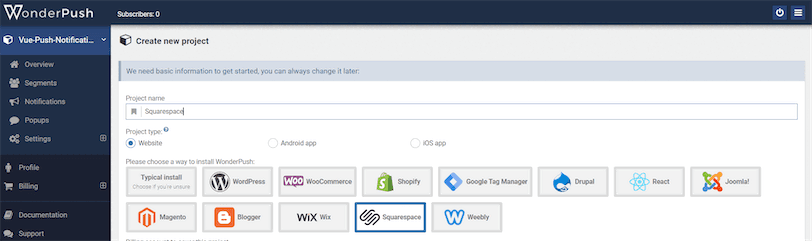
You can easily create a free WonderPush account by visiting their registration page. You will see a screen like the one below once you log in. Enter a project name and select the Squarespace option.
Step 2 - Creating a new WonderPush app
Then, you need to enter the name of your website, URL, and icon.
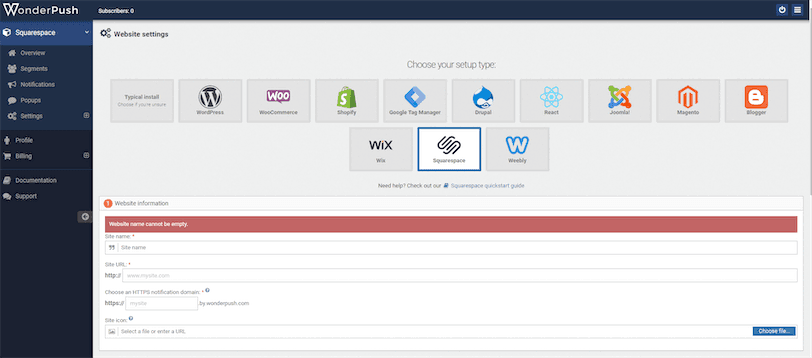
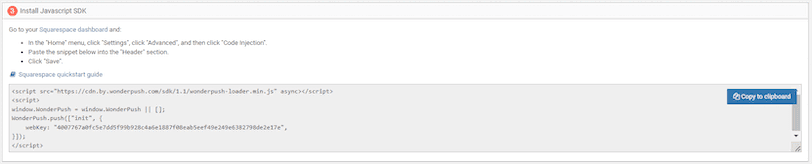
After configuring website details and subscription prompts, you will see a configuration to add WonderPush to the Squarespace application under the Install JavaScript SDK section. Make sure to copy the configuration and save the changes.
Step 3 - Connecting to Squarespace
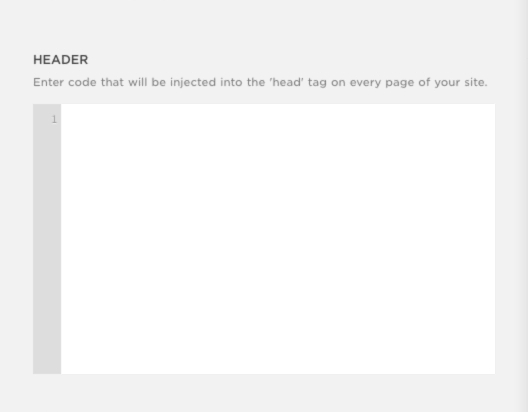
You need to connect the Squarespace application to WonderPush using the above configuration. For that, go to the Code Injection page in your Squarespace dashboard ( Home Menu -> Settings -> Advanced -> Code Injection) and paste the configuration under the header section.
Step 4 - Sending Notifications
After saving the changes, refresh your Squarespace website a few times to get the subscription message. In addition, you can create customized push notifications using the WonderPush console. For that, select the Notifications tab in the WonderPush console and press Create notification button.
2. Using OneSignal
OneSignal is another excellent platform that can be used to send push notifications. It comes with features like segmentation, automatic messaging, and real-time reporting. In addition, OneSignal lets you send SMS, emails, and in-app messages. The four pricing tiers for OneSignal are Free, Growth, Professional, and Enterprise.
Pros of Using OneSignal
- Easy to integrate.
- Omnichannel support is available.
- Excellent documentation.
- Simple and effective GUI.
- Very scalable.
Cons of Using OneSignal
- It costs a lot more than the alternatives.
- Support is only offered in English.
- Monitoring performance might be complicated.
- Older users must upgrade to a premium model to access new features.
Tutorial: How to Implement Push Notifications with OneSignal
Step 1 - Creating a OneSignal Account
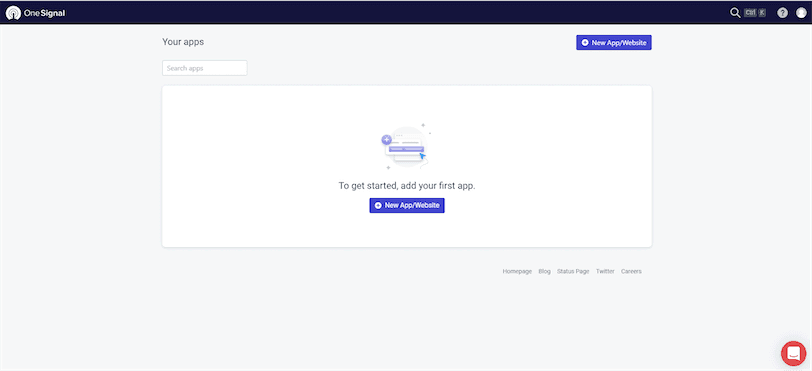
You can easily create a free OneSignal account by visiting their registration page. After registration, go to the Apps page, and you will see a UI like the one below:
Step 2 - Creating a new OneSignal App
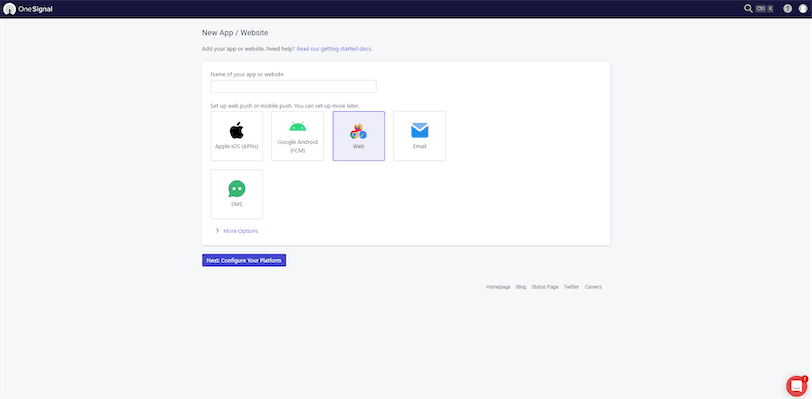
Then, click on the New App/Website button to create a new app. You will see a list of application platforms supported by OneSignal. Select Web as the application type.
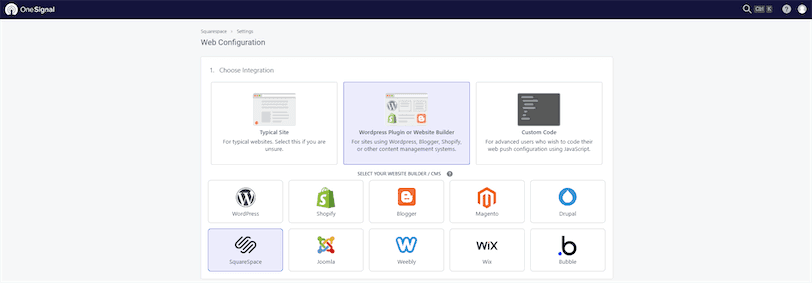
Then, you will be redirected to the Web Configuration page. Select Website Builder as the integration type and Squarespace as the builder.
After that, enter the site details, configure the permission prompt, welcome push notification, and advance push settings.
Step 3 - Connecting to Squarespace
After saving the above settings, you will get a code like the one below. You need to include it in the header section of your Squarespace application. You can find the header section under Home Menu -> Settings -> Advanced -> Code Injection.
<script src="https://cdn.onesignal.com/sdks/OneSignalSDK.js" async=""></script><script>window.OneSignal = window.OneSignal || [];OneSignal.push(function() {OneSignal.init({appId: "4c34f168-7703-4495-9204-88e16f695247",});});</script>
Step 4 - Sending Notifications
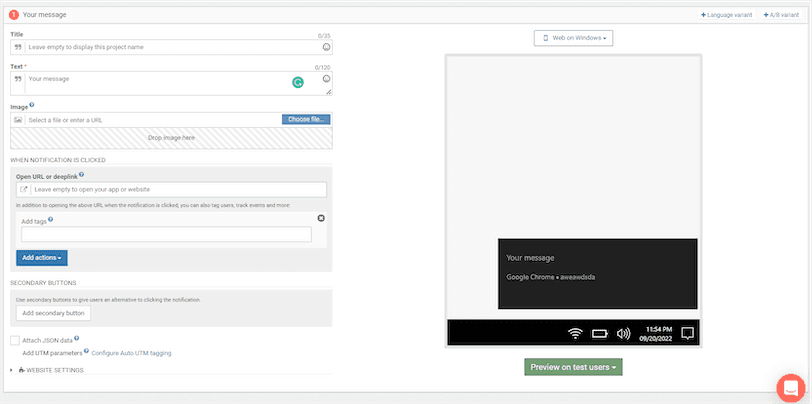
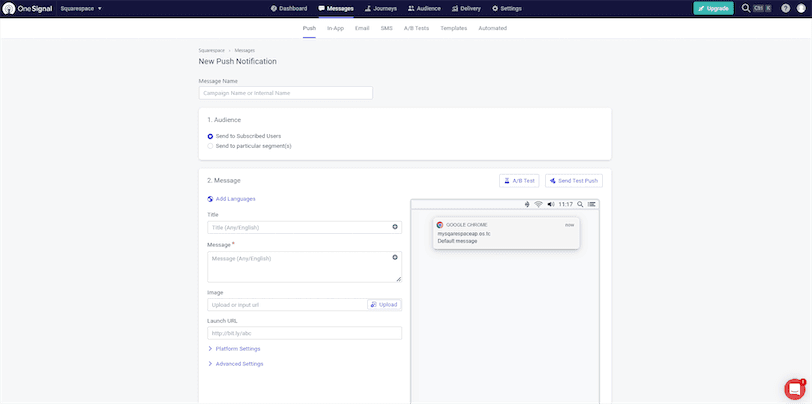
Now, your application is ready to receive push notifications. You can go to the OneSignal console and create push notifications by selecting the New Push option under the New Message dropdown.
3. Using PushEngage
PushEngage is another widely used platform for sending push notifications. It has impressive features like dynamic segmentation, advanced analytics, and multi-site/multi-user support. In addition, PushEngage provides four pricing tiers, including an unlimited free plan.
Pros of Using PushEngage
- Support multi-user transmissions
- Support user segmentation.
- GDRP compliant.
- Support offline notifications.
Cons of Using PushEngage
- The free version only has very minimal features.
- The platform's user interface needs to improve.
Tutorial: How to Implement Push Notifications with PushEngage
Step 1 - Creating a PushEngage Account
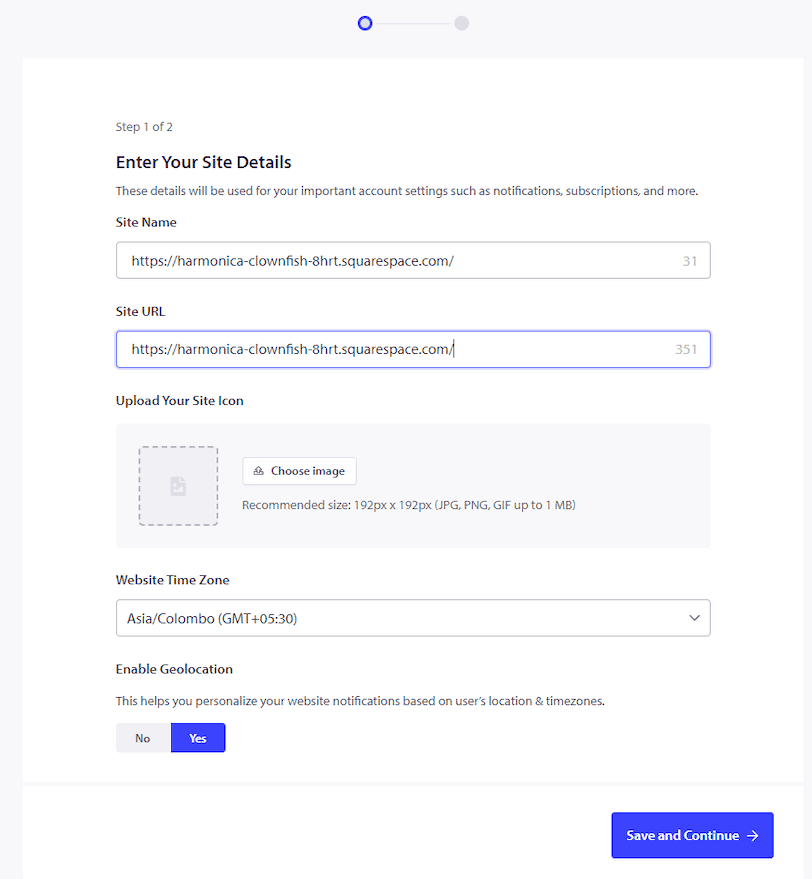
You can easily create a free PushEngage account by visiting their registration page. During registration, you will have to enter your site details.
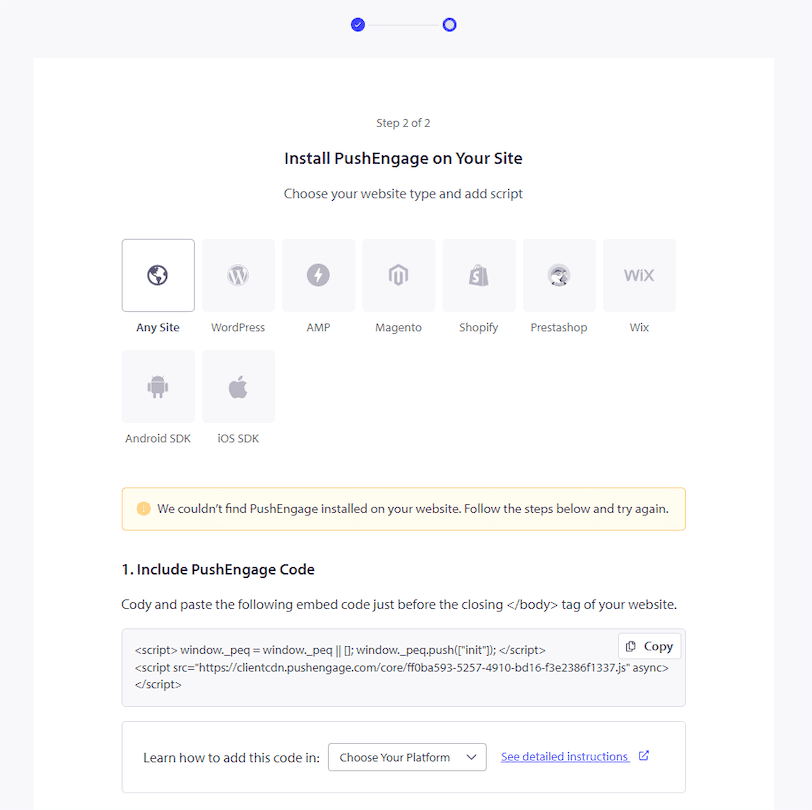
Afterward, select Any Site as the website type and use the code snippet from the Include PushEngage Code section to connect PushEngage to Squarespace.
Step 2 - Connecting PushEngage to Squarespace
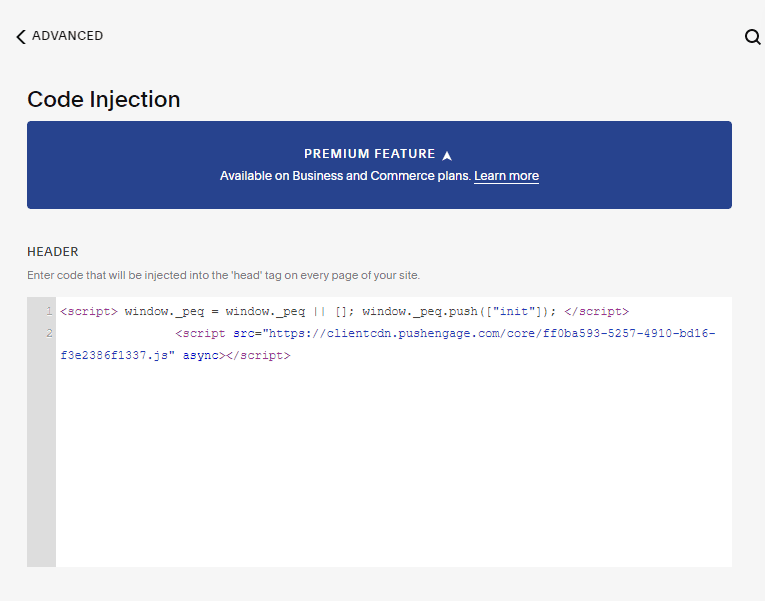
Then, copy the code snippet from the Include PushEngage Code section in the above UI and paste it into the Code Injection header section in your Squarespace application. You can find the Code Injection tab in the Advanced section under Settings.
Step 3 - Sending Push Notifications
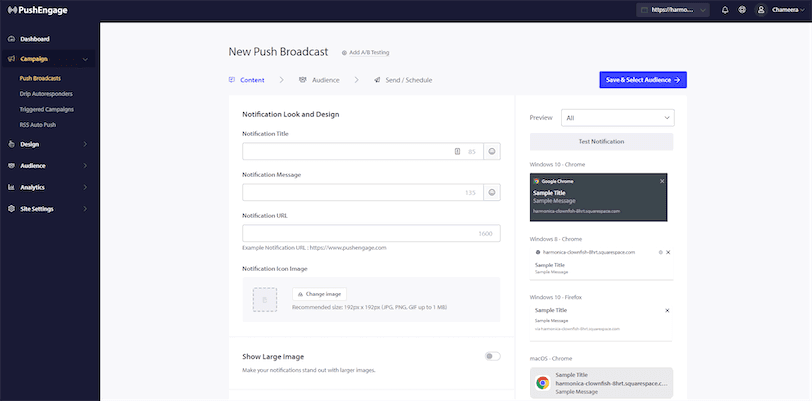
Now, your application is ready to receive push notifications. You can start a new push notification campaign from the PushEngage dashboard.
Wrapping It Up
This guide discussed three methods for implementing push notifications with the Squarespace applications: WonderPush, OneSignal, and PushEngage. You can quickly get started with any of these methods with a basic understanding of programming. I hope this guide will help you to implement push notifications for your Squarespace applications.
Keep exploring
More guides
One API, every channel
Ship notifications without the boilerplate
Courier gives you one API for email, SMS, push, and chat, with templates, routing, retries, and delivery logs built in.
Last updated Jun 30, 2026. Code samples are illustrative; provider APIs and pricing change over time, so check each provider’s docs before relying on them.