To create your first notification, head to the Templates page and create a notification from the New button. Select Message Template, and follow the prompt to name your notification.
1
Add a Delivery Channel
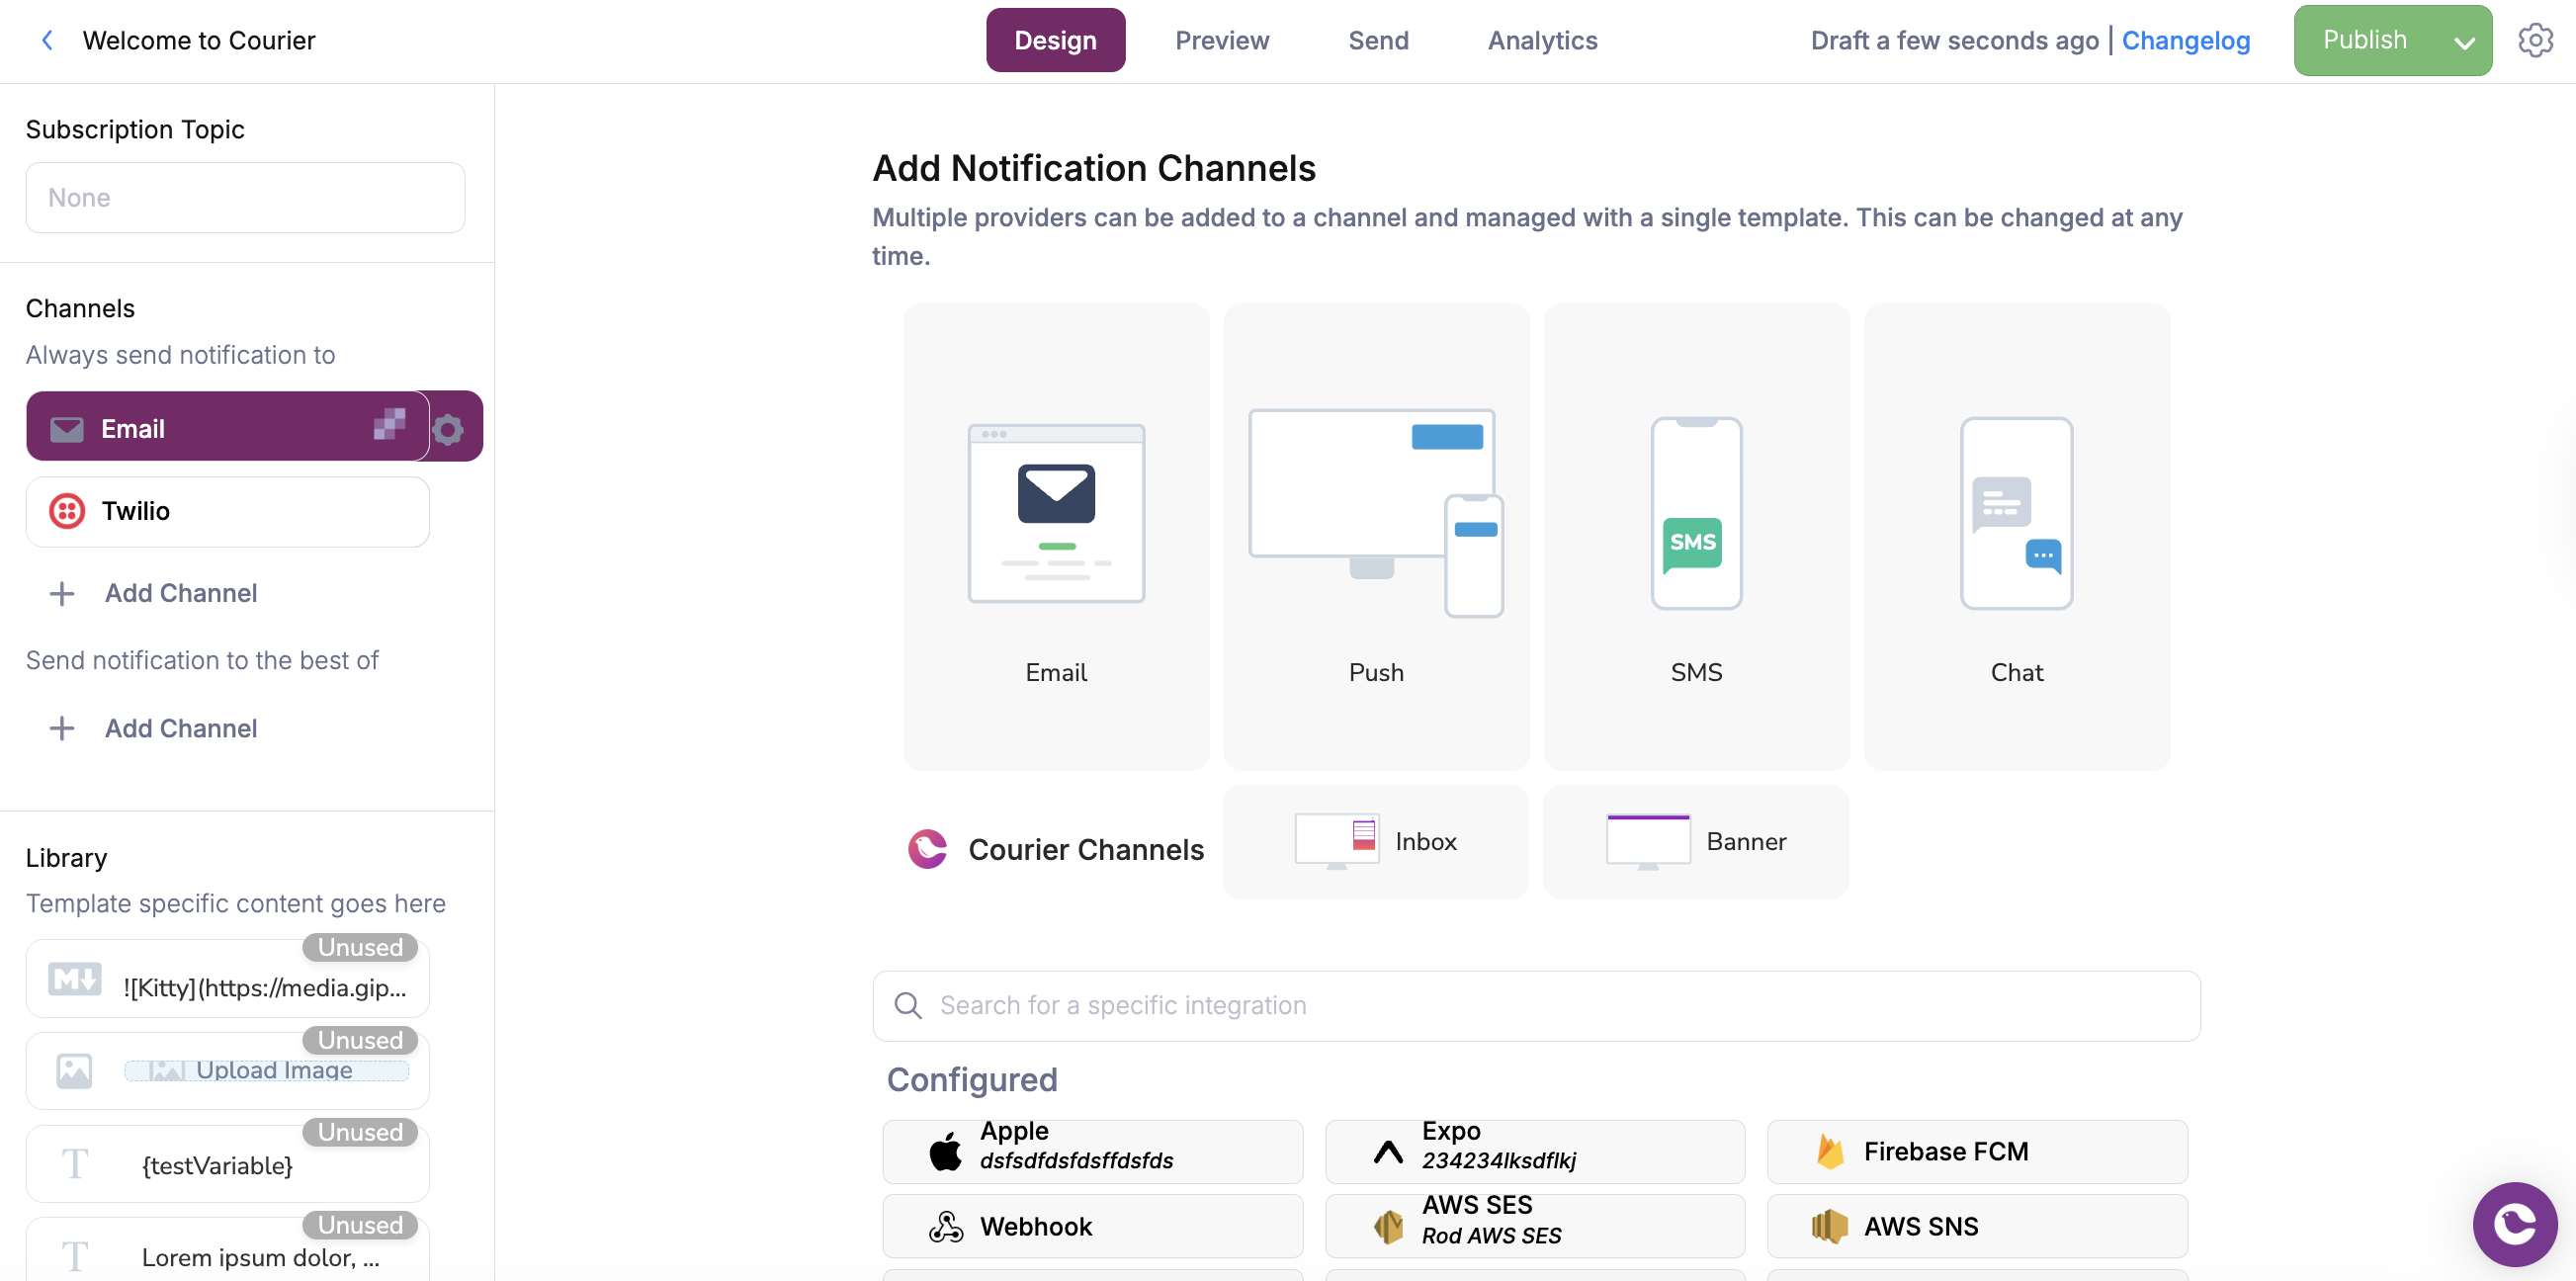
After creating your message template, select a delivery channel and choose a provider, or you can directly select a standalone provider. In this example, we’ve added an Email channel and selected SendGrid as the provider.
Select your channel provider
2
Go Back to your Channel
After selecting your delivery channel, you can begin editing your template by selecting the newly added channel on the left side of the page.
3
Create Your Notification Content
Now that you have selected a channel and provider, you can begin creating content for your notification. Courier offers an intuitive UI for building notifications using content blocks and dynamic variables.
Once you’re satisfied with your email channel content, you can add additional channels and easily reuse content blocks from the Content Library. Courier automatically adapts your content blocks for each channel’s unique technical requirements.
5
Understand Delivery Routing Strategy
By default, message templates in the Courier designer will be configured to use the best ofrouting strategy. This means that if your message template has multiple delivery channels, Courier will send to the first channel in the list and try the following channels in order if we encounter an error.Below you can find a brief breakdown of the different routing strategies:
Strategy
Routing Description
API Definition
Best of
Courier will attempt to send to the first channel configured in the message template. Any subsequent channels will be used if the request encounters an INCOMPLETE_PROFILE error, and continue down the list until all options have been exhausted.
single
Always send to
Courier will send to all configured channels in the message template.
Now that you have a complete notification template, you can easily test it right within the template UI before sending it to real users.
1
Preview Your Notification
Start by opening the Preview tab in your notification, then hit Create Test Event to see how it will render in a simulated email client. Here you can see how dynamic variables will render from the data in your test events.
For a more in-depth walkthrough, check out our Template Designer preview tutorial.
2
Understand Data and Profile Objects
Courier uses JSON-formatted payloads to pass relevant data (e.g. names, dates, email addresses, phone numbers) into your message templates. There are of two key elements in a Courier send request that help you personalize your notifications:
JSON Object
Description
API Definition
Data
The data object in the send request contains key-value pairs for dynamic fields in your template, such as name, date, or flight time. If your template includes {name}, Courier fills it using the value from the data object, e.g., "name": "John Doe".
data
Profile
The profile object contains all your recipient information, like email and phone_number. If you want to reference values from the profile in your message template, you must format the path like {profile.name}.
to
3
Publish Your Changes
After confirming that your preview displays all variables and content blocks correctly, click Publish in the top right corner to apply your changes. Your notification is now live and ready to send.
Now that you’re happy with your message template, how it looks, and you’ve published it, it’s time to send. We’ll cover 2 ways you can send your notification:
Once your template is published, the fastest way to test it is via the Designer UI Send tab. Here you can edit your test event data or specify a non-default brand if you want to customize your message.
Send test notification from the Designer
When you’re ready, click the green Send Test button, and Courier will deliver the notification to the profile specified in your test event. You’ll see a toast notification confirming your test message has been sent. Afterward, you can view the logs to verify its delivery status.
Congratulations! You’ve successfully created and sent your first notification with Courier. For a more configurable and powerful way to send your templated messages, check out the next section on sending from an API platform.
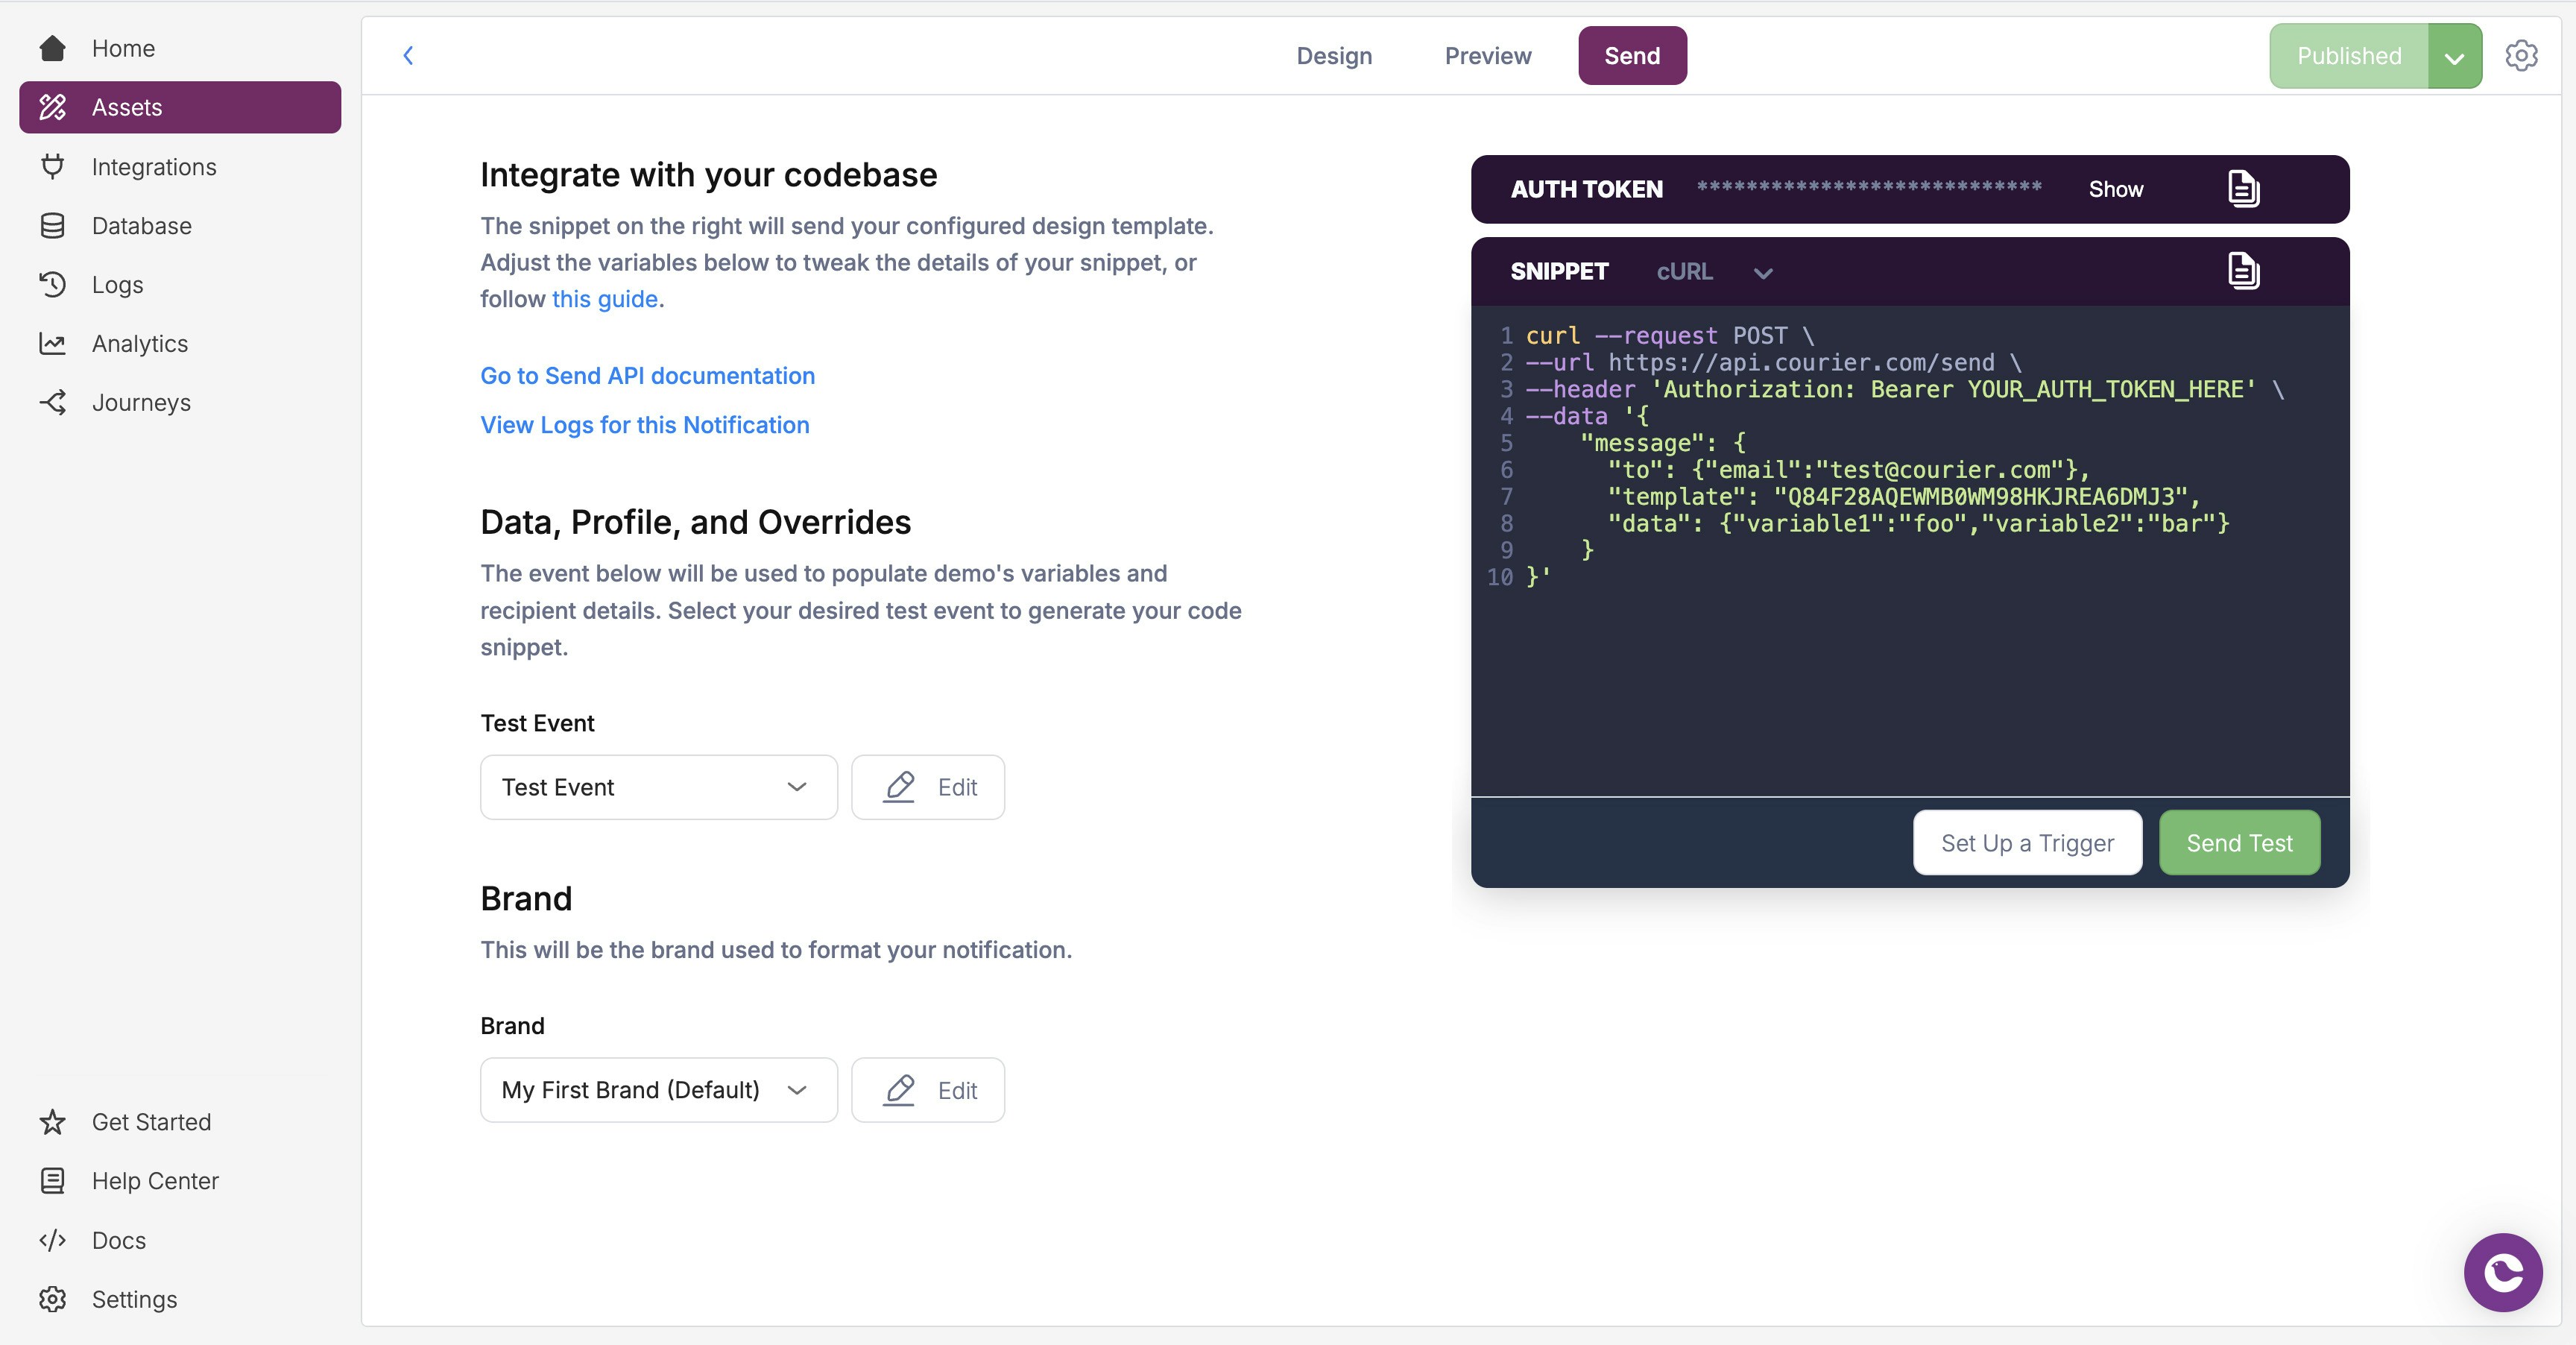
Now, let’s explore how to send your notification using an API platform such as Postman or Insomnia. This approach gives you a foundation for programmatically integrating Courier notifications into your application. To make a successful send, you’ll need the following:
Notification template ID: Locate this in your template settings by selecting the gear icon at the top right, or by finding it in the template’s URL just before /design
The send API uses the https://api.courier.com/sendendpoint to send messages. Use the following complete request in your API platform editor, replacing the template, email, and YOUR_AUTH_TOKEN fields with your own:
The "to" field in your send request corresponds to the "profile" object from your test event; add your recipient’s email or other profile fields inside "to" just as shown under "profile".
After you’ve sent this API request, you can monitor the status and delivery details of your notification by visiting the message logs. The message logs provide valuable insights into each message event, including delivery status, engagement, and any potential errors.Once you are comfortable that your test notification is rendering and sending to the correct channels, you can use this same API request as a building block to integrate Courier notifications directly into your application’s backend or workflow. Happy sending!
Instead of making raw HTTP requests, you can use Courier’s server-side SDKs to send notifications directly from your application code. The SDKs handle authentication, request formatting, and error handling for you. Here’s how to implement the same send request from the cURL example above using Courier SDKs:
using System.Collections.Generic;using System.Text.Json;using Courier;using Courier.Models;using Courier.Models.Send;var client = new CourierClient { APIKey = "YOUR_AUTH_TOKEN" };var parameters = new SendMessageParams{ Message = new Message { To = new UserRecipient { Email = "YOUR_EMAIL" }, Template = "YOUR_TEMPLATE_ID", Data = new Dictionary<string, JsonElement> { { "name", JsonSerializer.SerializeToElement("Nomen Nescio") } } }};var response = await client.Send.Message(parameters);
To get started with a specific SDK, install it using your language’s package manager and replace YOUR_AUTH_TOKEN with your Courier API key. For more complete examples and advanced use cases, check out the Courier SDK samples repository.