Learn how to build scheduled digests using Courier’s preferences, automation workflows, and subscription topics to batch and send grouped event data.
Digests let you batch incoming events over a time period and send them as a single notification. For example, instead of notifying a user every time someone likes their post, you can send a daily summary: “Your posts received 47 likes today.”Courier’s digest system uses three pieces working together:
A subscription topic with a digest schedule (how often to send)
Two automations: one that collects events, and one that fires when the schedule triggers
A notification template that renders the batched data
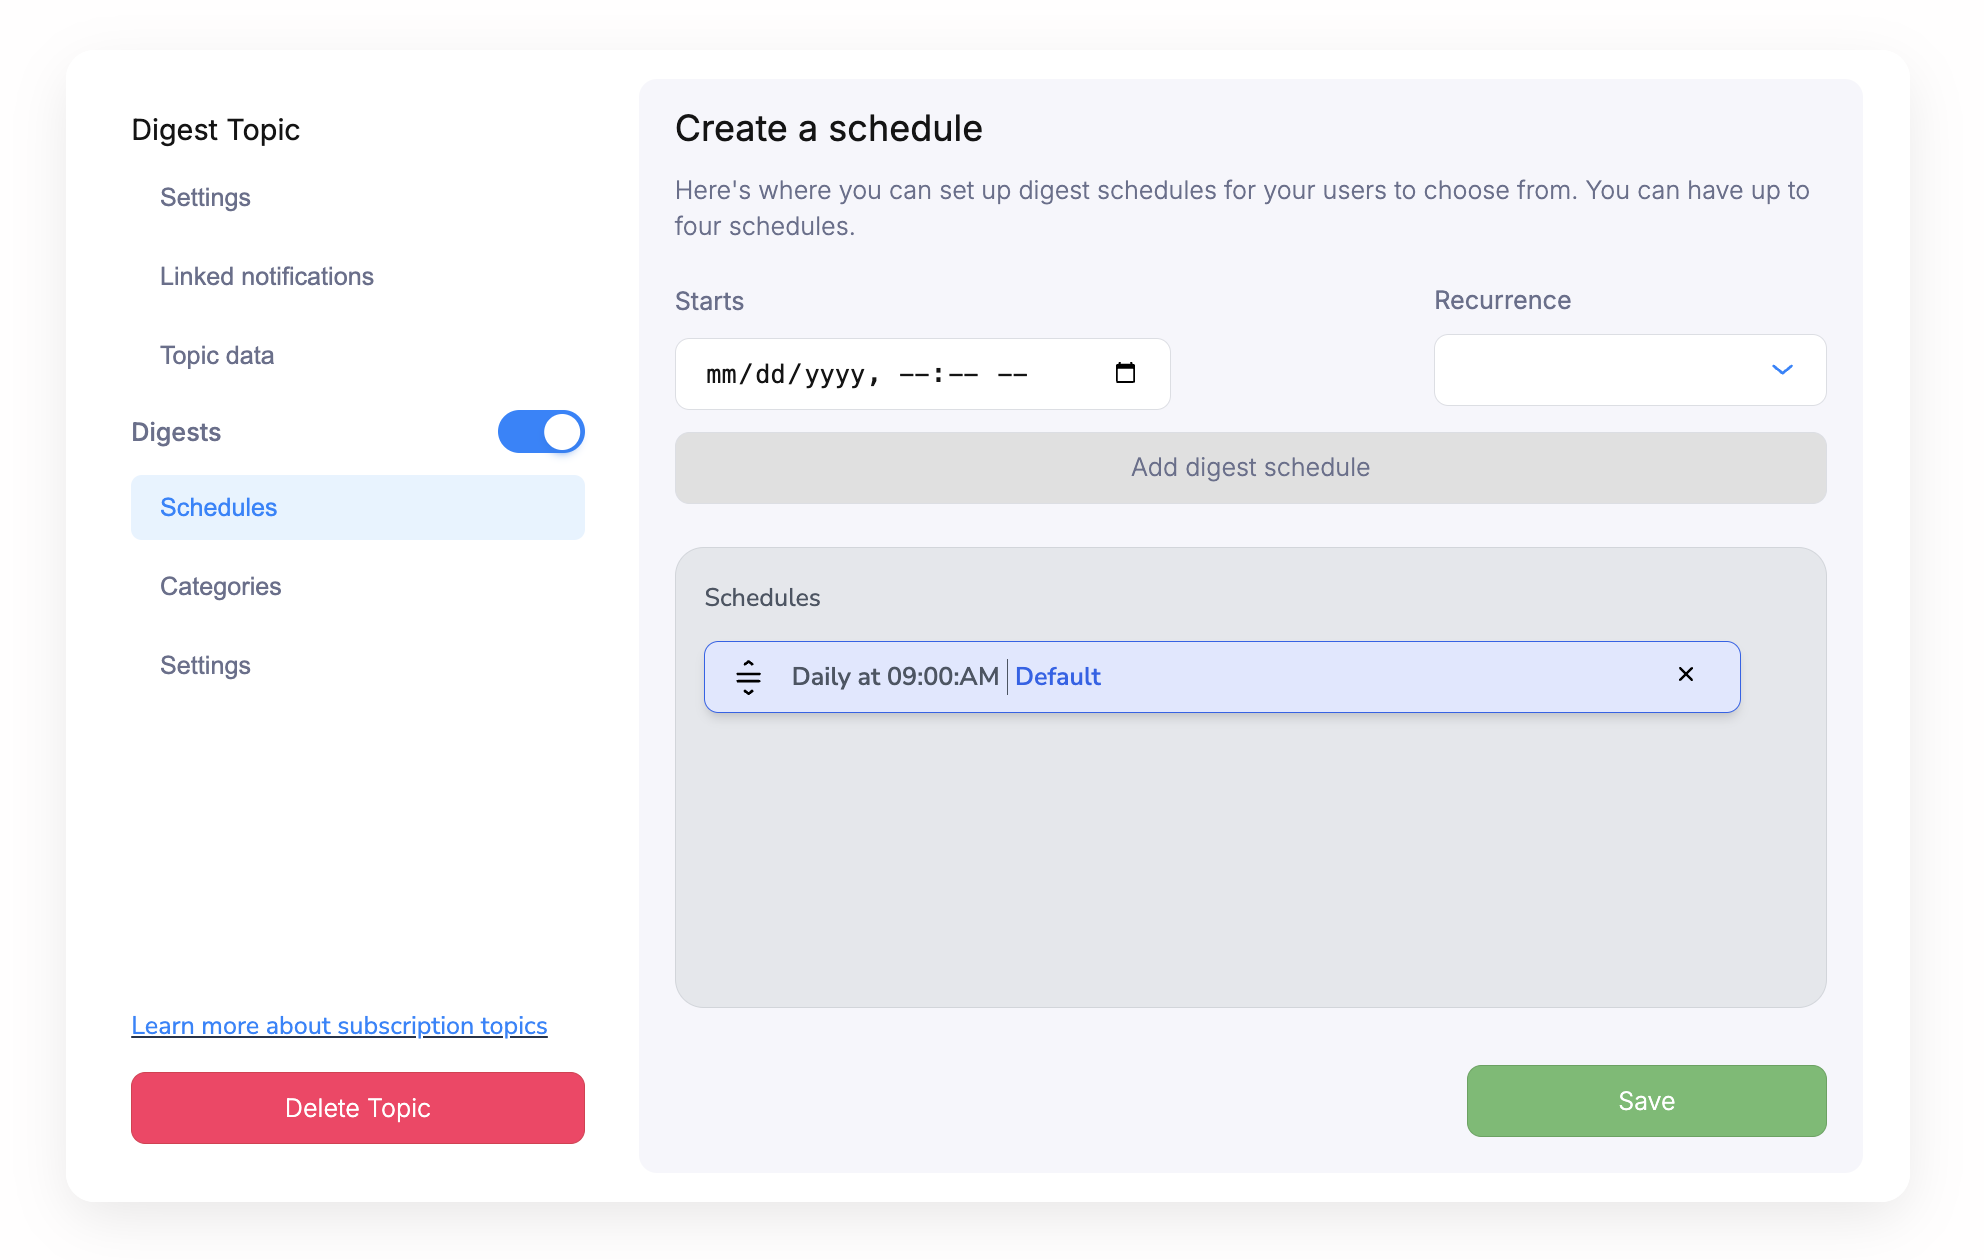
Create a subscription topic with a digest schedule
Head to the Preferences Editor and create a new subscription topic for your digest (e.g. “Daily Activity Summary”).Once created, enable the Digests toggle. This unlocks schedule and category settings.Add at least one schedule (e.g. “Every day at 9am”). You can add multiple schedules to let users choose their preferred frequency through the hosted preference page.
Digest Schedule
Notification templates don’t need to be mapped to the digest subscription topic. The digest is triggered through an automation, not a direct template mapping.
2
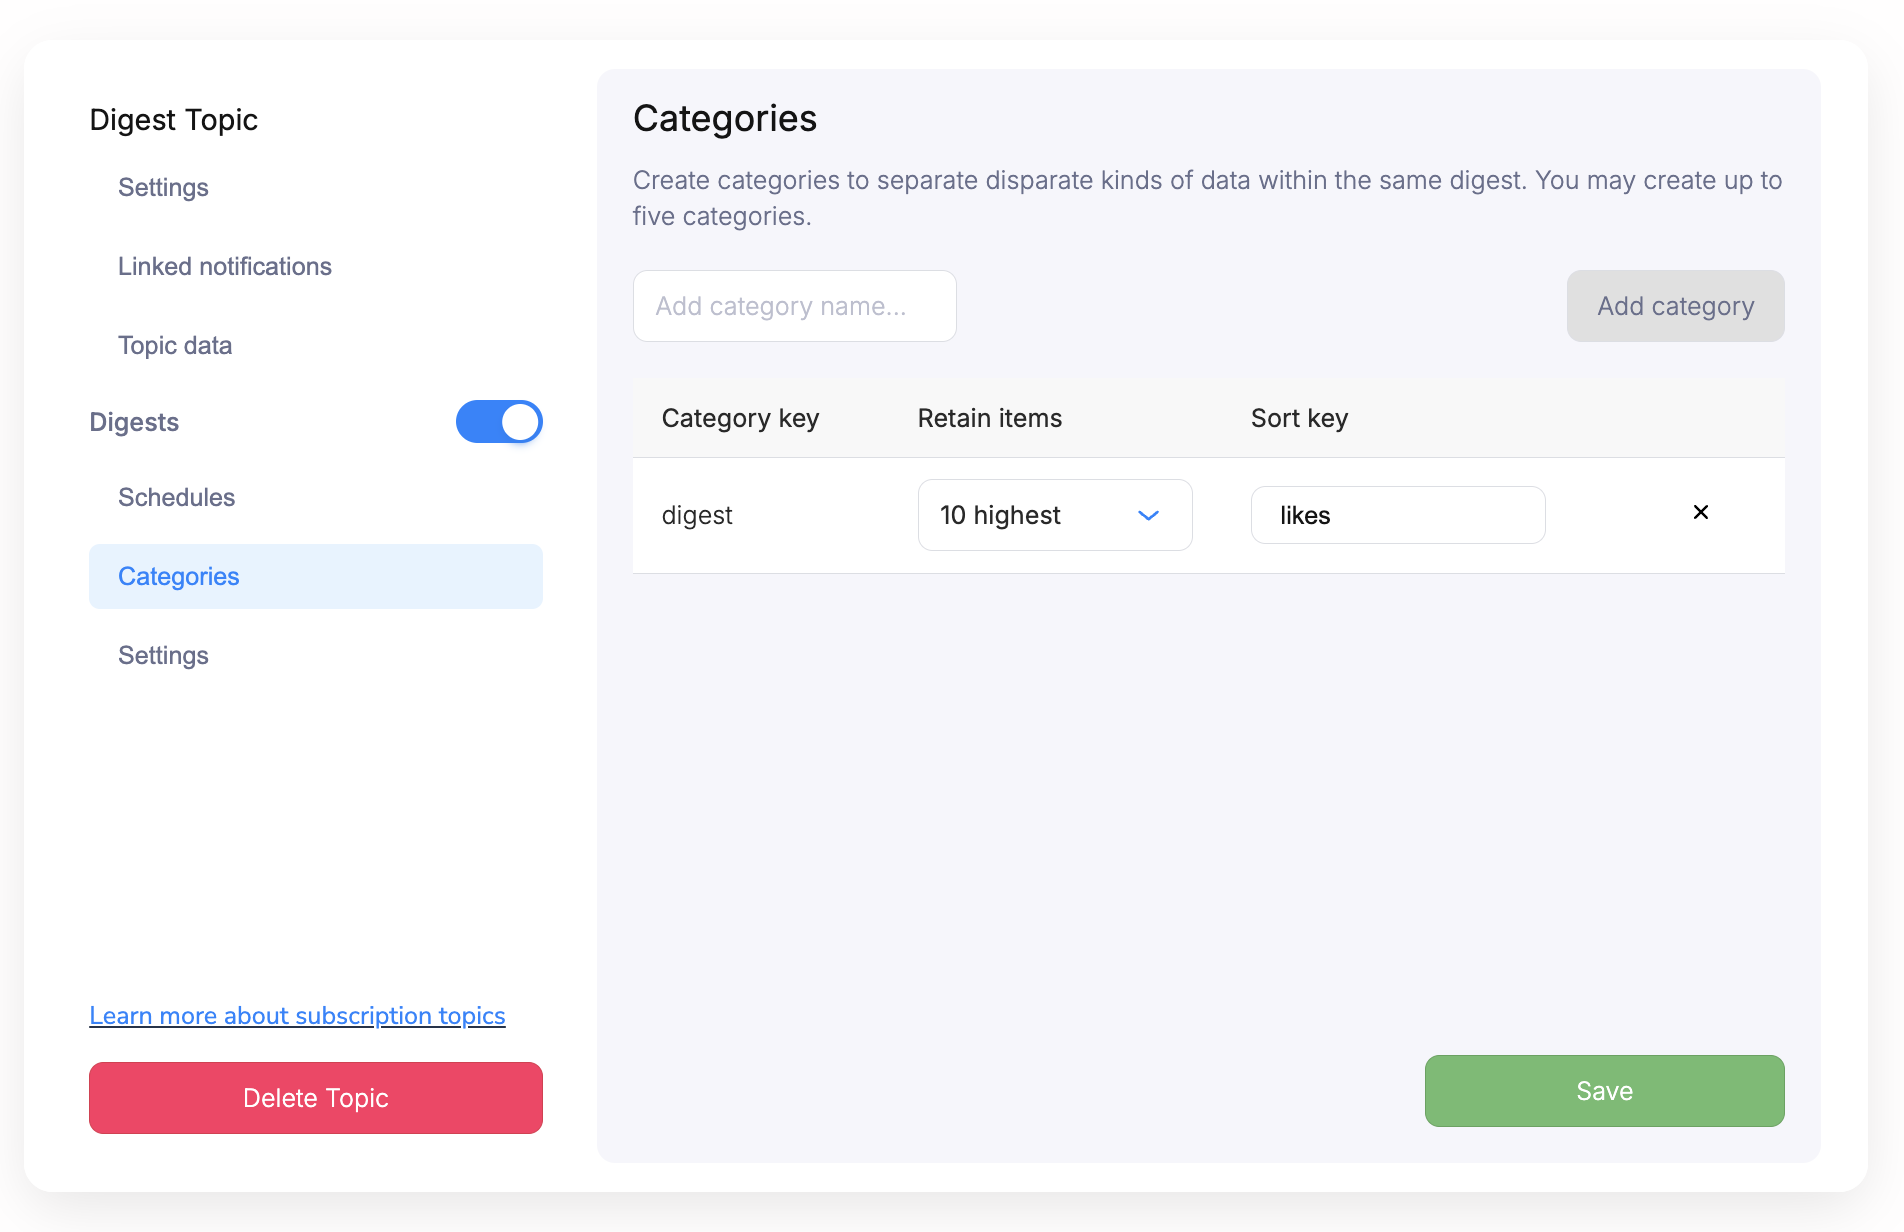
Configure a digest category
Every digest needs at least one category. The category key (default: digest) determines how batched data is grouped and released to the automation.You can configure the retain strategy to control which events are kept:
Strategy
Description
All items
Keep every event in the batch
10 highest
Keep the 10 events with the highest value for a sort key
10 lowest
Keep the 10 events with the lowest value for a sort key
Digest Category Key
For example, with “10 highest” and a sort key of likes, Courier will batch incoming events and keep only the 10 with the most likes. A sample incoming event payload might look like:
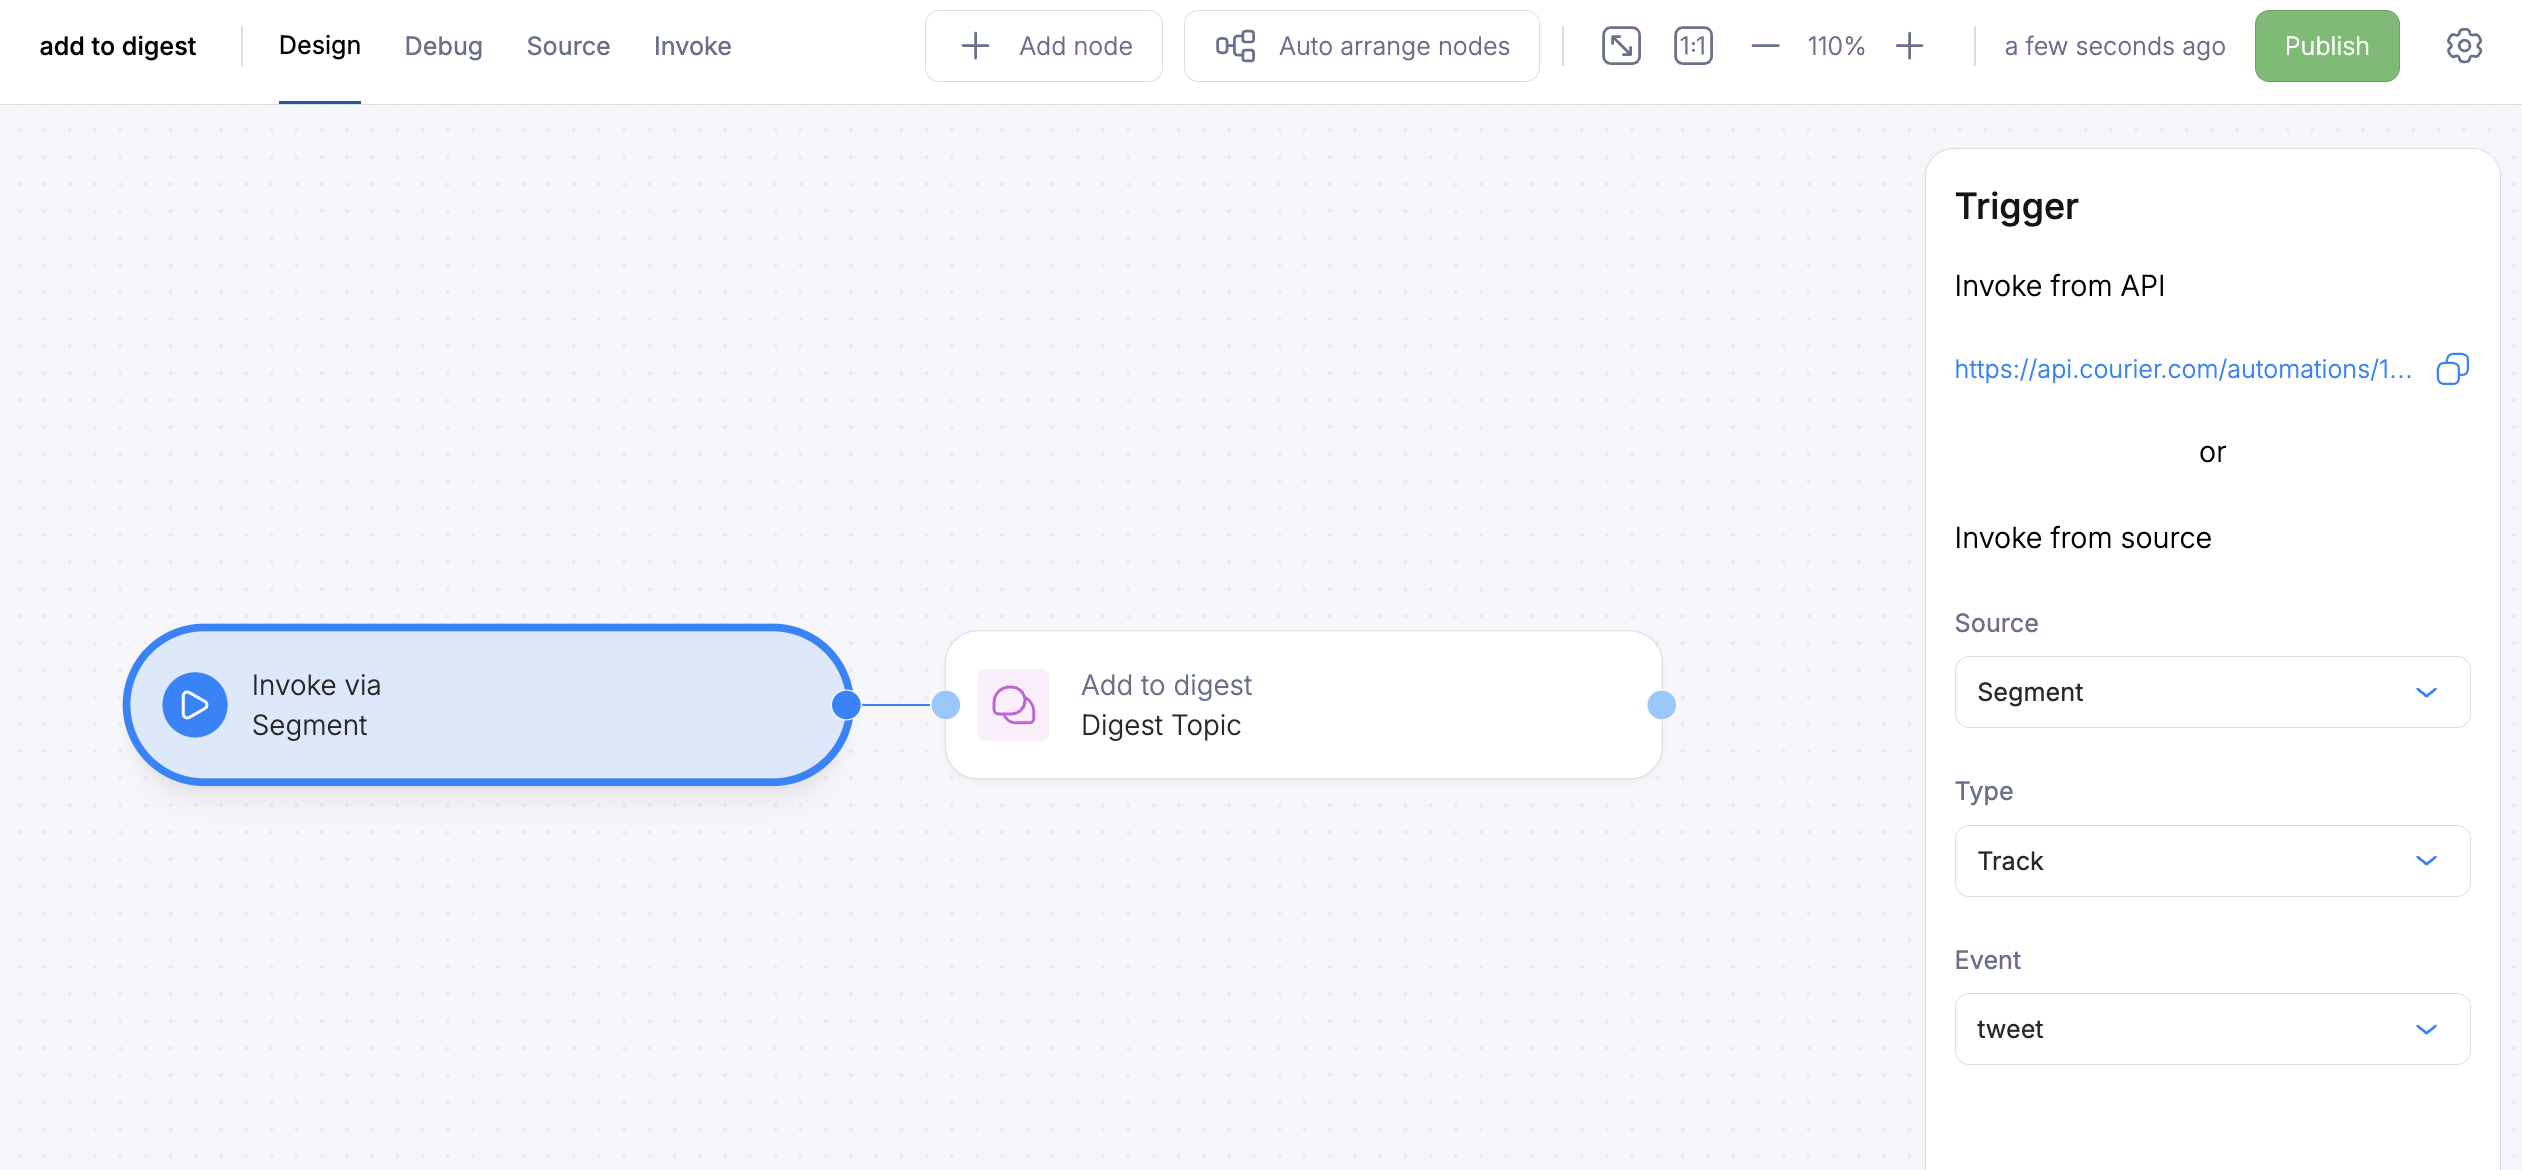
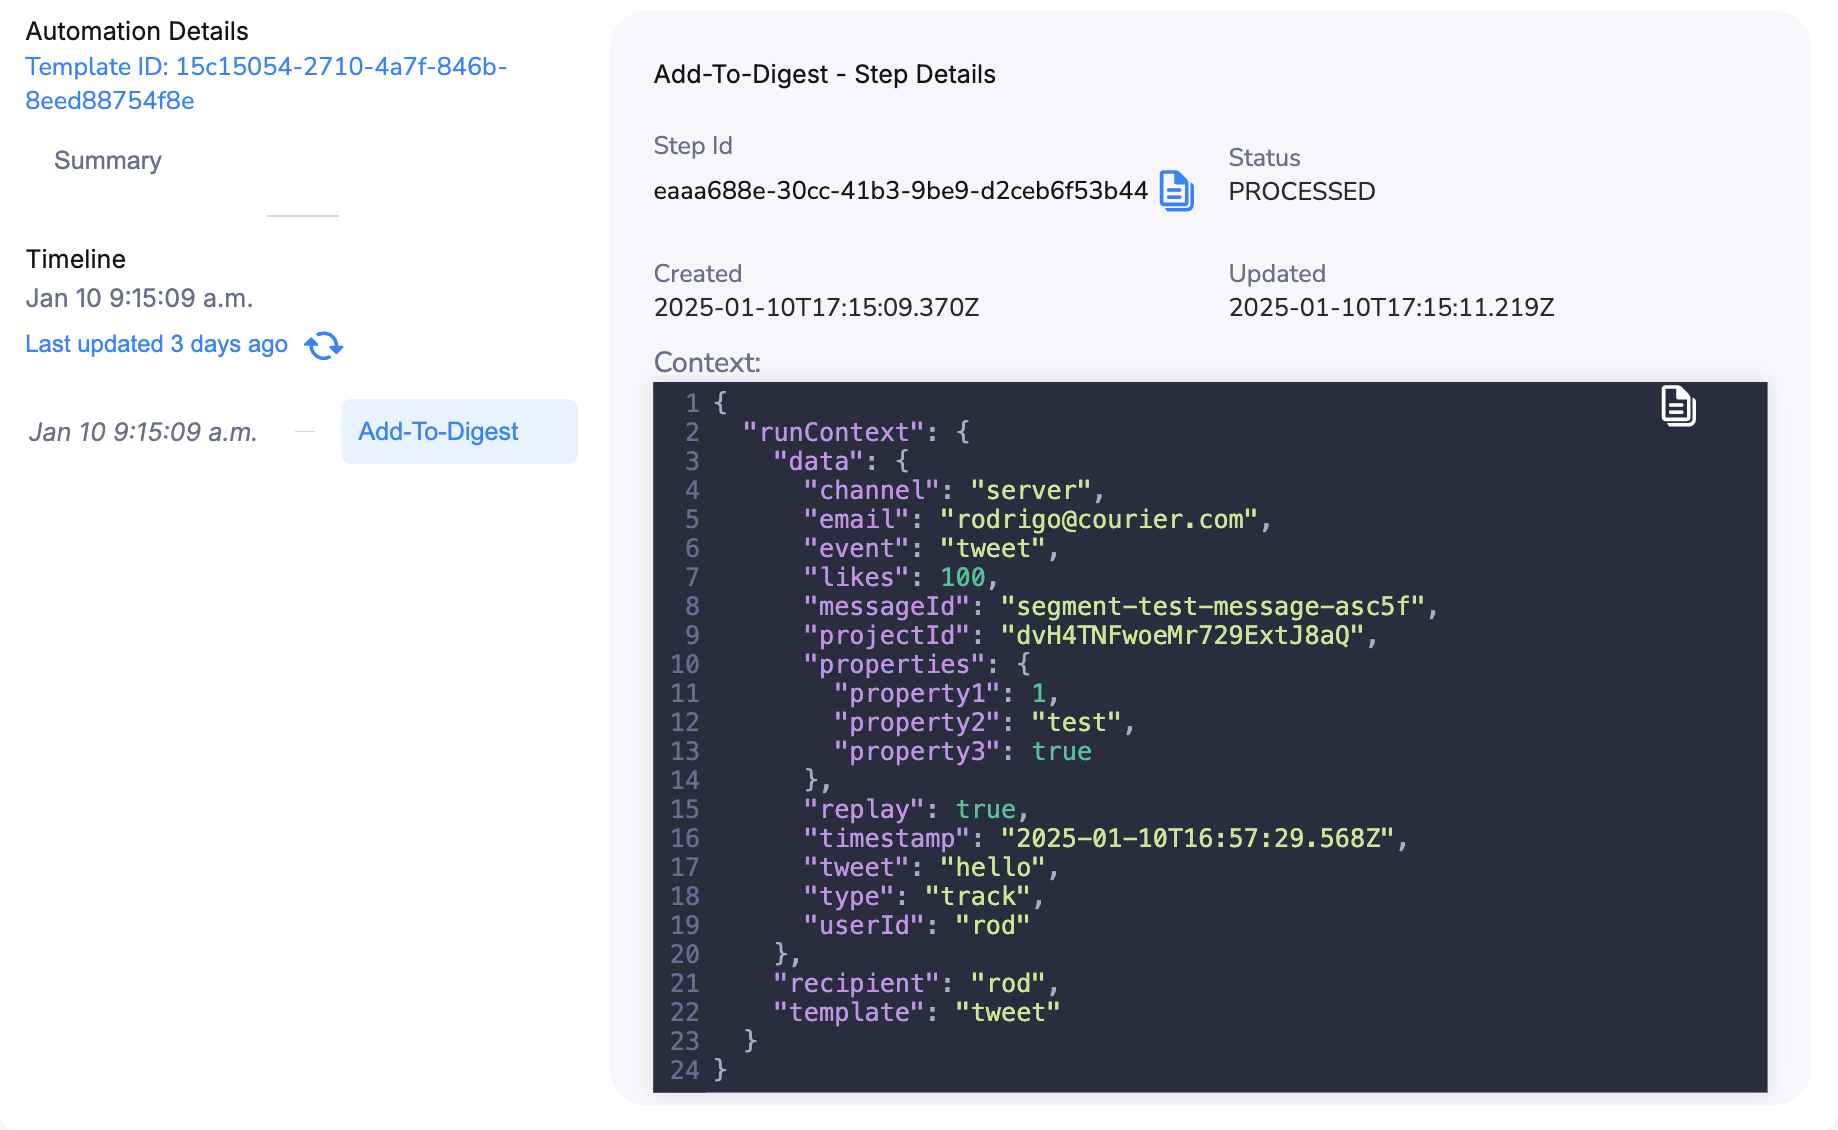
You need two automations for a digest. The first one collects incoming events into the digest bucket.In the Automations Designer, create an automation with:
A trigger that fires on the events you want to digest (e.g. a Segment event, API call, etc.)
A digest node mapped to the subscription topic you created in Step 1
The digest node should reference the preference topic that holds your digest settings.
Add to Digest Automation
Every time this automation runs, it adds the event data to the digest bucket for the relevant user.
4
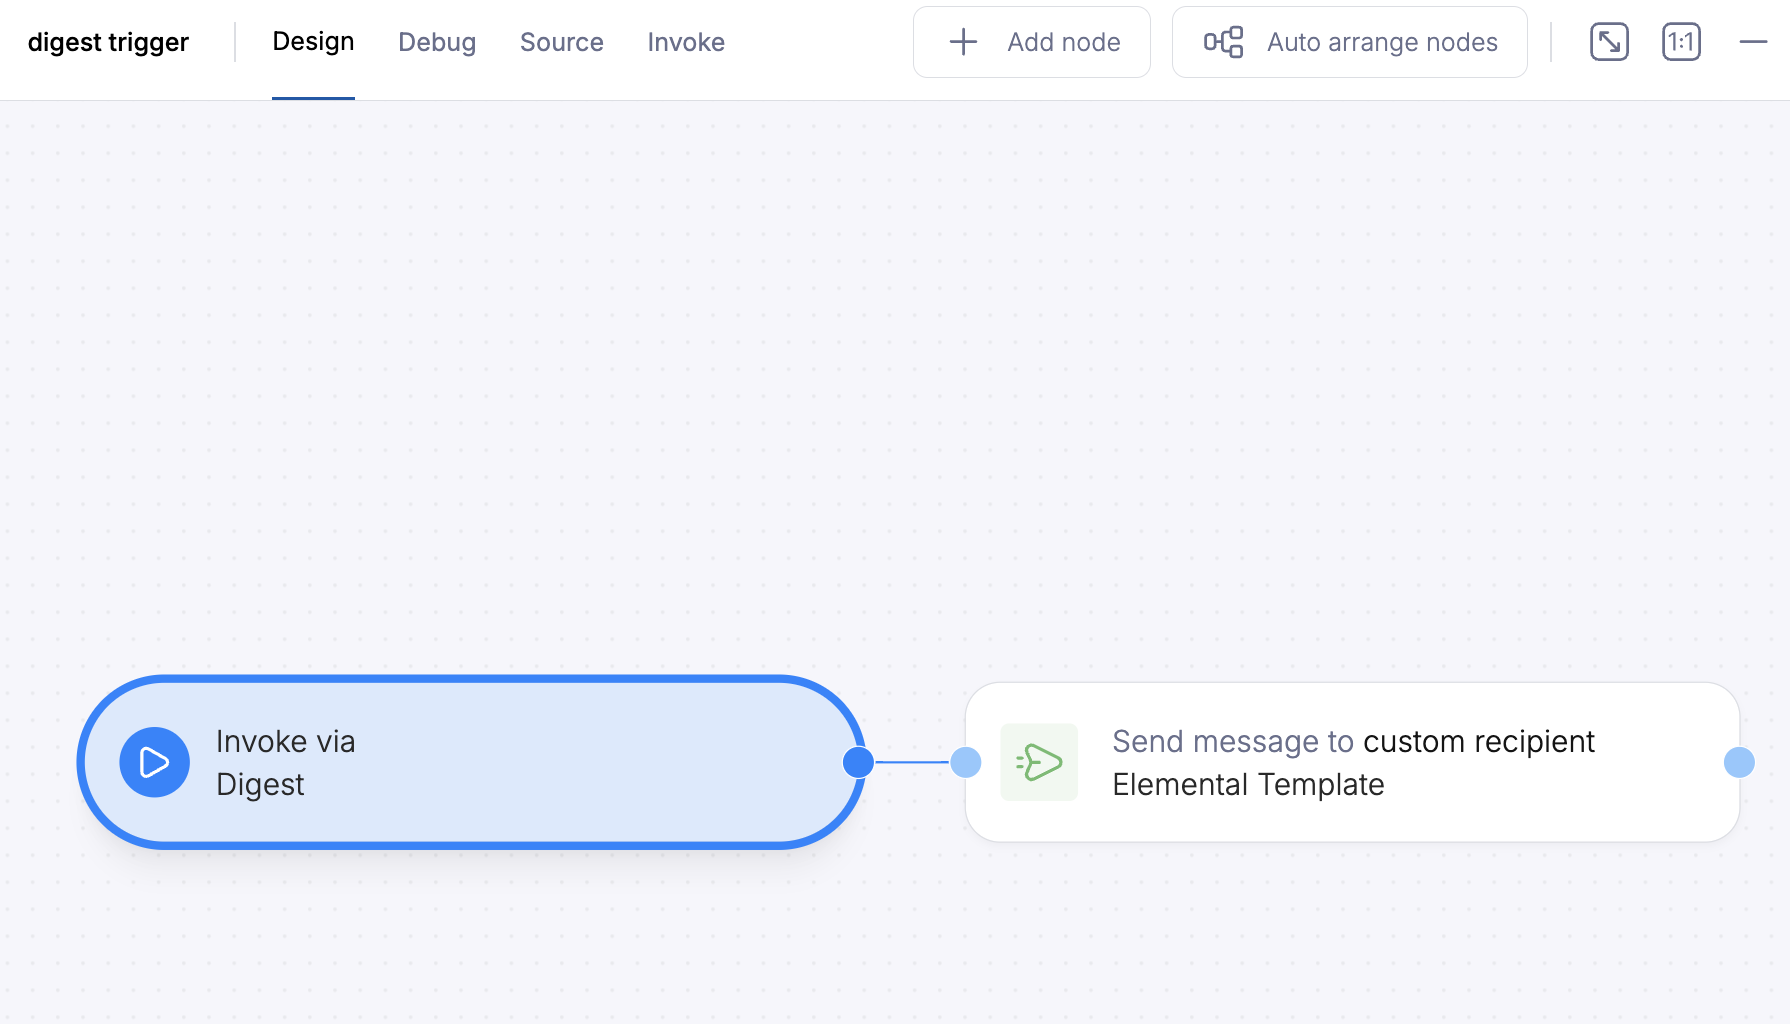
Create the 'digest trigger' automation
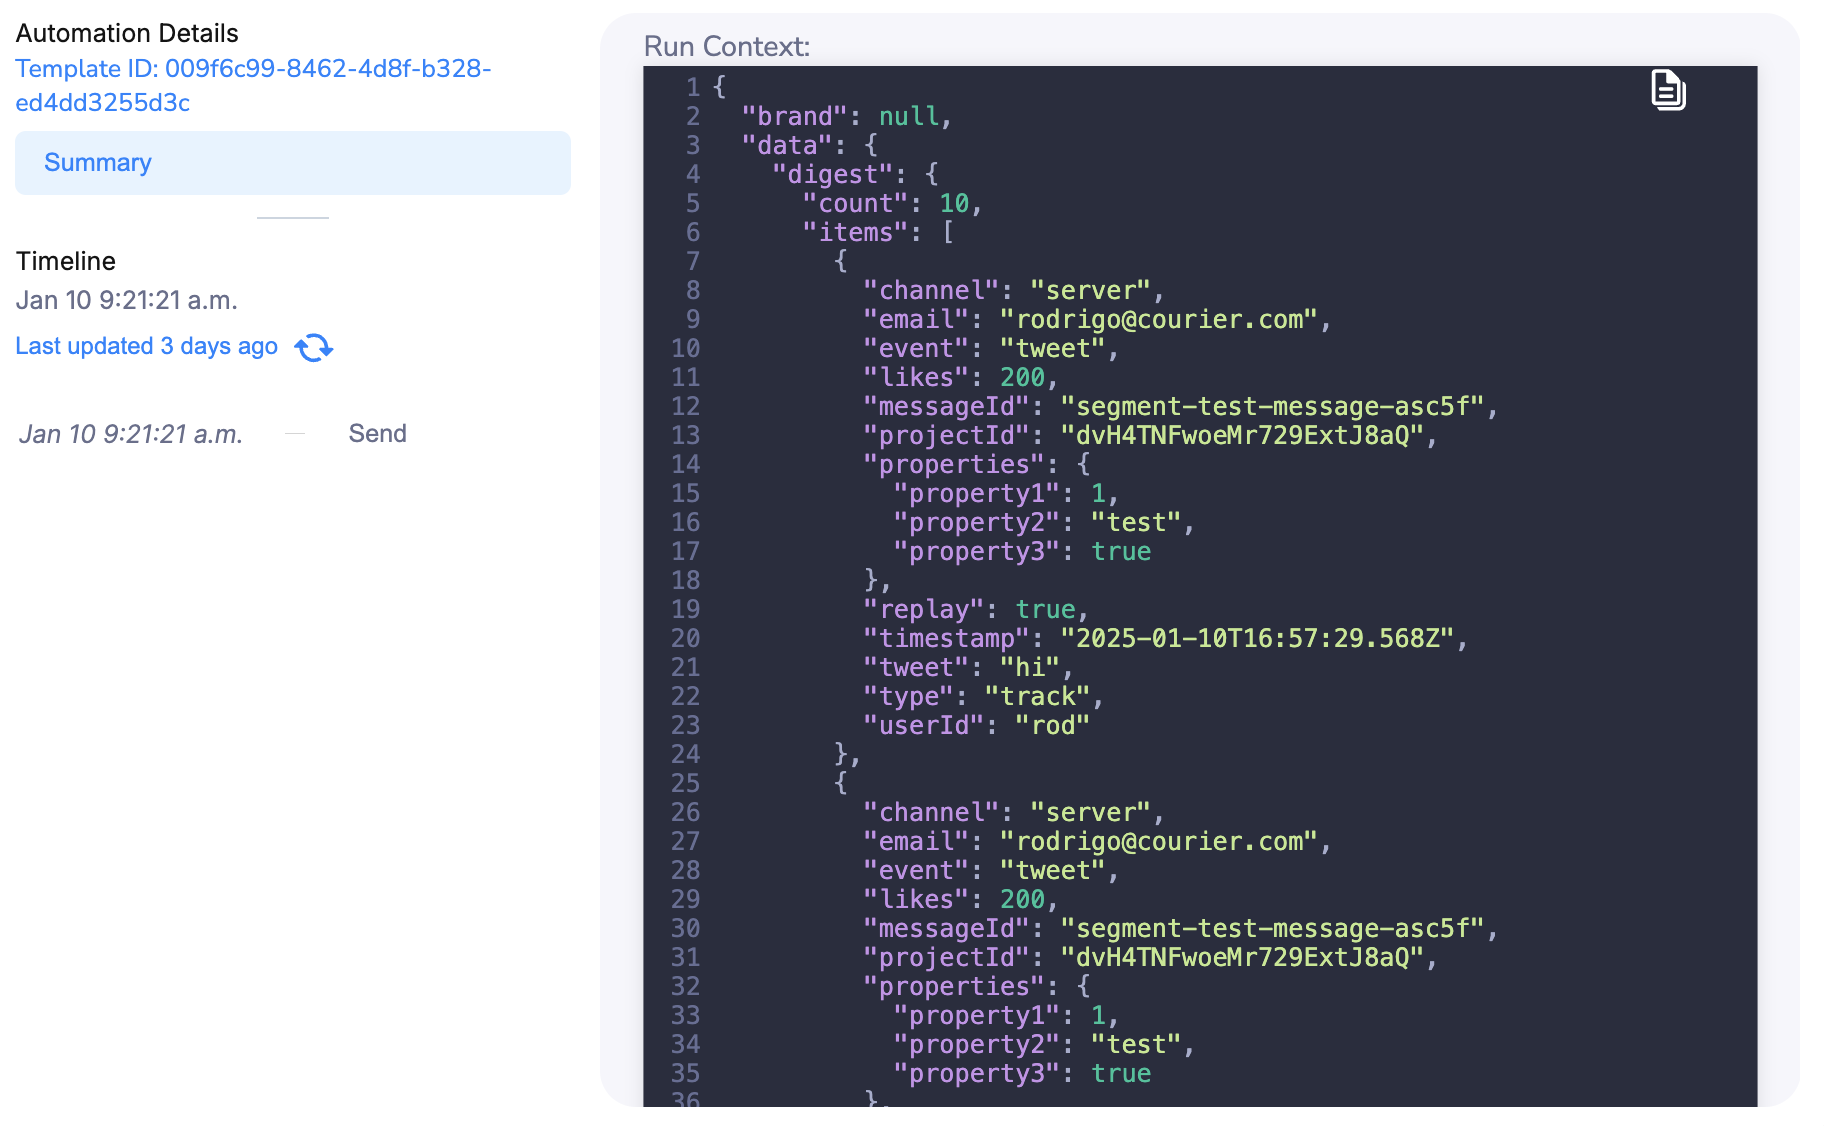
The second automation fires when the digest schedule triggers. It receives the batched event data and sends the notification.Create a new automation with:
A digest trigger step linked to the same subscription topic
A send step that references your digest notification template
The send step will receive the accumulated events as template data, so make sure your template is set up to iterate over the batched items.
Trigger Digest Automation
The digest trigger automation is automatically invoked by Courier when the schedule fires. Do not invoke this automation manually via the API; doing so will bypass the digest system and result in empty event data. To manually test a digest release, use the /digests/schedules/{schedule_id}/trigger endpoint instead.
Make sure all your templates are published before sending any events.
5
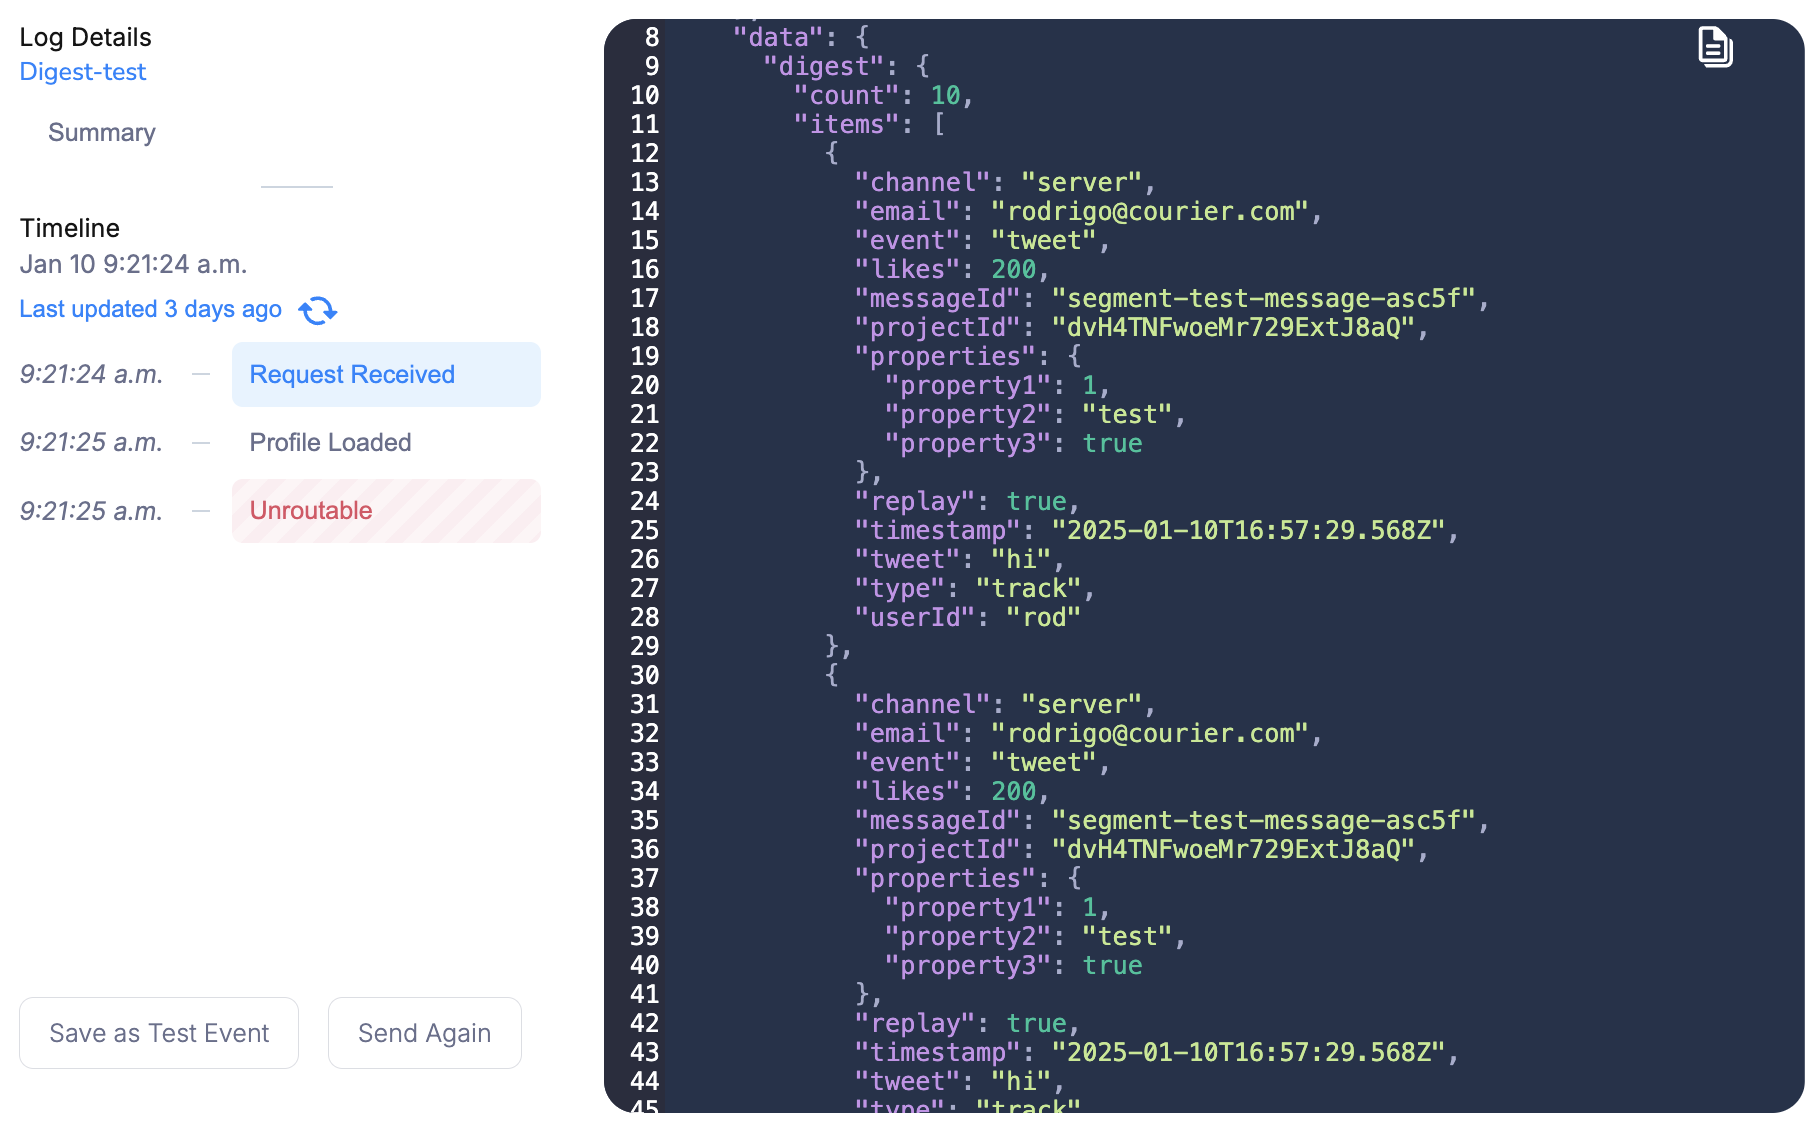
Verify in the logs
Once events start flowing, you can track the digest in two places:Automation Logs: Each incoming event appears as an add-to-digest entry.
Digest Log
When the schedule fires, you’ll see the trigger event with the accumulated data (in our example, the top 10 posts by likes).
Digest Trigger Invoked
Message Logs: The sent message will contain the full digested data payload that was passed to the notification template.