Build a journey from scratch: choose a trigger, define a schema, add a send node, design a message, publish, and invoke.
This tutorial walks you through creating a simple journey end-to-end: one trigger, one send node, one email. By the end, you’ll have a working journey that sends an email when invoked via API.
Journeys can do much more than send a single email. Add delays to space out messages, branches to send users down different paths, fetch nodes to pull in data from external APIs, or throttles to prevent over-messaging. Once you’re comfortable with the basics, check out Build an Onboarding Journey for a more advanced example.
Navigate to Journeys and click New Journey. You’ll see the trigger selection screen.
The trigger selection screen: choose Segment event or API
2
Choose the API trigger
Click API. This creates a journey that starts when your code sends a POST request. Courier adds a trigger node to the canvas and opens its configuration panel.
3
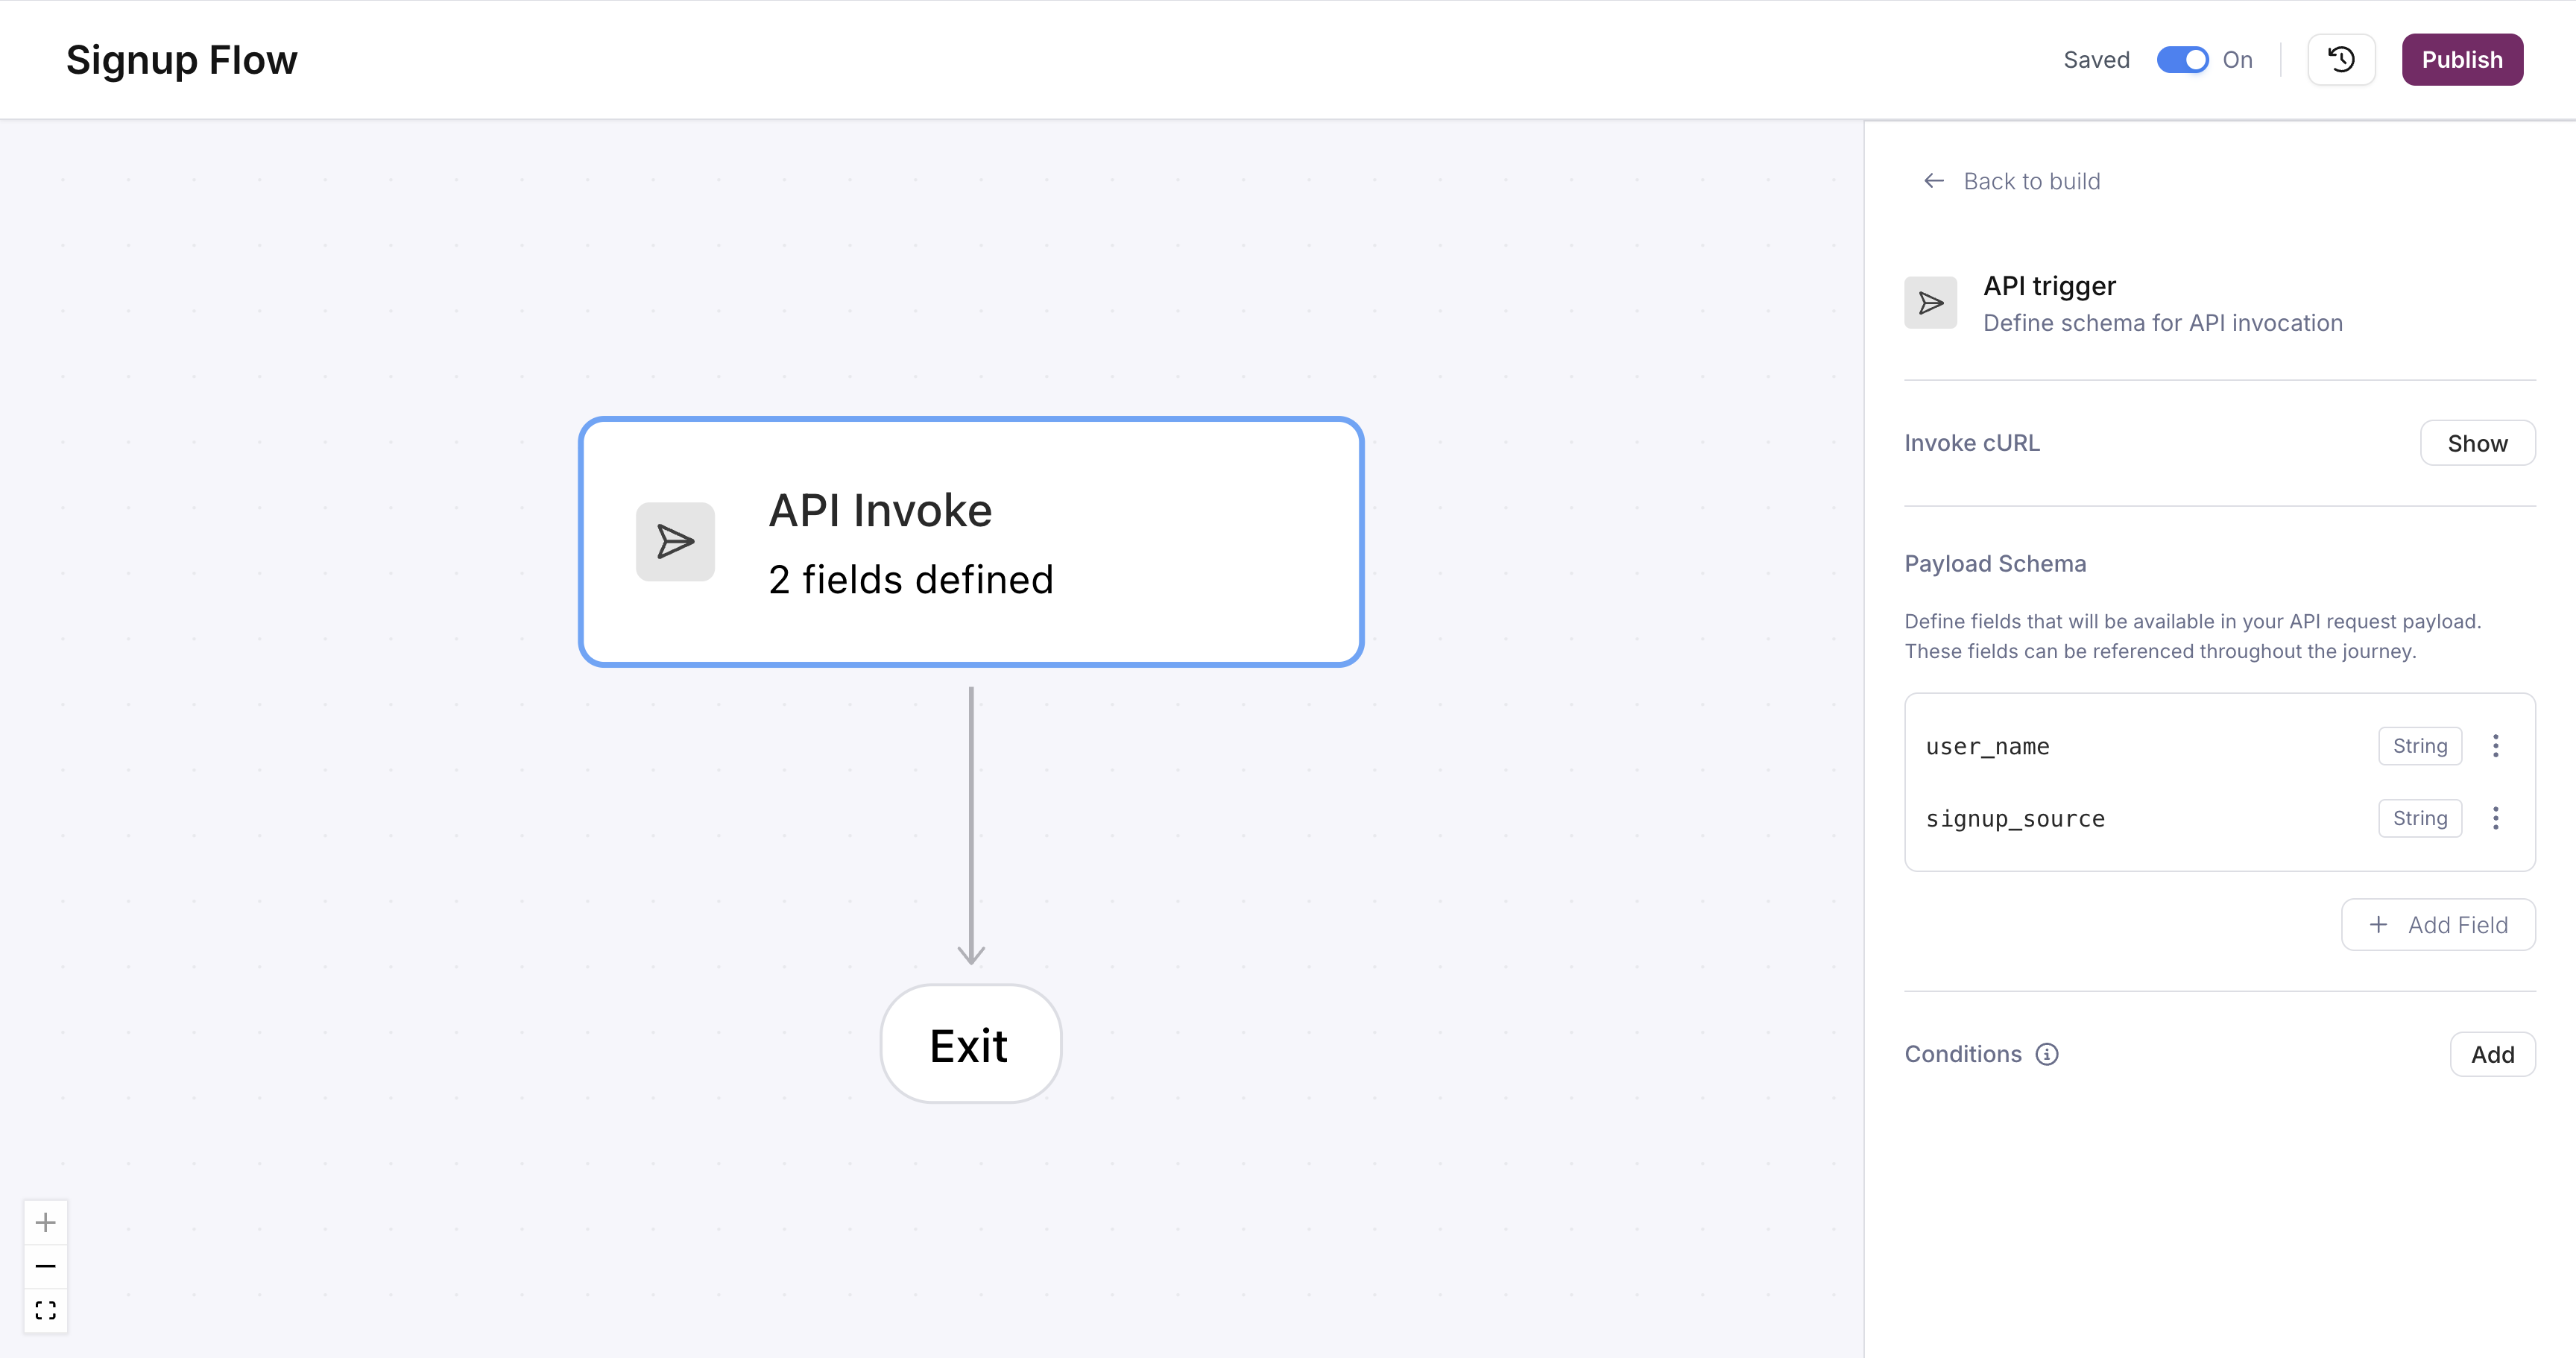
Define schema fields
Schema fields define the data contract between your application and this journey. Every invocation must include these fields.Add two fields:
Field name
Type
user_name
String
signup_source
String
Click Add Field for each one, enter the name, select the type, and save. These fields will be available as variables throughout the journey.
API trigger with user_name and signup_source schema fields defined
4
Add a Send Email node
Drag a Send node from the palette onto the canvas below the trigger, or click the + button on the edge below the trigger node. Select Email as the channel.
5
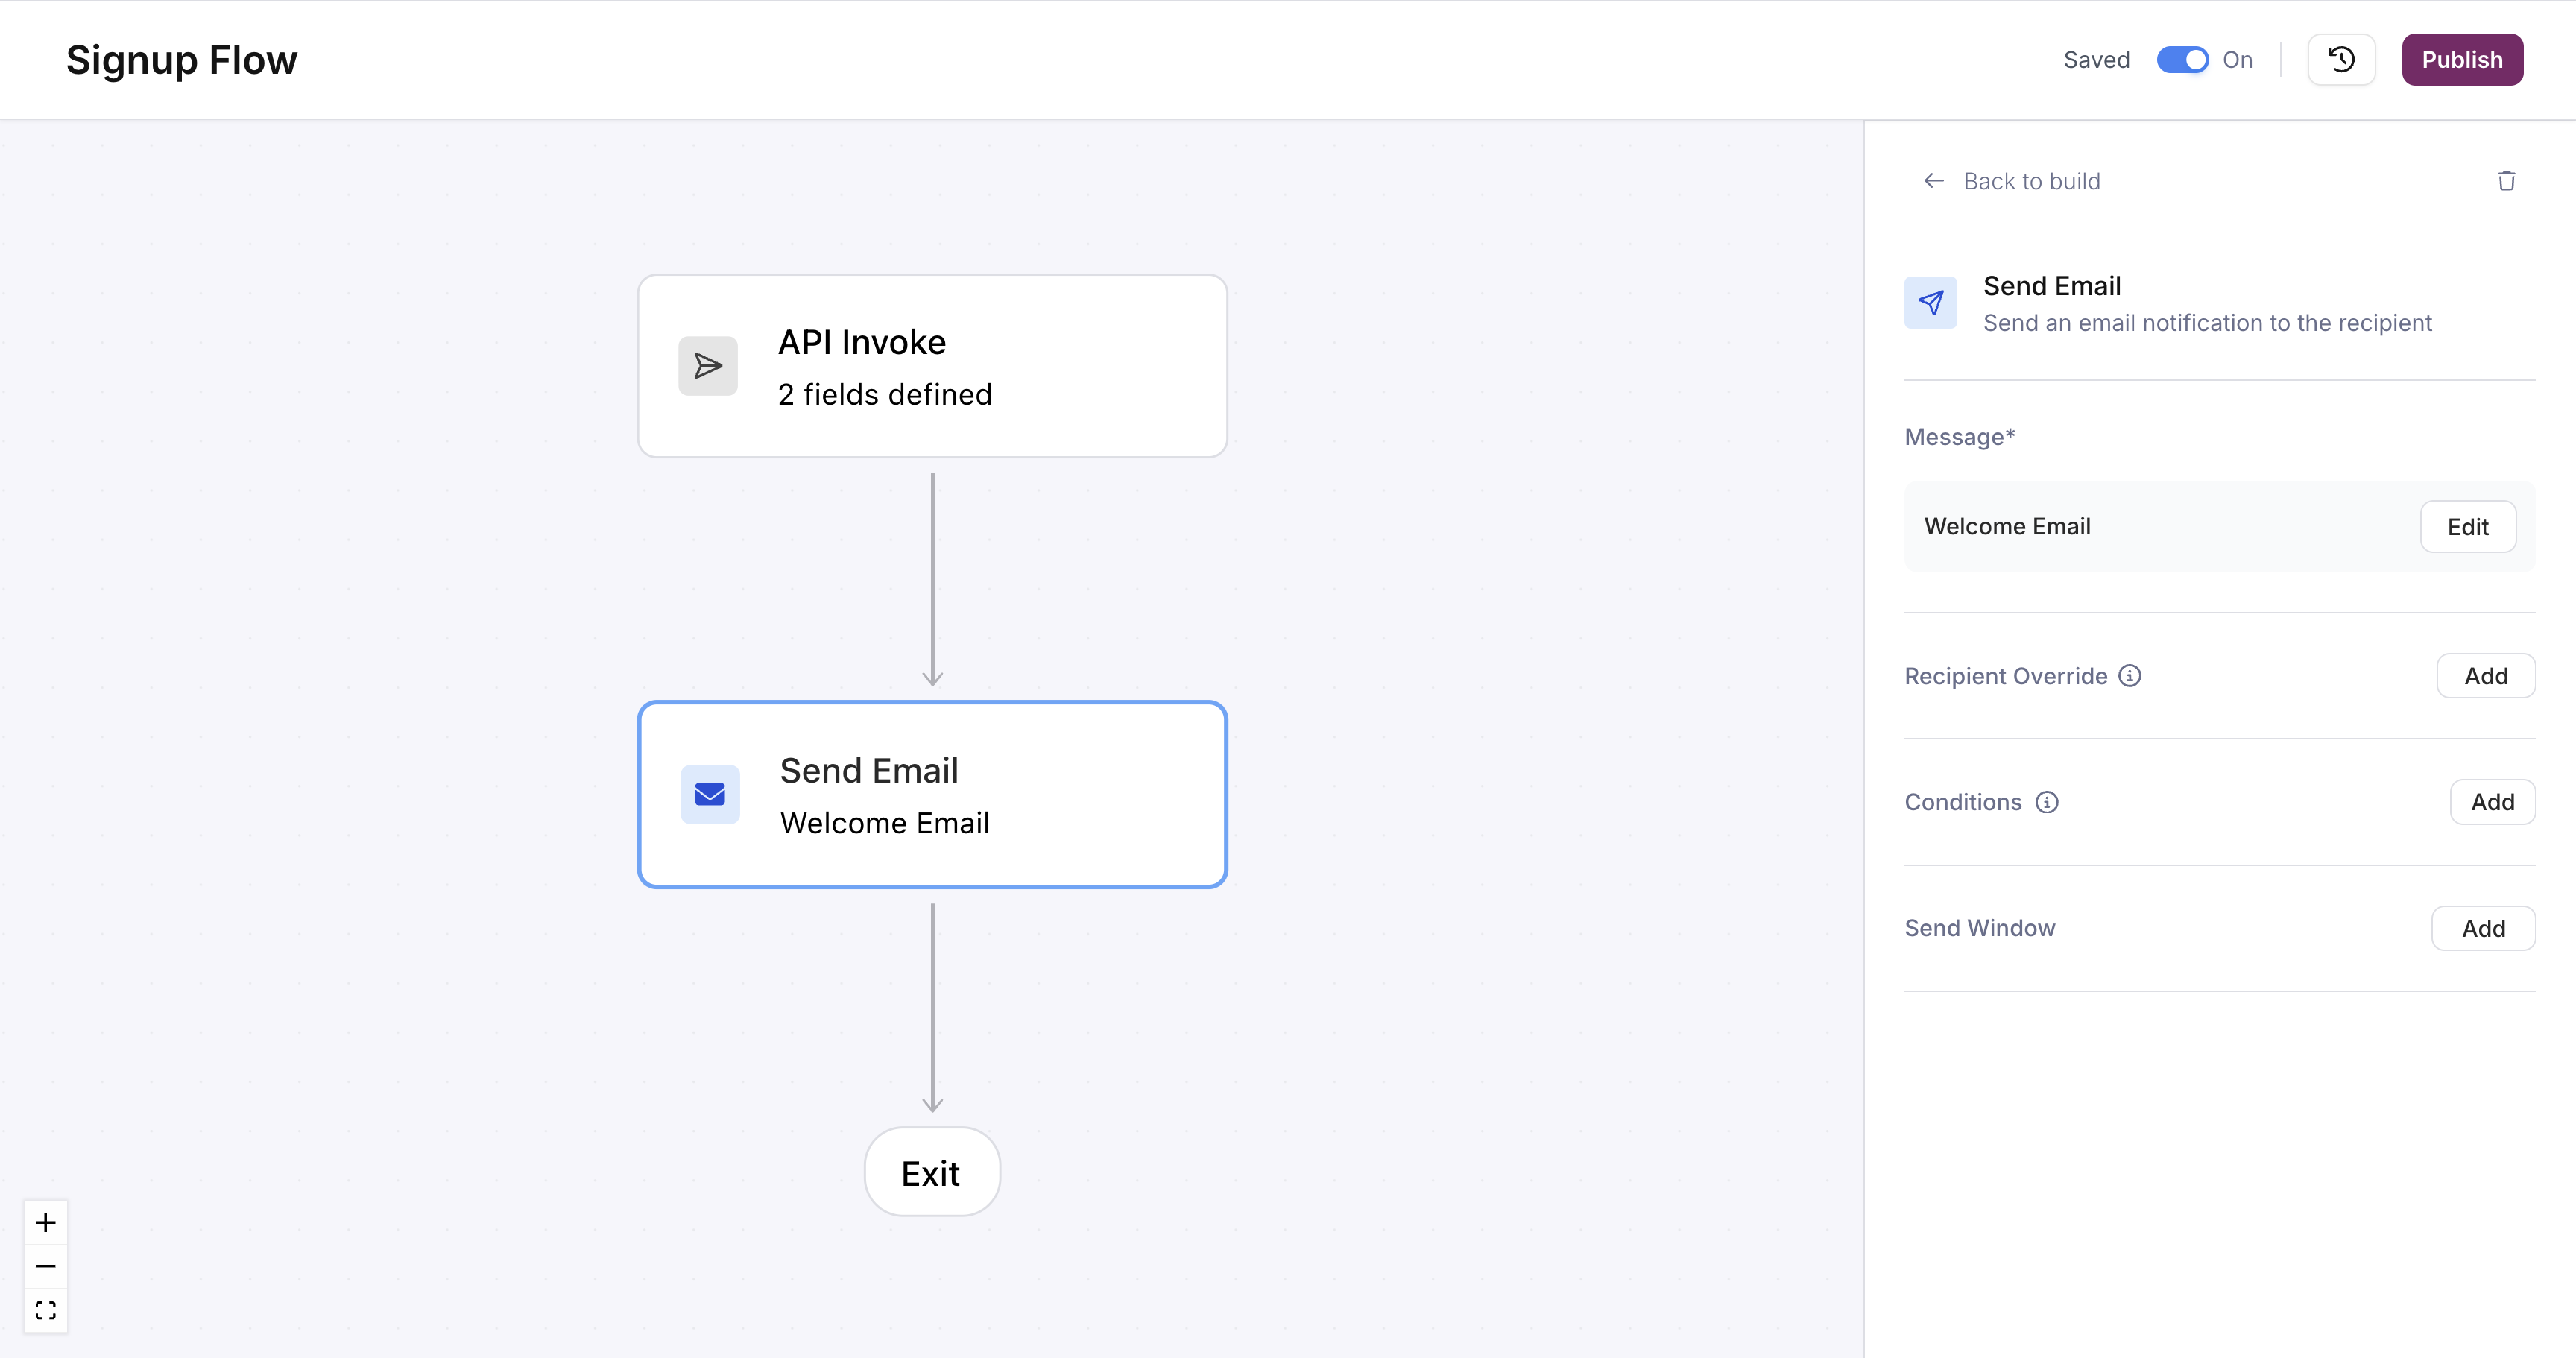
Create the message template
In the send node’s configuration panel, click + Create next to “Message.” Courier creates a new template and opens the template designer.Design your welcome email:
In the Subject field at the top, type Welcome, then insert the user_name variable so it reads Welcome, {{user_name}}!
In the body editor, add a Text block and write something like Thanks for signing up via {{signup_source}}. We're glad you're here.
Close the designer when you’re done. The send node now shows the template name.
Send node with the welcome email template linked
6
Publish the journey
Click Publish in the top-right corner. The journey is now live and ready to receive invocations.
Make sure user user_123 has an email address in their Courier profile, or include it in the profile field of the request. Without an email, the send node won’t have a delivery address.
Open your journey and click the Logs tab. You should see the run you just triggered. Click it to open the detail view.The run detail overlays execution status on the journey canvas. You can see that the trigger node started the run and the send node delivered (or attempted to deliver) the email. Click the send node to inspect the payload and delivery status.See Run Inspection for a full guide on debugging runs.