Courier Brands let you apply a consistent look and feel to your email and inbox notifications. You can maintain a single brand or create multiple brands for white-labeling, multi-tenant apps, or different product lines. Brands are fully API-enabled via the Brands API. By the end of this tutorial you’ll have a brand configured with a logo, colors, footer, and social links, and you’ll know how to apply it to notifications.

Prerequisites

  • A Courier account
  • Your brand assets ready: logo image, hex color codes, social media URLs

Understanding Email Brand Templates

Courier offers three template types for brands:
Template TypeBest ForCustomization Level
StandardMost use cases; visual editorLogo, colors, footer, social links
HandlebarsCustom header/footer layoutsHandlebars templating in header/footer
Custom MJML/HandlebarsFully custom email layoutComplete control over HTML structure
This tutorial uses the Standard template. For custom MJML/Handlebars templates, see the Brands reference.

Step 1: Create a Brand

1

Open the Brand Designer

Navigate to Templates > Brands in the Courier dashboard and click New Brand.
2

Name your brand

Give your brand a descriptive name (e.g. “Acme Corp”). Optionally set a brand_id if you plan to manage the brand via the API.

Step 2: Customize Your Brand

1

Upload a logo

In the Brand Designer, locate the Logo section and upload your logo. Requirements:
  • JPEG, PNG, or GIF format
  • Maximum 5MB
  • Ideally 140px wide (height is flexible)
2

Set brand colors

Configure your color palette:
  • Primary - Buttons, links, and key accent elements
  • Secondary / Tertiary - Supporting accent colors
  • Header - Background color of the email header bar
3

Configure the footer

Add your company name and optional legal text. You can use built-in variables:
  • {datetime.year} - Current year (e.g. for © {datetime.year} Acme Corp)
  • {urls.unsubscribe} - One-click unsubscribe link
  • {urls.preferences} - Link to the user’s preference page
Add social media links (Facebook, Instagram, LinkedIn, Twitter/X, Medium) to display icon links in the footer.
4

Preview and publish

Click Preview to see how your brand looks in a sample email. When you’re satisfied, click Publish.

Step 3: Apply the Brand

Set as Default

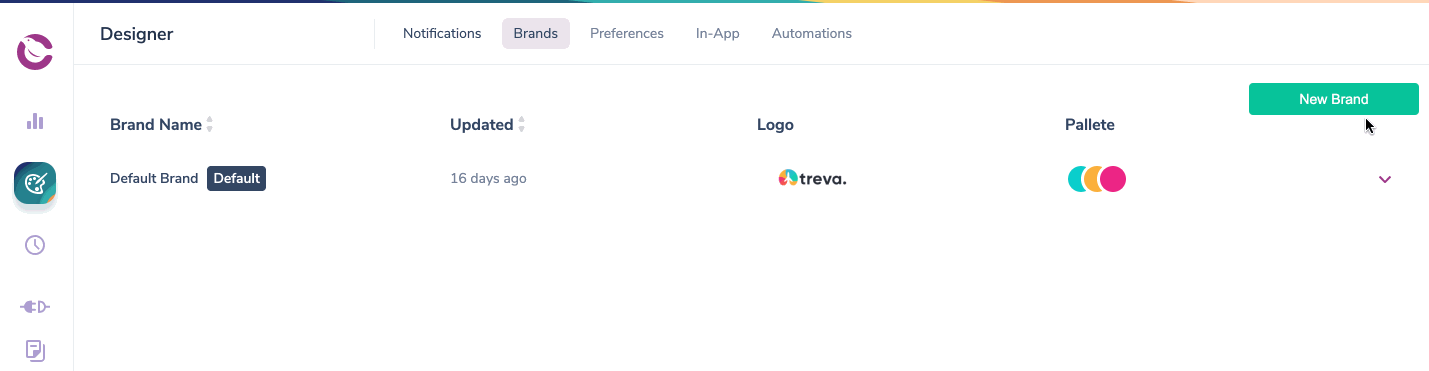
Setting a brand as default means it automatically applies to all notifications that don’t specify a different brand. Open the brand settings and click Set as Default.
Every email notification uses the default brand unless you explicitly disable brands in the template settings or specify a different brand in the send request.

Apply to Specific Notifications

If you don’t want the brand as default, you can assign it per notification:
  1. Open the notification template
  2. Go to Template Settings
  3. Select your brand from the dropdown

Specify at Send Time

Pass a brand_id in the Send API request to override the default brand:
curl -X POST https://api.courier.com/send \
  -H "Authorization: Bearer $COURIER_AUTH_TOKEN" \
  -H "Content-Type: application/json" \
  -d '{
    "message": {
      "brand_id": "your-brand-id",
      "to": { "email": "[email protected]" },
      "content": {
        "title": "Welcome!",
        "body": "This uses your custom brand."
      }
    }
  }'

Advanced Customization

Custom Templates

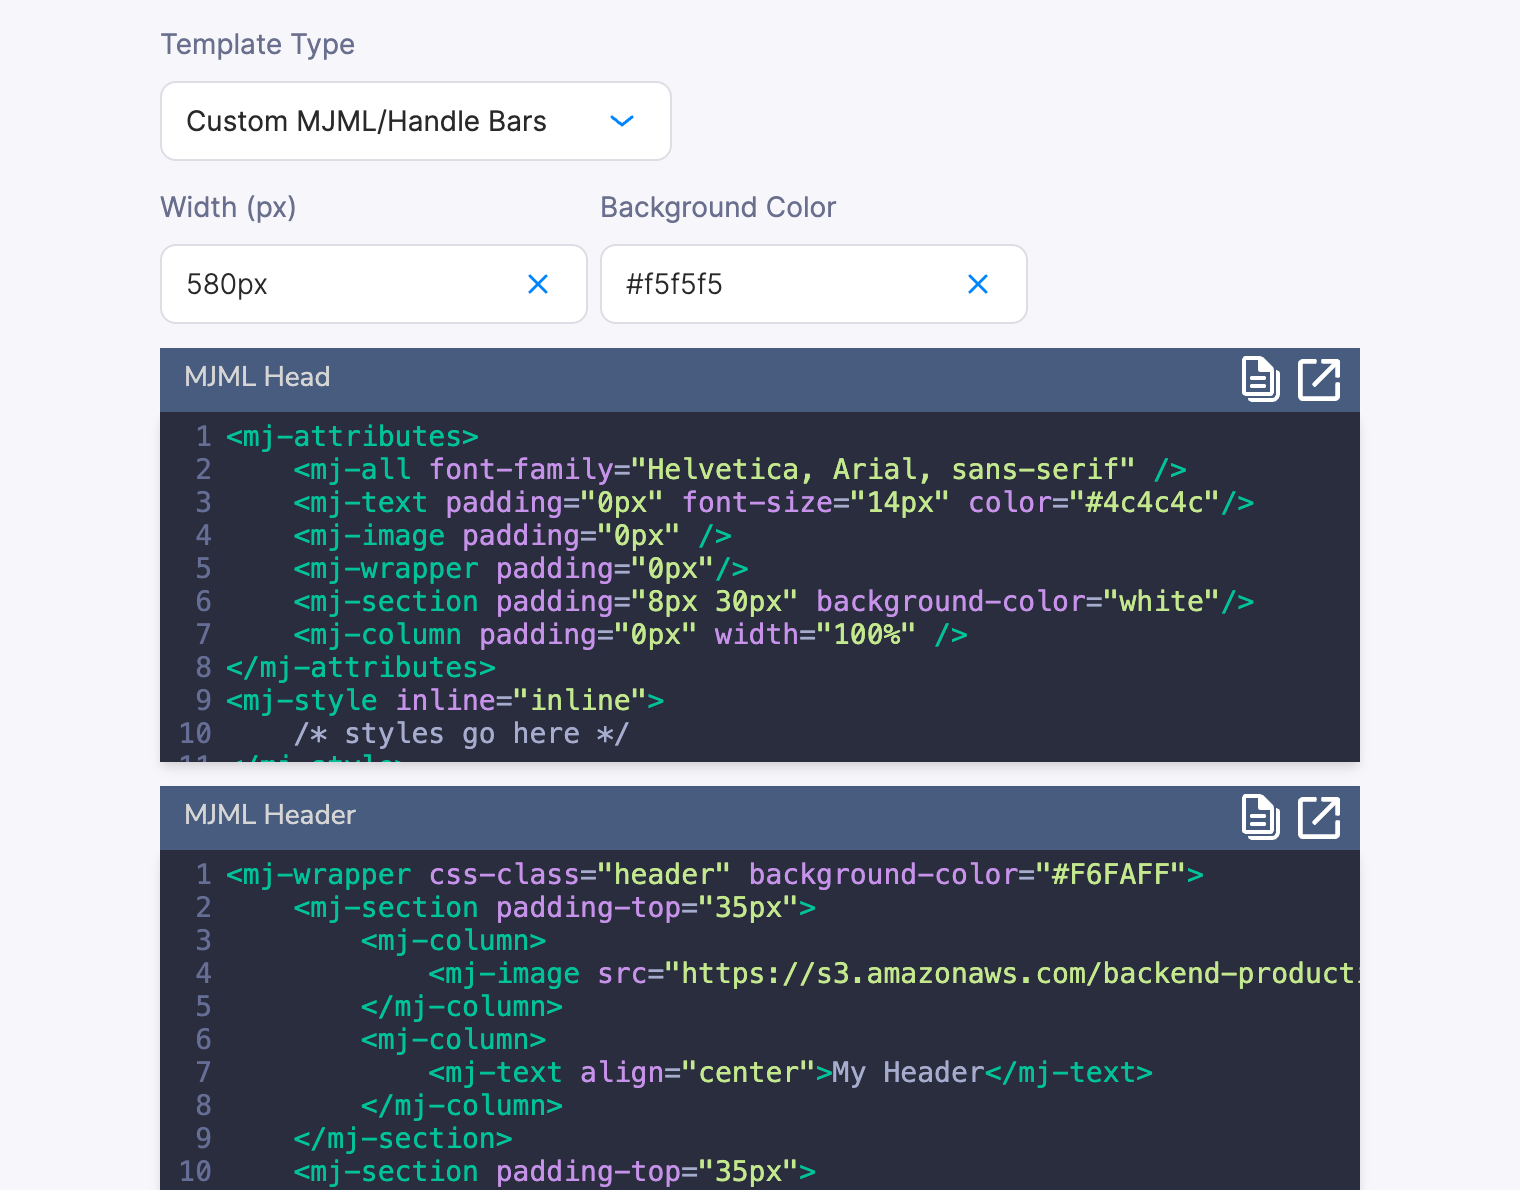
For more control over the email layout, select Use Custom Template in the Brand Designer. This lets you write Handlebars and HTML or MJML for the header and footer while still using drag-and-drop content blocks for the email body.

Custom CSS

You can customize the <style> element in the <head> section of your emails. This works with both Standard and Custom template brands. See CSS Classnames for available selectors.

Snippets

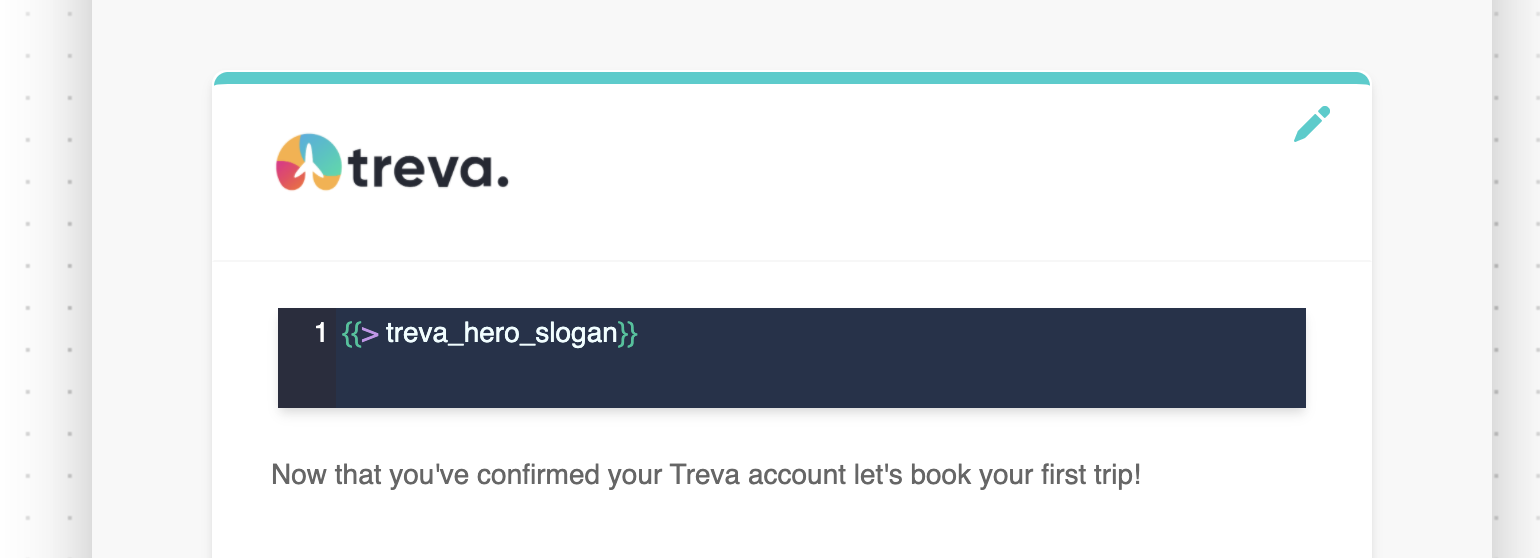
Snippets are reusable pieces of Handlebars code that you can call from any template block:
  1. Create a snippet in the Brand Designer (e.g. my_snippet)
  2. In a notification, add a Template Block and call it: {{>my_snippet}}
Snippets support variables, so you can pass dynamic content into them via the send request. A snippet defined in the default brand is available in all custom brands unless the custom brand defines its own snippet with the same name.

Brand Variables

Any brand attribute you can configure in the UI is also available as a Handlebars variable. For example, {{var "brand.social.facebook"}} renders the Facebook URL. Available variables include:
  • brand.colors.primary, brand.colors.secondary, brand.colors.tertiary
  • brand.email.header.barColor, brand.email.header.logo.image, brand.email.header.logo.href
  • brand.social.facebook, brand.social.instagram, brand.social.linkedin, brand.social.twitter, brand.social.medium

What’s Next