How To Implement a Facebook-Like Web Notification System
Create a web notification system like Facebook's using JavaScript. This step-by-step tutorial covers all the necessary steps.
Updated Jun 30, 2026
A notification system is a tool that allows developers to manage and send custom notifications to their web application users. Notification systems keep users informed and engaged with a website or app by sending them timely updates, announcements, or other useful information. There are many potential use cases for notification systems, including:
- In-app user engagement: Notification systems keep users engaged with an app by sending them notifications about new features, updates, or promotions, which can help to increase user retention and engagement.
- Sharing announcements: Notification systems help communicate critical announcements with users, such as information about upcoming events or new products or services.
- Sharing changes with app usage policies: Notification systems can inform users about changes to an app's usage policies or terms of service. This helps ensure that users are aware of any changes and can continue to use the app in compliance with the updated policies.
- Real-time updates: Notification systems can also provide real-time updates on events or activities, such as sports scores or traffic updates, which further increases customer engagement.
In this article, you'll learn how to use Courier to create a notification system for your website similar to the one used on Facebook. You'll learn about the features of Courier’s In-App push notifications and use them to create and manage custom notifications. More specifically, you'll use Courier's pre-built components, such as Toast and Inbox, to implement your notification system in React and create a custom backend in Node.js to send the notifications.
Facebook’s Notification Inbox
Facebook is one of the most popular social networking websites. Its in-app notification system sends updates to users to inform them about important activities and updates on the platform to help users stay up-to-date, connected, and engaged with their friends and communities.
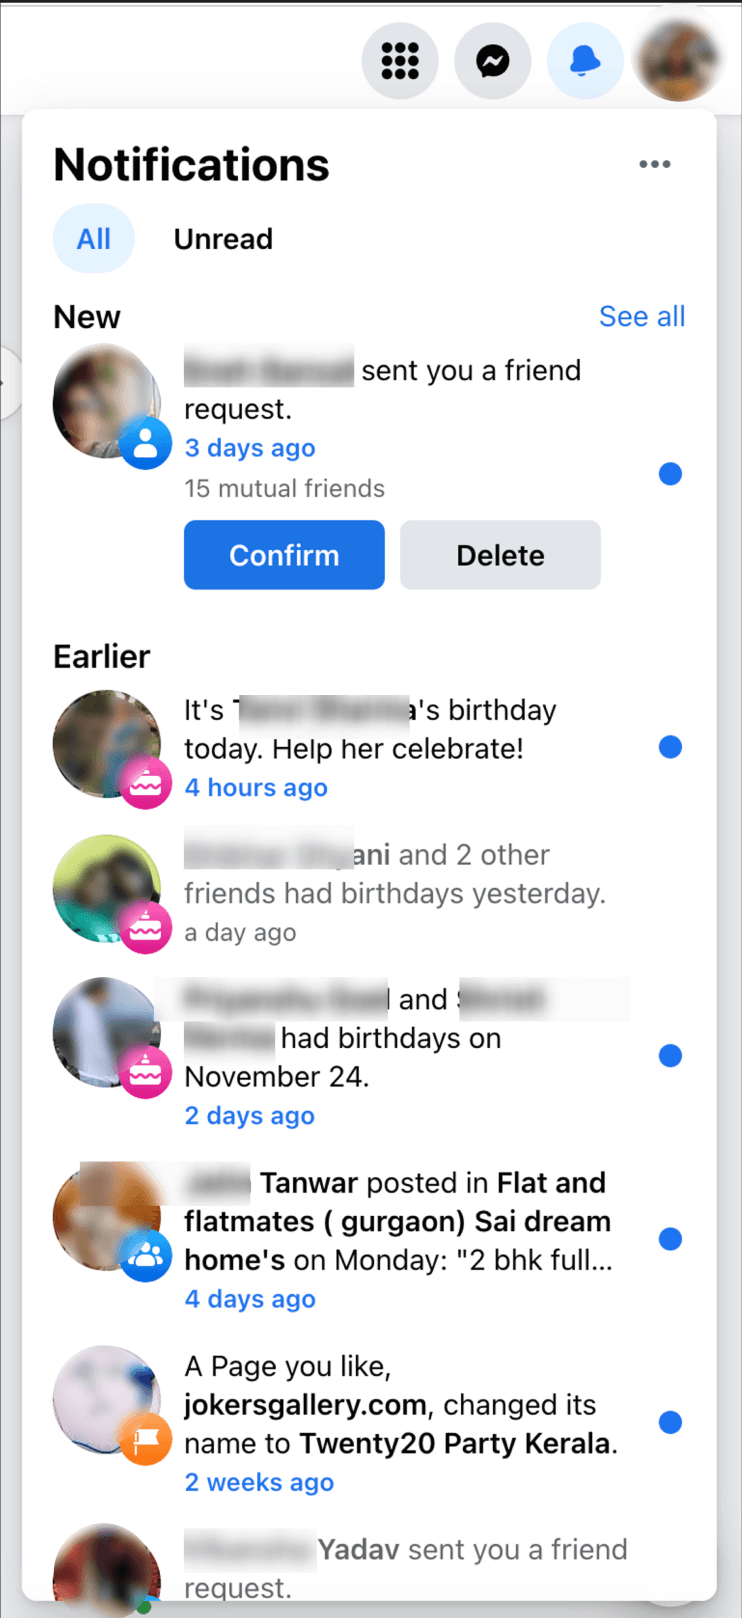
You’re likely familiar with Facebook notifications already. Visit facebook.com in your web browser and log in to your account. Then click the bell icon in the top-right corner of the page to view your notifications:

When you receive a notification on Facebook, it will appear in the notifications menu as an unread notification. Unread notifications are highlighted in bold and have a blue dot next to them, while read notifications are in a regular font and don't have the blue dot next to them. Once you click on the notification to view it, it will be marked as read and will no longer appear unread in the notifications menu.
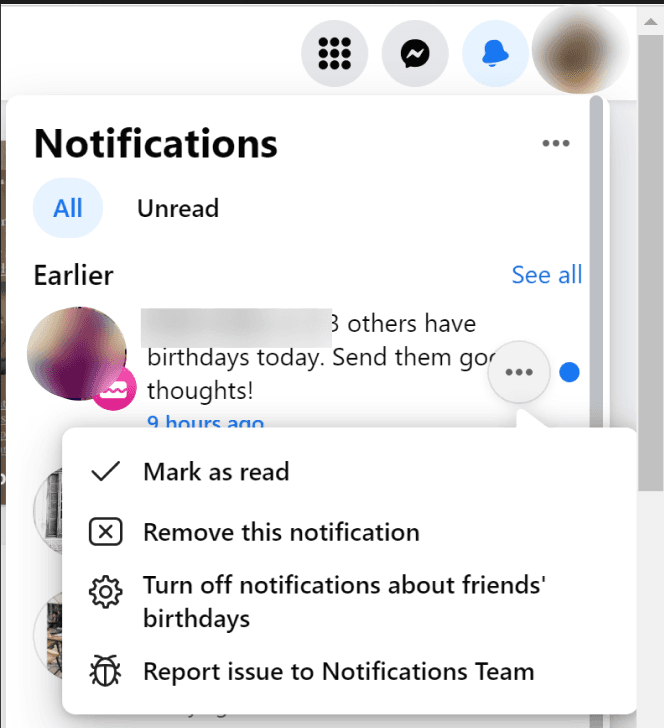
The options (three vertical dots) button on a notification on Facebook allows you to perform various actions, such as marking it as read or unread, removing it, or turning off notifications from a particular source:
The following tutorial will guide you through how to create a notification system similar to Facebook’s.
Implementing Facebook-Like Notifications with Courier
Before getting started, you’ll need Node and npm installed on your computer. This tutorial was built using Node v16.18.1 and npm v8.19. For development, you'll also need a code editor like VS Code. You can follow along with the tutorial by cloning this GitHub repository.
Set Up the Project
This example uses Next.js as the React framework to develop both the frontend and backend in the same repository. Run the following command to initialize a Next.js project:
npx create-next-app@12.1.4 courier-web-notification
Now, change directory in the terminal to the project:
cd courier-web-notification
The Courier React packages are compatible with React v17 and may experience issues with React v18. To ensure you're using the correct versions, run the following command to install the proper dependencies:
npm install react@17.0.2 react-dom@17.0.2 --exact --force
Then, to install the correct dev dependencies, run this command:
npm install --save-dev @types/react@17.0.39 --exact --force
Install the Courier packages in your Next.js project using npm. These packages provide the components and functions you'll need to integrate Courier notifications into your application:
npm install @trycourier/react-provider @trycourier/react-toast
Set Up Courier API Keys
To get the API key and client key for your Courier project, you can follow these steps:
- Log in to your Courier account and go to the dashboard for your project.
- In the dashboard, click on the settings (cog) icon on the top right and then select the API Keys tab.
- In the API Keys tab, you'll see your project's API and client keys. Copy these keys and save them in your project's new
.env.localfile:
NEXT_PUBLIC_COURIER_CLIENT_KEY=<client-key>COURIER_SERVER_KEY=<production-api-key>
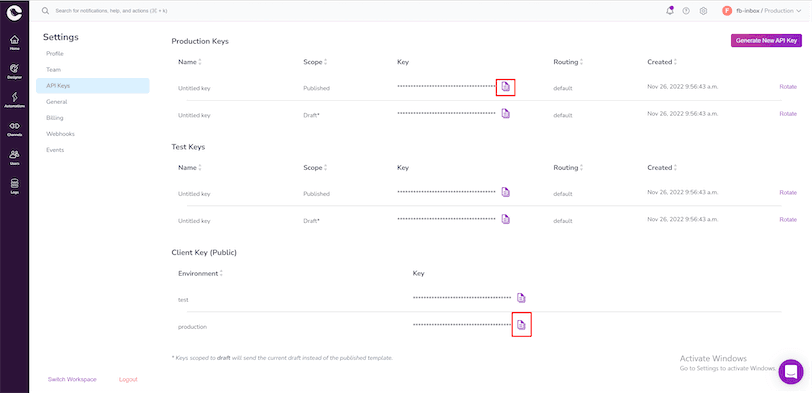
Note that it is important to keep your API key and client key secure and not share them with anyone else. You should also avoid exposing these keys in your app's code or in public repositories.
Integrate Using CourierProvider
Now, import the CourierProvider component from the @trycourier/react-provider package in the pages/_app.js file in your Next.js application. These components provide the context and state for the Courier notifications:
import { CourierProvider } from "@trycourier/react-provider";
Then import the Toast component from @trycourier/react-toast package. This component will display a toast when a notification is received:
import { Toast } from "@trycourier/react-toast";
Next, set up the CourierProvider component in your application by wrapping your application with CourierProvider and providing the clientKey and userId props with the correct values for your Courier project. CourierProvider will provide the context and state for the Courier notifications to the rest of your application:
import "../styles/globals.css";import { CourierProvider } from "@trycourier/react-provider";import { Toast } from "@trycourier/react-toast";const CLIENT_KEY = process.env.NEXT_PUBLIC_COURIER_CLIENT_KEY;const USER_ID = "Github_28081510";function MyApp({ Component, pageProps }) {return (<CourierProvider clientKey={CLIENT_KEY} userId={USER_ID}><Toast /><Component {...pageProps} /></CourierProvider>);}export default MyApp;
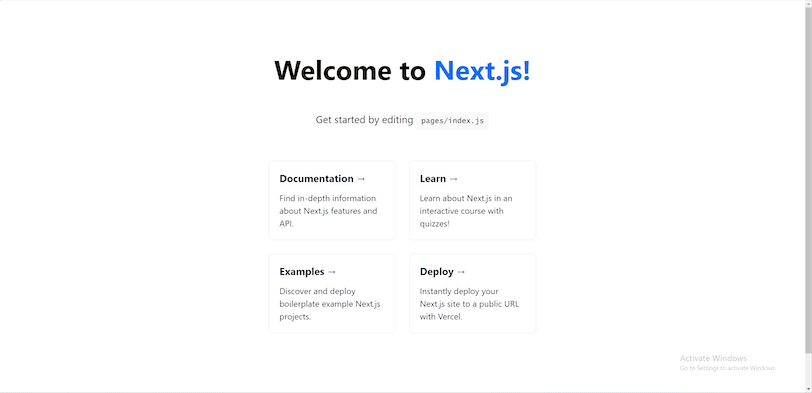
Finally, run npm run dev to start the application and open http://localhost:3000 in a web browser window. You should see the default Next.js project page:
Test Integration Using Courier Dashboard
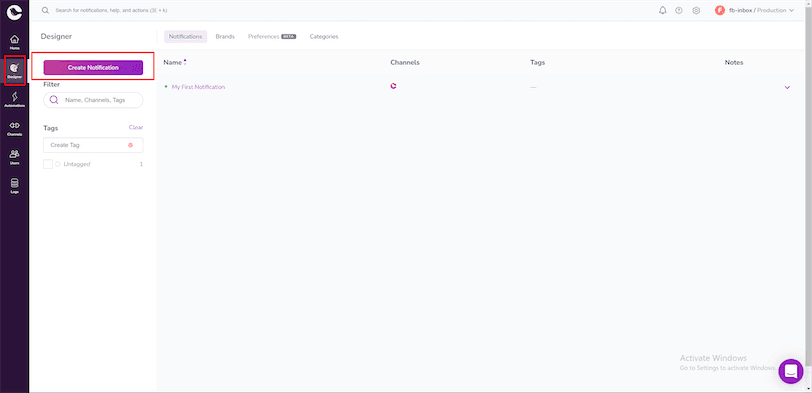
To test the integration, open the Courier dashboard and click on Designer in the left navigation menu. Then click Create Notification to start creating a notification template:
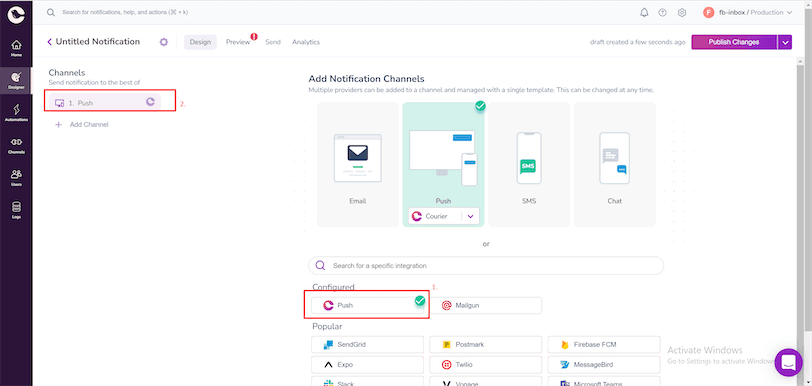
Add Push as the notification channel and select Push from the Channels list on the left sidebar:
Now create a notification template, as pictured here:
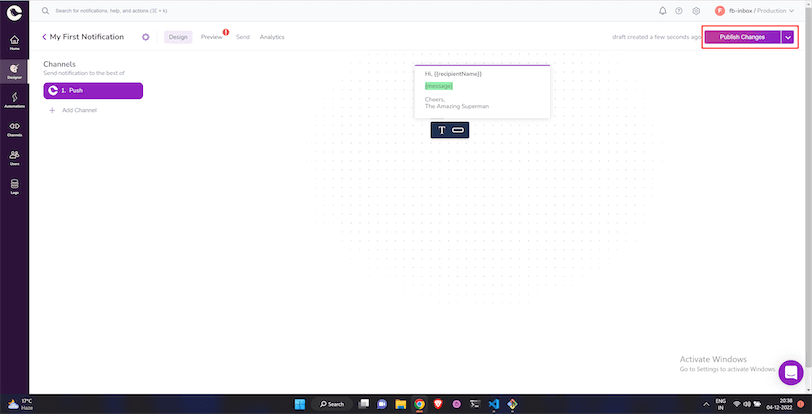
Enter Hi, {{recipientName}} as the title, {message} as the body, and add a sign-off message, “Cheers, The Amazing Superman”.
Courier will fill the variable in curly braces with values from the notification event object.
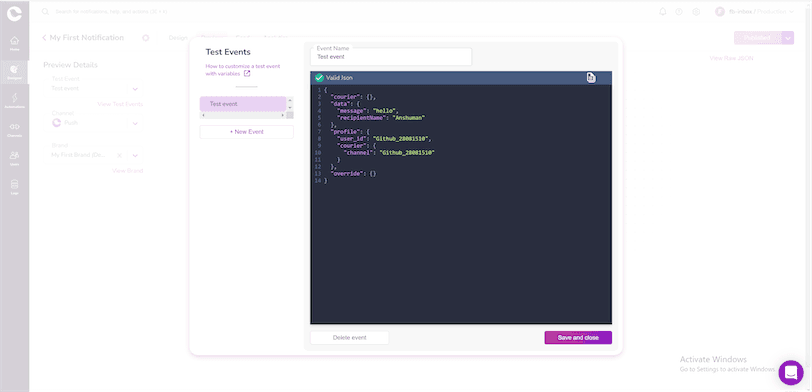
Next, open the Preview tab and create a new notification event called Test event. In the event JSON, use the following data:
{"courier": {},"data": {"message": "hello","recipientName": "Anshuman"},"profile": {"user_id": "{{user_id}}","courier": {"channel": "{{user_id}}"}},"override": {}}
Remember to replace the
{{user_id}}with your user ID.
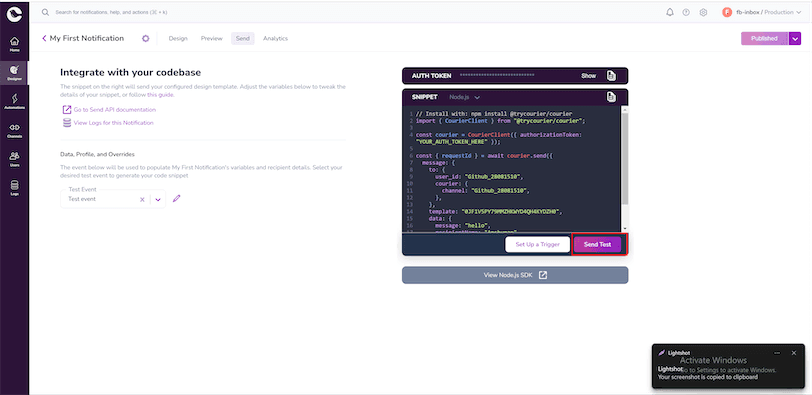
Now, open the Send tab and click on the Send Test button under the code example to send your test notification:
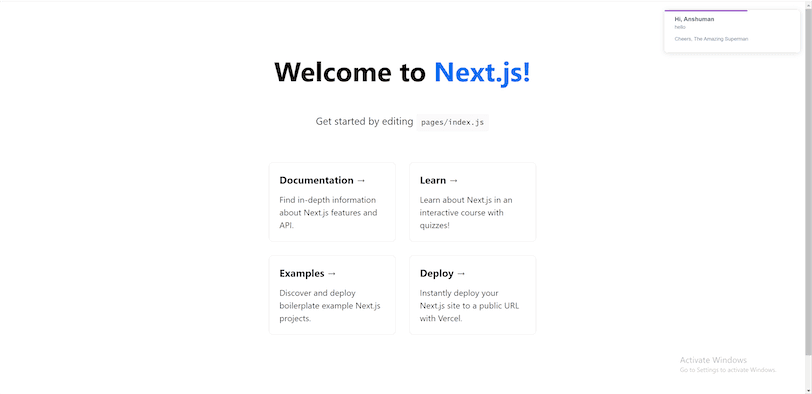
Finally, open the browser window with your Next.js application to see the test notification appear:
Add Alarm-Bell Icon and Notification Inbox
Currently, the application only shows a toast for the notification received. Facebook displays old notifications in an Inbox UI component. To implement an Inbox feature like Facebook, install the Courier Inbox package from npm:
npm install @trycourier/react-inbox
Now update the pages/index.js file with the following code to show a top header with an alarm icon. The <Inbox/> component only works on the client side. To avoid issues during server-side rendering, you need to only mount it on the client side. To do this, create a boolean state isReady, set it to false by default, and set it to true in a useEffect that only runs on the client side:
import Head from "next/head";import { Inbox } from "@trycourier/react-inbox";import { useEffect, useState } from "react";export default function Home() {const [isReady, setReady] = useState(false);useEffect(() => {setReady(true);}, []);return (<div><Head><title>FB like Notifications</title><meta name="description" content="Generated by create next app" /><link rel="icon" href="/favicon.ico" /></Head><main><headerstyle={{display: "flex",padding: "0 20px",background: "#d1f2ff",alignItems: "center",justifyContent: "space-between",}}><h1>FB Notification</h1>{isReady && <Inbox />}</header></main></div>);}
Your application will look like this:

Using Notification Read Status
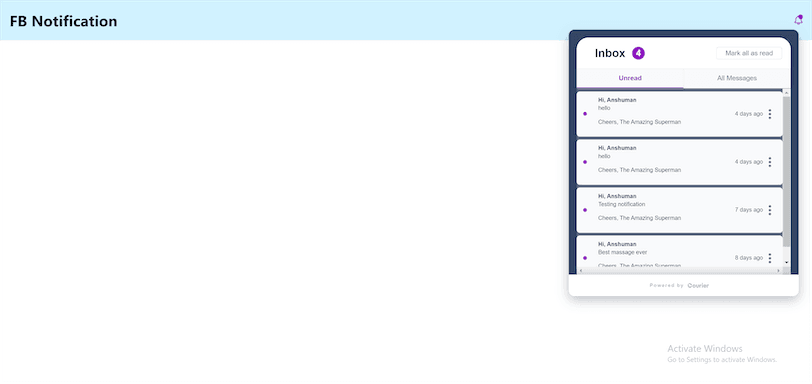
The Courier Inbox component has built-in support for read status of notifications like Facebook. Click on the alarm bell icon on the top right to open the notification inbox. You'll see all unread notifications by default:
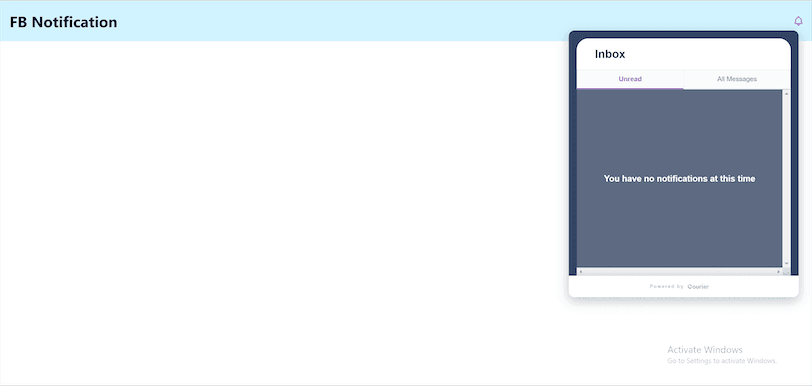
Click the Mark all as read button to mark all notifications as read. You'll notice that the alarm-bell icon no longer has a dot, and the Unread notifications tab is also empty:
You can click the All Messages tab to see all notifications, including the ones you’ve read already:
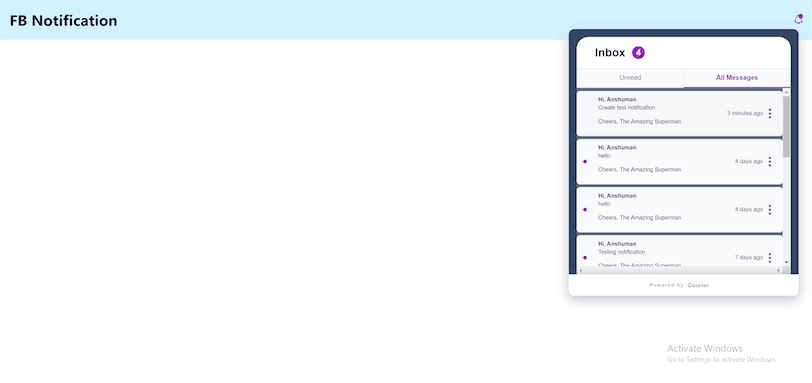
You can also click on the three-dot button on a notification to mark a notification as read or unread:
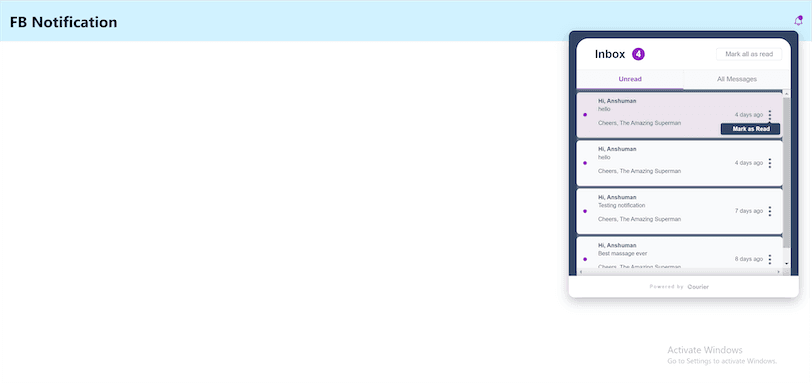
The application only receives notifications so far. To send them, you’ll use the Node.js SDK.
Send Notification from Backend
To send notifications using Courier’s SDK, you need a template ID. To collect that, open the Courier dashboard, go to the Designer page, and select the notification you like. Now open the notification settings by clicking on the gear icon beside the notification name and copy the notification ID:
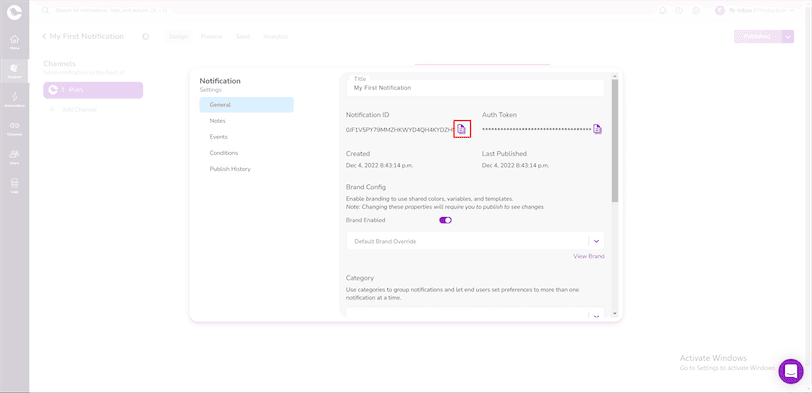
Run the following command to install the Courier Node.js SDK:
npm i @trycourier/courier
To send a Courier notification using Next.js, create a new API route in your pages/api/sendNotification.js file. Import the CourierClient module from the @trycourier/courier package and initialize CourierClient with your authorization token. Use the send method to send a notification with the message received in the request body:
import { CourierClient } from "@trycourier/courier";const USER_ID = "Github_28081510";const courier = CourierClient({authorizationToken: process.env.COURIER_SERVER_KEY,});export default async function handler(req, res) {const { requestId } = await courier.send({message: {to: {user_id: USER_ID,courier: {channel: USER_ID,},},template: "0JF1V5PY79MMZHKWYD4QH4KYDZH0",data: {recipientName: "Anshuman",message: req.body.message,},},});return res.send({ requestId });}
That's it! You can now send Courier notifications using this Next.js route.
Send Notification from Frontend
Now that the backend API route is ready, it's time to connect it to the frontend to send custom notifications. Create a text input field in pages/index.js to receive a message from the user and update the message state with this value. Create an async function called sendNotification to make a POST request with message as the request body to the /api/sendNotification endpoint. Your final code should look like this:
import Head from "next/head";import { Inbox } from "@trycourier/react-inbox";import { useEffect, useState } from "react";export default function Home() {const [isReady, setReady] = useState(false);const [message, setMessage] = useState("");async function sendNotification() {await fetch("/api/sendNotification", {method: "POST",headers: {"content-type": "application/json",},body: JSON.stringify({ message }),});setMessage("");}useEffect(() => {setReady(true);}, []);return (<div><Head><title>FB like Notifications</title><meta name="description" content="Generated by create next app" /><link rel="icon" href="/favicon.ico" /></Head><main><headerstyle={{display: "flex",padding: "0 20px",background: "#d1f2ff",alignItems: "center",justifyContent: "space-between",}}><h1>FB Notification</h1>{isReady && <Inbox />}</header><divstyle={{display: "flex",flexDirection: "column",alignItems: "center",}}><textareaplaceholder="Notification message"value={message}onChange={(e) => setMessage(e.target.value)}cols={30}rows={5}style={{ margin: "20px auto" }}/><button onClick={sendNotification}>Send Notification</button></div></main></div>);}
Your Facebook-like notification system is now ready!

Conclusion
In this article, you used Courier to create a notification system for your website similar to the one used on Facebook. You used Courier's In-App messaging and pre-built components, such as Toast and Inbox, to show notifications. You also implemented a backend API route to send custom notifications using the Courier Node.js SDK.
If you're interested in delivering a better notification experience for your website, consider using Courier to create a custom notification system tailored to your needs. With Courier, you can easily create and manage custom notifications to keep your visitors engaged with your website.
Keep exploring
More guides
One API, every channel
Ship notifications without the boilerplate
Courier gives you one API for email, SMS, push, and chat, with templates, routing, retries, and delivery logs built in.
Last updated Jun 30, 2026. Code samples are illustrative; provider APIs and pricing change over time, so check each provider’s docs before relying on them.
© 2026 Courier. All rights reserved.