How-To Implement Notifications in Your React-Powered Website
This step-by-step tutorial (with screenshots) will show you how to implement browser push notifications for your React powered website.
Updated Jun 30, 2026
Clear and seamless communication is essential for delivering quality products or services. On average, users spend less than fifteen seconds on your website before deciding if they should leave or stay longer. So, even the smallest issue can be a deciding factor on whether or not you retain your customers and visitors. It's essential to find a way to communicate with your users while they are actively on your website and after they leave. This can be achieved using browser notifications.
Notifications sent when a user is using your app usually happen in-app and don't require the user's permission. However, you'll have to obtain user permission to enable push notifications that will be sent to them instantly, even when they are not actively using your website or app. Your website will request permission from a user when they visit for the first time. It's good practice to always inform users about how you'll use their permission, which allows them to better consider the implications of your permission request.
You can use browser notifications for different purposes centered around communicating with your users. Some of the different use cases for browser notifications are the following:
Relaying helpful information to the user
Increasing engagement and retention
Providing feedback to a user in response to an action
Using a marketing channel to alert users of product updates, changes, or improvements
In this article, you'll learn how to implement in-app notifications in a React-powered website using Courier.
What Is Courier?
Courier is a platform that provides a solid and robust notification infrastructure so you can give your customers an excellent notification experience. Courier offers a wide range of notification services, including the following:
- Email: Courier integrates with many email providers, ranging from Gmail to email APIs like SendGrid, Mailgun, and AWS Simple Email Service.
- SMS: Courier integrates with several SMS providers like Twilio, Vonage, MessageBird, and many others.
- Push notifications: Courier supports push notification providers like Expo, Firebase Cloud Messaging, Airship, Apple push notifications, and OneSignal push.
- Chat: Courier also supports several chat providers like WhatsApp, Slack, Discord, Microsoft Teams, and others.
- In-app: Courier provides Toast notification and an Inbox component that you can use to deliver notifications inside your app.
- Others: Courier also supports many other notification channels, which may not fit under a single category, such as AWS Simple Notification Service, Intercom, Webhook, PagerDuty, and many others.
Courier In-App Notification
Courier Push is a notification provider that works using WebSocket and a Toast or Inbox component. The notification is delivered to the frontend via WebSocket, and then the received notification can be displayed using the Toast or Inbox component. Integrating third-party applications for notifications can be quite challenging. However, Courier Push helps us quickly set up in-app push notifications without having to worry much about authentication and setting up proxy API routes.
Implementing Browser Notifications with Courier
The following sections explain the steps you need to take to implement browser notifications with Courier:
Create and Set Up a Courier Account
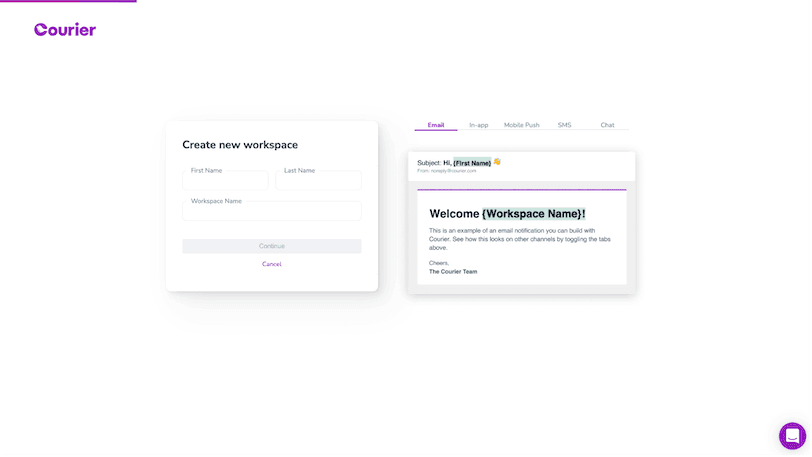
First, go to https://app.courier.com/signup and create an account. You'll be asked to add a workspace name during account creation. The workspace name is usually added to the heading of notifications sent out to users.
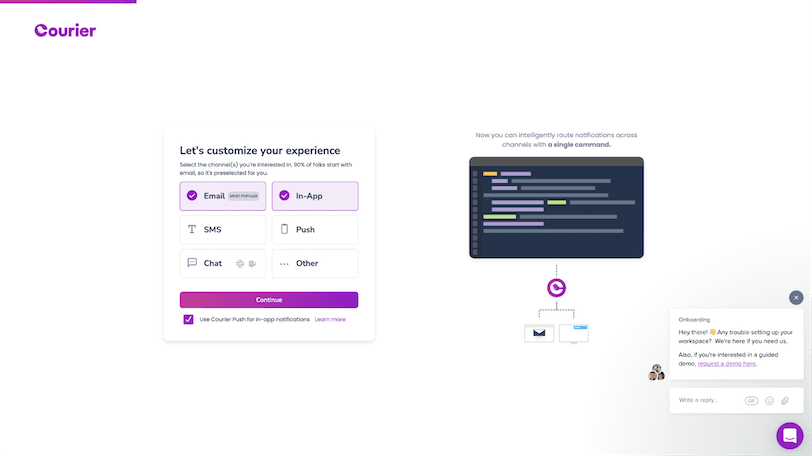
You'll be asked to select the channels you're interested in, but you can add more later. For this demo, select In-App. Email is selected by default and can be unselected, but you can just leave it.
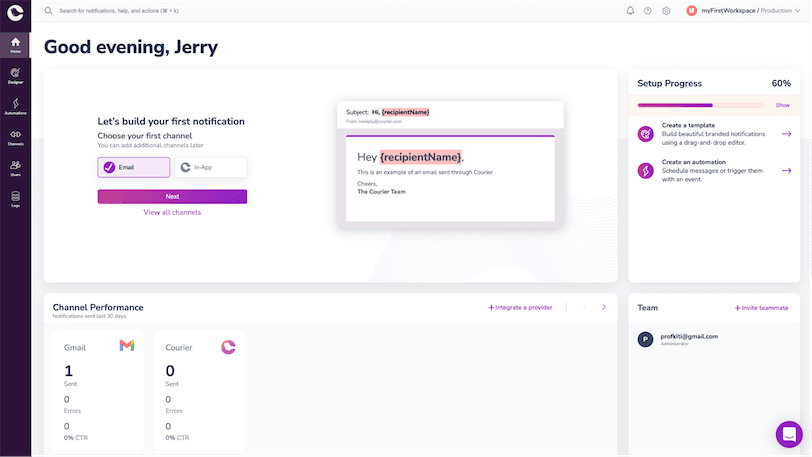
Follow the rest of the steps, and you should arrive at a dashboard that looks like the image below.
Manage Workspace Switch Environments (Optional)
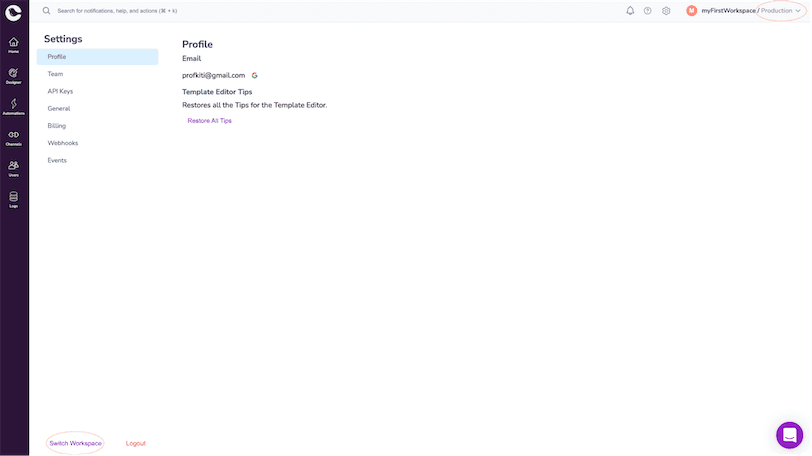
After account creation, you can add more workspaces to your company and switch between them. For each workspace, you can also switch between production and test environments. For this demo, the environment was switched to 'test'.
Configure In-App Notifications
To configure in-app notifications using Courier Push, go to the channels tab in your sidebar and select Courier Push under configured providers. If you can't find Courier Push under configured providers, then search the provider catalog section. Clicking Courier Push would take you to a page that looks like this (https://app.courier.com/test/channels/courier):
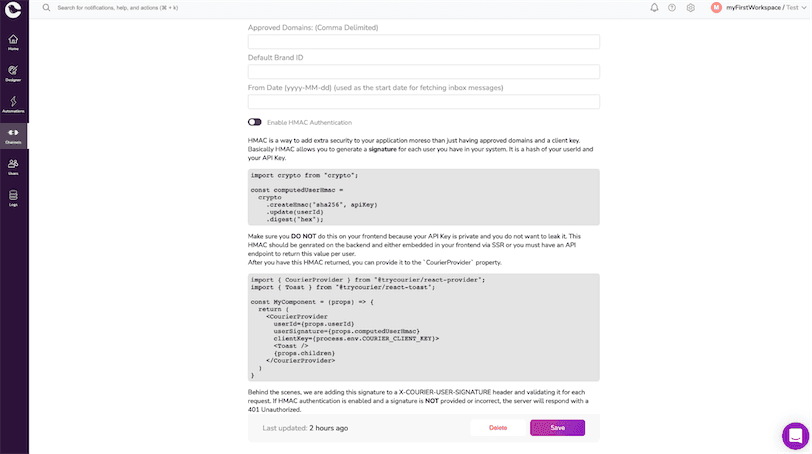
Click the save button. You'll return here later to copy the client key in the upper part of the form (this is not captured in the above screenshot).
Create a Notification Template
Your next step is creating a notification template. Click the Designer tab on the dashboard, and you'll see a Create notification button. Click the Create notification button, and it will bring you to the page depicted in the following screenshot.
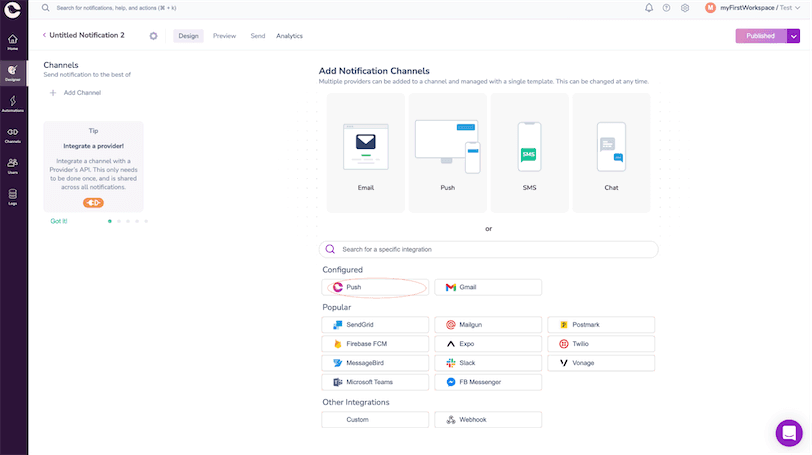
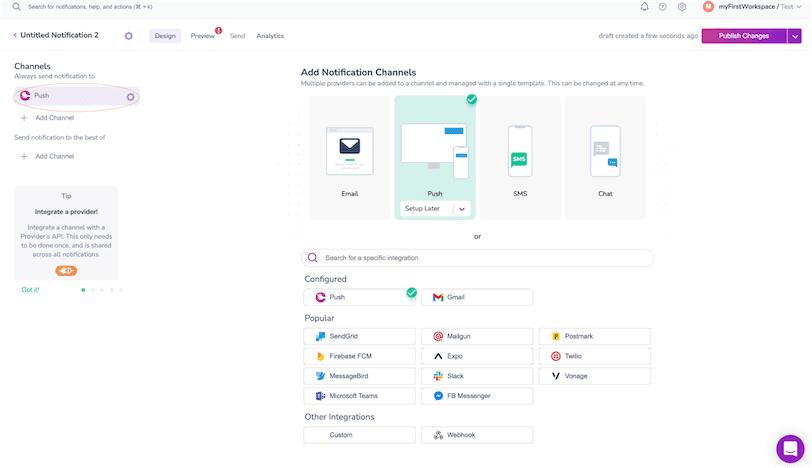
Select Courier Push, and you'll see that Courier Push was added under the channels tab on the left-hand side of the screen.
Add Message Title and Body
After clicking Courier Push, you'll be taken to a page where you can add a title and body. After adding the title and body, proceed to publish changes.
As mentioned, one of Courier Push's main benefits is that it doesn't require much initial authentication setup; this is because it uses your clientKey for authentication. However, you might want to tighten your authentication for a production environment. Courier allows you to do this using approved domains—a list of comma-delimited approved domains that can access Courier clients' APIs. This prevents unapproved domains from accessing your site. Courier also has an HMAC signature option that prevents a page's users from accessing another user's data.
Create a React App
If you don't already have one, you can set up a React app by running one of the following commands, depending on the package manager you wish to use:
npx create-react-app my-app
or
yarn create-react-app my-app
Then enter cd my-app, followed by npm start or yarn start.
Install Courier SDK
After setting up your React app, the next step is installing Courier's React SDK. You'll need to download three packages for this:
- Courier's provider handles everything that concerns authentication and integration to the backend. You can install it using either of these commands:
yarn add @trycourier/react-provider --legacy-peer-depsornpm i @trycourier/react-provider --legacy-peer-deps. - Courier's Toast component: Install the package for Courier's Toast component using either
yarn add @trycourier/react-toast --legacy-peer-depsornpm i @trycourier/react-toast --legacy-peer-deps. - Courier's Inbox component: Install the package for Courier's inbox component using either
yarn add @trycourier/react-inbox --legacy-peer-depsornpm i @trycourier/react-inbox --legacy-peer-deps.
Note: We added the --legacy-peer-deps flag because @trycourier currently uses react@17 as a peer dependency, while the latest version of create-react-app uses react@18. Without this flag, you might run into an issue where npm cannot resolve your dependency. We use the --legacy-peer-deps flag to tell npm not to install the peer-dependencies automatically.
Importing Courier In-App Notifications Packages
After you've successfully installed the packages, your next step is importing these packages and using them in your application inside App.js.
Note: The CourierProvider component, which we would import from @trycourier/react-provider, should be added at the top level of your React application.
import { CourierProvider } from "@trycourier/react-provider";import { Toast } from "@trycourier/react-toast";import { Inbox } from "@trycourier/react-inbox";const userId = Math.round(Math.random() * 10e16).toString(36);const CLIENT_KEY = // client key goes here;const MyApp = ({ children }) => {console.log(userId); // logs the userId, you'll need this id when setting up the test eventreturn (<CourierProvider clientKey={CLIENT_KEY} userId={userId}><Toast /><Inbox />{children}</CourierProvider>);};
You get the clientId from the form in the Courier Push page (https://app.courier.com/test/channels/courier for the test environment and https://app.courier.com/channels/courier for prod environment). The userId is the id you use in tracking the user, which usually comes from your backend. The Toast and Inbox components can be used anywhere in your application if the component is a descendant of the CourierProvider component.
Note: It's best practice to store your key as an environmental variable. Your application uses a different CLIENT_KEY in the test and production environment, so it makes sense to put it into your env file as an environmental variable. This would then be read as follows:
process.env.REACT_APP_COURIER_CLIENT_KEY;
You should be able to see a notification icon, which opens an inbox when clicked.
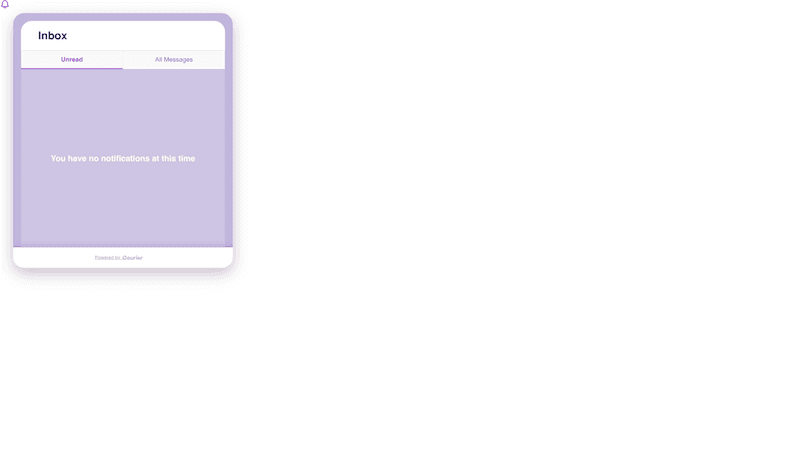
Note: Make sure to use the right CLIENT_KEY for the right environment. For your test environment, copy the test client key, and for your production environment, copy the actual client key.
Testing Your Implementation
To test your Courier Push setup, take the following steps:
Check Your WebSocket Is Connected to Courier Push
First, ensure your WebSocket is connected to Courier Push by clicking on WS section on the network tab.
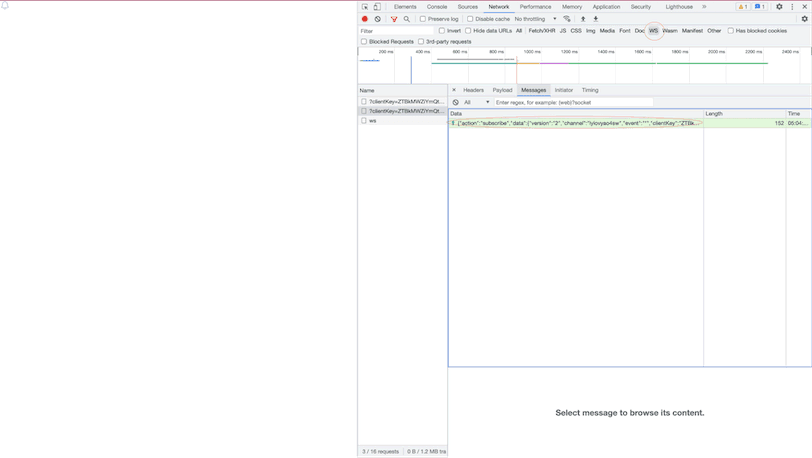
Even if you see "WS not connected" in the console tab, as long as the messages section under WS in the network tab returns this payload with your userId (channel) and clientKey, you're successfully connected to Courier Push. If you can't see something like this, check that you're using the right clientKey.
Select Notification
Under the designer tab in your courier account, select the notification you want to use for the test.
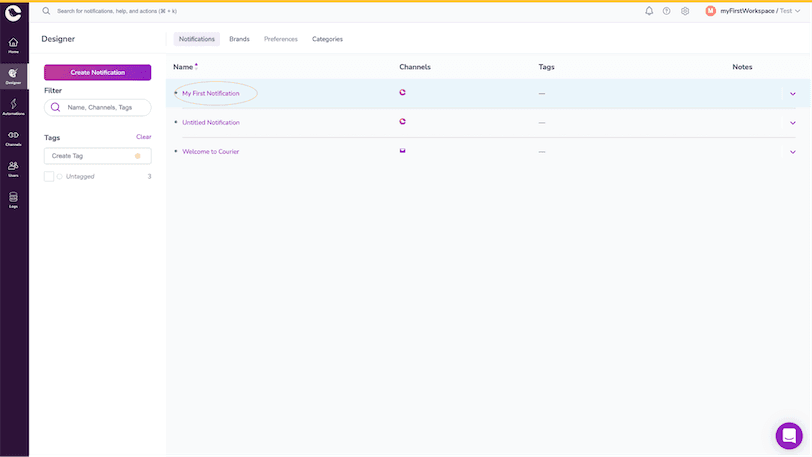
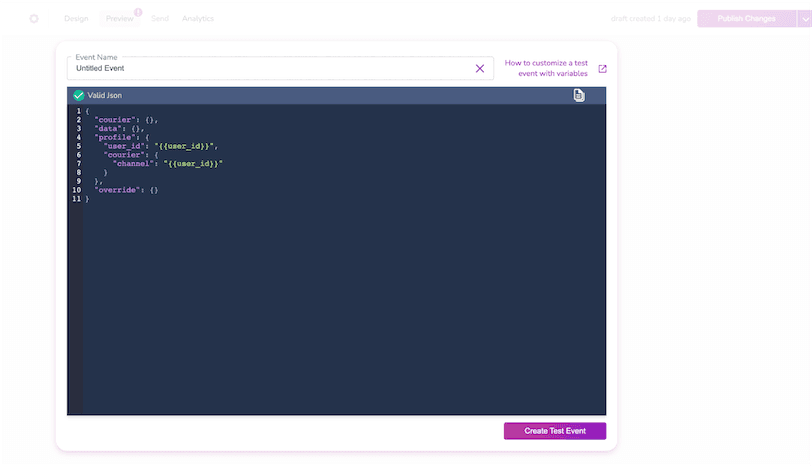
Click on the notification and head over to the preview tab. Click the Create test event button, and you'll see a modal.
Trigger Test Event
Input the userId of your test user (which you logged earlier in your app.js file), then click the Create test event button.
After the modal closes, click the Send tab.
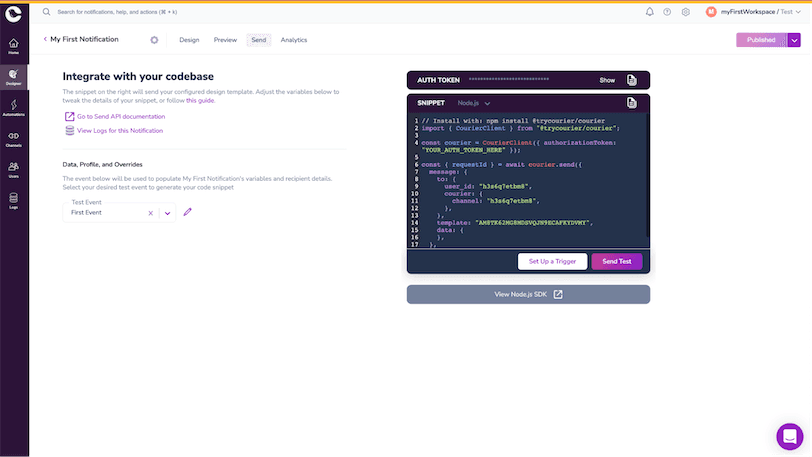
Once you hit the Send Test button, quickly open your React application console. You'll see your Toast display. Click on the notification bell to see your inbox.
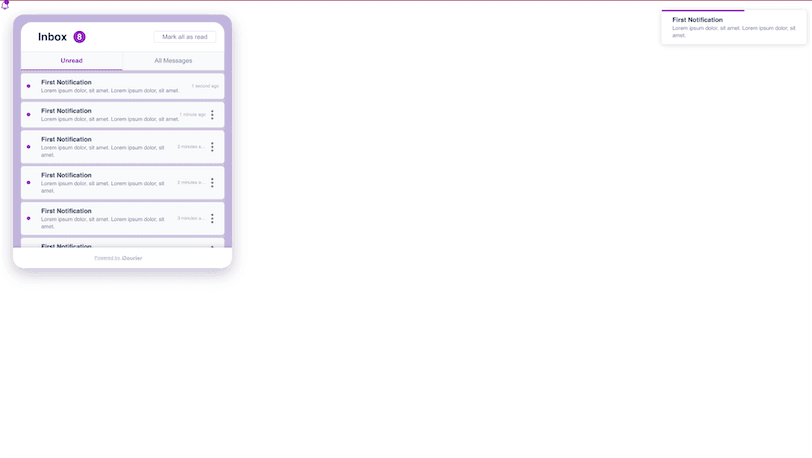
Voila! You have successfully implemented in-app notification using Courier Push. Courier really simplifies this process. With just a few lines of code and no WebSocket setup, you implemented in-app notification relying on the Courier Push service.
Conclusion
You've seen how you can implement in-app notification using Courier Push. Courier Push simplifies this process and removes the overhead that comes with setting up your own notification system from the ground. With just your clientKey and your users' id, Courier can seamlessly deliver notifications to your users.
Courier provides so many other notification services. Though this article was focused on in-app notifications using Courier Push, you can check out Courier's website to see how you can use Courier to meet all other notification needs. You can also access the code used in this article from this link.
Author: Jerry Chibuokem
Keep exploring
More guides
One API, every channel
Ship notifications without the boilerplate
Courier gives you one API for email, SMS, push, and chat, with templates, routing, retries, and delivery logs built in.
Last updated Jun 30, 2026. Code samples are illustrative; provider APIs and pricing change over time, so check each provider’s docs before relying on them.