Adding a Send Node
Drag a Send node from the palette onto the journey canvas, or drop it onto an edge between two existing nodes. When you add a send node, you’ll first choose the channel.Supported Channels
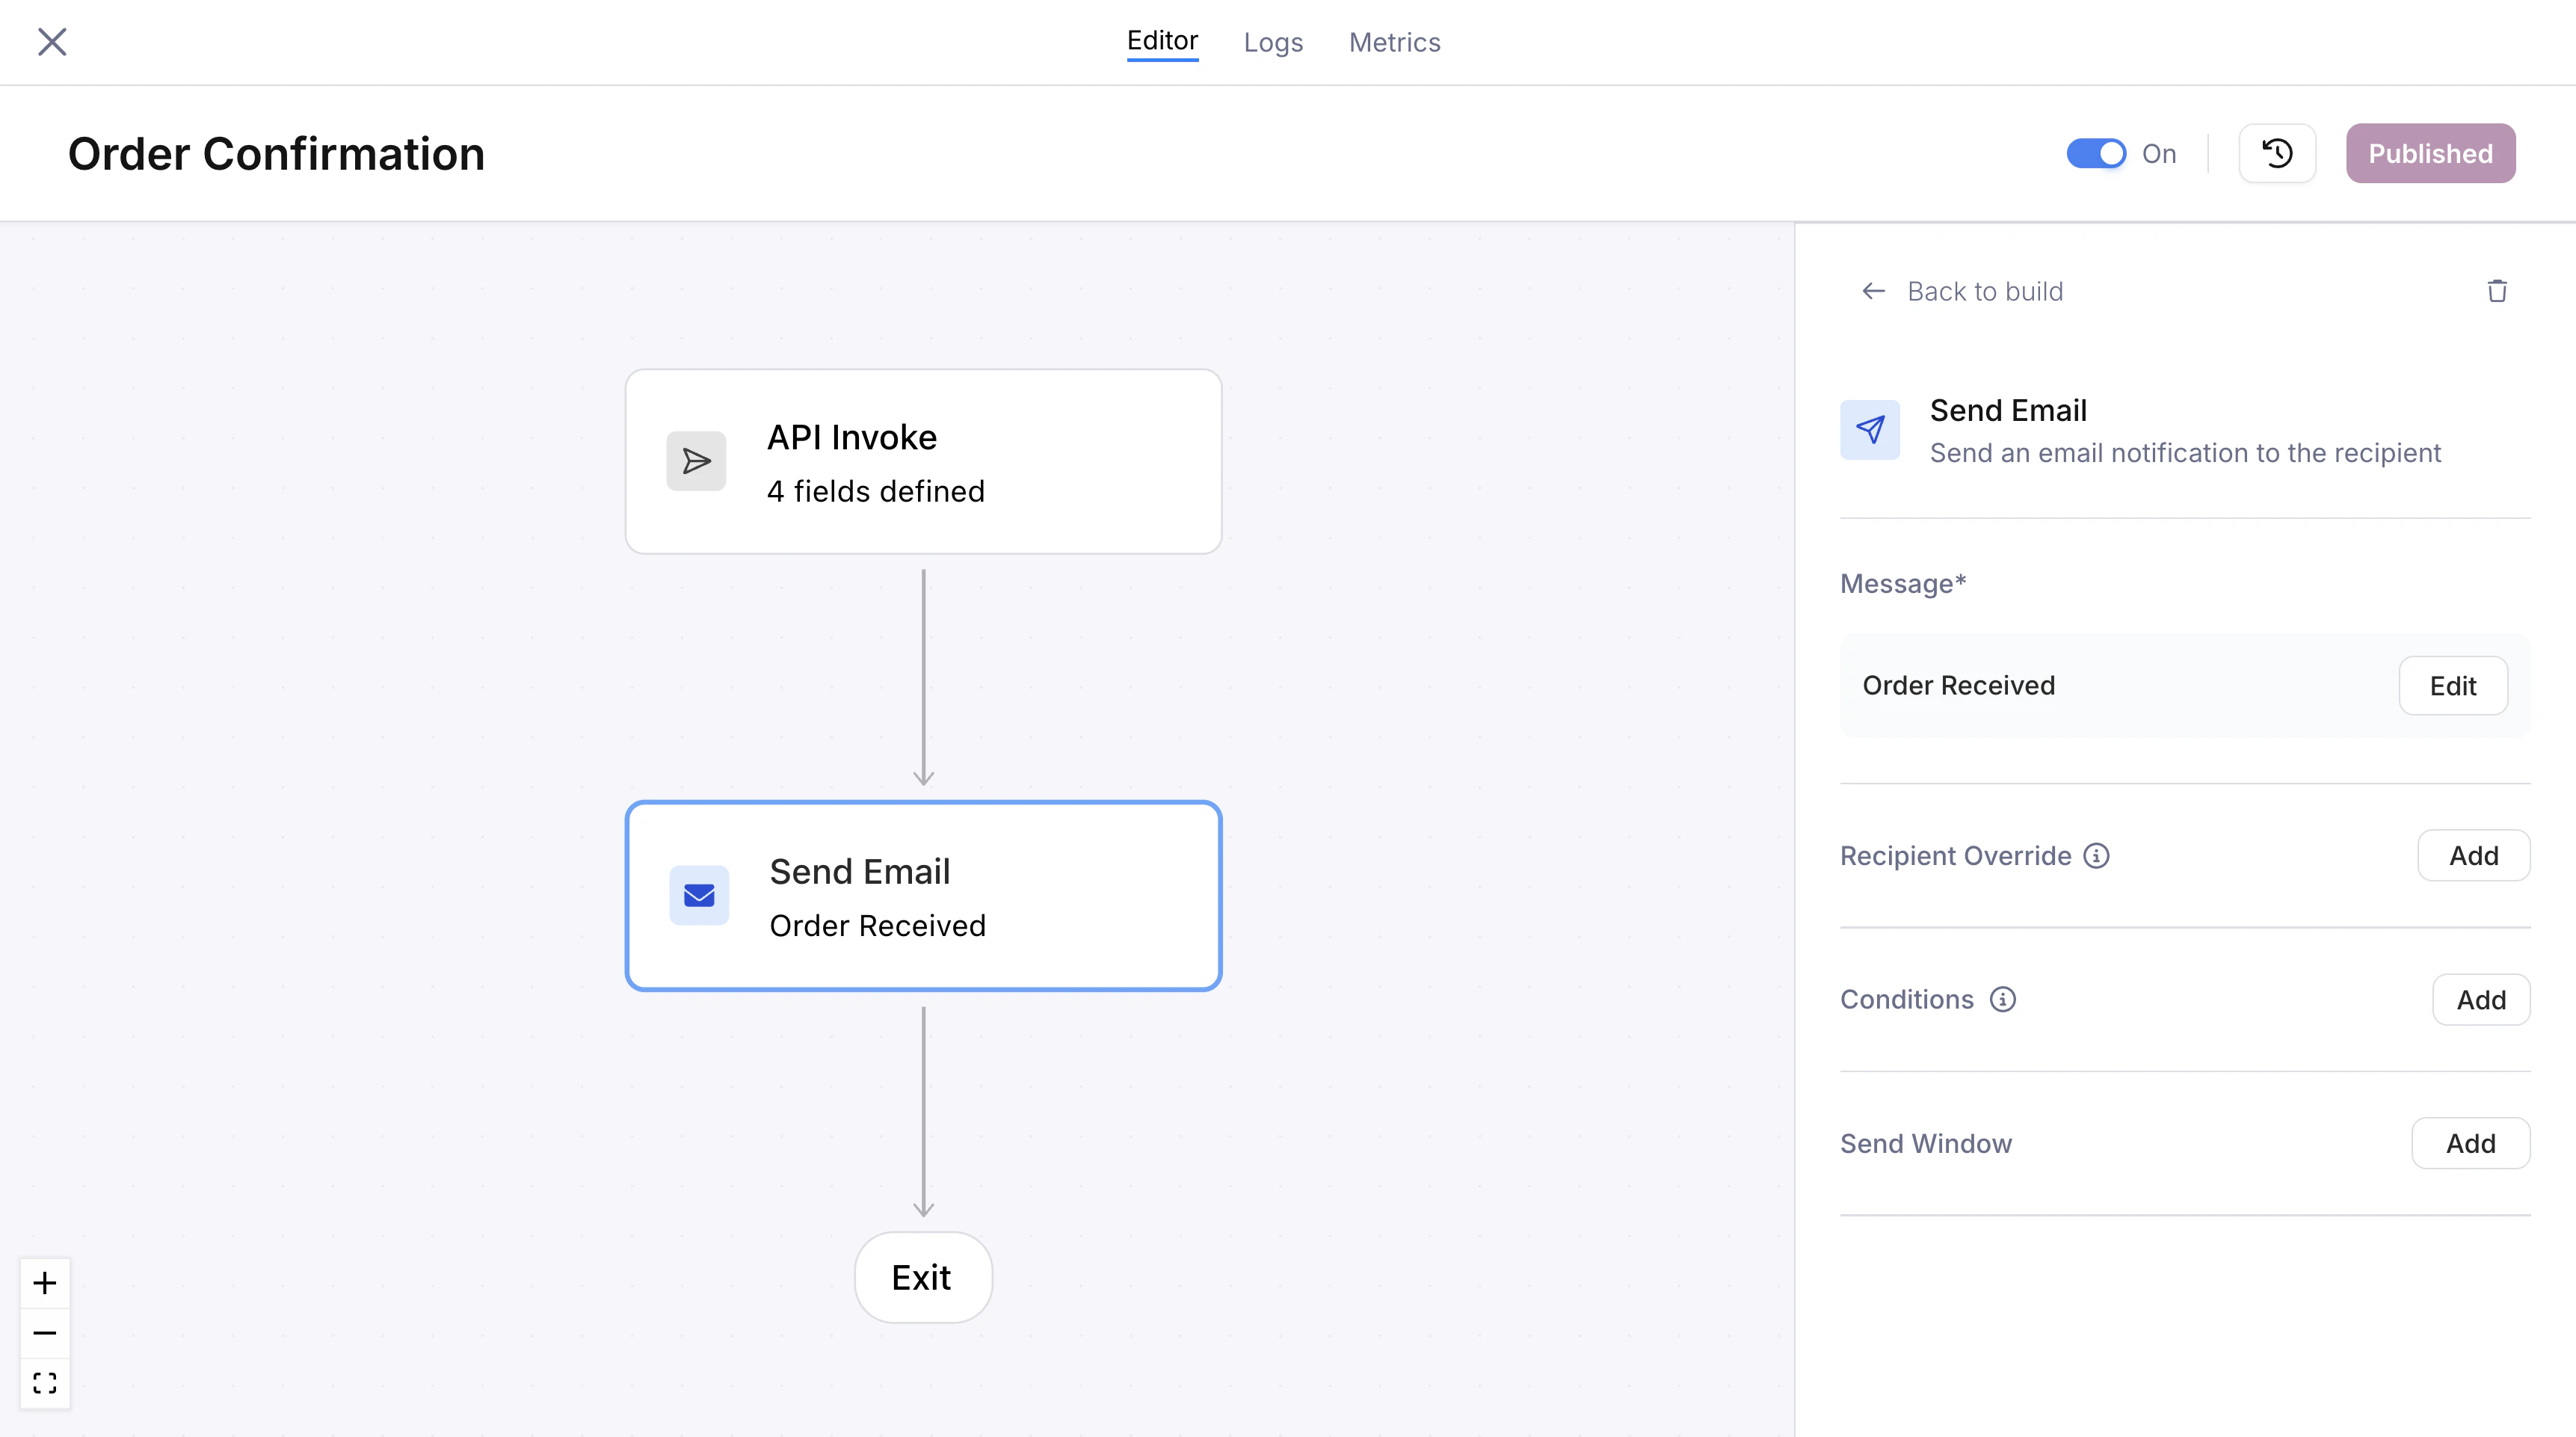
Send node configuration panel with an email channel selected and a linked message template
Experiments
A send node can run an experiment to A/B test multiple versions of a message. The node holds 2 to 10 variants, each linked to its own journey template, and Courier splits traffic across them by weight. Every recipient is deterministically assigned to one variant and stays in it across sends, so their experience is consistent. You compare delivery and engagement per variant, then promote one when you’re ready. A send node uses either a single template or an experiment, not both. For traffic allocation, bucketing keys, stickiness, results, and promotion, see Experiments.Recipient Override
By default, a send node delivers to the user who entered the journey (identified by theuser_id or profile from the invocation). You don’t need to configure anything for this default behavior.
To send to a different recipient, click Add next to “Recipient Override” in the send node’s configuration panel. This opens a single field where you can either:
- Select a field reference from the dropdown. Courier shows all available fields from the trigger schema, profile, and upstream fetch node responses. At runtime, the field value is resolved and used as the recipient address.
- Type a hardcoded value directly (e.g.,
ops@yourcompany.comor+15551234567). The field is creatable; type your value and click away to commit it.
To remove the override and revert to the default recipient, click Remove.
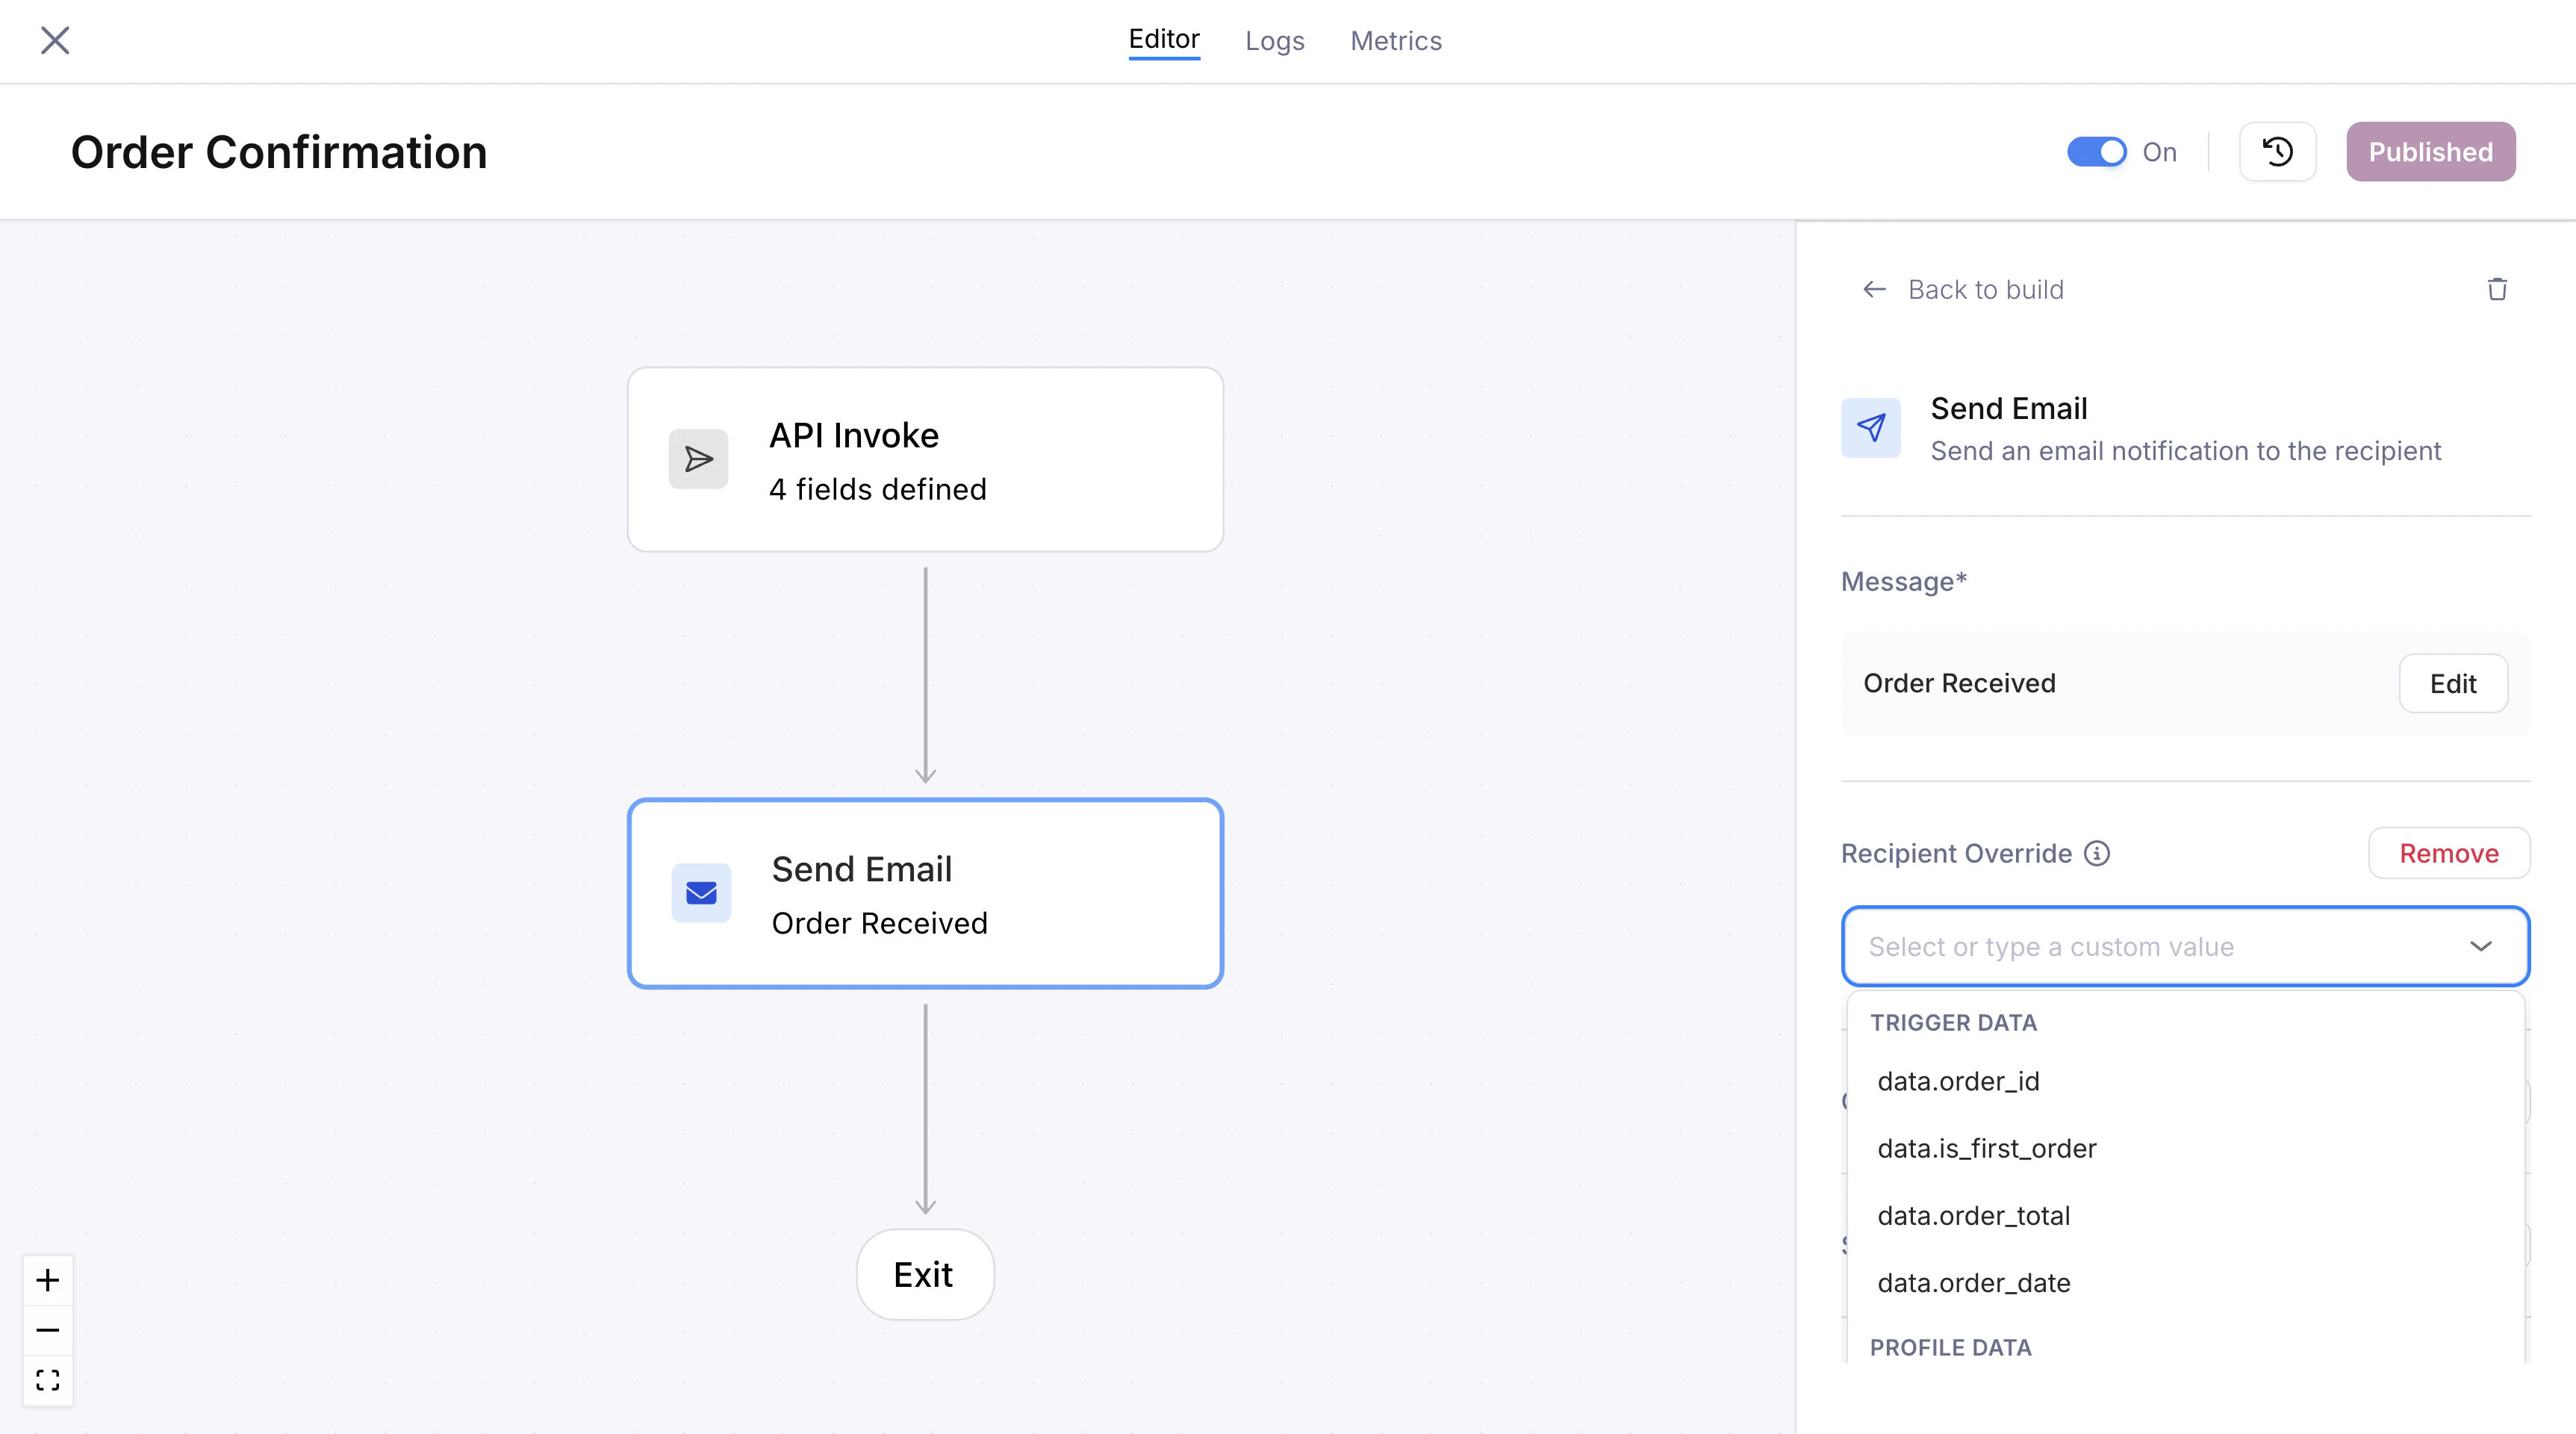
Recipient override with the dropdown showing available schema and profile fields
Conditions
Each send node can have conditions that are evaluated at runtime. If the conditions are not met, the node is skipped and the journey continues to the next step. Conditions use the same operators and field references as branch nodes. Common patterns:- Skip a push notification if
profile.push_tokensis empty - Only send an email if
data.notification_preferenceequals"email" - Send only when a fetch node response indicates the user hasn’t completed an action
Send Window
A send window controls when a message is actually delivered. If the journey reaches a send node outside the configured window, delivery is held until the window opens. This is useful for respecting business hours, avoiding late-night messages, or batching sends into a specific time range.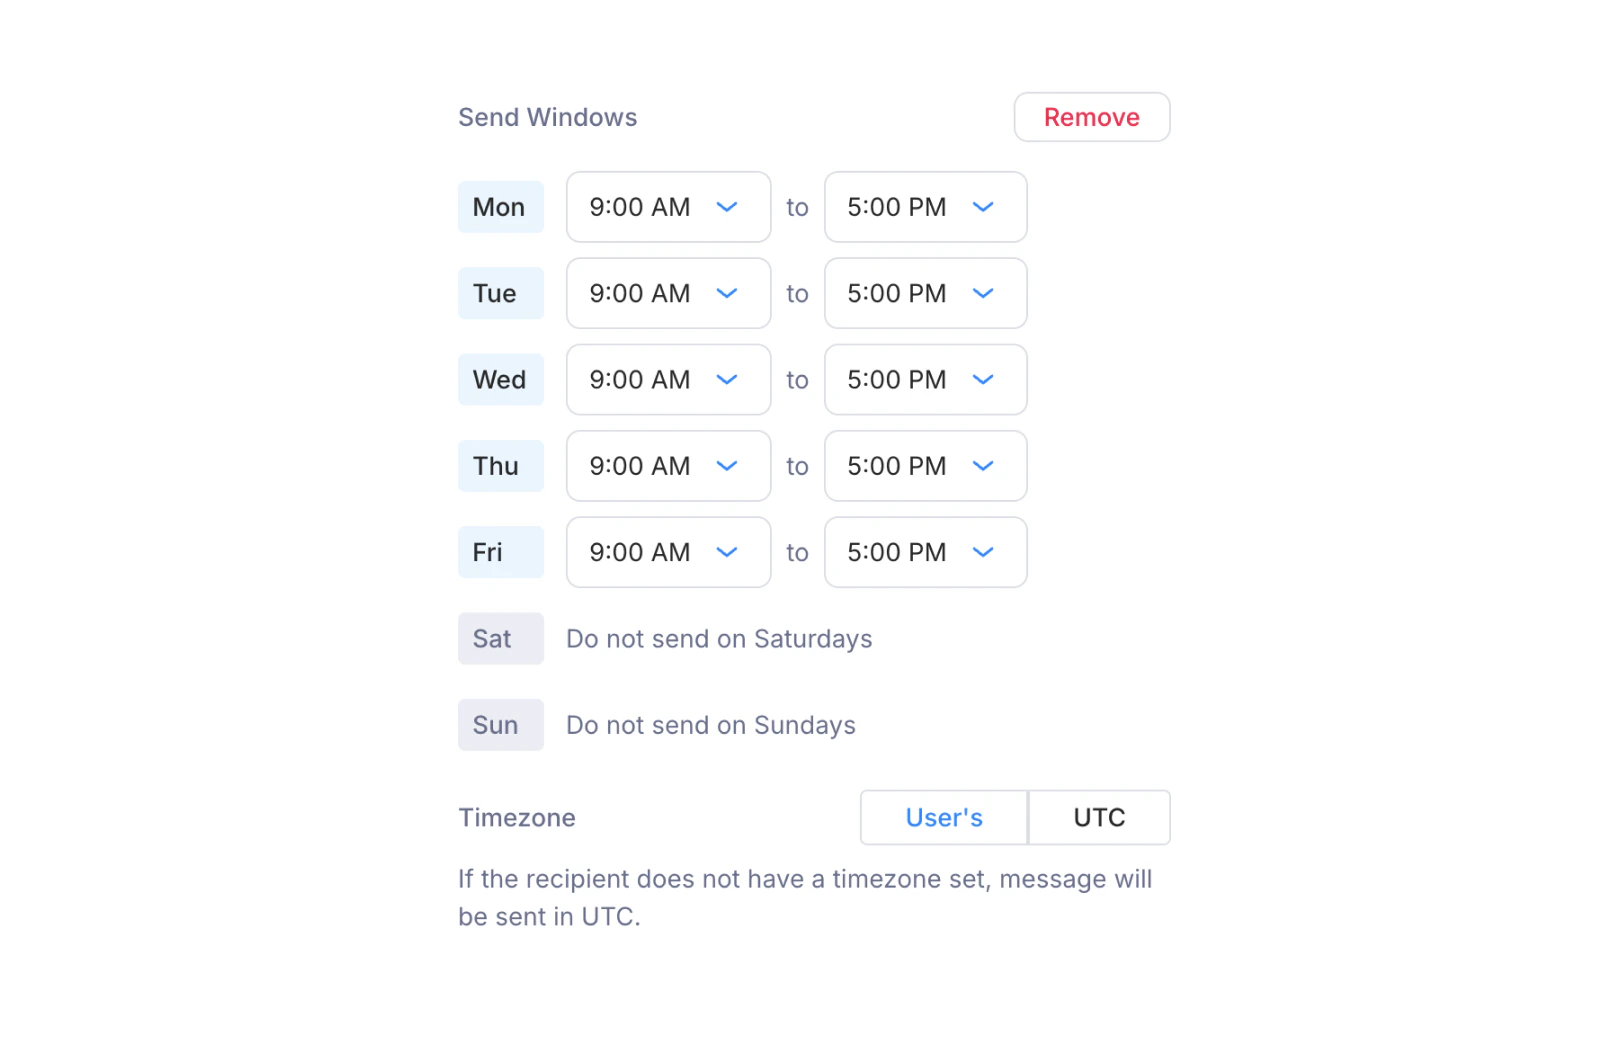
Send window configuration with per-day time ranges and timezone selection
- Day-by-day schedule — Each day of the week has its own row with an opening and closing time (e.g., Mon through Fri, 9:00 AM to 5:00 PM). Days without a time range are blocked entirely (e.g., “Do not send on Saturdays”).
- Timezone — Choose between User’s timezone (resolved from the recipient’s profile) or UTC. If the recipient doesn’t have a timezone set, messages are sent in UTC.